 Skip to main content

The world of fine wines, rare bottles, and auctioning seems lightyears away from high-end technologies like the blockchain. Still, their combination can bring alcohol manufacturers and their customers many benefits.
Challenges related to the authenticity of bottles and sellers’ trustworthiness have long been present in the fine alcohol industry. Although the blockchain is often associated with cryptocurrencies, its inherent properties, like transparency and decentralization, can be applied to the alcohol industry and reshape how alcohol auctions operate.
In this article, you’ll learn how you can create an alcohol auction dApp using non-fungible tokens to prove asset ownership, track all sales and transfers, and handle auctions securely. We’ll show you a step-by-step process for developing your own alcohol auctioning platform based on the Aptos blockchain so you can protect your customers’ assets and provide customers with a trustworthy place to buy and sell rare alcohol.
This article will be useful for alcohol manufacturers, sellers, collectors, elite alcohol shops, auction houses, and owners of any other alcohol-related business that wants to know how to build an auction dApp.
Contents:
Alcohol auction platform: business needs and challenges
Imagine this situation: an alcohol manufacturer decides to release a series of rare alcohol and wants to make it even more exclusive by including some additional benefits for customers.
The company wants customers to be able to buy bottles without worrying about security and storage conditions. They believe that it would be best to store the alcohol at a secure facility in safe conditions and allow buyers to claim it at any convenient moment. This makes buyers feel secure about purchasing a bottle because they don’t have to worry about its safety before they claim and receive it.
To facilitate remote purchases, a manufacturer, auctioneer, or seller can create a dedicated platform.
First, they need to find a way to associate a buyer with the bottle of alcohol they bought. And what if a buyer decides to sell the purchased bottle to someone else? A possible solution is implementing a ledger to track all purchases and customers and find a way for buyers to show ownership of their alcohol.
To prove the credibility and authenticity of a bottle, we can implement the ability to track deals between customers, including over-the-counter deals that happen between two parties without any intermediary. The alcohol manufacturing company wants to list the released bottles for auction where customers can decide how much they want to pay for a particular bottle.
Given this, we need a platform that is able to:
- Host auctions
- Act as a ledger for all sales and transfers
- Be accessible to all bottle owners and provide information on their bottles at any time
- Build trust with customers through high security
Creating such a platform from scratch is a time- and resource-consuming task. Is there a way to simplify its development? Building an auction dApp with the Aptos blockchain is the perfect answer.
A blockchain as a solution for building an alcohol auction app
Blockchain technology can meet all the requirements mentioned above, as it’s a distributed ledger with high availability that is transparent and secure. How do we prove ownership and hold auctions?
To prove that a user owns a particular bottle of alcohol, we can use non-fungible tokens or NFTs. To facilitate the auction without any third parties, we’ll use the Aptos blockchain. A decentralized auction governed by immutable code will be safe for both sellers and buyers.
Now that we know how to tackle our task let’s talk more about non-fungible tokens.
Non-fungible tokens and their application in the alcohol auction platform
Non-fungible tokens (NFTs) are virtual assets that can be freely transferred and stored in a blockchain. NFTs are indivisible and unique and cannot be exchanged on a one-to-one basis like cryptocurrencies. This makes them perfect for creating unique identifiers for real-world assets, providing identity verification, proving product authenticity, and tracking a product’s lifecycle in the supply chain.
In our case, we will use them to allow customers to prove ownership and have constant access to the entire lifecycle of their rare alcohol bottles.
By attributing an NFT to a specific bottle, you can give your customers information about:
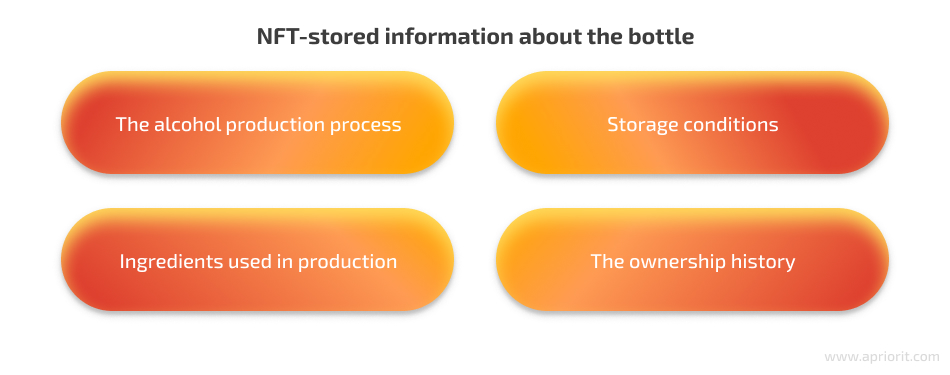
All this will allow your customers to get a unique collecting experience and protect them from fraud.
To create, manage, and integrate these digital assets into a system, we’ll need a blockchain infrastructure. The Aptos blockchain platform is a great option for this project. Let’s learn more about it.
Key features of the Aptos blockchain platform
Aptos is a public blockchain platform developed by former Facebook employees. It quickly became popular due to its safety, scalability, and upgradability.
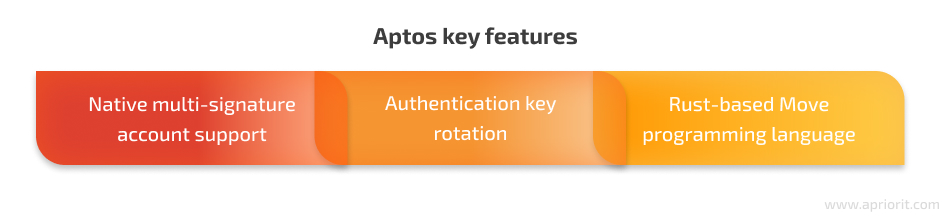
Like most modern blockchains, Aptos uses a Proof of Stake (PoS) consensus algorithm. Smart contract developers value Aptos for features like blockchain-level tokens and coin standards.
Aptos also uses a unique resource-oriented approach that makes smart contracts more secure and less error-prone. How exactly does it work?
In Aptos, all possible assets, like coins or tokens, are stored within the account that owns them. We call these assets resources. If a user owns an NFT, it’s stored directly within their account, and to transfer it, the user must issue an explicit withdrawal and deposit. This is called a resource-oriented approach.
When a user deploys any module, its publicly available functions become callable by other users and modules while still disallowing unauthorized changes to the resources owned by that user, like tokens and coins.
This also influences the way the Aptos blockchain works with smart contracts. Unlike Ethereum, where each smart contract maintains its own storage space, Aptos stores smart contracts within the individual account.
To authorize changes to the account state, the user who deployed a module should explicitly sign the transaction and provide a signer object representing the transaction’s sender. This creates an issue because it requires the deployer to explicitly sign every incoming transaction to transfer an NFT to a winner or start a new auction.
Fortunately, the Aptos blockchain has a workaround called resource accounts.
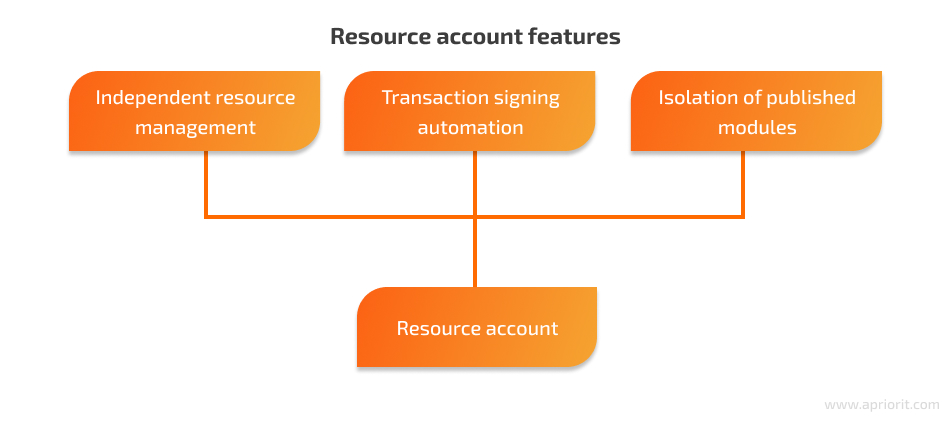
A resource account can sign transactions on behalf of its module with the help of a unique object called signer capability. This object can be used to create signer objects and is usually stored directly within the affected resource account to make it always available. A signer capability object can only be used to create a signer for an associated account.
Resource accounts are a crucial concept in the Aptos blockchain, as they allow us to achieve typical smart contract behavior while still benefiting from the security, simplicity, and efficiency of a resource-oriented approach. You can find out more about resource accounts in the official Aptos documentation.
Now that we know more about the specific concepts of this platform let’s start building a dApp for an alcohol auction using Aptos.
How to build a dApp for an alcohol auction platform
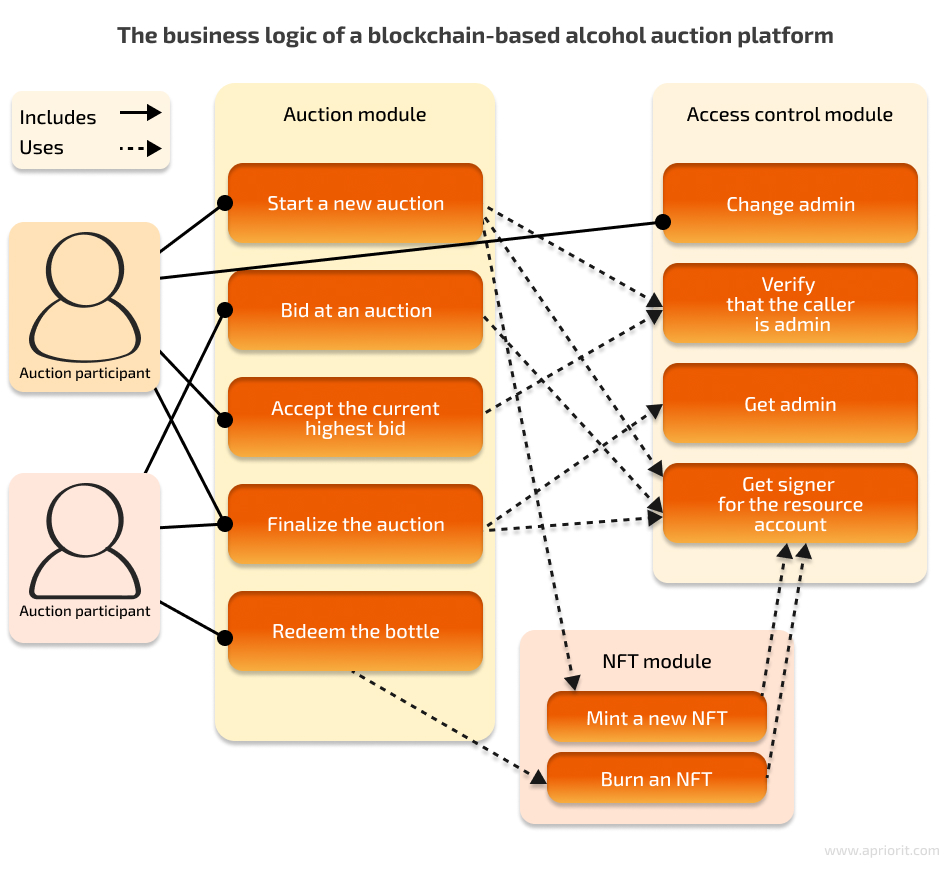
Let’s start building an alcohol auction dApp on Aptos by creating an architecture for our auction platform. We will need the following distinct parts or modules:
- Access control — responsible for managing a resource account and providing basic access control for our NFT and auction modules
- NFT creation and management — responsible for creating and minting new NFTs, destroying and burning them when needed, and providing basic functions like token transfer
- Auction — the platform core, allowing sellers to place bottles of alcohol up for auction, finalize auctions, transfer purchased NFTs to their new owners, and allow customers to redeem their bottles of alcohol by burning corresponding NFTs
Here’s a simplified use case diagram that explains the architecture and logic we’ll use when building an auction dApp with Aptos.
Let’s now implement this logic and develop the alcohol auction dApp step by step.
Step 1. Prepare the environment
Our first step is to install the Aptos CLI tool. To do so, just follow the instructions from the Aptos documentation. The Aptos CLI tool has everything we need, including a testing framework, a compiler, and a formal specification verifier.
First, we need to create a new project:
$ aptos move init --name alcohol-auctionThis command will create the standard directory structure and a configuration file named Move.toml.
Let’s change the configuration so we don’t have to return to it later:
[package]
name = 'alcohol-auction'
version = '1.0.0'
[dependencies.AptosFramework]
git = 'https://github.com/aptos-labs/aptos-core.git'
rev = 'mainnet'
subdir = 'aptos-move/framework/aptos-framework'
[dependencies.AptosToken]
git = 'https://github.com/aptos-labs/aptos-core/'
rev = 'mainnet'
subdir = 'aptos-move/framework/aptos-token'
[dependencies.AptosStdlib]
git = 'https://github.com/aptos-labs/aptos-core/'
rev = 'mainnet'
subdir = 'aptos-move/framework/aptos-stdlib'
[addresses]
source_addr = '_'
# resource account
alcohol_auction = '_'We added two new dependencies as well as two addresses that we’ll use during development. Please note that we explicitly specified that we want to use the mainnet version of all packages to avoid unstable or broken features.
The addresses specified in the addresses section of the configuration file are called named addresses and can be used as placeholders in the code. They allow us to avoid writing long, hard-to-read addresses.
During compilation, the named addresses are substituted with actual values, so there is no runtime cost. As you can see in the snippet above, we provided no addresses but left a blank space. This requires us to substitute the addresses using command-line arguments when calling most commands but provides a more flexible approach. For example, here is the compilation command that uses this approach:
aptos move compile --named-addresses
source_addr=0x123,alcohol_auction=0x456Now we are all ready to start adding components.
Step 2. Add access control
Let’s start with creating the access control module, as all other modules rely on it.
Move programs always start with the definition of a module or script. Scripts are more atomic than modules. They are used to create complex transactions and are not stored anywhere. Modules, on the other hand, are libraries stored in global storage. A Move source file may have multiple modules and scripts defined, but it’s good practice to create a separate source file for each module.
Defining a module is as easy as it gets:
module <address>::<identifier> {
(<use> | <friend> | <type> | <function> | <constant>)*
}The Identifier is the module’s name, and the address is the account address under which we want to publish the module. The identifier should be unique at the account level.
In our case, the module definition will look like this:
module alcohol_auction::access_control {
}We used the alcohol_auction address that we defined in the configuration file earlier.
Let’s start by creating the constructor function for our module.
In a Move module, the init_module constructor function is called during module publishing. This function can have only one argument – a reference to a signer object representing the account under which the module is being published.
As we already discussed, we’ll use this module to manage the resource account. Therefore, it will be responsible for retrieving signer capability after account creation. So, our constructor function must retrieve the signer capability and store it inside the resource account.
The Move language only allows objects with the key ability to be stored in global storage. Objects with the key ability are also called resources. It is also required that each object inside an object with the key ability has the store ability. The store ability basically allows types with this ability to exist inside structures in global storage, but they can’t be stored directly without a wrapper object.
As you have probably guessed, the account capability object has the store ability; therefore, we need a wrapper object to store it in global storage.
Let’s define this object:
struct AccessControl has key {
resource_signer_cap: account::SignerCapability,
}Now, we can retrieve the signer capability, create an AccessControl object, and store it inside the account. Here’s how we do it:
fun init_module(account: &signer) {
let resource_cap = resource_account::retrieve_resource_account_cap(account, @source_addr);
move_to(
account,
AccessControl {
resource_signer_cap: resource_cap,
}
);
}The account parameter is a reference to a signer object that represents our resource account. The Move VM provides signer parameters, so we don’t need to specify them ourselves.
The source address is the address of an account that we used to create a resource account, and it is a standard account that a user controls. When we create a resource account, the source account’s address and a set of bytes are used to derive a new account address that will be used as a resource account. After we create a resource account, its signer capability is stored inside the Container resource under the origin account and can be later retrieved.
You can also see that we referred to the resource_account module when retrieving the signer capability. We had to import the resource_account module provided by the Aptos framework to use it. The import statement should be placed at the top of the module and look like this:
module alcohol_auction::access_control {
use aptos_framework::resource_account; // ... }We moved the AccessControl object with the signer capability inside our resource account using the built-in move_to function. This function requires us to provide the signer object representing the account to which we wish to move our resources. We do it to prevent unauthorized resources from moving to accounts. This way, we can be sure that unwanted tokens and NFTs will stay out of our resource account unless we explicitly accept them.
Now that we have successfully retrieved the signer capability for our resource account, we also want to introduce an admin entity in this module. Thus, we’ll have a centralized access control module and avoid defining an admin in each module. This will allow us to easily transfer administrator privileges and track changes. Let’s add a field that will store the admin’s address to the AccessControl structure:
struct AccessControl has key {
resource_signer_cap: account::SignerCapability,
admin: address }To track transfers of admin capabilities more efficiently, we can use events. Move has no standalone events because all events are parts of event streams. They allow us to track the whole history of an NFT and see what happened at any point without looking through all executed transactions.
Events are represented using structures, so we have to define a structure to track transfers of adminship:
struct AdminChangeEvent has drop, store {
old_admin: address,
new_admin: address
}We need to give the event structure both the store and drop abilities. Before we move further, let’s discuss the drop ability.
In Move, all values by default should be dealt with by the end of execution: they can be dropped, stored inside global storage, or destroyed. Let’s start with the last option. A structure can only be created or destroyed inside the module that declared it. We also can’t access fields of a structure directly outside of a module that declared it.
We have already discussed how we can store structures inside global storage, so let’s focus on dropping structures. By the end of execution, all values with the drop ability that weren’t destroyed or stored inside global storage are dropped. They just go out of scope, and we forget about them.
But if a structure doesn’t have the drop ability and isn’t dealt with by the end of execution, the compiler won’t allow us to compile our code. So, if our structure doesn’t represent anything valuable, we can safely add the drop ability to allow it to be safely dropped. That is exactly the case with events: they don’t represent anything of value and should be ephemeral.
To create an event stream, we can use the event::EventHandle function from the account module provided by the Aptos framework. This function returns an EventHandle object that we can store inside our AccessControl structure and use to emit events. Let’s modify the AccessControl structure one last time:
struct AccessControl has key {
resource_signer_cap: account::SignerCapability,
admin: address,
admin_change_events: event::EventHandle<AdminChangeEvent>,
}Now we can store the administrator’s address and track all admin privilege transfers.
Finally, we have to modify the structure creation code inside the init_module function:
fun init_module(account: &signer) {
let resource_cap = resource_account::retrieve_resource_account_cap(account, @source_addr);
move_to(
account,
AccessControl {
resource_signer_cap: resource_cap,
}
);
}We imported two more modules to make this work:
aptos_framework::eventaptos_framework::account
It may seem that it was a lot of work just to create one function, but we covered many vital concepts we will encounter in all other modules.
Now we should provide a way for other modules to access the signer capability. To make things easier, we will create the signer object in the access control module and return it to the calling module. This way, we won’t have to bother creating signers in other modules and will have a standard API that all future modules can rely on.
There is an important thing to account for: we don’t want all existing modules to be able to get the signer object that represents our resource account. The reason is that this would allow modules to authorize any changes on behalf of our account. We want to restrict access to this function and make it only callable by specific modules.
The Move language has an excellent feature that allows us to achieve this behavior: friend modules. A friend module is a module that can call friend functions. We declare friend modules at the top of our module, and we can’t change them once the module is deployed.
We don’t have any other modules right now, so we can’t declare them as friend modules because Move requires all friend modules to be known at compile time. This assures that we won’t accidentally give privileged access to an undesirable module. We will add all needed friend modules in the following sections. For now, let’s focus on creating a convenient API that our friend modules will use later.
Let’s create a function that will create the signer object using the signer capability:
public(friend) fun get_signer(): signer acquires AccessControl {
	let resource_signer = account::create_signer_with_capability(
   &borrow_global<AccessControl>(@alcohol_auction).resource_signer_cap
	);
	resource_signer
}As you can see, we annotated the function with the acquired AccessControl statement. We must specify all resources stored in global storage that we use in our functions. This function borrows the AccessControl resource we created and stored earlier in the init_module function and creates a signer object that represents our resource account. This function has public (friend) visibility that allows all modules declared as a friend of this module to call it.
Let’s create a simple view function that will return the admin’s address:
  #[view]
  public fun get_admin(): address acquires AccessControl {
    borrow_global<AccessControl>(@alcohol_auction).admin
  }
We should also create a function that allows us to check that the caller is the admin:
public(friend) fun admin_only(account: &signer) acquires AccessControl {

assert!(signer::address_of(account) == get_admin(), ENOT_ADMIN);

}In other blockchains like Ethereum, we’d use msg.sender to check who the sender of a transaction or a message is. In Move programs, there is no msg.sender counterpart, but we can achieve the same behavior using the signer module provided by the Aptos framework. The address_of function allows us to get the address of an account represented by the provided signer.
The ENOT_ADMIN variable is a constant we defined at the top of our module to avoid having undocumented values (or so-called magic numbers) in the code. Magic numbers make it hard to debug and read code, so it’s a good practice to replace all such values with constants. To learn more about the ENOT_ADMIN variable, check out the full code in our GitHub repository.
Also, we should create a way for our admin to transfer their privileges to someone else:
  public entry fun change_admin(account: &signer, new_admin: address) acquires AccessControl {
	admin_only(account);
	let access_control = borrow_global_mut<AccessControl>(@alcohol_auction);
	access_control.admin = new_admin;
	event::emit_event(
  	&mut access_control.admin_change_events,
  	AdminChangeEvent {
    	old_admin: signer::address_of(account),
    	new_admin
  	}
	);
  }
We use the entry modifier to make this function directly invokable from a transaction. Functions without the entry modifier can only be called from other modules or scripts.
This function verifies that the caller is the admin and then changes the admin’s address to the provided address. We don’t make this function callable by friend modules because our admin is a user that will call this function directly.
We also emit an event at the end of the function using the EventHandle object we created in the init_module function. It’s important to emit events when crucial changes occur if we want to have readable and auditable contracts that are easy to integrate with off-chain solutions.
To ensure there are no mistakes, we can compile our module by running the following command:
$ aptos move compile --named-addresses alcohol_auction=0xc,source_addr=0xa
Compiling, may take a little while to download git dependencies...
UPDATING GIT DEPENDENCY https://github.com/aptos-labs/aptos-core.git
UPDATING GIT DEPENDENCY https://github.com/aptos-labs/aptos-core/
UPDATING GIT DEPENDENCY https://github.com/aptos-labs/aptos-core/
INCLUDING DEPENDENCY AptosFramework
INCLUDING DEPENDENCY AptosStdlib
INCLUDING DEPENDENCY AptosToken
INCLUDING DEPENDENCY MoveStdlib
BUILDING alcohol-auction
{
  “Result”: [
    "000000000000000000000000000000000000000000000000000000000000000c::access_control",
  ]
}Running this command for the first time takes a few additional minutes because the compiler must download all dependencies specified in the configuration file.
Now that we have everything we need to make other modules work, we can finally start creating them.
Step 3. Create the NFT module
The Aptos blockchain provides a framework that developers can use to create NFTs. This framework has all commonly used functions including transfer, mint, and burn.
Thanks to this, we don’t have to implement everything by ourselves or use an external library. Having a well-known and tested framework makes development faster, easier, and more secure. Let’s explore how we can create an NFT.
First, we need to create a new module. As mentioned, we should store all modules in separate files for better readability. We will most likely need the signer representing our resource account in this module, so we can declare this module as a friend of the access control module:
module alcohol_auction::access_control {
  // ...
  friend alcohol_auction::token;
   // ...
}Now our new module can access all friend functions in the access control module, allowing us to get the signer object when needed.
Let’s create the constructor function for our new module. The token framework from Aptos provides a convenient way of creating new NFT collections. In our case, we will only have one collection, so we can create it in the constructor function:
  fun init_module(account: &signer) {
	let description = string::utf8(b"NFTs that represent corresponding bottles of elite alcohol");
	let collection_uri = string::utf8(b"www.example.com/collection-metadata.json");
	let maximum_supply = 0;
	let collection_mutate_settings = vector<bool>[ false, false, false ];
	token::create_collection(account, get_collection_name(), description, collection_uri, maximum_supply, collection_mutate_settings);
}The create_collection function provided by the token framework creates a new NFT collection and stores all associated metadata inside the creator’s account. Creating a new collection allows us to mint NFTs for this collection in the future.
Note that we set the maximum supply to zero because we don’t know how many NFTs we need. Collection mutation settings are responsible for allowing or disallowing the mutation of description, URI, and maximum supply, respectively.
We also defined the get_collection_name helper function because we will need the collection’s name in the future:
  #[view]
  public fun get_collection_name(): String {
	string::utf8(b"Alcohol Auction NFT")
}Now we must create a way for the admin to mint the new NFTs. We said earlier that the token framework provides the mint function, but we still have to create a function that will get the signer object and call the mint function from the framework. Our mint function looks like this:
  public(friend) fun mint(
	token_name: String,
	token_description: String,
	token_metadata_uri: String
  ): token::TokenId {
	let resource_account_signer = alcohol_auction::access_control::get_signer();
	let token_mutate_settings = vector<bool>[false, false, false, false, false];
	let token_mutability_config = token::create_token_mutability_config(&token_mutate_settings);
	let token_data_id = token::create_tokendata(
  	&resource_account_signer,
  	get_collection_name(),
  	token_name,
  	token_description,
  	// disable token balance tracking to avoid deletion of token data when burning
  	0,
  	token_metadata_uri,
  	// royalty payee
  	@alcohol_auction,
  	// royalty points denominator
  	0,
  	// royalty points numerator
  	0,
  	token_mutability_config,
  	//            	predefined constant from the aptos_token::token module
      vector<String>[string::utf8(b"TOKEN_BURNABLE_BY_CREATOR")],
      vector<vector<u8>>[bcs::to_bytes<bool>(&true)],
      vector<String>[string::utf8(b"bool")],
	);
	let token_id = token::mint_token(&resource_account_signer, token_data_id, 1);
	token_id
}As you can see, we use the get_signer function, defined in the access control module, to get the signer object representing our resource account. In this case, the signer object allows us to mint NFTs and store the corresponding token metadata under our account.
There are a few additional things that we should take into account.
First, the new function has public (friend) visibility. The admin will never call this function directly: we still have to create the auction module to call the mint function we just created. We’ll use the same pattern as in the AccessControl module: declare the auction module as a friend of the token module, allowing it to call the mint function.
To mint a token, we first should create the TokenData structure that holds the metadata and is used to mint new tokens. All tokens minted from the same TokenData share metadata and allow us to achieve behavior similar to ERC-1155 semi-fungible tokens.
Before creating TokenData, we should create a token mutability configuration responsible for the mutation settings of maximum supply, URI, royalty settings, description, properties, and property values.
We also disabled token balance tracking even though we know that each TokenData will only have one token associated with it. We did this to avoid deletion of metadata when burning the last token in the supply.
The last three arguments in the create_tokendata function allow us to add custom properties to the token. In our case, we added a property that makes our tokens burnable by the creator. We will need this later when a user decides to redeem their bottle of alcohol by burning the NFT. This property is predefined in the token module, but we can add completely new properties if needed.
After we mint the new token, it is stored inside our resource account and can be transferred to other users. Please note that when we mint a new token, we get the TokenId object. We use this object to identify the token and perform basic operations like transfer. This object has the drop ability, so it’s not a big deal if we don’t save it immediately.
We can create this object later by calling the create_token_id function and providing a collection name, creator address, and token name. We decided to return this object after minting the token to simplify the process and avoid creating TokenIds each time an auction is finished or a bottle is burned.
Speaking of which, we also have to create a function that will allow us to burn tokens when needed:
  public(friend) fun burn(token_id: &token::TokenId, owner: address, amount: u64) {
	let resource_account_signer = alcohol_auction::access_control::get_signer();
	let (_, collection_name, token_name, property_version) = token::get_token_id_fields(token_id);
    token::burn_by_creator(&resource_account_signer, owner, collection_name, token_name, property_version, amount);
}This function takes a TokenId object, an owner address, and a number of tokens to burn. As you can see, burn_by_creator doesn’t accept the TokenId object but takes its fields instead. To call this function, we first must destructure the TokenId object by passing it to the get_token_id_fields function.
Our token module is ready. Now we can focus on creating the last and most critical part – the auction module.
Read also:
NFTs for Real Estate: Exploring the Concept and Creating Tokens in Python, JavaScript, and Solidity
Step 4. Create the auction module
The auction module must have the following functionality:
- The admin should be able to start new auctions
- Users should be able to participate in active auctions
- An admin should be able to finalize an auction
- The admin should be able to accept the current bid price even if the auction is not over
- An auction winner should be able to redeem a bottle of alcohol represented by an NFT by burning the NFT
Let’s implement these functionalities one by one.
1. Creating an auction
Let’s start with creating the constructor function. We should track all existing auctions in this module, so we will have to use the TableWithLength structure provided by the Aptos standard library that allows us to store a large amount of data.
This structure works by associating a key with a value and tracking the number of entries stored. Tracking the length is helpful because we can use the table’s length to avoid calculating an identifier for new auctions.
What information about our auctions do we want to store? We will need to store their statuses, the highest bids, and the address of the highest bidder. Our auctions will have durations deadlines, so we can also keep them here. We can also store the token ID created when a new token is minted. Let’s create the structure that will store all the required information about our auctions:
struct Auction has store {
status: u64,
token_id: aptos_token::token::TokenId,
top_bid: u64,
top_bidder: address,
deadline: u64
}We should also track all the bids for our bid history. We can do this with the help of events. Let’s create the structure that will store all required information about new bids:
struct NewBidEvent has store, drop {
new_top_bid: u64,
new_top_bidder: address
}Now, we can add it to the Auction structure:
struct Auction has store {
status: u64,
token_id: aptos_token::token::TokenId,
top_bid: u64,
top_bidder: address,
new_bid_events: event::EventHandle<NewBidEvent>,
deadline: u64
}Let’s create a table that will associate the auction identifier with the corresponding information:
struct ModuleData has key {
auctions: table_with_length::TableWithLength<u64, Auction> }The TableWithLength structure we defined in the ModuleData uses unsigned integers as keys and Auction structures as values.
Now let’s create a few more events that we want to track:
struct AuctionStartEvent has store, drop {
starting_price: u64,
token_name: String,
deadline: u64
}
struct AuctionFinalizeEvent has store, drop {
auction_id: u64,
auction_winner: address,
final_bid: u64
}
struct BottleRedeemEvent has store, drop {
auction_id: u64,
timestamp: u64
}We want to track the start of new auctions, auction finalizations, and bottle redeems. These events provide general data about the platform, so we should store them in ModuleData:
struct ModuleData has key {
auctions: table_with_length::TableWithLength<u64, Auction>,
auction_start_events: event::EventHandle<AuctionStartEvent>,
auction_finalize_events: event::EventHandle<AuctionFinalizeEvent>,
bottle_redeem_events: event::EventHandle<BottleRedeemEvent>
}Now we can finally create the constructor function:
fun init_module(account: &signer) {
move_to(
account,
ModuleData {
auctions: table_with_length::new<u64, Auction>(),
auction_start_events: account::new_event_handle<AuctionStartEvent>(account),
auction_finalize_events: account::new_event_handle<AuctionFinalizeEvent>(account),
bottle_redeem_events: account::new_event_handle<BottleRedeemEvent>(account)
}
)
}It will create the ModuleData structure with an empty auction information table and all necessary event handles.
In order to reduce code duplication and make our code more readable, we created a few helper functions. We won’t include their code here, but you can check them out in our GitHub repository.
To avoid magic numbers in our code, let’s define a few constants that will be used as auction statuses:
const AUCTION_LIVE: u64 = 1;
const AUCTION_FINISHED: u64 = 2;
const AUCTION_BOTTLE_REDEEMED: u64 = 3;Other languages like Python and C# have enumerations that help avoid magic numbers. Unfortunately, Move doesn’t have enumerations yet.
2. Starting an auction
Now we can focus on creating a function that will allow us to start new auctions. The function’s signature looks like this:
public entry fun start_new_auction(
admin: &signer,
deadline: u64,
starting_price: u64,
token_name: String,
token_description: String,
token_metadata_uri: String
) acquires ModuleData {
}This function is pretty big, so let’s tackle it step by step. First, we need to verify that the caller is the admin. Previously, we created a function in the access control module to do that for us.
Note that in order to use friend functions in other modules, we must declare our module as a friend of those modules. We should also check that the suggested deadline is not in the past. We can mint tokens and start a new auction if everything is fine. The function’s body looks like this:
alcohol_auction::access_control::admin_only(admin);
assert!(timestamp::now_seconds() < deadline, EDEADLINE_IN_PAST);
let auction_id = get_auction_id();
let module_data = borrow_global_mut<ModuleData>(@alcohol_auction);
let resource_account_signer = alcohol_auction::access_control::get_signer();
let token_id = alcohol_auction::token::mint(token_name, token_description, token_metadata_uri);
let auction = Auction {
status: AUCTION_LIVE,
token_id,
top_bid: starting_price,
top_bidder: @alcohol_auction,
new_bid_events: account::new_event_handle<NewBidEvent>(&resource_account_signer),
deadline
};
table_with_length::add(&mut module_data.auctions, auction_id, auction);
event::emit_event(
&mut module_data.auction_start_events,
AuctionStartEvent {
starting_price,
token_name,
deadline
}
);We also defined constants for all possible error codes. Move doesn’t allow us to abort with strings and only accepts abort codes. To make our code easier to debug, we can use constant values representing errors. We can then create a help page that describes all possible error codes and ways to fix them so that our users can refer to it when needed.
We also provide a way for the admin to set a starting price for new auctions. It’s also possible to set the price to zero.
After the token is minted, we create a new Auction structure and save it inside our auctions table. We also emit an event at the end.
3. Bidding
Now we should provide a way for users to participate in auctions. This function should accept a new bid if it is higher than the current bid and send a refund to the previous highest bidder.
There is an important note, however. As we mentioned before, Aptos uses the resource-oriented approach, so all coins (even native ones) are considered resources and are stored under owners’ accounts. Such an approach makes it easier to accept payments because a payment is just a regular argument passed to a function.
With that in mind, let’s create the bid function:
public fun bid(
bidder: &signer,
auction_id: u64,
coin: coin::Coin<aptos_coin::AptosCoin>
) acquires ModuleData {
assert!(auction_exists(auction_id), EWRONG_AUCTION_ID);
assert!(auction_status(auction_id) == AUCTION_LIVE && !auction_is_over(auction_id), EAUCTION_IS_FINISHED);
let module_data = borrow_global_mut<ModuleData>(@alcohol_auction);
let auctions = &mut module_data.auctions;
let auction = table_with_length::borrow_mut(auctions, auction_id);
assert!(coin::value(&coin) > auction.top_bid, EBID_TOO_LOW);
let new_top_bid = coin::value(&coin);
let new_top_bidder = signer::address_of(bidder);
// accept the new bid
coin::deposit<aptos_coin::AptosCoin>(@alcohol_auction, coin);
let previous_top_bidder = auction.top_bidder;
if (previous_top_bidder != @alcohol_auction) {
// return the amount of the previous highest bid to the bidder if there was at least one legitimate prior bid
let previous_top_bid = auction.top_bid;
let resource_account_signer = alcohol_auction::access_control::get_signer();
coin::transfer<aptos_coin::AptosCoin>(&resource_account_signer, auction.top_bidder, previous_top_bid);
};
auction.top_bid = new_top_bid;
auction.top_bidder = new_top_bidder;
event::emit_event(
&mut auction.new_bid_events,
NewBidEvent {
new_top_bid,
new_top_bidder,
}
);
}First, we have to check that the requested auction exists, that it is live, and that its end date is not in the past. If all these assertions are true, we have to ensure that the new bid is higher than the current.
After all verifications, we can safely deposit funds for the new bid and make it the highest. After everything is done, we emit an event.
4. Auction finalization
Now we should focus on auction finalization. As we already said, there should be two ways to finalize an auction: when the deadline has passed and when the admin decides to accept the current highest bid. As these two functions share most of the same code, we can create an internal function and then create two publicly exposed wrapper functions that the admin and users can call.
First, let’s create the internal function for finalizing an auction:
fun finalize_auction_unchecked(
auction_id: u64
) acquires ModuleData {
let module_data = borrow_global_mut<ModuleData>(@alcohol_auction);
let auctions = &mut module_data.auctions;
let auction = table_with_length::borrow_mut(auctions, auction_id);
auction.status = AUCTION_FINISHED;
let resource_account_signer = alcohol_auction::access_control::get_signer();
let top_bidder = auction.top_bidder;
// Transfer APT and offer a token only if there was at least one legitimate bidder
if (top_bidder != @alcohol_auction) {
// transfer APT to the admin
coin::transfer<aptos_coin::AptosCoin>(&resource_account_signer, alcohol_auction::access_control::get_admin(), auction.top_bid);
// offer the token to the top bidder so it can later be accepted
token_transfers::offer(&resource_account_signer, top_bidder, auction.token_id, 1);
} else {
// otherwise, offer the token to the admin
token_transfers::offer(&resource_account_signer, alcohol_auction::access_control::get_admin(), auction.token_id, 1);
};
event::emit_event(
&mut module_data.auction_finalize_events,
AuctionFinalizeEvent {
auction_id,
auction_winner: auction.top_bidder,
final_bid: auction.top_bid
}
);
}
This function doesn’t perform any verifications (hence the name) and just finalizes an auction by changing its status and performing all required operations. These include transferring gathered coins to the admin and transferring the NFT representing the object being auctioned to the auction winner.
Aptos prohibits direct transfers of tokens unless:
- The recipient already has this token (if a token is semi-fungible)
- The recipient has explicitly enabled direct transfers using the opt_in_direct_transfers function provided by the token framework
These precautions ensure that unwanted tokens will never be transferred to a user’s account without prior arrangement.
We still have to transfer the NFT to our winner, so how do we do it? Aptos has a mechanism called token offerings that allows us to offer a token to the recipient. The recipient must explicitly accept this offer to have the token transferred, and that’s just what we need. This way, our auction winner can accept the NFT after the sale is finalized, and we don’t have to wait for winners to explicitly call a function tp receive their tokens.
Our internal function is ready. Now we need to create two wrapper functions: one will allow anyone to finish an auction if its deadline has passed, and another will allow the admin to accept the highest bid at any point during an auction.
Let’s start with a more general function:
public entry fun finalize_auction(
auction_id: u64
) acquires ModuleData {
assert!(auction_exists(auction_id), EWRONG_AUCTION_ID);
assert!(auction_status(auction_id) == AUCTION_LIVE, EAUCTION_IS_FINISHED);
assert!(auction_is_over(auction_id), EAUCTION_IS_NOT_OVER_YET);
finalize_auction_unchecked(auction_id);
}This function checks that the requested auction exists, that it is active, and whether its deadline hasn’t already passed. If all these assertions are true, we call our internal function to handle the rest.
Now, let’s create the admin version of this function:
public entry fun accept_bid_price(
admin: &signer,
auction_id: u64
) acquires ModuleData {
alcohol_auction::access_control::admin_only(admin);
assert!(auction_exists(auction_id), EWRONG_AUCTION_ID);
assert!(auction_status(auction_id) == AUCTION_LIVE, EAUCTION_IS_FINISHED);
finalize_auction_unchecked(auction_id);
}In this case, we have to verify that the caller is the admin without needing to check whether the deadline has passed.
Now we have two functions that allow us to finalize an auction. But auction winners still can’t redeem their NFTs for bottles of alcohol, so let’s fix that.
5. Bottle redemption
An auction winner should be able to trade their NFT for an actual bottle of alcohol by calling this function. Our new function looks like this:
public entry fun redeem_bottle(
owner: &signer,
auction_id: u64
) acquires ModuleData {
assert!(auction_exists(auction_id), EWRONG_AUCTION_ID);
let auction_status = auction_status(auction_id);
if (auction_status == AUCTION_LIVE) {
abort EAUCTION_IS_NOT_OVER_YET
} else if (auction_status == AUCTION_BOTTLE_REDEEMED) {
abort EBOTTLE_ALREADY_REDEEMED
};
let module_data = borrow_global_mut<ModuleData>(@alcohol_auction);
let auctions = &mut module_data.auctions;
let auction = table_with_length::borrow_mut(auctions, auction_id);
auction.status = AUCTION_BOTTLE_REDEEMED;
alcohol_auction::token::burn(&auction.token_id, signer::address_of(owner), 1);
event::emit_event(
&mut module_data.bottle_redeem_events,
BottleRedeemEvent{
auction_id,
timestamp: timestamp::now_seconds()
}
);
}First, we check that this particular bottle wasn’t redeemed earlier and that the auction is over. After these verifications, we can safely change the auction status and burn the NFT. We also emit an event at the end to ensure we can always track all bottle redemptions. Mostly, the bottle redemption process is an off-chain event, so we won’t focus on it in this article.
Our platform is ready! Before using it to start new auctions, let’s write some unit tests to ensure it works as intended.
Step 5. Testing the alcohol auction solution
The Aptos CLI tool has a built-in testing framework that we can use to test our modules. We can write tests inside existing modules or move them to an external module.
Tests in Move aren’t compiled when a module is published on the blockchain and are only used when calling the compiler in test mode. There is also an annotation to mark directives that should only be valid in test mode. For example, we can mark an entire module or a use statement with a test-only annotation.
In our case, we will write all unit tests in an external module named Tests, which will be marked with the test-only annotation. As our modules sometimes use private functions, we need to also create public wrappers for these functions. This will allow us to call them from our new module because test-only modules follow the same rules as usual modules.
We won’t demonstrate all the unit tests in this article because there are too many. Instead, we’ll focus on explaining one unit test that uses most of the testing framework’s features. If you’d like to see all other unit tests, you can find them in our GitHub repository.
First, we need to initialize our contracts. The init_module function isn’t called automatically in test mode, so we have to do it manually. As you probably remember, the constructor function is private, so we must create a wrapper for each constructor function:
#[test_only]
public fun init_module_test(account: &signer) {
init_module(account);
}The wrappers of the auction and token module constructor functions look the same, but the access control module is different because of the resource account. We can’t create a resource account during testing because we don’t know that account address beforehand, and it is impossible to use the address substitution mechanism as we did before. To fix this issue, we can use a test-only function provided by the account module that allows us to create a signer capability for any account. This way, we avoid creating a resource account and use a dummy value that works as a regular signer capability.
A public wrapper of the auction module’s constructor function looks like this:
#[test_only]
public fun init_module_test(account: &signer) {
move_to(
account,
AccessControl {
resource_signer_cap: account::create_test_signer_cap(signer::address_of(account)),
admin: @source_addr,
admin_change_events: account::new_event_handle<AdminChangeEvent>(account)
}
);
}
}Now we can create a function that will prepare the test environment:
fun set_up_testing_environment(
resource_account: &signer,
source_account: &signer,
aptos_framework: &signer,
other_accounts: vector<address>
) {
timestamp::set_time_has_started_for_testing(aptos_framework);
timestamp::update_global_time_for_test_secs(1);
account::create_account_for_test(signer::address_of(resource_account));
account::create_account_for_test(signer::address_of(source_account));
while (!vector::is_empty<address>(&other_accounts)) {
let account = vector::pop_back(&mut other_accounts);
account::create_account_for_test(account);
};
access_control::init_module_test(resource_account);
alcohol_auction::token::init_module_test(resource_account);
auction::init_module_test(resource_account);
}This function initializes the blockchain state by setting the global timestamp and creating the required accounts. After the blockchain is in the desired state, we initialize our modules using the wrapper functions we created. As each test resets the blockchain state, we must call this function at the beginning of each unit test. Having a standalone function is a great way to reduce code duplication and improve readability.
We should also create a small helper function that will initialize the native currency of the Aptos blockchain and provide us a way to mint and burn APT coins when needed:
fun init_aptos_coin(
aptos_framework: &signer,
resource_account: &signer,
source_account: &signer
): (coin::BurnCapability<aptos_coin::AptosCoin>, coin::MintCapability<aptos_coin::AptosCoin>) {
let (burn_cap, mint_cap) = aptos_coin::initialize_for_test(aptos_framework);
coin::register<aptos_coin::AptosCoin>(resource_account);
coin::register<aptos_coin::AptosCoin>(source_account);
(burn_cap, mint_cap)
}This function initializes the APT coin and returns minting and burning capabilities that we can use later.
Now we are ready to test our platform. Let’s test the bottle redemption process. We specifically chose this test because, in our case, it is an end-to-end (E2E) test, as it interacts with all parts of our platform.
We should use the annotation to mark a function as a test. This annotation also allows us to specify addresses we’ll use to provide signer arguments to our function. Note that test functions can only have signer objects as arguments, and it is required that the names of annotation parameters and function arguments match. In our case, the function’s definition looks like this:
#[test(resource_account = @alcohol_auction, source_account = @source_addr, aptos_framework = @aptos_framework, bidder = @0xb1d)]
fun auction_redeem_success(
resource_account: signer,
source_account: signer,
aptos_framework: signer,
bidder: signer
) {
}Now we should prepare the testing environment and initialize the native currency of the Aptos blockchain. Let’s use our helper function to do it:
// ... set_up_testing_environment(&resource_account, &source_account, &aptos_framework, vector<address>[signer::address_of(&bidder)]);
let (burn_cap, mint_cap) = init_aptos_coin(&aptos_framework, &resource_account, &source_account); // ...Next, we should start a new auction and mint new coins so our bidder can make a bid:
// ... let new_bid_amount = 11;
let coin = coin::mint<aptos_coin::AptosCoin>(new_bid_amount, &mint_cap);
let auction_id = start_new_auction(&source_account, 10); // ...The start_new_auction function is another helper function that starts a new auction with a starting price of 0.0000010 APT. You can find its source code in our GitHub repository.
Now our bidder can make a bid, and the admin can accept the bid price to finish the auction quickly:
// ... auction::bid(&bidder, auction_id, coin);
auction::accept_bid_price(&source_account, auction_id); // ...Finally, the bidder should be able to accept the NFT offer and redeem a bottle of alcohol represented by this NFT:
// ... let token_id = auction::get_auction_token_id(auction_id);
token_transfers::claim(&bidder, signer::address_of(&resource_account), token_id);
auction::redeem_bottle(&bidder, auction_id);
assert!(auction::get_auction_status(auction_id) == auction::get_auction_bottle_redeemed_status(), EAUCTION_FAILED_13);
clean_up(burn_cap, mint_cap); // ...To ensure that everything worked, we need to check the status of our auction after the NFT is redeemed for the bottle of alcohol it represents.
Let’s run this test to make sure that it works:
$ aptos move test --named-addresses alcohol_auction=0xff,source_addr=0xab -f auction_redeem_success
INCLUDING DEPENDENCY AptosFramework
INCLUDING DEPENDENCY AptosStdlib
INCLUDING DEPENDENCY AptosToken
INCLUDING DEPENDENCY MoveStdlib
BUILDING alcohol-auction
Running Move unit tests
[ PASS ] 0xff::tests::auction_redeem_success
Test result: OK. Total tests: 1; passed: 1; failed: 0
{
"Result": "Success"
}Great! Our E2E test works as intended.
A built-in testing framework is handy because we don’t have to set up any third-party solutions. Still, it has room for improvement. For example, it would be great to have Mocha-like hooks to automate the execution of tedious tasks like environment preparation.
If you want to test the Aptos CLI testing framework by yourself, you may as well use the –coverage argument to prepare a test coverage report.
Now, our alcohol auction platform is ready and tested! You can check out the full code in Apriorit’s GitHub repository and see the whole instruction on how to build an alcohol auction dApp.
Conclusion
Blockchain technology is a great way to host secure auctions. It allows you, as the owner of an alcohol-related business, to add value to your product, build a unique experience for your customers, and reliably demonstrate the histories of your rare bottles.
Using a blockchain-based solution, you can offer your customers a transparent, reliable, and quick way to purchase, trade, and sell bottles without worrying about their condition or authenticity.
In this article, you’ve learned how to build auction dApp with Aptos. If you’d like to create a more advanced platform for your alcohol manufacturing business, our blockchain development team will be happy to assist you and build a reliable solution for your business needs.
Contact us to start building a blockchain solution that fits your business perfectly!
Have a question?
Ask our expert!
VP of Engineering


