 Skip to main content

As organizations migrate their infrastructure and workflows to Microsoft 365, securely handling sensitive data becomes increasingly challenging. Traditional network-level monitoring tools like proxies or firewalls are often ineffective in cloud-native environments, where users work with SaaS applications like OneDrive, SharePoint, and Teams. This gap creates visibility and control issues for security teams.
In this article, we share how Graph API works in detail and how you can use it to improve the security of a Microsoft-based corporate environment.
This article will be useful for cloud security officers, CISOs, and SaaS product owners looking to enhance data security and respond effectively to malicious activity without relying on legacy perimeter-based tools.
Contents:
- What is Microsoft Graph API and why do you need it?
- What can you do with Microsoft Graph API?
- Implementing file monitoring and DLP with Microsoft Graph API
- Step 1. Set up the Microsoft Graph API client in a .NET project
- Step 2. Retrieve file changes using a delta query
- Step 3. Scan file contents with a DLP system
- Conclusion
What is Microsoft Graph API and why do you need it?
Microsoft Graph API is a powerful RESTful interface that provides unified access to a wide range of Microsoft 365 cloud services, including OneDrive, Outlook, Teams, and SharePoint. It allows developers to interact with Microsoft 365 data by performing CRUD operations (Create, Read, Update, Delete), managing user permissions, and monitoring user behavior to achieve compliance and data security.
For organizations, Microsoft Graph API offers a centralized way to:
- Build custom integrations
- Automate administrative tasks
- Gain deeper visibility into how data is used across the Microsoft ecosystem
- Improve security monitoring, regulatory compliance, and internal governance
In other words, you can use it to create smarter and more secure workflows tailored to your business needs.
Pros and cons of using Microsoft Graph API
Before adopting Microsoft Graph API as a core part of your Microsoft 365 monitoring or automation efforts, it’s important to consider its capabilities and potential limitations.
Advantages
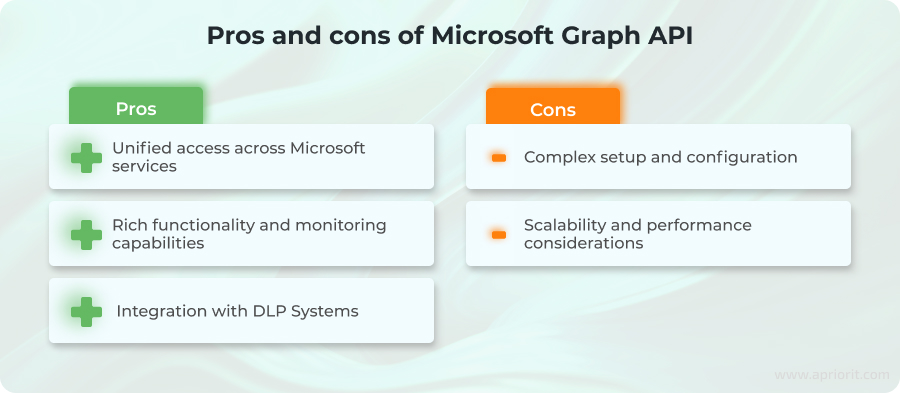
Unified access across Microsoft services. Seamless integration with all major Microsoft Cloud services allows developers to interact with multiple resources through a single API. This unified model greatly simplifies development and offers an opportunity for building cross-service workflows without managing multiple APIs.
Rich functionality and monitoring capabilities. Graph API provides extensive support for performing standard CRUD operations with data. With features like delta queries, it allows developers to monitor file activity, track changes, and detect suspicious behavior. Also, dynamic permission revoking allows your teams to enforce data access policies and prevent leaks.
Integration with DLP systems. This allows organizations to automatically scan files for sensitive data (credit card numbers, email addresses) and take immediate action, such as blocking access or alerting security teams, based on content analysis.
Disadvantages
Complex setup and configuration. Proper use requires configuring permissions, authentication flows, and access tokens through the Azure Portal, which can be complex and time-consuming.
Scalability and performance considerations. Processing delta queries, permission checks, and content retrievals for many users or files can slow down response times and affect the user experience. For high-scale environments, you might need to consider additional optimization and architectural planning.
Now, let’s see what the core components of Microsoft Graph API are and how they contribute to effective file access, permission control, and change tracking.
Looking for ways to improve the security of your Microsoft 365 infrastructure?
Our experts will design and implement secure solutions that integrate seamlessly with your existing systems and support your long-term security strategy.
What can you do with Microsoft Graph API?
Microsoft Graph API includes an extensive toolkit for working with user data across Microsoft 365 services. When it comes to monitoring user activity and securing sensitive files, there are five main capabilities that can help you secure and audit your cloud environment:
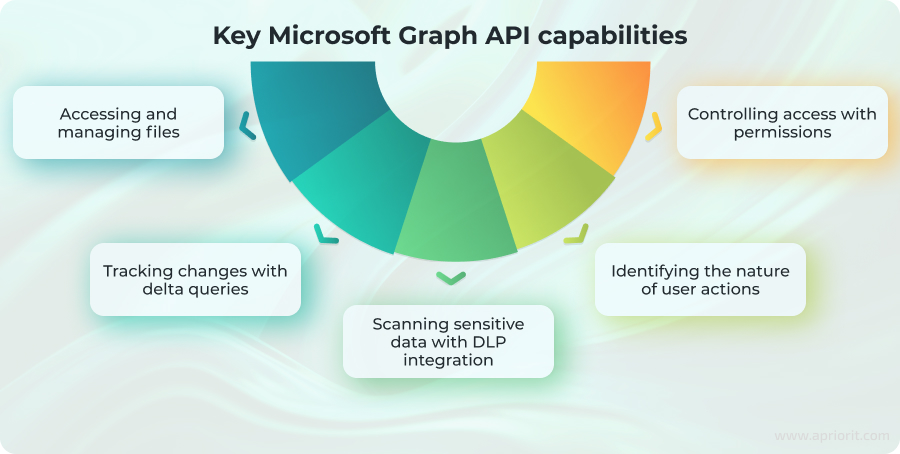
Accessing and managing files
The driveItem resource is the foundation for interacting with files and folders in OneDrive and SharePoint. It supports listing files, searching, accessing content, deleting items, and other operations.
Working with driveItem starts with accessing the root directory of the drive and exploring the entire file hierarchy from there.
Here is how you can access the root folder:
GET /me/drive/root
This request returns a JSON response like the following:
{
  "createdBy": {
  	"user": {
      	"id": "efee1b77-fb3b-4f65-99d6-274c11914d12",
      	"displayName": "Ryan Gregg"
  	}
  },
  "createdDateTime": "2016-03-21T20:01:37Z",
  "cTag": "\"c:{86EB4C8E-D20D-46B9-AD41-23B8868DDA8A},0\"",
  "eTag": "\"{86EB4C8E-D20D-46B9-AD41-23B8868DDA8A},1\"",
  "folder": { "childCount": 120 },
  "id": "01NKDM7HMOJTVYMDOSXFDK2QJDXCDI3WUK",
  "lastModifiedBy": {
  	"user": {
      	"id": "efee1b77-fb3b-4f65-99d6-274c11914d12",
      	"displayName": "Ryan Gregg"
  	}
  },
  "lastModifiedDateTime": "2016-03-21T20:01:37Z",
  "name": "OneDrive",
  "root": { },
  "size": 157286400,
  "webUrl": "https://contoso-my.sharepoint.com/personal/rgregg_contoso_com/Documents"
}This JSON response contains essential information, such as the ID of the root folder, and includes metadata that can be used to verify user activity, monitor modifications, and more. Essentially, this forms the foundation for any further file operations.
Without this identifier, it would be difficult to orient within the OneDrive structure, especially when dealing with deeply nested directories.
Next, you can request listing files, track changes, or manage permissions. Here’s an example of a typical request:
GET /me/drive/root/children?$filter=name eq 'example.docx'
This is a filter query that allows you to find a file based on a file name. The result of executing this request will be the following JSON response:
{
 "@odata.context": "https://graph.microsoft.com/v1.0/$metadata#users('user_id')/drive/root/children",
    "value": [
        {
            "id": "0123456789ABCDE",
            "name": "example.docx",
            "eTag": "\"0123456789ABCDE\"",
            "cTag": "\"0123456789ABCDE\"",
            "createdDateTime": "2023-11-01T12:34:56Z",
            "lastModifiedDateTime": "2023-11-10T08:22:34Z",
            "size": 12345,
            "webUrl": "https://onedrive.live.com/?cid=123456789ABCDE&id=0123456789ABCDE",
            "createdBy": {
                "user": {
                    "displayName": "John Doe",
                    "id": "user_id"
                }
            },
            "lastModifiedBy": {
                "user": {
                    "displayName": "John Doe",
                    "id": "user_id"
                }
            },
            "parentReference": {
                "driveId": "drive_id",
                "id": "parent_folder_id",
                "path": "/drive/root:/"
            },
            "file": {
                "mimeType": "application/vnd.openxmlformats-officedocument.wordprocessingml.document",
                "hashes": {
                    "quickXorHash": "examplehash=="
                }
            },
            "fileSystemInfo": {
                "createdDateTime": "2023-11-01T12:34:56Z",
                "lastModifiedDateTime": "2023-11-10T08:22:34Z"
            }
        }
    ]
}The key values of interest here are:
- The
eTag, which helps track changes to the file’s contents - The
cTag, which reflects structural changes, such as renaming or moving the file
In other words, these tags allow you to analyze the nature of changes made by the user.
Controlling access with permissions
To protect sensitive information stored in OneDrive or SharePoint, you often need to manage or revoke user access to specific files or folders. Unauthorized sharing or excessive permissions can lead to data leakage, so being able to programmatically remove access is critical for maintaining a secure environment.
Microsoft Graph API allows you to revoke a user’s permissions with the following request:
DELETE /me/drive/items/{item-id}/permissions/{perm-id}
In response, you will receive the following:
HTTP/1.1 204 No Content
This status code indicates that the operation was completed successfully, the permission was removed, and there is no content to return in the response body.
Note: This change is immediate. The user will lose access to the item as soon as the request is processed. This can be particularly useful for:
- Revoking access after an employee leaves the organization
- Removing external collaborators who no longer need access
- Responding to suspicious activity or potential insider threats
Before deleting permissions, consider logging the existing permission state or notifying an administrator to achieve full traceability and accountability in case access needs to be restored.
Tracking changes with delta queries
Delta queries provide incremental change tracking, meaning that you receive only the changes that have occurred in the file list since the last delta request. An initial delta request looks like this:
GET /me/drive/root/delta
In response, you will receive a JSON payload similar to the following:
{
    "@odata.context": "https://graph.microsoft.com/v1.0/$metadata#Collection(driveItem)",
    "@odata.deltaLink": "https://graph.microsoft.com/v1.0/me/drive/root/delta?token={token-id},
    "value": [
        {
            "@odata.type": "#microsoft.graph.driveItem",
            ...
            "root": {},
            ...
        },
        {
            "@odata.type": "#microsoft.graph.driveItem",
            ...
        }
        ...
    ]
}The root of the drive is always the first item in the list, followed by other resources such as files and folders. The @odata.deltaLink field contains the REST endpoint for the next delta query, based on the current one. If the response also includes @odata.nextLink, it indicates that not all data fits into the response. In this case, you need to issue a follow-up request using the link in @odata.nextLink to retrieve the remaining data.
This functionality allows you to programmatically detect and respond to suspicious activity. For example, if a file is suddenly deleted, moved, or shared with an unknown user, the system can capture this and trigger a response.
Note: This process isn’t fully automatic by default, as it requires implementation on the developer’s side to run checks and interpret results.
Read also
How to Ensure SaaS Data Security with Curated Database Design
Make your SaaS solution resilient from the design stage. Learn how a proper database architecture strengthens your system’s overall security posture.support for existing features.

Identifying the nature of user actions
With the help of Microsoft Graph API delta queries, you can monitor user activity and understand the exact type of actions performed by the user. Here is a list of various delta queries that provide information on user actions:
Table 1. Nature of user actions
| Delta query | The information it provides |
|---|---|
driveItem.shared | Whether the file was shared by a user |
item.createdBy != null | Whether the file was created by an Office 365 user (via web application) |
item.deleted != null | Whether the file was deleted |
item.lastModifiedBy != null | The user’s ID who last modified the file |
item.lastModifiedBy.application | Name of the application that last modified the file |
item.createdDateTime == item.lastModifiedDateTime && item.size != 0 | Whether the file was uploaded (created and last edited timestamps match, and the file contains content) |
There are many more conditional checks you can use to better understand the nature of user interactions with files.
Based on these insights, different response strategies can be applied. For example, if a user tries to share a file containing sensitive information with a suspicious account, you could revoke their sharing permissions or restrict their ability to view files altogether. In this way, you can build automated monitoring systems that respond dynamically to potentially risky behavior.
Scanning sensitive data with DLP integration
If you already use a data loss prevention (DLP) system to protect sensitive information from being inappropriately shared or exposed, you can enhance it by integrating Microsoft Graph API. This integration will allow your DLP solution to automatically scan the full text content of documents before access is granted or files are shared, helping you more effectively enforce data protection policies.
For example, let’s send the following request to automatically inspect sensitive data:
{
    "item": {
      "value": "This is a sample text containing a credit card number 4111-1111-1111-1111."  // The text to be scanned for sensitive information
    },
    "inspectConfig": {    // Configuration for sensitive data inspection
      "infoTypes": [      // Array of types of sensitive information to detect
        { "name": "CREDIT_CARD_NUMBER" },  // Data type: credit card number
        { "name": "EMAIL_ADDRESS" }        // Data type: email address
      ],
      "minLikelihood": "LIKELY"  // Minimum likelihood threshold for detection
    }
}We receive the following JSON response:
{
  "result": {

    "findings": [
      {
        "infoType": {
          "name": "CREDIT_CARD_NUMBER" // Type name (in this case, a credit card number)
        },
        "likelihood": "VERY_LIKELY",   // Likelihood that this is indeed sensitive data
        "quote": "4111-1111-1111-1111",// The exact piece of text containing sensitive information
        "location": {          // Information about the location of the detected data in the text
          "byteRange": {       // Byte range where the data is located
            "start": 41,
            "end": 61
          },
          "codepointRange": {  // Character range (code points) in the text
            "start": 41,
            "end": 61
          }
        }
      }
    ],
    "statistics": {            // Statistical data about the scan
      "processedBytes": 74,    // Number of bytes processed
      "totalFindings": 1       // Total number of detected sensitive data items
    }
  }
}In the response, we see that the DLP system has detected a credit card number, pinpointed its exact location in the text (byte range), and estimated the likelihood of the data being truly sensitive as VERY_LIKELY.
This allows the DLP system to automatically flag potentially risky content and take further action, such as blocking access to the item, notifying an administrator, or applying data handling policies.
Now that we’ve explored the key components and capabilities of Microsoft Graph API, let’s walk through how to use Microsoft Graph API in practice to facilitate file monitoring and sensitive data detection.
Read also
Comparing Open Banking API Management Platforms: Apigee vs AWS vs Azure
Optimize your open banking initiatives with a smarter approach to API management. Our experts share key security, compliance, and performance techniques to help your solution stand out in the FinTech space.

Implementing file monitoring and DLP with Microsoft Graph API
To securely monitor file activity and detect sensitive content in Microsoft 365, you can combine the capabilities of Microsoft Graph API with a DLP system.
In this section, we will walk you through the full implementation process.
Before implementing Microsoft Graph API in your project, you need to set up the required environment in Microsoft Azure. This includes:
- Creating a Microsoft Azure account
- Registering an application in Azure Active Directory
Granting appropriate Graph API permissions to the app: Files.Read.All, Sites.Read.All, User.Read, etc.
Once your Azure app is registered and permissions are configured, you can integrate Microsoft Graph API into your .NET project and start building the monitoring workflow.
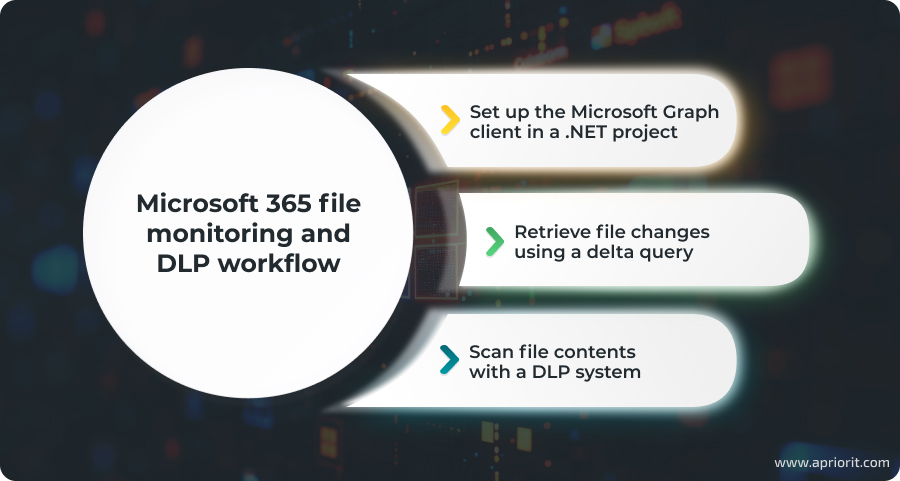
Step 1. Set up the Microsoft Graph API client in a .NET project
Microsoft Graph API can be integrated into a .NET project using the Microsoft.Graph library, which can be installed via NuGet. The client is configured by passing an access token:
var scopes = new[] { "User.Read" };

// Multi-tenant apps can use "common"
// Single-tenant apps must use the tenant ID from the Azure portal
var tenantId = "common";

// Value from app registration
var clientId = "YOUR_CLIENT_ID";

// Using Azure.Identity;
var options = new DeviceCodeCredentialOptions
{
    AuthorityHost = AzureAuthorityHosts.AzurePublicCloud,
    ClientId = clientId,
    TenantId = tenantId,
    // Callback function that receives the user prompt
    // Prompt contains the generated device code that the user must
    // enter during the auth process in the browser
    DeviceCodeCallback = (code, cancellation) =>
    {
        Console.WriteLine(code.Message);
        return Task.FromResult(0);
    },
};

// https://learn.microsoft.com/dotnet/api/azure.identity.devicecodecredential

var deviceCodeCredential = new DeviceCodeCredential(options);
var graphClient = new GraphServiceClient(deviceCodeCredential, scopes);Step 2. Retrieve file changes using a delta query
Delta queries allow you to track incremental file changes like edits, deletes, and access since the last sync. Here is how you can make a delta query:
// Specify the name of the user to perform operations for
var userName = "John Doe";

// Retrieve a list of all users in the organization
var usersResponse = await graphClient.Users.GetAsync();

// Extract the list of users from the response
var users = usersResponse?.Value!;

// Find the User ID of the specified user by matching the display name
var userId = users.Find(user => user.DisplayName == userName)?.Id;

// Retrieve the list of drives associated with the specified user
var drivesResponse = await graphClient.Users[userId].Drives.GetAsync();

// Extract the drives from the response and get the ID of the first drive
var drives = drivesResponse?.Value;
var driveId = drives?.First().Id;

// Retrieve the root ID of the specified drive
var rootId = await m_graphClient.Drives[m_driveId].Root.GetAsync()?.Id;

// Retrieve the delta changes for the specified drive and its root folder
var delta = await m_graphClient.Drives[m_driveId].Items[rootId].Delta.GetAsDeltaGetResponseAsync();

// Extract the collection of drive items from the delta response
var driveItems = delta.Value;These driveItems represent all files and folders that have changed since the last delta query. You can now analyze this list to determine which files need to be inspected or flagged for further security review.
Step 3. Scan file contents with a DLP system
Once you have file references from the Graph API, pass their contents to a DLP service to check for sensitive data.
// Get the file id (we will get only the first element)
var fileId = driveItems.First();

var dlp = DlpServiceClient.Create();

// Get content stream
var driveItemContentStream = await graphClient.Drives[driveId].Items[fileId].Content.GetAsync();

// Instantiate a client
var dlp = DlpServiceClient.Create();

// Get the bytes from the file
var fileBytes = await ByteString.FromStreamAsync(fileStream, cancellationToken);
Console.WriteLine($"File: \n {fileBytes.ToStringUtf8()}");

// Construct a request
var request = new InspectContentRequest
{
    Parent = new LocationName(projectId, "global").ToString(),
    Item = new ContentItem
    {
        ByteItem = new ByteContentItem
        {
            Data = fileBytes,
            Type = ByteContentItem.Types.BytesType.Unspecified
        }
    },
    InspectConfig = new InspectConfig
    {
        // Types of information to match
        InfoTypes =
        {
            new InfoType { Name = "CREDIT_CARD_NUMBER" },
            new InfoType { Name = "CREDIT_CARD_TRACK_NUMBER" },
            ...
        },
        // The minimum likelihood before returning a match
        MinLikelihood = Likelihood.Unspecified,
        // Whether to include the matching string
        IncludeQuote = true,
        Limits = new InspectConfig.Types.FindingLimits
        {
            // Maximum number of findings to report per request
            // (0 = server maximum)
            MaxFindingsPerRequest = 0
        }
    }
};

// Execute request
var response = await dlp.InspectContentAsync(request);

// Inspect response
Console.WriteLine(response.Result.Findings);With this setup, you can now:
- Track changes in Microsoft 365 files using Microsoft Graph API delta queries
- Extract updated files dynamically
- Scan file contents for sensitive data using Google DLP or a similar solution
- React to potentially risky file activity through custom logic
However, it’s important to understand how automation is handled in this system, since this is not a fully autonomous solution out of the box. Delta queries only return raw data about changes in the file system, such as file edits, deletions, or shares. The system does not automatically decide whether an action is suspicious. You should implement custom logic to:
- Define what suspicious activity looks like: for example, sharing a file externally, uploading sensitive content, etc.
- Detect patterns of suspicious activity based on delta data
- Forward relevant files for DLP scanning
- Take appropriate action, such as revoking permissions
To make this work at scale, especially in large enterprise environments, the monitoring logic should be executed regularly and automatically — for example, via scheduled jobs or background services. In high-volume scenarios, delta results can be processed with the help of distributed microservices or clusters to achieve maximum performance and reliability.
This flexible and code-driven approach promotes proactive and customizable data monitoring. As a result, you will be able to enforce internal security policies, meet compliance requirements, and reduce the risk of data leaks without relying solely on manual oversight.
Related project
Optimizing and Securing a SaaS Platform by Migrating to Angular
Learn how our experts migrated a complex SaaS platform to Angular while preserving functionality, enhancing UI performance, and ensuring long-term support for evolving product requirements.

Conclusion
As organizations increasingly rely on Microsoft 365 for file storage and collaboration, the need for reliable, automated monitoring and security continues to grow. Microsoft 365 Graph API offers a powerful way to access and analyze user activity across Microsoft cloud services. However, implementing a scalable monitoring system requires a thoughtful approach to architecture, data processing, and seamless DLP integration.
At Apriorit, we specialize in SaaS development and cloud-based monitoring solutions that turn complex API-driven workflows into secure, scalable systems. Our experienced team will help you architect and deliver a solution tailored to your unique business needs, whether you’re building a compliance-focused enterprise platform or monitoring sensitive data across cloud apps.
Need help building a scalable SaaS product?
Accelerate your software development with our expert team and get a secure, cloud-ready SaaS solution tailored to your business goals.
Have a question?
Ask our expert!
VP of Engineering


