 Skip to main content
Delivering a competitive and attractive cross-platform application is heavily dependent on quality assurance (QA). Your QA team has to ensure that all app versions work equally smoothly and bug-free across platforms and devices. One approach that can help your team achieve top-notch quality of your cross-platform software is end-to-end testing.
In this article, you’ll discover benefits of and helpful practices for applying end-to-end cross-platform testing. You’ll also find a detailed example of testing a cross-platform app with web, Android, and iOS versions.
This article will be useful for development leaders and project owners who are working on cross-platform applications and looking for ways to improve the quality of their products.
Contents:
- Why use E2E testing for cross-platform apps?
- 6 best practices for writing end-to-end tests
- Testing a cross-platform React Native application
- 1. Setting up the environment
- 2. Creating test utilities
- 3. Writing test cases
- 4. Integrating tests into the CI/CD pipeline
- Testing an app on real mobile devices
- Improving test stability
- Conclusion
Why use E2E testing for cross-platform apps?
End-to-end (E2E) testing is a type of quality assurance (QA) that evaluates an application’s behavior from the user’s perspective. E2E tests are designed to verify an app’s functionality by simulating real user interactions with the application and ensuring that it behaves as expected.
In contrast to traditional testing that focuses on a certain part of an application, E2E testing checks the functionality of the application as a whole. E2E tests simulate the end-user experience, including all interface interactions such as clicking, long-pressing, dragging, swiping, and entering data into forms.
Using E2E tests in cross-platform projects provides your development team with the following benefits:
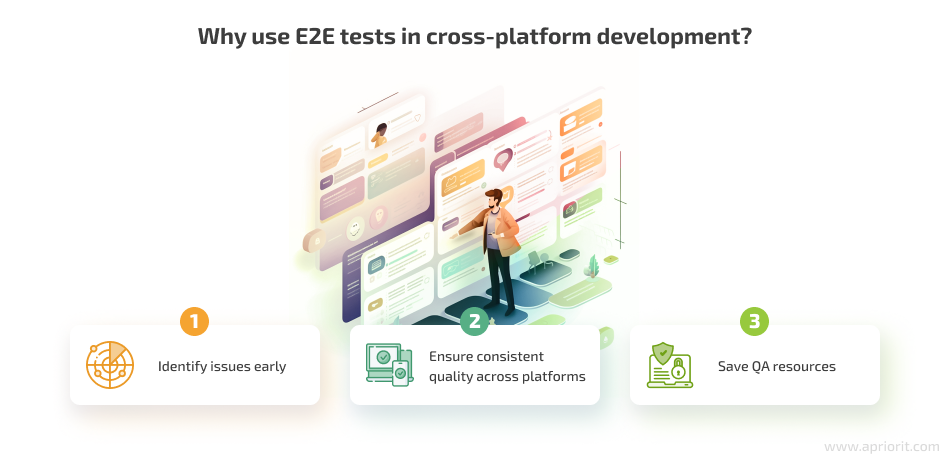
- Identify issues early. QA engineers run end-to-end tests after each development iteration, discovering bugs before they can be rolled out to users or introduced to app versions for other platforms. By identifying potential problems early in the development process, automated E2E testing saves time, effort, and resources in the long run while improving while improving overall application quality.
- Ensure consistent quality across platforms. You can write end-to-end test cases for сhecking both platform-dependent and universal features. Universal test cases can be run on different platforms without changes, which saves a lot of time for QA and allows you to consistently check the app’s quality.
- Save QA resources. End-to-end tests are mostly automated, which saves a lot of QA time and effort. QA teams usually automate test scenarios for key software functionality that has to consistently work in each product version.
Before we dive into practical examples of testing cross-platform apps, let’s examine some tips and practices for efficient E2E testing of React Native apps.
Need to enhance the quality of your cross-platform application?
Team up with Apriorit’s experienced QAs to leverage the best testing approaches and tools for your project.
6 best practices for writing end-to-end tests
There are a lot of nuances to writing efficient, stable, and consistent end-to-end tests. Looking back on our experience of checking a React Native app with end-to-end testing, we can share some practical tips you can use in your projects:
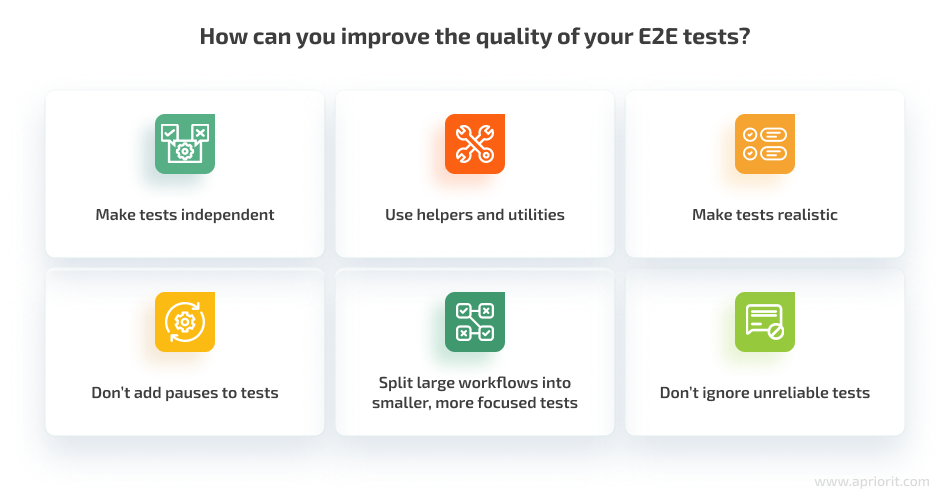
1. Make tests independent
Independent, or atomic, tests aren’t linked with the execution or results of other tests. Here are the key properties of independent tests:
- Performance of each subsequent test should not be dependent on the previous test.
- The application’s state must be reset before starting the test.
- If the test requires a specific application state, it must be set directly before the test starts.
Making tests independent allows you to get consistent and accurate results and helps avoid unnecessary debugging.
2. Use helpers and utilities
If you see yourself repeating the same code in your tests to find or interact with items, put that code in a separate utility. It can do something as simple as selecting the n-th option or as complex as describing the process of logging in to the application. Logging in is done in each test. If you put the code for it in a separate utility, then if the login flow changes, you will only need to make changes to the testing code in one place.
Creating such utilities greatly reduces the time for writing tests and avoids mistakes.
3. Make tests realistic
Create test scenarios that approximate real user behavior. Look at the application from the perspective of a person who is using it for the first time. For example, most people don’t just click all items on the screen in a random order.
Testing realistic scenarios helps to discover and fix issues that users will likely encounter.
4. Don’t add pauses to tests
Sometimes, adding a pause to a test may seem like an appropriate solution when you need to wait for a specific event to end. For a short-term solution (for example, when running a test once), adding a pause will work. However, if you need to run a test many times under various conditions, you’ll need another solution.
Instead of pauses, it’s best to wait for a specific event, such as the displaying of certain elements on the screen or execution of certain scripts.
5. Split large workflows into smaller, more focused tests
If a test case can logically be split into several separate test cases, it should be split. Smaller cases will help you accurately identify where in the application an error occurred based on the name of the failed test.
We recommend writing a separate test case for each application feature. For example, when testing an application for an online store, your QA engineers can write separate test cases for registration, login, adding to cart, payment, and delivery.
6. Don’t ignore unreliable tests
Some E2E tests can be unstable and occasionally crash for no obvious reason. While a test may work perfectly fine after some time or after certain changes are made to the project, it’s better to analyze the reason for inconsistent crashes than to ignore them because a test seems to have fixed itself.
Investigating such tests often leads to the discovery of unobvious bugs or ways to improve the tests themselves to make them more stable and reliable.
Now, we can move on to end-to-end testing of a React Native app on different platforms.
Related project
Cross-Platform Data Backup Solution Development: Windows, Android, macOS, iOS
Discover how we helped a returning client augment their Windows-based data backup solution with versions for macOS, iOS, and Android. After the release of new versions, the client doubled the total number of users.

Testing a cross-platform React Native application
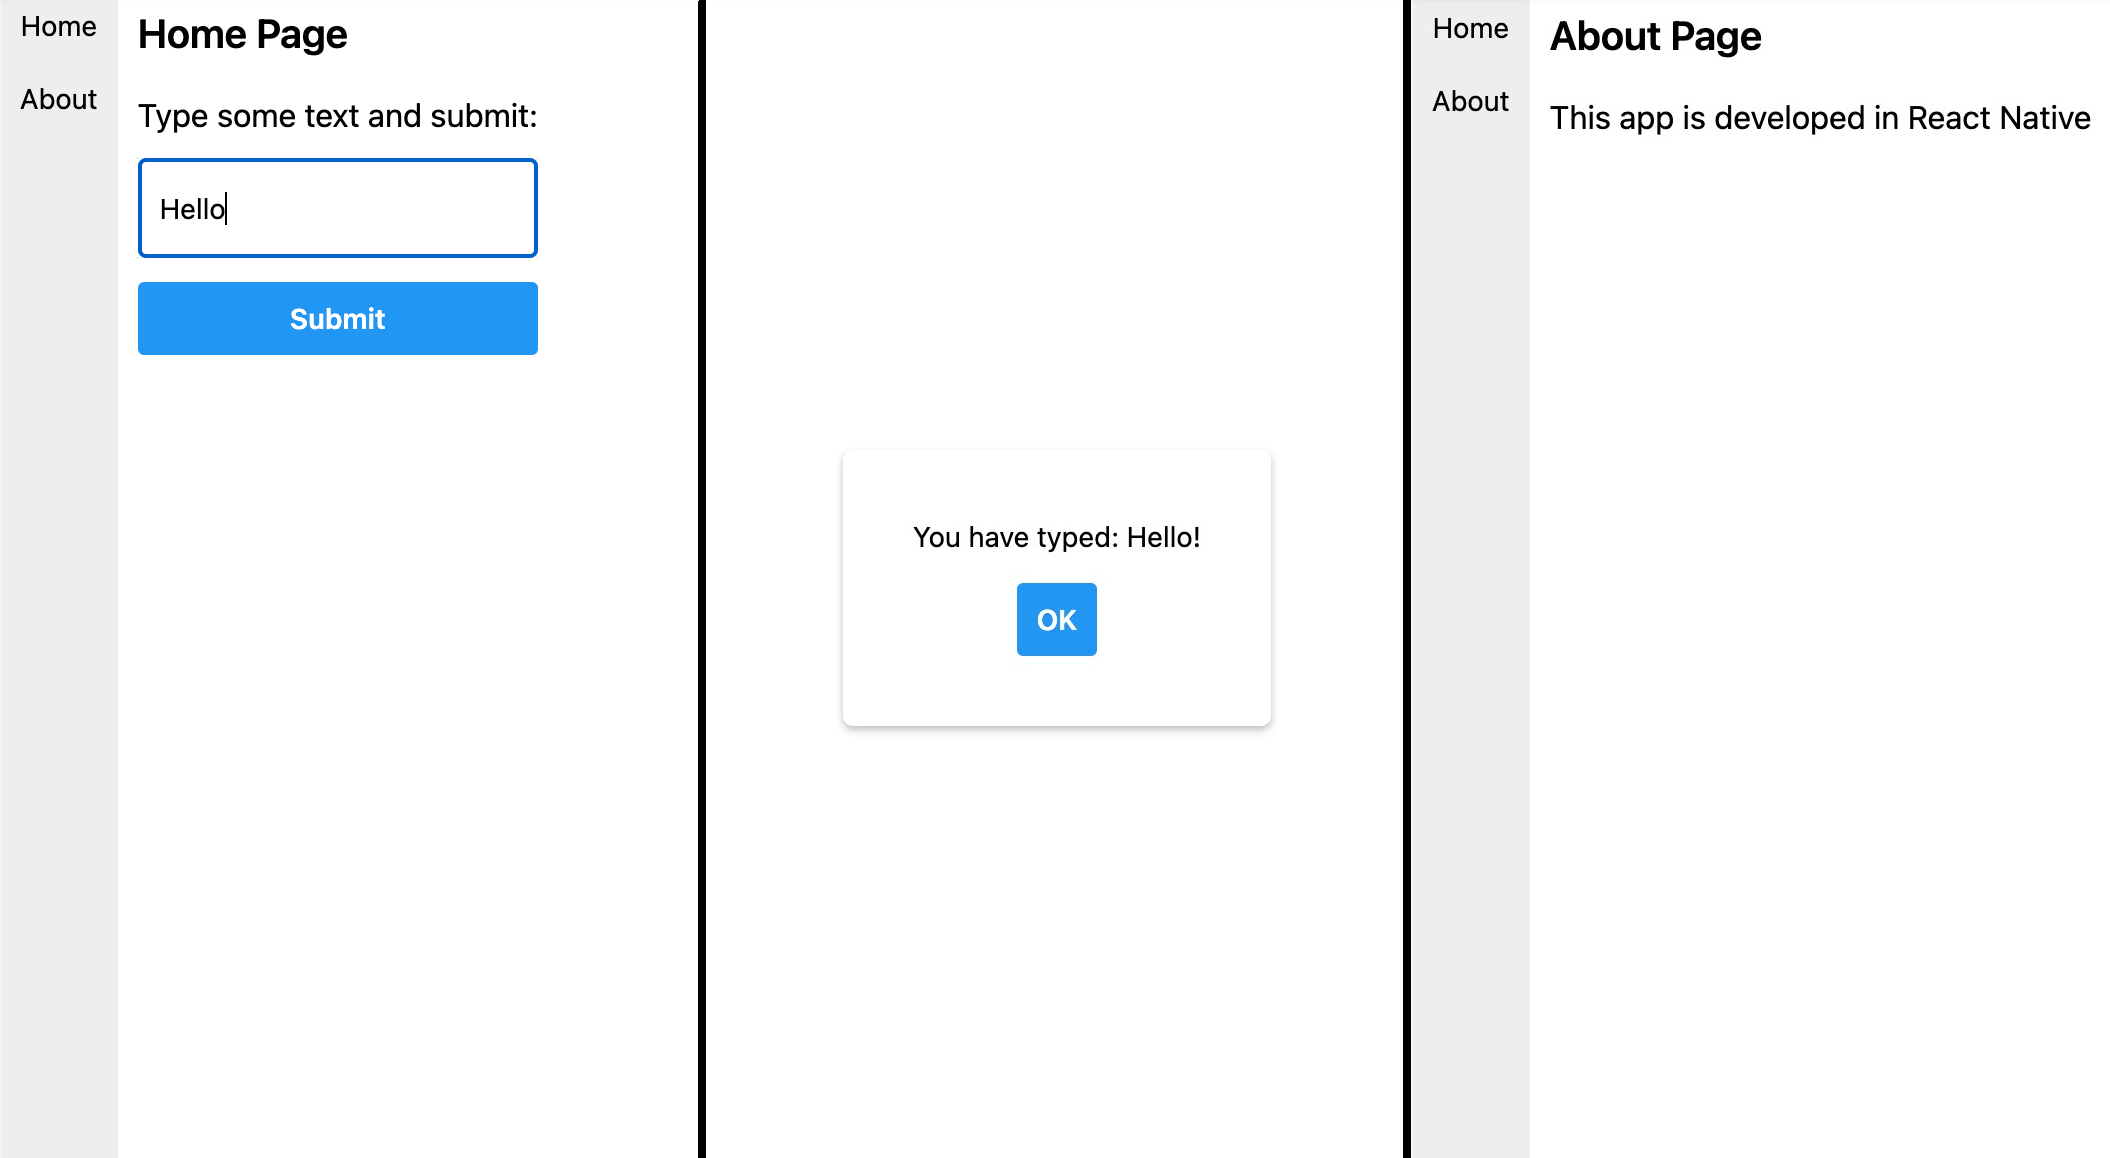
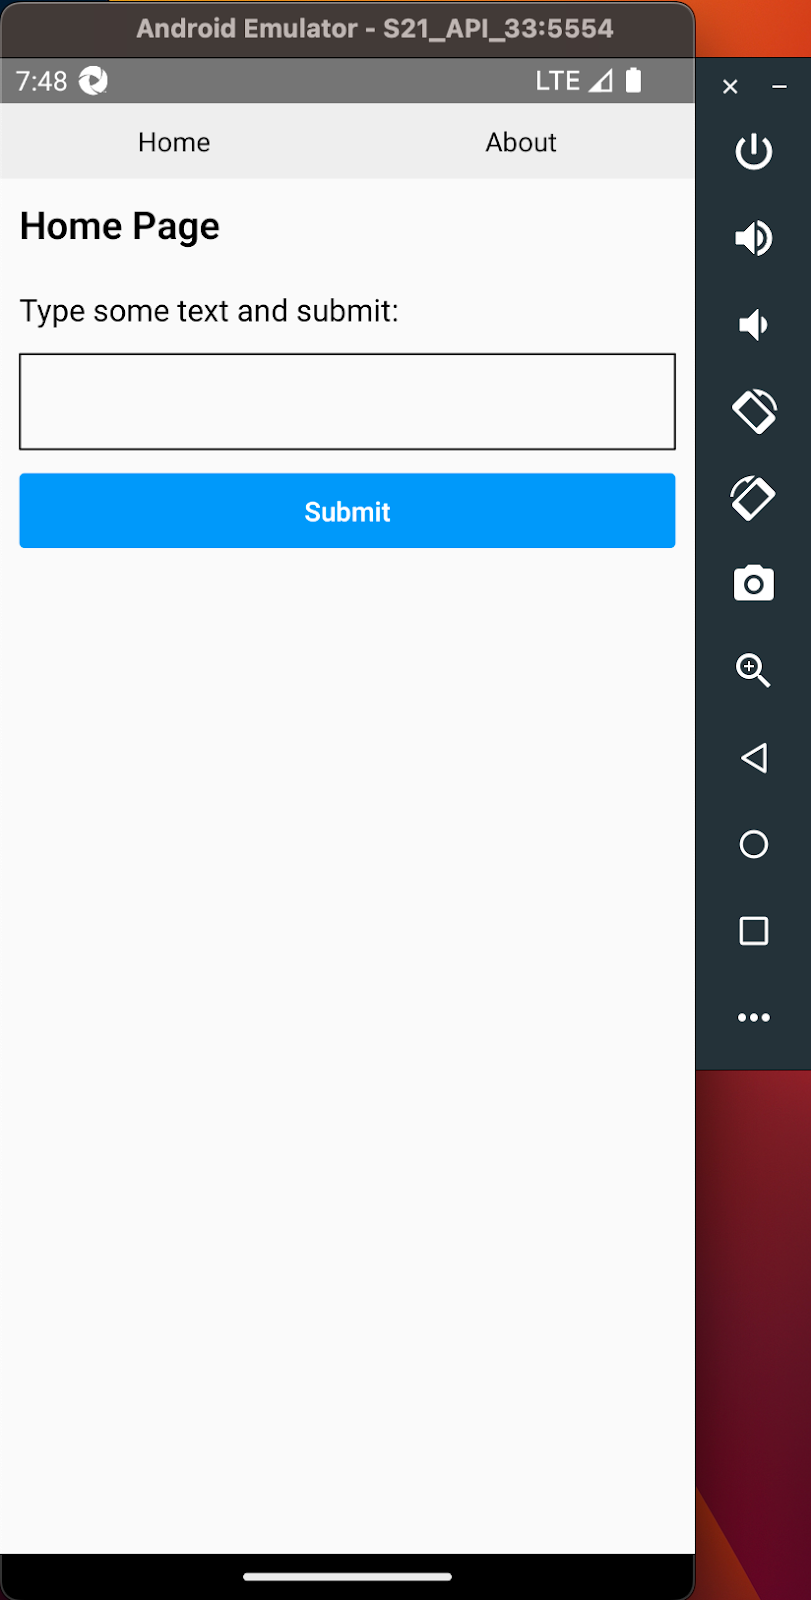
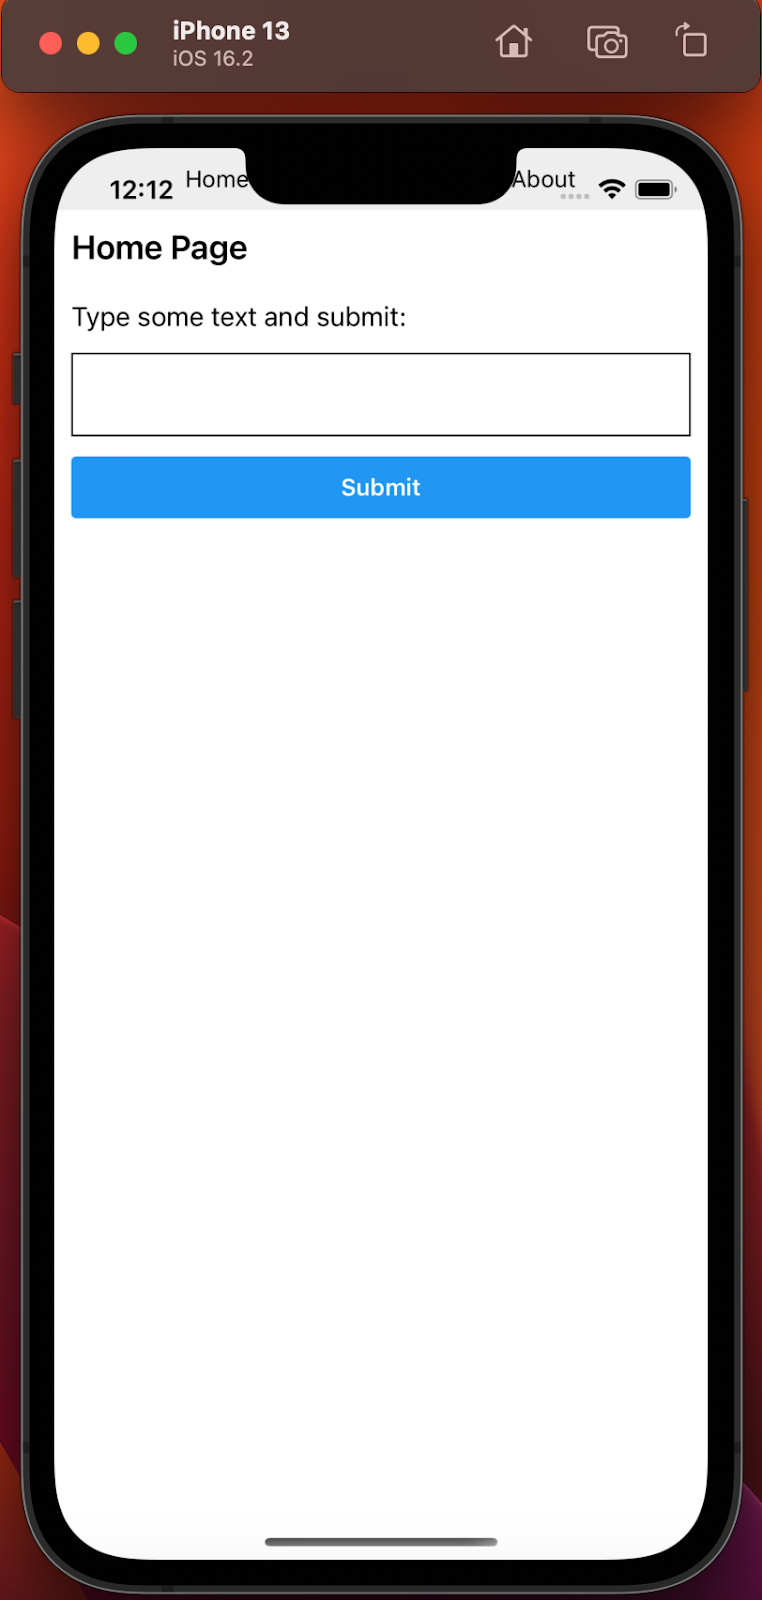
To show how to leverage the E2E testing approach in real life, let’s use an example application that we described in a previous article: a rather simple app with web, Android, and iOS versions. The application has two pages: Home Page and About Page. It also has a modal window and a navigation menu.
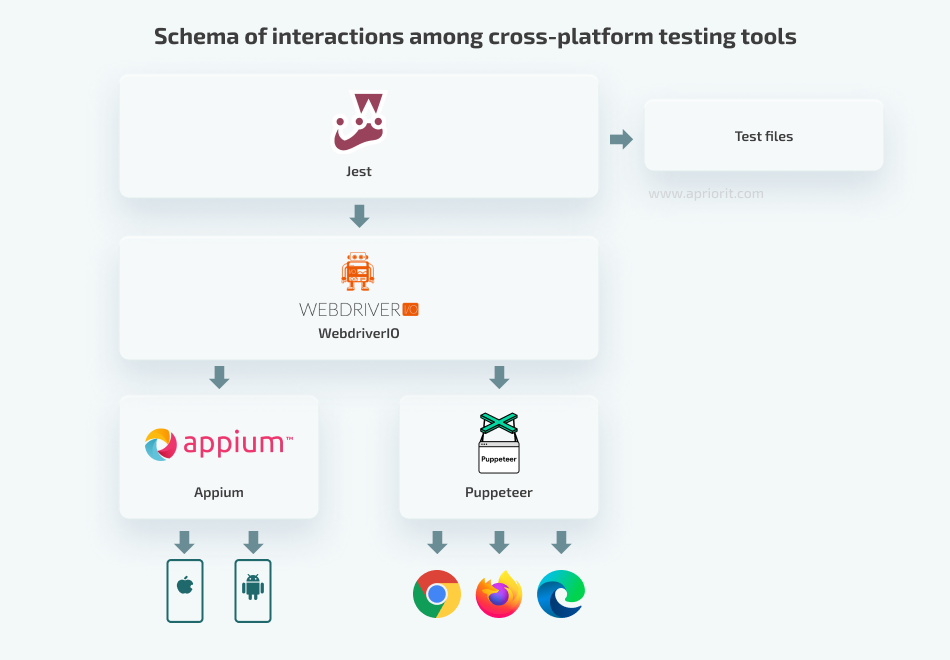
We’ll use the following cross-platform testing tools to test this app:
- Jest, a popular testing framework that comes with the default React Native template. Jest provides an intuitive testing environment with a comprehensive set of features, including snapshot testing, mock modules, and code coverage reports. It’s highly configurable, allowing developers to customize their testing environment to suit their specific needs.
- WebdriverIO, a testing tool that seamlessly integrates with React Native. It supports mobile app testing through integration with Appium, allowing tests to run on both iOS and Android devices. Additionally, we can combine WebdriverIO with Puppeteer to test web apps and web-based components of React Native apps.
- Puppeteer, a Node.js library for controlling Chrome or Chromium browsers. It provides a high-level API for automating user interactions, taking screenshots, etc.
- Appium, an open-source tool for cross-platform mobile application testing that supports iOS, Android, and Windows. It provides a wide set of features for testing mobile apps, including the ability to simulate user interactions, take screenshots, and run tests on multiple devices.
Let’s use Jest to read test files and run test scripts and WebdriverIO instructions. WebdriverIO will interact with the corresponding platforms via Appium and Puppeteer drivers. Here’s how the tools will interact:
Setting up the environment
Before writing our first test, let’s set up the environment for cross-platform app testing so that we can run our tests on web, Android, and iOS versions. The web version is both an ordinary web page and a web extension for the Chrome browser. You can find the full code for this project in the Apriorit GitHub repository.
Web version
First, we need to install the npm packages with our chosen tools:
yarn add webdriverio serve dotenv jest-environment-node pm2 --devBesides Jest and WebdriverIO, this command also installs:
serve— a package that allows us to serve a static site, single-page application, or static filedotenv— a module that loads environment variables from a .env file into the global variable process.envpm2— a process manager for Node.js applications that keeps applications alive in the background
We installed packages with the --dev flag because they are used exclusively in the development process and are not included in the final bundle.
Next, let’s take a look at the scripts section of our package.json file. Here, we define the scripts that we’ll use during testing:
"scripts": {
"web:build": "webpack --mode=production --config ./web/webpack.config.js",
"chrome:build": "webpack --mode=production --config ./web/webpack.config.js && cp web/manifest.chrome.json web/build/manifest.json && cp web/logo.png web/build/logo.png && cp web/ext_sw.js web/build/ext_sw.js",
"serve:web": "source .env && serve web/build -p $E2E_WEB_SERVE_PORT",
"serve:web:start": "pm2 start npm --name RNEverywhereWeb -- run serve:web > /dev/null",
"serve:web:stop": "pm2 stop RNEverywhereWeb > /dev/null",
"e2e:web": "yarn serve:web:start && sleep 3 && E2E_PLATFORM=chrome jest --config jest.config.e2e.js --runInBand && yarn serve:web:stop",
"e2e:web:extension": "E2E_PLATFORM=chrome-extension jest --config jest.config.e2e.js --runInBand",
},Here’s how we’ll use these scripts:
web:build— Build a web version of the app.chrome:build— Build a Chrome extension.serve:web— Start hosting the web version of the application on localhost:3000.serve:web:start— Runserve:webin the background.serve:web:stop— Stopserve:webfrom running in the background.e2e:web— Launch the web server and wait three seconds for it to start, then run tests on the web version of the application.e2e:web:extension— Run tests in the Chrome extension.
Our configuration files scheme will look like this:
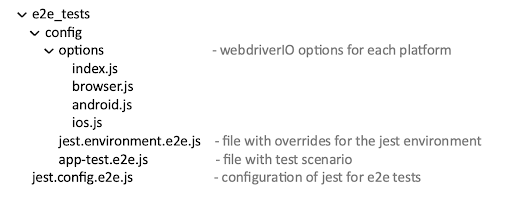
Note that we’ll use the same Jest configuration for all platforms. We specify which platform we want to run using the E2E_PLATFORM environment variable.
Next, we’ll add the file jest.config.e2e.js to the application’s root folder. This file contains the configurations to run our tests:
require('dotenv').config();


const config = {
  testEnvironment: './e2e_tests/config/jest.environment.e2e.js',
  testMatch: ['**/e2e_tests/**.e2e.js'],
  testTimeout: 60 * 1000
};


module.exports = config;In the first line, we import the dotenv package and use it to access the environment variables defined in the .env file in all files related to the tests. The testMatch variable specifies files with test cases to execute. In our case, we have to run all files with .e2e.js in their names located in the e2e_tests folder.
The testTimeout variable defines the maximum time that a test can last before it triggers an “Exceeded timeout” error. By default, the timeout is 5000 ms, which is obviously too short to start the application and test its interface, so we set it to 60000 ms, or one minute.
The testEnvironment variable contains the path to the file that overrides the default test environment. It allows us to customize the runtime environment for tests, simulate different environments, and test specific behaviors or features.
In our case, we need to somehow launch our browser and open the page with the application or extension that we want to test in it. To do this, we use WebdriverIO’s remote() method that creates a connection to the browser with the specified parameters. Let’s define these parameters in a separate file, since they are extensive and different for each platform:
import browserCapabilities from './browser';


const platform = process.env.E2E_PLATFORM;


const browserOptions = {
  capabilities: browserCapabilities,
  automationProtocol: 'devtools',
  logLevel: 'error',
};


let options;


if (['chrome', 'chrome-extension'].includes(platform)) {
  options = browserOptions;
} else {
  throw new Error('The E2E_PLATFORM env value is invalid or not specified');
}


module.exports = options;We also need to define browserCapabilities in a separate file:
import path from 'path';


const extensionPath = path.resolve(__dirname, '../../../web/build');


const extensionWindow = {
  height: 600,
  width: 350,
};


const capabilities = {
  browserName: 'chrome',
  'goog:chromeOptions': {
    headless: false,
    args: [
      '--no-sandbox',
      ...(process.env.E2E_PLATFORM === 'chrome-extension'
        ? [
            `--disable-extensions-except=${extensionPath}`,
            `--load-extension=${extensionPath}`,
            `--window-size=${extensionWindow.width},${
              extensionWindow.height
            }`,
            '--app=data:text/html,RNE e2e tests', // to open extension in separate popup window
          ]
        : []),
    ],
    slowMo: 10,
  },
};


module.exports = capabilities;Note that we specify the path to the folder where our application is built in the extensionPath variable. Different apps will require different paths.
You can learn more about all available modules in the official WebdriverIO documentation and the list of arguments for Google Chrome.
Let’s return to overriding and redefining of the environment:
import NodeEnvironment from 'jest-environment-node';
import * as webdriverio from 'webdriverio';
import driverOptions from './options';


class CustomEnvironment extends NodeEnvironment {
  timeout = 10000;
  client;
  platform;
  constructor(config, context) {
    super(config, context);
  }


  async setup() {
    this.global.timeout = this.timeout;
    this.platform = process.env.E2E_PLATFORM;


    await this.createSession();
  }


  async createSession() {
    this.client = await webdriverio.remote(driverOptions);
    this.global.client = this.client;
    if (this.platform === 'chrome') {
      await this.openWebAppPage();
    } else if (this.platform === 'chrome-extension') {
      await this.openExtensionPopup();
    }
  }


  async teardown() {
    await this.client?.deleteSession();
    await super.teardown();
  }


  async openExtensionPopup() {
    const puppeteer = await this.client.getPuppeteer();
    let target;


    await this.client.waitUntil(
      async () => {
        const targets = await puppeteer.targets();


        target = targets.find(t => t.type() === 'service_worker');
        return Boolean(target);
      },
      {
        timeoutMsg: 'Failed to find service worker target',
      },
    );


    const [, , extensionId] = target?.url()?.split('/');
    const extensionUrl = `chrome-extension://${extensionId}/index.html`;
    await this.client.url(extensionUrl, {waitUntil: 'load'});
  }


  async openWebAppPage() {
    await this.client.url(
      `http://localhost:${process.env.E2E_WEB_SERVE_PORT}`,
      {waitUntil: 'load'},
    );
  }
}


module.exports = CustomEnvironment;We need to import jest-environment-node, webdriverio, and driverOptions. The driverOptions are the options that WebdriverIO needs to create the client entity with which we will control the browser.
Next, we break down the setup() method. This method is an asynchronous function that prepares the environment for running tests. It’s called before test suite execution begins. The createSession() method initializes the WebdriverIO client by calling the remote() function and passing driverOptions as the configuration.
The created client instance is stored in the this.client property and is accessible within the class. Additionally, it’s assigned to the client property of the global object, making it available globally across all test cases.
After we use the variable E2E_PLATFORM to define the target platform for tests, the corresponding function opens our application page on that platform.
The openWebAppPage() method uses the WebdriverIO client to navigate to a web application page that is served on localhost on the port defined by the E2E_WEB_SERVE_PORT variable. This variable is defined as 3000 in the .env file. The waitUntil: 'load' option ensures that the page is fully loaded before proceeding.
The openExtensionPopup() method performs a series of actions to open an extension popup in Chrome. Then, we need to use the WebdriverIO API and get an instance of a Puppeteer using the getPuppeteer function.
Next, let’s determine which URL we need to open in the browser to access the web extension. To do this, we first get all targets inside the browser. In our case, a target can be a browser, page, or service worker. We are interested in a service worker because it is the target that corresponds to our extension’s service worker process. In our case, we only need it to define our extension.
If your browser extension does not have a service worker, you can add one by adding this code to the manifest.json file:
"background": {
  "service_worker": "ext_sw.js"
}The ext_sw.js file can be empty.
Loading our extension in the browser and starting the service worker takes some time. So we can use the waitUntil() function to wait until our service worker process starts and becomes available from the browser. The method then waits until a service worker target is found. It does so by repeatedly checking the list of Puppeteer targets until it finds one with the service_worker type.
Once a service worker target is found, the loop stops. The URL of the target is extracted and parsed to obtain the extensionId. Finally, the WebdriverIO client navigates to the extension page using the constructed extension URL. We then open the extension in the browser window.
What is left is calling the teardown method when the test ends, whether it succeeds or fails. We can call deleteSession() to terminate the connection and close the browser.
Everything is now ready to launch our first test:
describe('Test app', () => {
  it('App opens', async () => {
    await client.pause(5000);
  });
});At the moment, this test is empty. All it does is open our application and closes it after five seconds. It only makes sure that the application launches on the target platform.
Next, we need to build our web application by running the yarn web:build command in the terminal. Then, we run yarn e2e:web to start the test. As a result, a browser window should open with our web application.
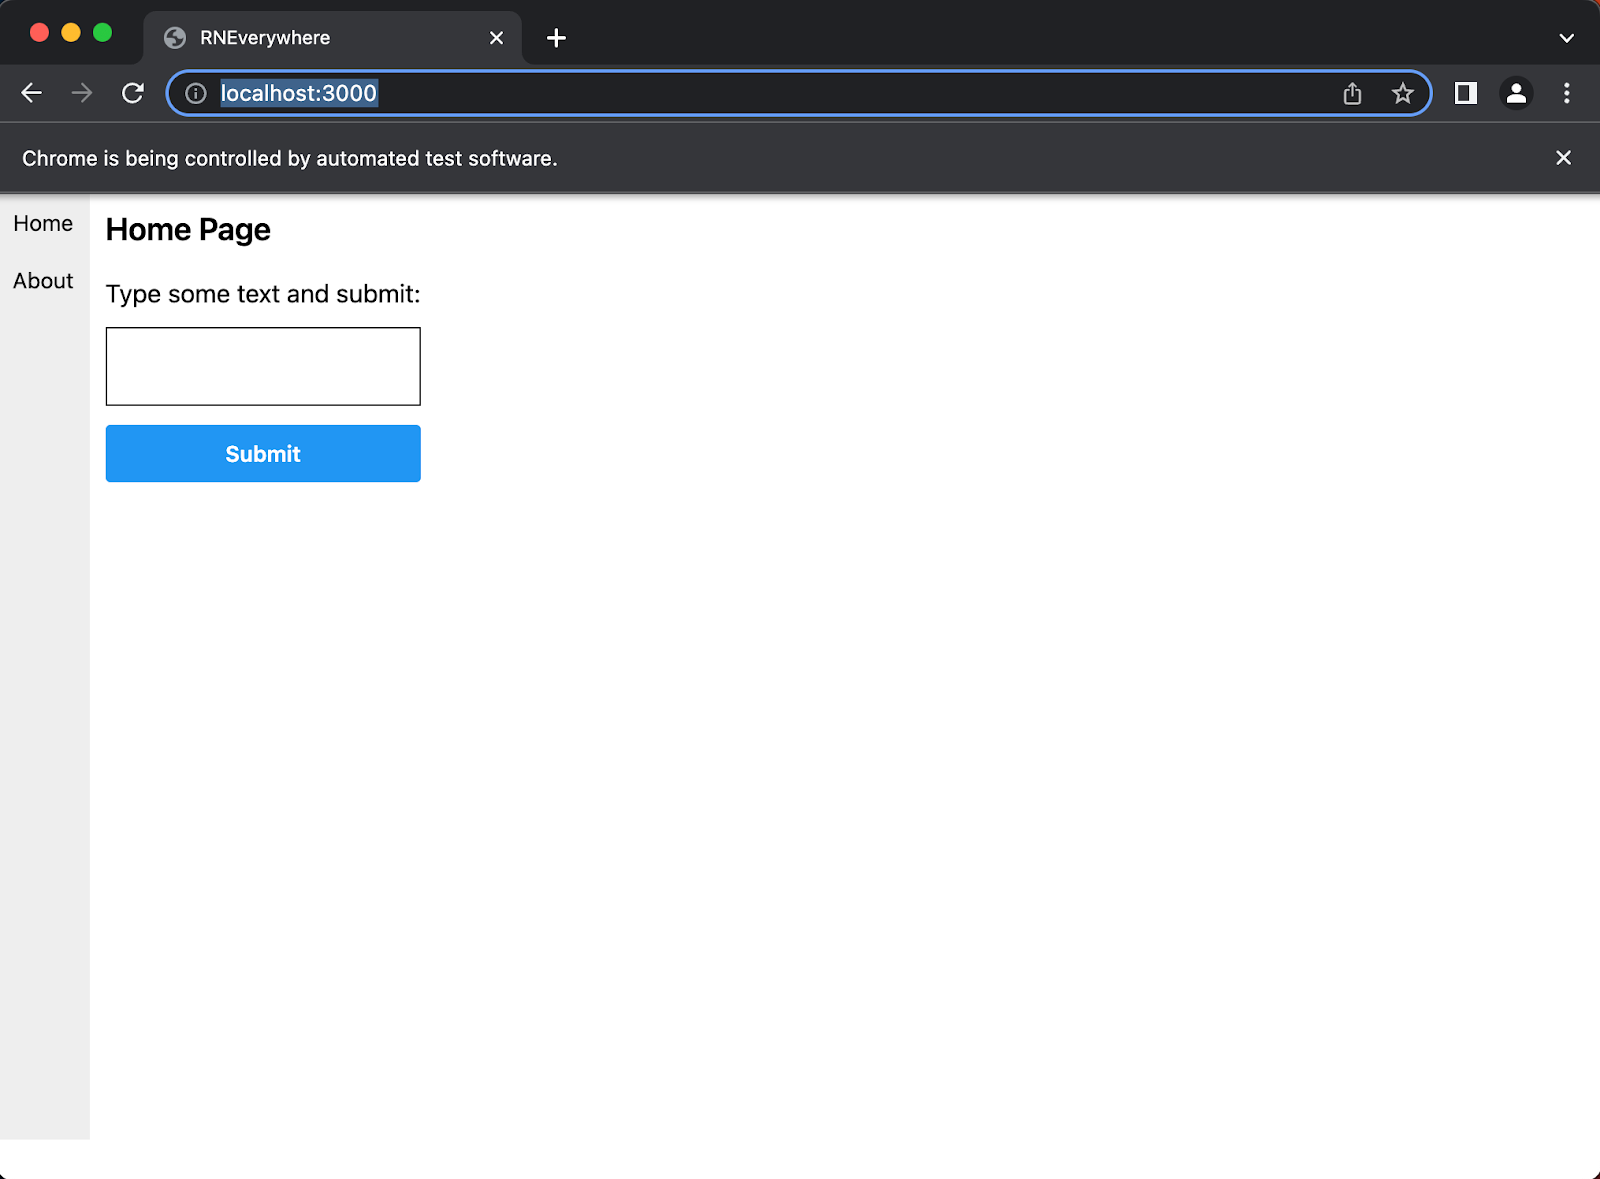
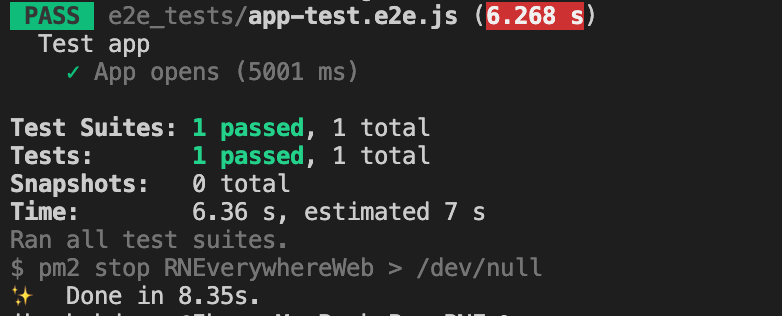
After five seconds, the browser window should close and the console will say the tests have been successfully completed.
Now, let’s move on to testing our application as a Chrome extension. To build it, we need to run the yarn chrome:build command. Then, we run tests with the yarn e2e:web:extension command. It should open the browser popup window with our Chrome extension.
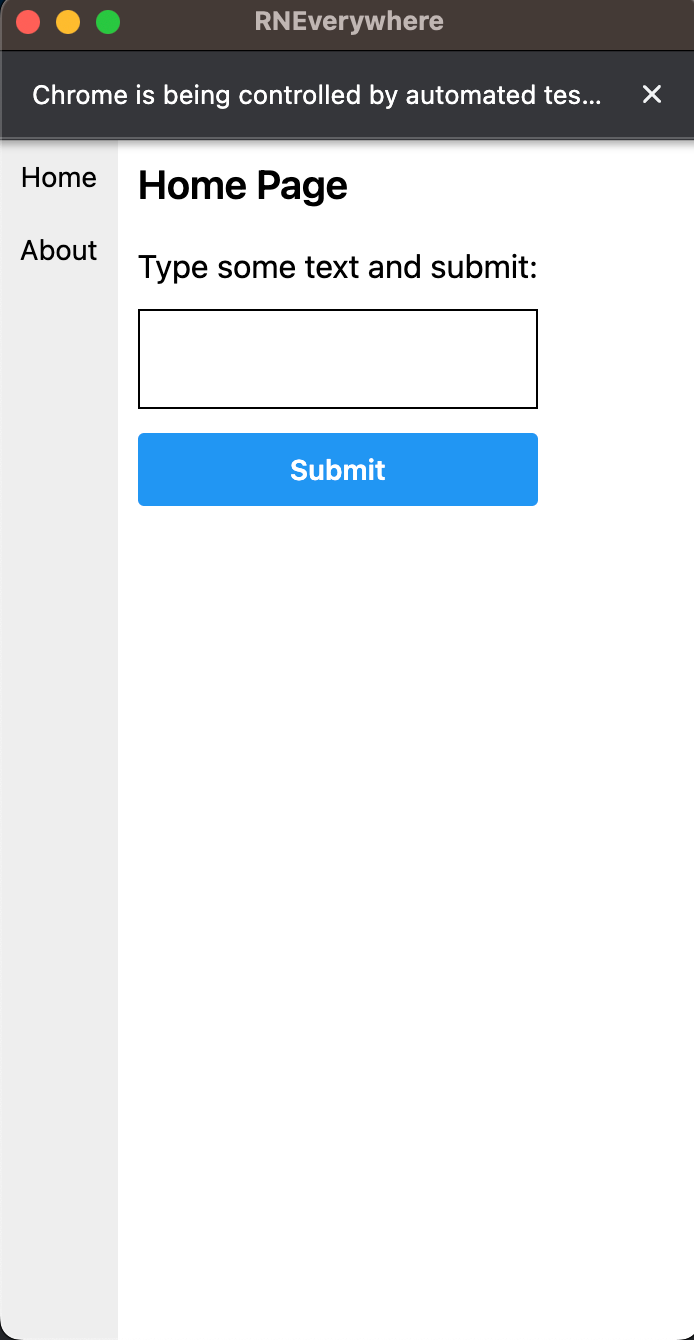
This popup will also close after five seconds and the terminal will display successful test results. With that, testing of the web version of our application is finished and we can move to mobile.
Read also
How to Use Python for Automation Testing: Building a QA Framework from Scratch
Find out how Selenium, Robot Framework, and Appium can help automate and improve tests on your project.

Mobile versions
In this article, we will not describe how to configure a testing environment for mobile applications, as you can follow the instructions in the React Native documentation. Also, you can install Android Studio, which automatically creates an Android emulation. If you want to test your application on a device with a specific screen resolution or operating system version, follow these instructions to emulate a device.
To start testing, we need to install the necessary npm packages:
yarn add appium appium-doctor appium-uiautomator2-driver appium-xcuitest-driver –-devBesides the Appium packages that we already discussed, this command installs:
- appium-doctor, which checks if everything is installed correctly for Appium to work. We can use it by running the
yarn appium-doctorcommand and making sure that all items in the Necessary section have a green check mark. - appium-uiautomator2-driver and appium-xcuitest-driver, the Appium drivers we need to run tests on Android and iOS, respectively.
With these packages at the ready, we can start testing.
Android
Let’s go back to the package.json file and look at the scripts we need to work with the Android version of the application:
"scripts": {
  "start": "react-native start",
  "android": "react-native run-android",
  "android:build": "react-native run-android --variant=release",
  "appium:start": "pm2 start \"yarn appium\" --name appium > /dev/null",
  "appium:stop": "pm2 stop appium > /dev/null",
  "e2e:android": "yarn appium:start && sleep 3 && E2E_PLATFORM=android jest --config jest.config.e2e.js && yarn appium:stop"
},Here’s what each script does:
start— Starts the metro bundler that ships with React-native. Should be launched only during development of Android and iOS applications.android— Launches the application on the Android emulator in development mode.android:build— Builds the Android application in release configuration and produces an .apk file. Doesn’t require metro to be launched beforehand.appium:start— Launches the Appium server in the background.appium:stop— Stops the Appium server.e2e:android— Launches the Appium server and waits three seconds for the server to start, then runs tests on the Android emulator and stops the Appium server after running them.
Since we have already configured our test environment, we only need to specify the correct configurations to create the WebdriverIO client. This is necessary to launch the application on the Android emulator when running tests.
Let’s modify the index.js file to look like this:
import androidCapabilities from './android';
import browserCapabilities from './browser';


const platform = process.env.E2E_PLATFORM;


const mobileLocalOptions = {
  capabilities:
    platform === 'android'
      ? androidCapabilities.localCapabilities
      : {},
  host: 'localhost',
  port: 4723,
  logLevel: 'error',
};


const browserOptions = {
  capabilities: browserCapabilities,
  automationProtocol: 'devtools',
  logLevel: 'error',
};


let options;


if (['chrome', 'chrome-extension'].includes(platform)) {
  options = browserOptions;
} else if (['ios', 'android'].includes(platform)) {
  options = mobileLocalOptions;
} else {
  throw new Error('The E2E_PLATFORM env value is invalid or not specified');
}


module.exports = options;Note that we assign mobileLocalOptions.capabilities equal to androidCapabilities.localCapabilities for Android. For web and iOS, we set it to an empty object.
We also need to add local capabilities for Android:
const localCapabilities = {
  platformName: 'Android',
  "appium:options": {
    deviceName: 'Android Emulator',
    app: process.env.E2E_ANDROID_APP_PATH,
    automationName: 'UiAutomator2',
  },
};


module.exports = {
  localCapabilities,
};Let’s set the E2E_ANDROID_APP_PATH environment variable, which points to the .apk file we will test by adding the following E2E_ANDROID_APP_PATH=./android/app/build/outputs/apk/release/app-release.apk line to the .env file:
Next, we need to build an Android app by running the yarn android:build command in the terminal. Then, we launch the tests with the yarn e2e:android command.
As a result, an Android emulator with our application should be opened. Note that the emulator must be running when we execute the command yarn e2e:android. In our case, the emulator will launch automatically after the application is built. We can also open it via Android Studio.
iOS
Similar to the configuration for Android, we need to add new scripts to the package.json file for testing on iOS:
"scripts": {
  "ios": "react-native run-ios",
  "ios:build": "react-native run-ios --configuration Release",
  "e2e:ios": "yarn appium:start && sleep 3 && E2E_PLATFORM=ios jest --config jest.config.e2e.js && yarn appium:stop"
},We add the following scripts:
ios— Launches the application on the iOS simulator in development mode.ios:build— Builds the iOS application in release configuration and without launching metro and provides a ready app file.e2e:ios— Launches the Appium server, waits three seconds for it to start, runs the tests on the iOS simulator, and stops the server when the tests are finished.
We also need to add new capabilities for Appium:
const localCapabilities = {
  platformName: "iOS",
  "appium:options": {
    deviceName: "iPhone 13",
    app: process.env.E2E_IOS_APP_PATH,
    automationName: "XCUITest",
    platformVersion: "16.2",
  },
};


module.exports = {
  localCapabilities,
};Then, let’s replace the empty object we left earlier with new capabilities in our configuration file:
import androidCapabilities from './android';
import iosCapabilities from './ios';
import browserCapabilities from './browser';


const platform = process.env.E2E_PLATFORM;


const mobileLocalOptions = {
  capabilities:
    platform === 'android'
      ? androidCapabilities.localCapabilities
      : iosCapabilities.localCapabilities,
  host: 'localhost',
  port: 4723,
  logLevel: 'error',
};


// .. Rest of the fileNow, we need to determine the path to the application file built for iOS. By default, it’s located at /Users/<username>/Library/Developer/Xcode/DerivedData/<app-name>-<app-id>/Build/Products/Release-iphonesimulator/<app-name>.app. Let’s add the E2E_IOS_APP_PATH=/Users/dev/Library/Developer/Xcode/DerivedData/RNEverywhere-cdvtlmscxytvugcptenwuavwtqrb/Build/Products/Release-iphonesimulator/RNEverywhere.app path in the .env file.
Next, we need to build an iOS app by running the yarn ios:build command in the terminal and launch the tests with yarn e2e:ios.
Before these commands run the application in the emulator, they will build and install WebdriverAgent, a WebDriver server implementation for iOS that can be used to remotely control iOS devices.
Testing will take some time and will open the iOS emulator with our application.
Now we have a test that does nothing but wait for five seconds after the application starts. However, we want to test some scenarios of user interactions with the interface. In order to interact with the interface in this way, we need to define these components on the screen with test utilities.
Read also
Android App–Backend Communication: Ably vs Azure IoT Hub vs Firebase Cloud Messaging
Discover key features and examples of backend communication implementations for three popular platforms that you can use in your next Android development project.

Creating test utilities
We can help tests define UI components with WebdriverIO, which has several ways to search for a component for each platform. Since we are using the same code base for testing different versions of the app, we need selectors common to all platforms. We’ll use testId and text content search for this project.
Since WebdriverIO has different web and mobile APIs, we’ll add some utilities to bring them into a common interface. Let’s describe UI interaction scenarios using these utilities:
class CustomEnvironment extends NodeEnvironment {
  // ...
  async createSession() {
    this.client = await webdriverio.remote(driverOptions);
    this.global.client = this.client;
    if (this.platform === 'chrome') {
      await this.openWebAppPage();
    } else if (this.platform === 'chrome-extension') {
      await this.openExtensionPopup();
    }
    await this.addUtils();
  }
  // …


  async addUtils() {
    if (!this.client) {
      throw new Error("The client does not exist!");
    };


    this.client.getExistingElementWithTestId = async (testId, params = {}) => {
      let selector;
      if (this.platform === "chrome" || this.platform === "chrome-extension") {
        selector = `[data-testid='${testId}']`;
      } else if (this.platform === "android") {
        selector = `android=new UiSelector().resourceId("${testId}")`;
      } else if (this.platform === "ios") {
        selector = `~${testId}`;
      }
      const element = await this.client.$(selector);
      await element.waitForExist({
        ...params,
        timeout: params?.timeout || this.timeout,
      });
      return element;
    };


    this.client.getExistingElementWithText = async (text, params) => {
      let selector;
      if (this.platform === "chrome" || this.platform === "chrome-extension") {
        selector = `//*[text()="${text}"]`;
      } else if (this.platform === "android") {
        selector = `android=new UiSelector().text("${text}")`;
      } else if (this.platform === "ios") {
        selector = `-ios predicate string:name == "${text}"`;
      }


      const element = await this.client.$(selector);
      await element.waitForExist({
        ...params,
        timeout: params?.timeout || this.timeout,
      });
      return element;
    };


    this.client.recreateSession = async () => {
      await this.client?.deleteSession();
      await this.createSession();
    };
  }
}The addUtils function adds the following methods to the client:
- getExistingElementWithTestId — Finds and returns the element with the given testId on the screen.
- getExistingElementWithText — Finds and returns the element with inner text equal to the given text.
- recreateSession — Restarts our application to test each case from the beginning. This method helps to reset any application states.
WebdriverIO provides an API for working with elements. In the getExistingElementWithTestId method, we define a selector by which we’ll search for an item on the screen. This selector will be different for each platform. The $() command is a short and convenient way to get a single element on a page. The waitForExist() command waits for the presence of the item on the screen for a specified number of milliseconds.
We’ll use getExistingElementWithTestId to control the interface (for example, clicking a button or adding input), and use getExistingElementWithText to find text on the page.
Note that the testId must be pre-added to the element in the application code:
<Link to="/" style={styles.navItem} testID='navigation-home'>
  <Text style={styles.navItemText} >Home</Text>
</Link>Writing test cases
Now we can cover our application with tests using everything described earlier. The application is quite small, so there are not many cases.
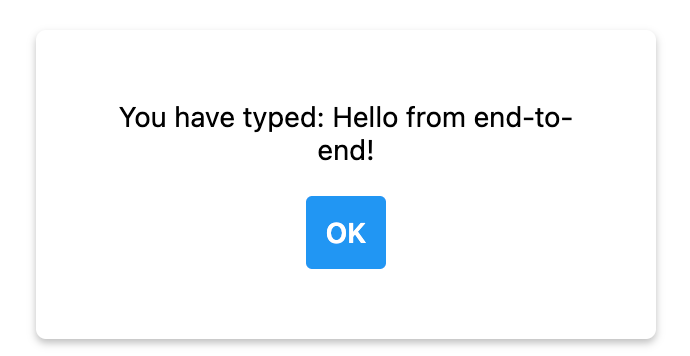
The first case is to check the correctness of the navigation. A user should be able to navigate the Home and About pages by clicking the appropriate button. The second case is to make sure the form on the Home page is working correctly. A user should be able to enter something into the input, click Submit, and see a modal window. The window should be closed by clicking Ok. After the modal window closes, we should see the Home page again.
Here are our test cases:
describe('Test app', () => {
  beforeEach(async () => {
    await client.recreateSession();
  });


  it('App navigation works', async () => {
    await client.getExistingElementWithText("Home Page");
    const aboutButton = await client.getExistingElementWithTestId("navigation-about");
    await aboutButton.click();
    await client.getExistingElementWithText("About Page");
    const homeButton = await client.getExistingElementWithTestId("navigation-home");
    await homeButton.click();
    await client.getExistingElementWithText("Home Page");
  });


  it('Home page form works', async () => {
    await client.getExistingElementWithText("Home Page");
    await client.getExistingElementWithText("Type some text and submit:");
    const input = await client.getExistingElementWithTestId("text-input");
    const greeting = "Hello from end to end";
    await input.setValue(greeting);
    const submitButton = await client.getExistingElementWithTestId('submit-btn');
    await submitButton.click();
    await client.getExistingElementWithText(`You have typed: ${greeting}!`);
    const confirmButton = await client.getExistingElementWithTestId('confirm-btn');
    await confirmButton.click();
    await client.getExistingElementWithText("Home Page");
  });
});Note that we call the recreateSession() method before each case to ensure that each scenario starts from the application’s initial state. We also run the tests for each platform in turn to make sure that everything works correctly.
With cross-platform end-to-end testing complete, we can start integrating tests into a continuous integration and continuous deployment (CI/CD) pipeline.
Read also
Introduction to Mobile Application Testing: Overview of Testing Types, Checklists, and Virtualization Services
Explore all you need to know about five key types of mobile app testing, functionalities they help check, and virtualization services to use for QA. Use this knowledge when planning testing routines for your next mobile project.
Integrating tests into the CI/CD pipeline
At this stage, we have run tests in manual mode, which wastes developers’ time and increases the project budget. Adding these tests to the CI/CD process will help us automate E2E testing and save developers’ time.
CI/CD is an approach to software development that automates merging, testing, and deploying code changes. Its goal is to create high-quality software faster and more reliably by identifying problems early in the development cycle and optimizing the release process. For example, if a developer makes changes in code, the pipeline automatically runs tests that allow or block the merge.
Let’s use GitHub Actions to make our tests run after we create a pull request to the main branch. GitHub Actions is an automation platform from GitHub that creates workflows to automate building, testing, and deploying code from the GitHub repository. It streamlines the development process and facilitates CI/CD.
This tool will allow us to test the application before changes get to the main branch and will ensure the stable operation of the application from the main branch. All we need to do is add a configuration file for GitHub:
name: Tests
on:
  pull_request:
    branches:
      - main
jobs:
  test_extension:
    name: Test Chrome Extension
    runs-on: ubuntu-latest
    steps:
      - uses: actions/checkout@v3
      - name: Setup Node
        uses: actions/setup-node@v3
        with:
          node-version: 18
          cache: "yarn"
      - name: Install dependencies
        run: yarn install --frozen-lockfile
        env:
          PUPPETEER_SKIP_CHROMIUM_DOWNLOAD: "true"
      - name: Build Chrome extension
        run: yarn chrome:build
      - name: Test Chrome extension
        uses: mujo-code/puppeteer-headful@18.9.0
        env:
          CI: "true"
        with:
args: yarn e2e:web:extensionYou can check the details of each step of this configuration in the documentation for GitHub Actions.
Here’s what happens when we run this workflow:
- A developer creates a pull request to the main branch
- The workflow starts
- Node.js is installed
- Dependencies are installed
- The Chrome extension is built
- Tests are run
Next, we need to push the code to GitHub and create a pull request to the main branch. After the request, we’ll see an indicator of workflow execution at the bottom of the page.
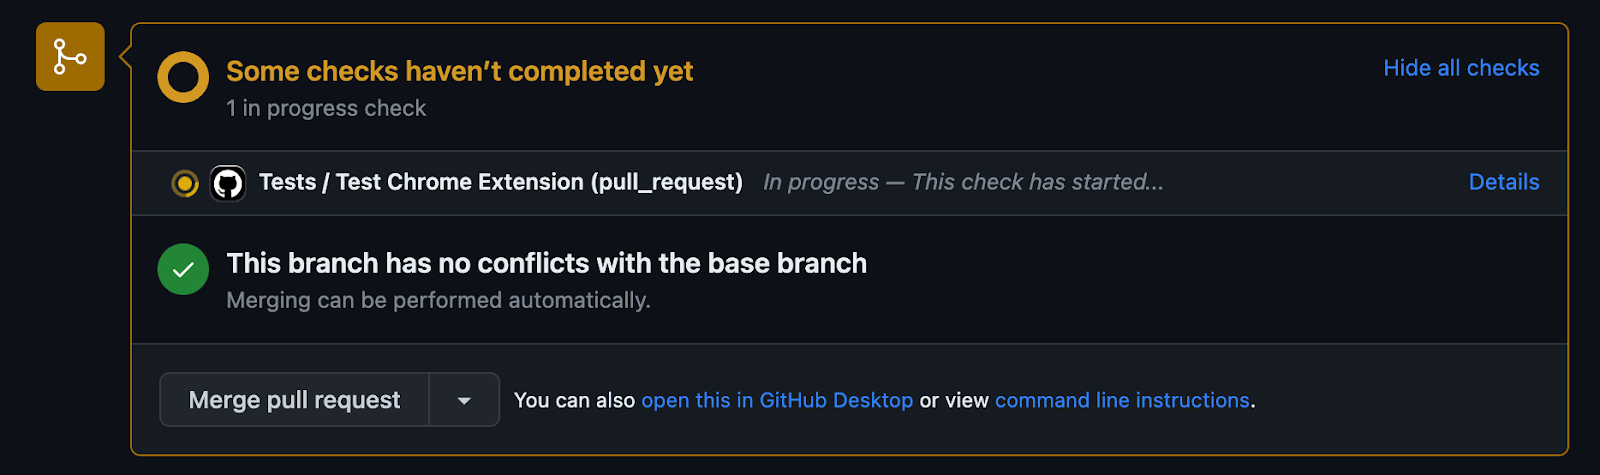
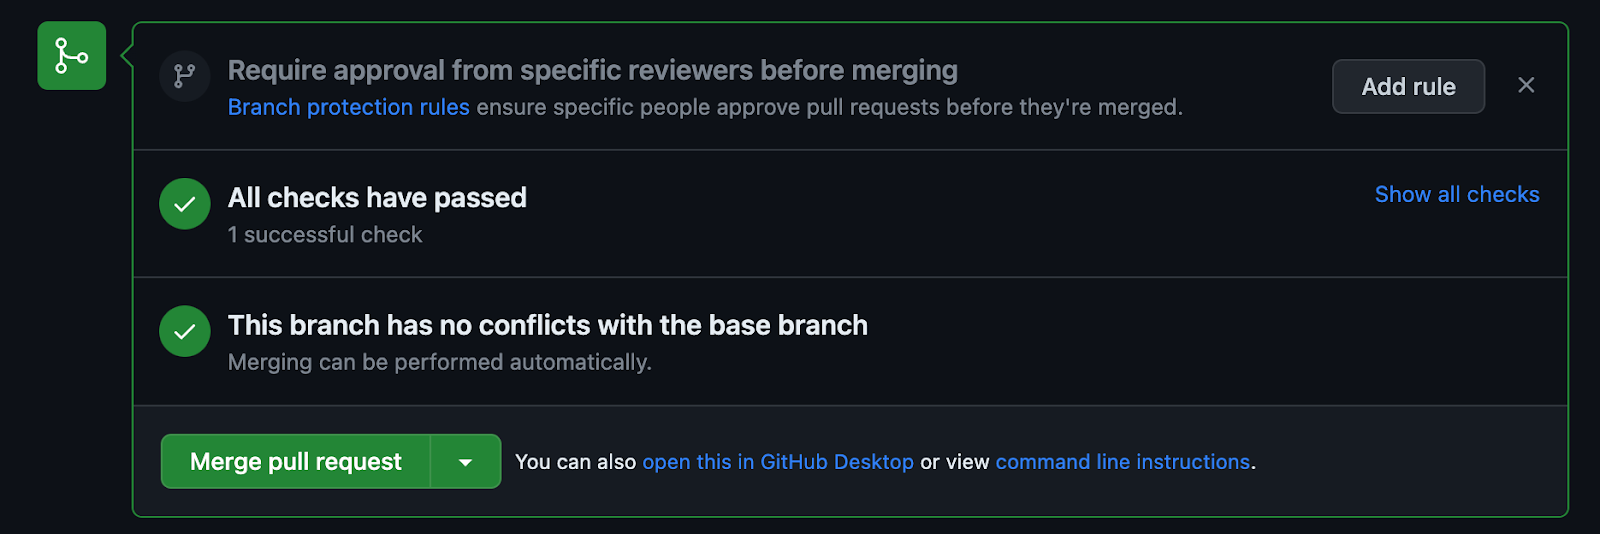
When the tests are successfully completed, the indicator will change to green. Testing a web application requires similar configurations of GitHub Actions, so we will not cover it in the article.
Testing an app on real mobile devices
We tested our application using emulations that eliminate the need to purchase dozens of smartphone models. Virtualization helps to reduce the cost of QA and speed up the process, but it can’t fully replicate a physical device. While virtual devices are useful for assessing layout and performance, they fall short in testing how an application interacts with various phone systems.
For instance, simulators can’t replicate scenarios like slow internet connections, incoming calls and SMS, and use of hardware features like the camera, microphone, and geolocation. The absence of real hardware during testing may result in differences between the application’s behavior on a virtual and real device.
Buying and maintaining an entire fleet of test devices can be quite expensive. This is where QA specialists need a device farm — a service that provides remote access to real testing devices. Some popular device farms are:
For this article, we’ll use Sauce Labs — one of the oldest and most established cloud-based platforms for testing web and mobile applications on real devices. Sauce Labs offers a wide range of devices, browsers, and operating systems for running automated tests. It also has comprehensive documentation.
Let’s run our tests on an Android device in Sauce Labs. First of all, we need to register on the site and select a pricing plan. For the purpose of this article, we will be working with a free plan. Next, let’s get a username and access key and set them to environment variables:
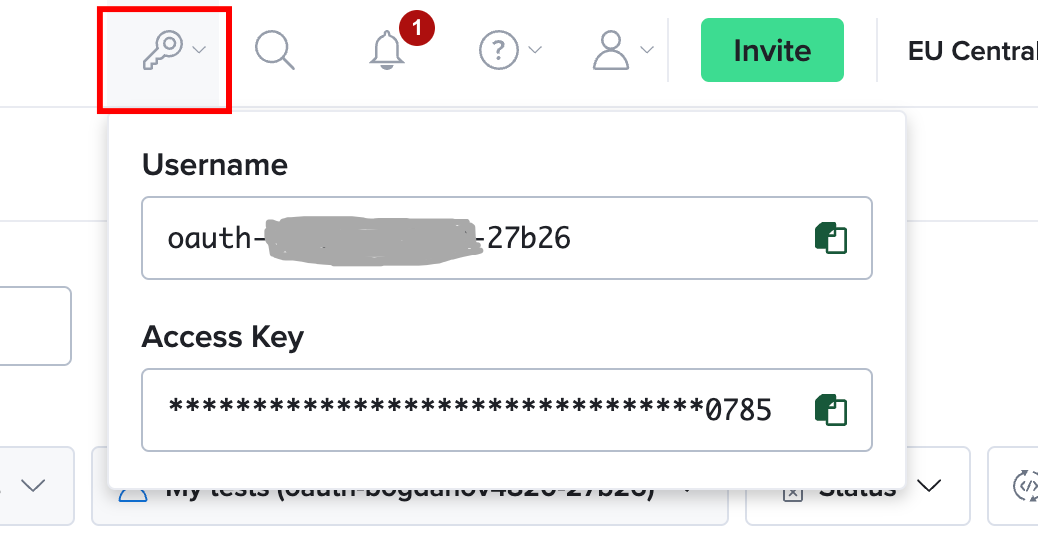
Now, we need to add these credentials to environment variables:
SAUCE_ACCESS_KEY=****************************0785
SAUCE_USER=oauth-*********-27b26Also, let’s add a script that will run the tests in Sauce Labs:
"e2e:android:sauce": "E2E_PLATFORM=android E2E_SAUCE=true jest --config jest.config.e2e.js"Now, let’s add Sauce Labs configurations to the Android tests. The free plan only allows us to test on one real Android device that is shared among users and may not always be available. That’s why we’ll add the configurations to the tests we run on an Android emulator. Using Sauce Labs with the emulator is practically the same as for the real device and can easily be changed if we decide to subscribe to the Sauce Labs service.
const sauceCapabilities = {
  platformName: 'Android',
  'appium:app': 'storage:filename=app-release.apk', // The filename of the mobile app
  'appium:deviceName': 'Android GoogleAPI Emulator',
  'appium:deviceOrientation': 'portrait',
  'appium:platformVersion': 'current_major',
  'appium:automationName': 'UiAutomator2',
  'sauce:options': {
    build: 'build1',
    name: 'Test',
  },
};


module.exports = {
  localCapabilities,
  sauceCapabilities,
};Finally, let’s add configurations for WebdriverIO:
const isSauce = process.env.E2E_SAUCE;


const mobileSauceOptions = {
  user: process.env.SAUCE_USER,
  key: process.env.SAUCE_ACCESS_KEY,
  hostname: 'ondemand.eu-central-1.saucelabs.com',
  port: 443,
  baseUrl: 'wd/hub',
  capabilities:
    platform === 'android'
      ? androidCapabilities.sauceCapabilities
      : {},
};


if (['chrome', 'chrome-extension'].includes(platform)) {
  options = browserOptions;
} else if (['ios', 'android'].includes(platform)) {
  options = isSauce ? mobileSauceOptions : mobileLocalOptions;
} else {
  throw new Error('The E2E_PLATFORM env value is invalid or not specified');
}

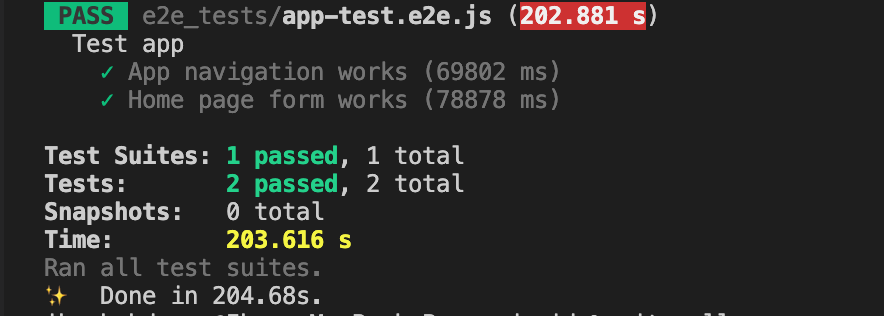
module.exports = options;All that’s left to do is run the yarn e2e:android:sauce command and wait for the terminal output with test results:
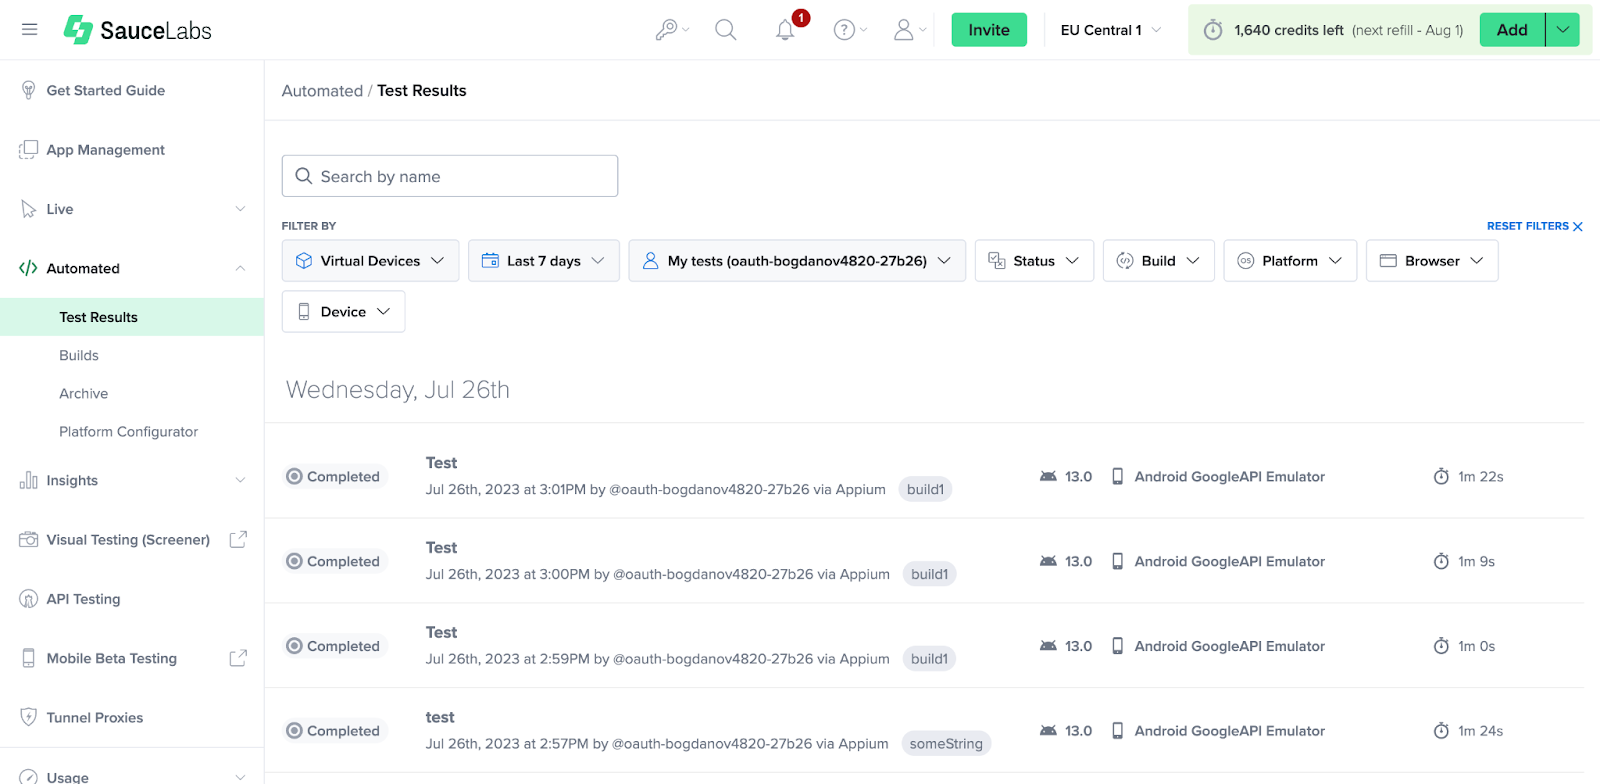
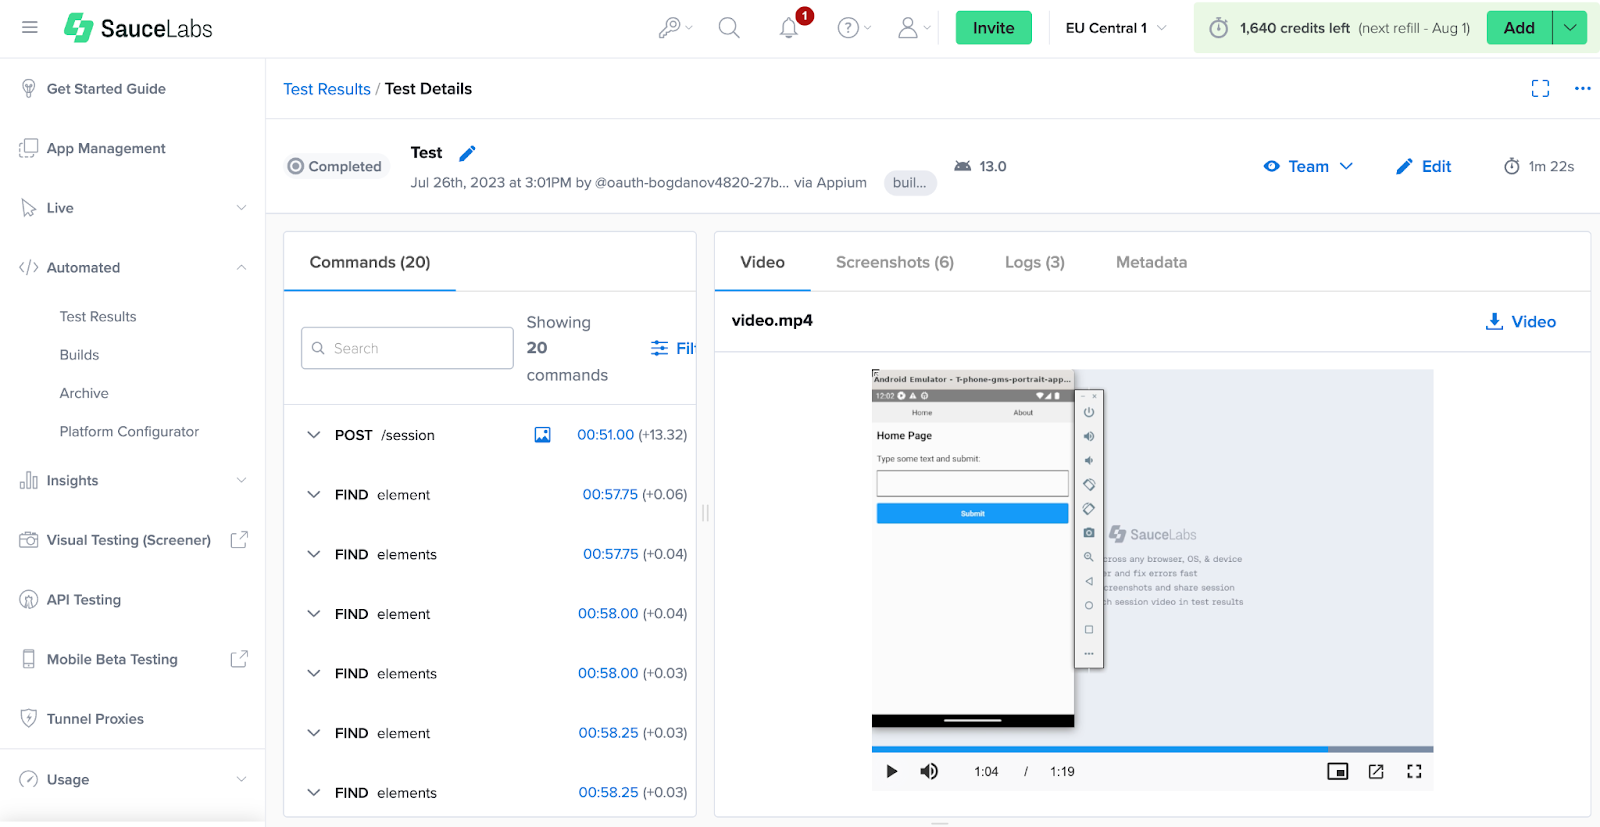
We can also review test results and test progress in the form of logs and videos in the Sauce Labs dashboard:
To further automate QA activities, you can add testing on real devices in a device farm to your CI/CD pipeline.
Read also
Pentesting Android Applications: Tools and Step-by-Step Instructions
Explore which tools can ensure efficient and professional penetration testing and prepare for pentesting challenges.
Improving test stability
Since end-to-end tests imitate the behavior of a real user, they can be less stable than other types of tests. A test may fail once and then work another time. For example, an application can make network requests and access system commands of the OS, and return different results. A common cause for unstable test execution is incorrect use of waiting, which cannot always be performed.
To detect unstable tests, we have to run all tests cyclically many times. We can improve their stability with debugging, but this also takes a lot of time.
Let’s examine some of the most frequent causes of errors in tests that we encounter in our projects. We’ll use previously written utilities in the code examples.
Clicking on an element that changes the position
Let’s imagine that our application contains a drawer element, or a side menu, which is a hidden panel that slides in from the edge of the screen (usually left or right) when triggered. We need to click on a button inside the drawer. Since WebdriverIO performs all actions much faster than a real user, it will try clicking the button while the drawer is still opening:

Also note that WebdriverIO doesn’t just call the onClick event on the specified element. It finds the coordinates of the center of the element and emulates a screen click on those coordinates. Some time passes between WebdriverIO finding the button coordinates and clicking the button. This pause gives the drawer time to fully open and move the button, but WebdriverIO will use old coordinates to click. Since it clicks a blank space, the application does nothing, and the test fails.
To fix this issue, we just need to add a pause before clicking the button:
const openDrawerBtn = await client.getExistingElementWithText("Open drawer");
await openDrawerBtn.click();
const targetBtn = await client.getExistingElementWithText("Two-level drawer");
await client.pause(2000);
await targetBtn.click();We added a two-second pause, but you can choose any amount of time that allows the drawer to open fully. Note that adding a pause isn’t the best practice when writing E2E tests; it’s better to add a wait for a certain event. In this example, we use pause because it’s the simplest solution.
Overlapping one element with another
Let’s imagine that a user wants to press the Success and Warning buttons. Pressing Success displays a message that overlaps the Warning button, and the test will click this message instead of the button.


As a general rule, a message has a life span and will disappear after some time. To ensure that our test works properly, we can make it wait until the message disappears before pressing Warning:
const successBtn = await client.getExistingElementWithText("Success");
await successBtn.click();
await client.getExistingElementWithText("This is success message");
await client.getExistingElementWithText("This is success message", { revers: true });
const warningBtn = await client.getExistingElementWithText("Warning");
await warningBtn.click();The reverse: true flag tells WebdriverIO that the item being searched for should not be on the screen.
Problematic network requests
Let’s imagine that during testing we need to get user data from the server and modify the interface based on it. If this data can be changed in the course of running other tests, we need to figure out how to bring data back to its original state.
In this case, we can use a mock server like json-server. We define the data we need on the server in advance and run it, for example, using Docker or the same device we use for running the tests. We’ll also be able to read and modify data on this server directly from the tests just by sending an HTTP request, thus converting the server’s state to our desired state.
In the application code, we need to specify the server address by adding const url = process.env.MOCK_SEVER_URL || "https://production.url" as an environment variable.
To use a mock server instead of the real one, we just need to pass its URL as a MOCK_SERVER_URL environment variable at build time.
Read also
Shift-left Testing: Benefits, Approaches, Adoption Best Practices
Start testing your applications as early as possible to ensure a quality-focused approach to development. Explore our practical tips for implementation of shift-left testing that you can adopt in your project.

Fractured text
The issue with fractured text can occur at the stage of test writing. For example, our application contains a modal window with the text You have typed: <user input>!.
The code inside this modal window looks like this:
<Text style={styles.modalText}>{`You have typed: ${text}!`}</Text>If we launch the application in a browser, type text in the input, and open the inspector, we will see the following:

The template text and the user’s input are converted to a single line. Now, let’s change the element code to the following:
<Text style={styles.modalText}>You have typed: {text}!</Text>After rebuilding and repeating all the steps above, we’ll see something like this in the inspector:

If we run our tests, they fail because the text inside the element is not as expected.
This issue is relevant only for the web application, as the tree of elements is formed differently on mobile devices. The solution is to modify the application code to have the view shown above. Alternatively, we can implement a new utility in the tests that will search for an element not by the entire text within it but by a portion of the text:
const greeting = "Hello from end-to-end";
await input.setValue(greeting);
const submitButton = await client.getExistingElementWithTestId('submit-btn');
await submitButton.click();
await client.getExistingElementWithSubstring(greeting);Adding this utility to our test project will look like this:
this.client.getExistingElementWithSubstring = async (text, params) => {
  let selector;
  if (this.platform === "chrome" || this.platform === "chrome-extension") {
    selector = `//*[contains(text(),'${text}')]`;
  } else if (this.platform === "android") {
    selector = `android=new UiSelector().textContains("${text}")`;
  } else if (this.platform === "ios") {
    selector = `-ios predicate string:name CONTAINS "${text}"`;
  }


  const element = await this.client.$(selector);
  await element.waitForExist({
    ...params,
    timeout: params?.timeout || this.timeout,
  });
  return element;
};Inaccessible nested element
This issue is relevant for the iOS version of the application and is most often encountered when working with component libraries. The internal implementation of some components can be hidden, which makes it impossible to access nested elements.
To demonstrate this, let’s change the code of the Submit button in our application so that it contains nested elements and build the application with the yarn ios:build command:
<Pressable
  testID='submit-btn'
  style={styles.button}
  onPress={() => setModalVisible(!modalVisible)}
>
  <View>
    <Text style={styles.textStyle}>Submit</Text>
    <Text style={styles.textStyle} testID='submit-text-form'
>form</Text>
  </View>
</Pressable>Next, we’ll add a simple test case that checks whether this item is displayed on the screen and run it with the yarn e2e:ios command:
it("Access nested element", async () => {
  await client.getExistingElementWithTestId("submit-text-form");
});Running this test case will result in failure even though we can see the button on the screen and its testId is equal to the one we are looking for. To figure out the reason for the fail, we need to install Appium Inspector, an additional tool for Appium that allows us to explore the structure of the interface displayed on the screen while executing tests.
After installation, let’s launch Appium Inspector and set the correct configurations:

Then, let’s run the tests again, go to the Attach to session tab in Appium Inspector, and press Refresh. When the session ID appears in the Enter your session ID here field, we need to press Attach to session.
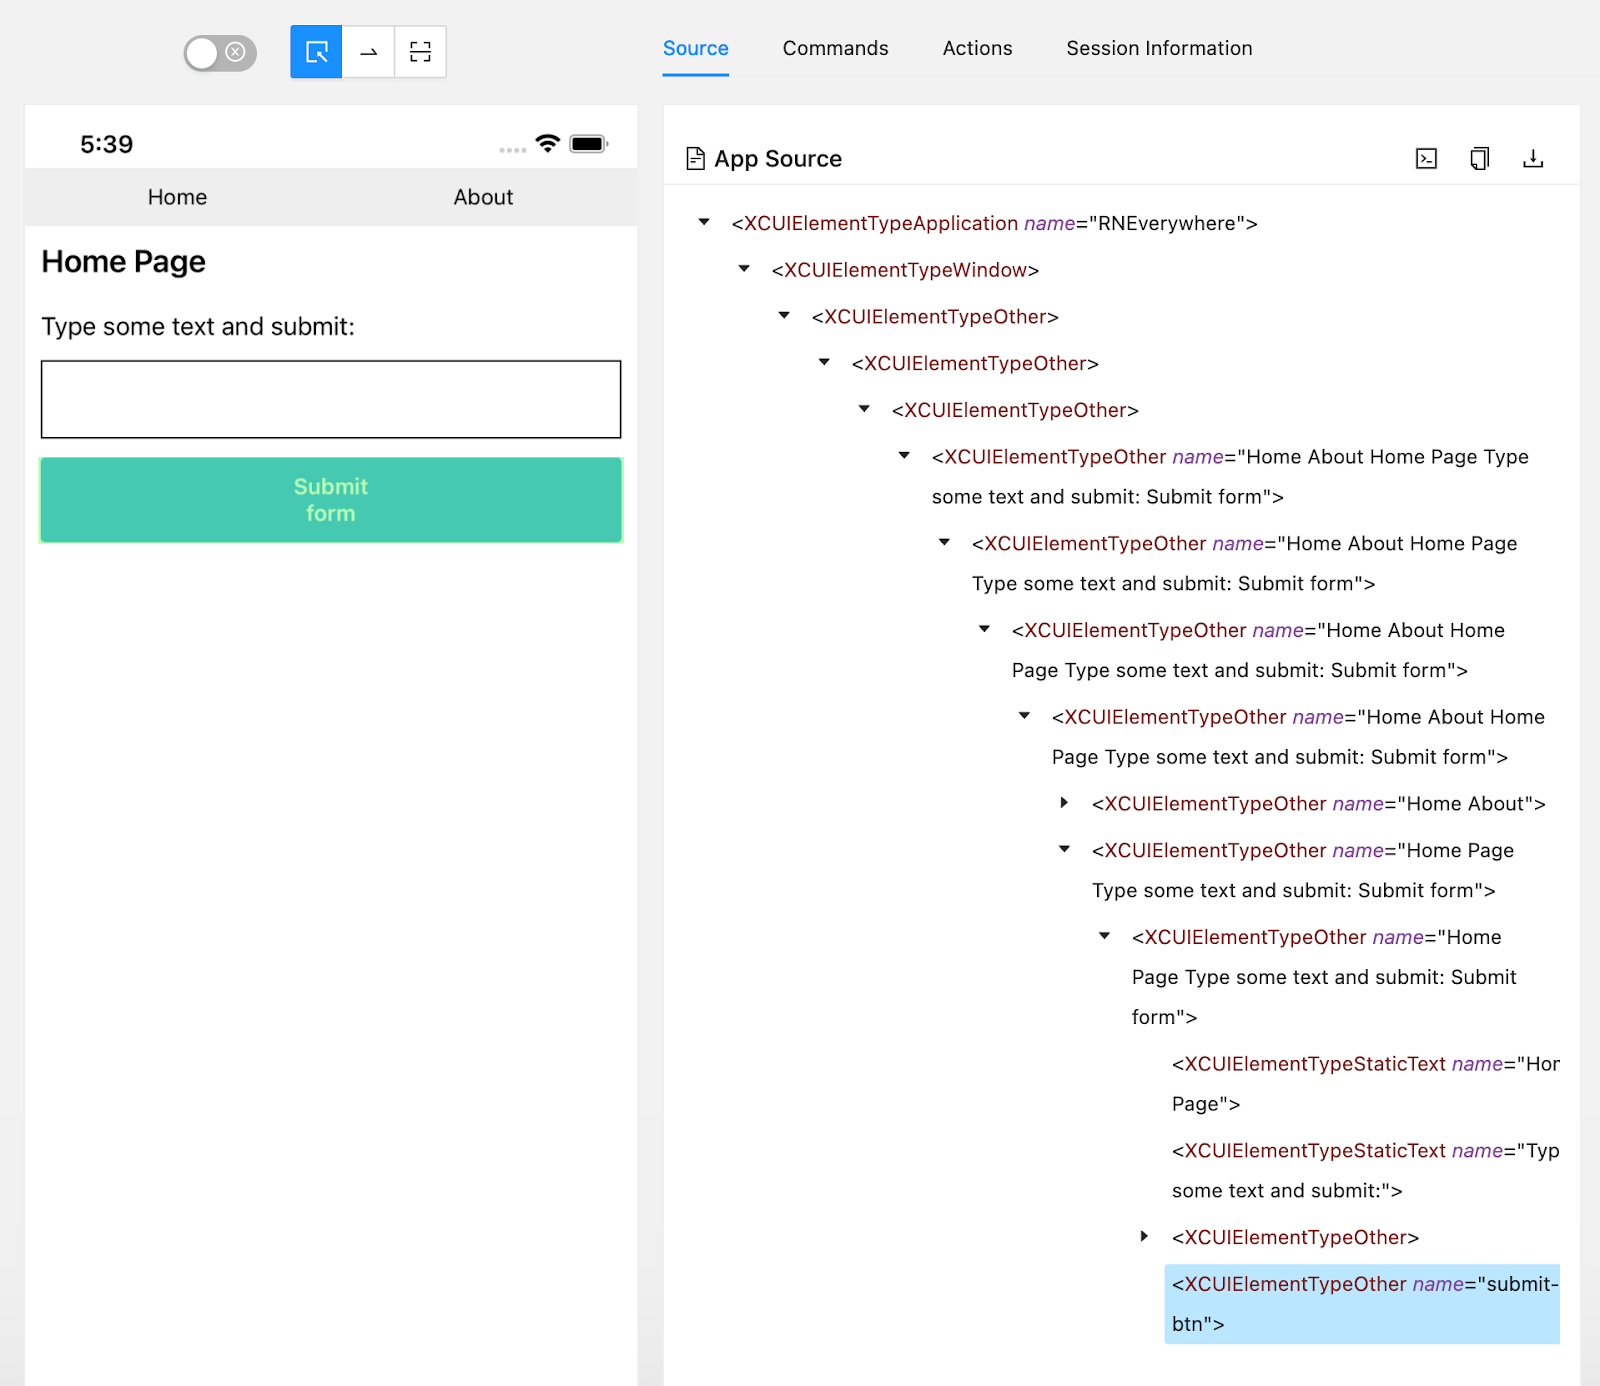
In the opened window, press Submit form. In the structure of the application interface, we can see that the button we are interested in is a single element that cannot be opened. This is caused by the accessible property, which defaults to true for the Pressable component, which is the root of the Submit form button.
To solve this, let’s set accessible = false for the Pressable component:
<Pressable
  accessible={false}
  testID='submit-btn'
  style={styles.button}
  onPress={() => setModalVisible(!modalVisible)}
>After building the application, our test should execute successfully.
Conclusion
End-to-end testing of cross-platform projects provides lots of benefits. It reduces the need for manual tests and debugging, supports testing of universal and platform-specific features, and helps to ensure a flawless user experience. Also, you can integrate E2E tests into a project’s CI/CD pipeline to create a continuous development flow for new features without harming existing functionality.
Apriorit’s QA experts have a lot of experience in writing quality and stable end-to-end tests, some of which we have shared in this article. Whether your project requires testing of web, desktop, or mobile application versions, we can ensure that your software works smoothly and provides the best possible user experience.
Have a complicated cross-platform product?
Entrust your project to Apriorit’s expert QAs and increase your product’s quality.
Have a question?
Ask our expert!
Director of Global Markets Development


