Developing separate applications to cover several target platforms is difficult, time-consuming, and expensive. No wonder cross-platform app development has become so popular — it allows businesses to reach a wider audience and reduce development costs by creating a single app.
You may already know that cross-platform technologies like React Native allow you to develop mobile applications for both Android and iOS. But did you know that you can also use React Native to adapt your mobile app to web and desktop platforms and even to create browser extensions?
This detailed guide shows you how to build cross-platform apps with React Native. Additionally, we include a link to our GitHub repository containing all code required for this setup, making it easy to follow along and implement it in your own projects.
This article will be helpful for team leads and business owners who want to streamline the development process and reduce costs and time to market for their products. It will also be useful for your React developers to expand their horizons in cross-platform app development. If your developers already know React, it will be easy for them to learn React Native, since both frameworks have similar syntax, concepts, approaches, and patterns.
Contents:
- Cross-platform development: pros, cons, and use cases
- Top cross-platform technologies and frameworks
- What is React Native and why use it for cross-platform development?
- Building a React Native mobile application: a brief project overview and plan
- Creating a web application
- Adjusting a React Native app to different platforms
- Creating a browser extension for your application
- Building a Windows desktop application
- Tools for adapting your React Native app to macOS and Linux
- Conclusion
Cross-platform development: pros, cons, and use cases
There’s a simple principle in software development: If you want to attract many end users, make sure your app is available on all platforms your target audience uses. Some users prefer Android smartphones; others are dedicated to Apple devices; and some use web or desktop software.
To ensure your app is present on all platforms, you’ll need a diverse team of specialists that will most likely consist of a:
- Kotlin developer for Android
- Swift developer for iOS
- .NET developer for Windows
- JavaScript developer for web
Even if you hire top specialists, there are still risk factors. First, it’s always a challenge to gather a diverse team of developers, QA engineers, and project managers with expertise relevant to your specific project. Moreover, maintaining and managing such teams requires a lot of money and effort on the part of your business.
Also, you’ll have multiple projects, one for each platform. The pacing may differ, so you risk releasing your products on different dates. Additionally, any changes, updates, and maintenance activities will be multiplied by the number of platforms you support.
One way to tackle these issues when delivering your application to several different platforms is to use the cross-platform development approach.
Cross-platform development uses specific frameworks that contain universal technologies, wrappers, and tools to run on multiple platforms. These technologies commonly include:
- JavaScript + HTML + CSS
- React
- C#
- Dart
In this article, we focus on JavaScript, as it’s the primary technology used in React Native — the framework we’ve dedicated this article to.
Want to expand your audience?
Build a robust and secure mobile app that will meet your target audience’s expectations and reach even more users with the help of Apriorit’s top developers.
Let’s discuss the pros and cons of cross-platform app development in general, starting with the benefits of this approach:
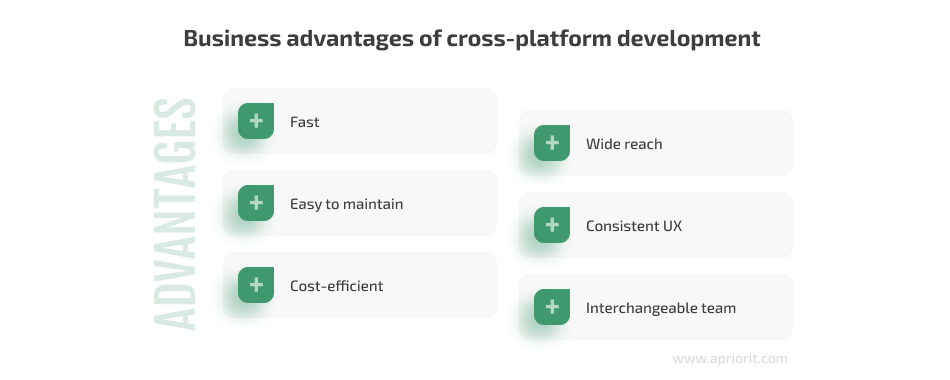
- Fast. Applying a cross-platform approach, developers can create applications quickly. There’s no need to develop a separate codebase for each platform.
- Easy to maintain. With cross-platform development, solution maintenance is easier, since developers only have to update a single codebase rather than multiple.
- Consistent user experience. By using cross-platform technologies, developers can ensure the user experience is consistent across all platforms. Having a familiar and convenient interface across platforms can improve user satisfaction and loyalty and consequently decrease the churn rate.
- Interchangeable team. Instead of hiring developers with diverse skill sets, you can get a team of JavaScript developers who will be able to cover all your needs. Also, it will be easy for you to find new developers and expand the team due to the popularity of JavaScript.
- Cost-efficient. Creating a single app for multiple platforms significantly cuts costs, as you don’t need to create a separate codebase for each platform and keep various developers on staff.
- Wide reach. You can cover a wide range of platforms with a single codebase and expand your pool of potential users.
Now, let’s take a look at general disadvantages and potential issues you may encounter in cross-platform development:
- Performance. Native technologies are more efficient than cross-platform technologies, as they use a platform’s core programming language and APIs to compile. A cross-platform framework, on the other hand, transforms code into the language of the platform. This results in slower data processing that can affect the performance of complex applications like games or video editors.
- Large app size. Even the simplest cross-platform app often weighs 80–100MB without optimization. On the bright side, developers now have ways to reduce the size of an application, and modern mobile networks allow users to download large apps.
- Integration issues. Cross-platform technologies often don’t give access to all the possibilities of an operating system (OS) because they don’t keep up with OS updates. You may need to wait till the cross-platform framework’s developers add functionality present in the new version of an OS.
Cross-platform technologies are suitable for a wide range of applications. Many world-famous products use cross-platform technologies, including Slack, Skype, Figma, Airbnb, Uber, and Dropbox.
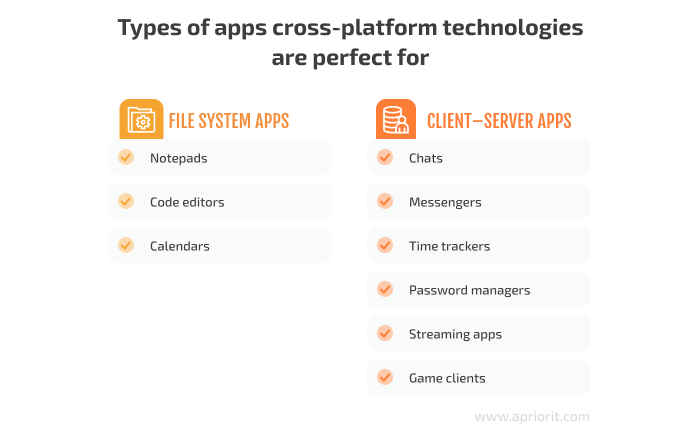
From our experience, cross-platform frameworks like React Native are the most suitable choice for applications such as:
- File system applications — notepads, notes, code editors, calendars
- Client–server applications — chats, messengers, time trackers, password managers, streaming applications, and game clients
However, cross-platform technologies have their limitations too and may not be suitable for all types of applications. For instance, applications that require heavy graphics processing or intensive computations on the client side may not perform well in a cross-platform environment.
Therefore, it’s important to carefully consider application requirements before choosing this development approach.
Let’s talk about the technologies that allow world-class products to provide a consistent user experience on multiple platforms simultaneously.
Top cross-platform technologies and frameworks
Your developers can use many technologies to build an efficient cross-platform application. Let’s briefly overview the most popular.
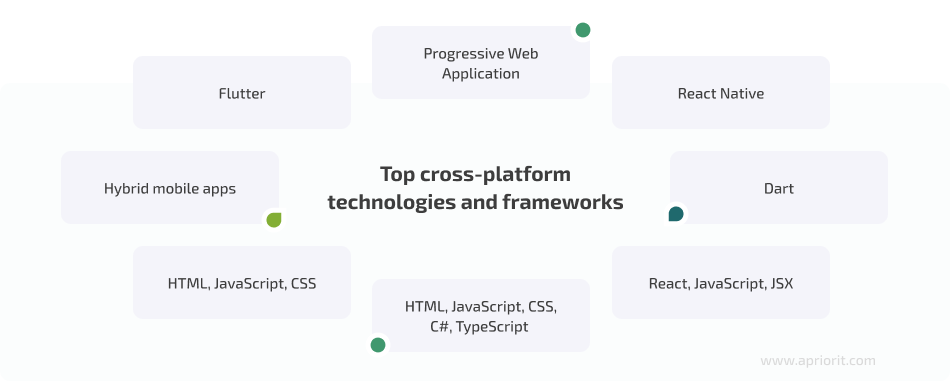
1. Progressive Web Application
A Progressive Web Application (PWA) is a type of website that is designed to work like a native mobile or desktop app. PWAs use modern web technologies to provide features like offline access, push notifications, and access to device hardware (such as cameras or GPS).
You can convert a WordPress website into a PWA, and then it can be installed on a user’s device and launched from the home screen like a regular app.
A downside of this technology, however, is that Apple doesn’t permit it, so it’s more suitable for self-hosted corporate applications.
2. Hybrid mobile apps
Hybrid mobile apps use web technologies such as HTML, CSS, and JavaScript and are then wrapped in a native app shell. This shell allows a hybrid app to run as a native app, giving it access to device-specific features such as the camera, contacts, and GPS.
Apache Cordova and Ionic are the most popular hybrid app frameworks. Unlike PWAs, you can deploy hybrid apps to both the App Store and Google Play Store.
3. Flutter
Flutter is a framework made by Google. It uses Dart, which allows for faster compilation speed. Flutter boasts native-like performance, widget-based logic, and ease of development.
Programmers can adapt Flutter apps to all platforms, from iOS and Android to web, macOS, Linux, and Windows.
4. React Native
Made and backed by Facebook, React Native allows developers to use JavaScript to build mobile apps for iOS and Android. The React Native cross-platform mobile app development is based on components that are bundled with the application, which provide access to underlying device hardware.
Developers can also expand their mobile apps to desktop and web apps and even create browser extensions.
React Native is a well-supported technology that offers lots of useful opportunities for application development. Let’s discuss the advantages of React Native in more detail.
Read also
Building a Cross-Platform Mobile Web Application with Ionic and Angular
Build a robust and secure mobile app that will meet your target audience’s expectations and reach even more users with the help of Apriorit’s top developers.
What is React Native and why use it for cross-platform development?
React Native is an open-source framework for building cross-platform mobile applications. It was developed and maintained by Facebook, which gives confidence in its future. React Native is based on the popular React library for building web applications.
React Native offers excellent performance, as it compiles into native code for each platform rather than running the app through a web view or emulator. This approach ensures that the application runs smoothly and performs well on both iOS and Android devices.
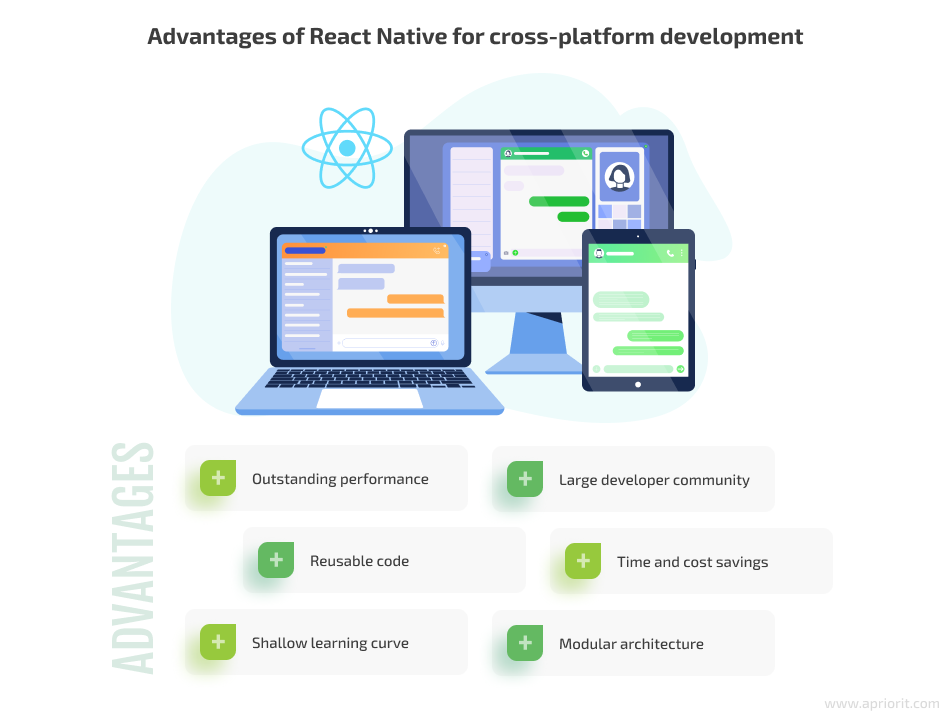
One of the benefits of React Native is its large and active community of developers who continue to improve and enhance the framework. So even if you run into a problem, there’s a good chance you’ll find a solution online.
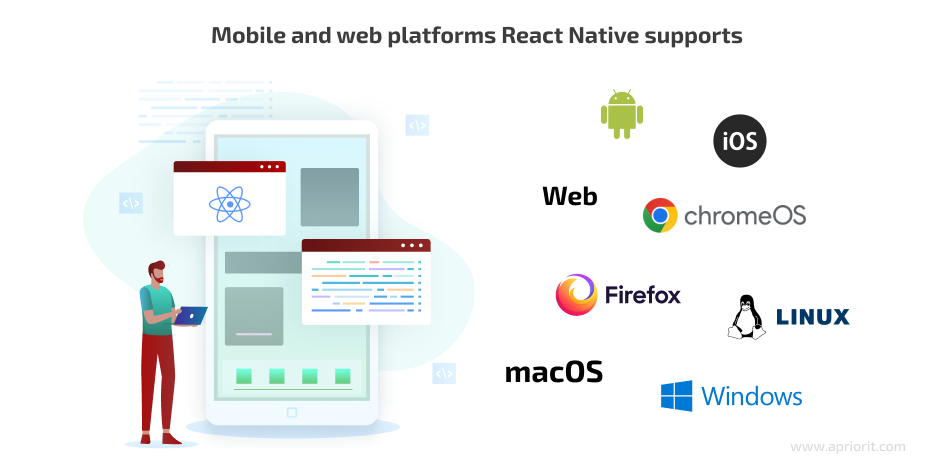
React Native is an excellent choice for cross-platform app development, as it allows developers to build apps for iOS, Android, Windows, macOS, and the web using a single codebase. It also has the potential to support other platforms through third-party libraries and tools.
One of the biggest advantages of using React Native for cross-platform development is the significant time and cost savings it offers. Instead of having to develop and maintain a separate codebase for each platform, developers can use a single codebase, which leads to faster development, easier maintenance, a consistent user experience, and reduced costs.
With React Native, you can reuse web development skills and knowledge, as it’s based on the popular React library for web development. This makes it easier for developers already familiar with React to learn and work with React Native.
Let’s now create our own React Native project and adapt it for all platforms.
Read also
React.js vs Knockout.js vs Vue.js: Features and Performance Comparison
Gain valuable insights into the strengths and weaknesses of various web frameworks to make informed decisions for your next project.
Building a React Native mobile application: a brief project overview and plan
To show a practical example of using React Native for cross-platform development, we’ll create a small project and set it up to run on the following platforms:
- Android
- iOS
- Web
- Chrome browser (as an extension)
- Firefox browser (as an extension)
We’ll also discuss the specifics of cross-platform development for these platforms:
- Linux
- Windows
- macOS
We’ll keep the application simple, so it won’t contain any complex business logic. What it will contain are a few components that are typical for app development, such as:
- Routing between two pages
- A simple form with an input field and a submit button
- A dialog box
We’ll start with a basic project in React Native, then create the user interface (UI) in it. By this point, we’ll be able to run the project on the Android and iOS mobile platforms.
Then, with the help of the React-Native-Web library and the Webpack builder, we will turn our app into a website.
Next, we will discuss how to get browser extensions from the website. To do this, we will need to add just a few files. Finally, we will port the product to Windows using the React-Native-Windows package.
Let’s explore each step in detail.
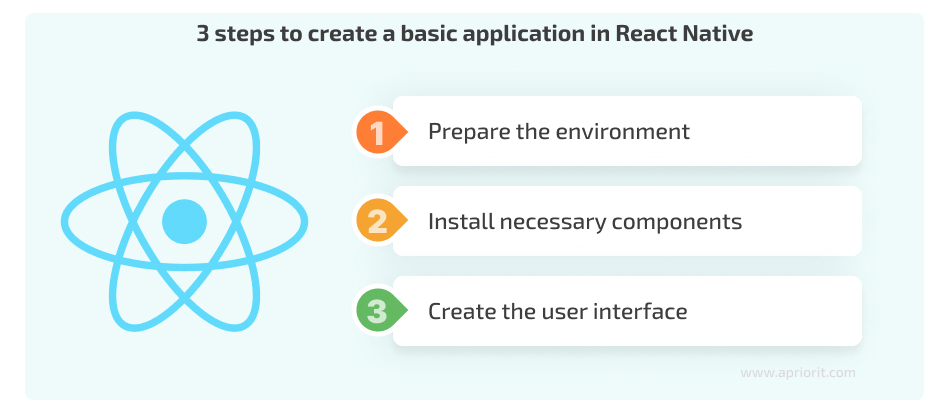
Step 1. Prepare the environment
To get started, you’ll need equipment. You can use React Native on different operating systems: macOS, Windows, or Linux. But you will only be able to develop for the iOS platform using a Mac, so it’s ideal to have one. We used an M1 Mac for this project. Later, we will also need a Windows PC to develop a desktop app.
Next, we set up the development environment. The official documentation describes this well, so you can follow the steps depending on the OS you’re using for development.
Expo vs CLI
There are two main sets of tools and services for building, deploying, and managing React Native apps: Expo and React Native Command-Line Interface (CLI).
Expo is simpler to use, but it can be somewhat limiting for larger projects. However, it’s perfect for quick prototyping.
CLI, on the other hand, is more complex and requires experience with native development and offers a number of advantages compared to Expo:
- Flexibility and more customization options
- Easy third-party library and package integration
- Wide range of build configurations
- Fast access to the latest React Native updates and features
We’ll be using CLI for this tutorial.
Step 2. Install necessary components
We start with installing the necessary software and tools, setting the environment variables, and creating a default project. Installing all components can take around an hour.
We created a project called RNEverywhere using the following command:
npx react-native@latest init RNEverywhereWe chose the Yarn package manager and installed it with this command:
npm install –global yarnNext, we went through all the steps for both Android and iOS and installed the Android emulator and iOS simulator according to the documentation. In the end, you should be able to run the default app on the Android emulator with the following command:
yarn androidFor the iOS simulator, use this command:
yarn iosThis is what you should see after completing the steps above:
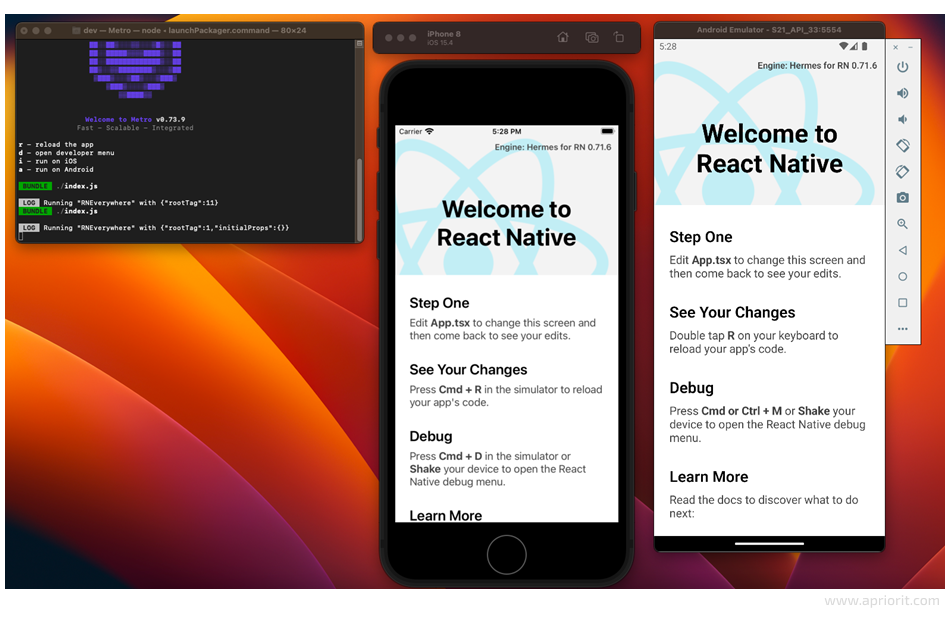
Together with the emulator and simulator, Yarn also runs Metro, a JavaScript bundler for React Native applications. It is responsible for packaging your application code and all its dependencies into a single bundle file that can be run on a mobile device.
Now we can open our project folder in a code editor — VS Code, in our case. This is the folder structure you should have if you did everything as described:
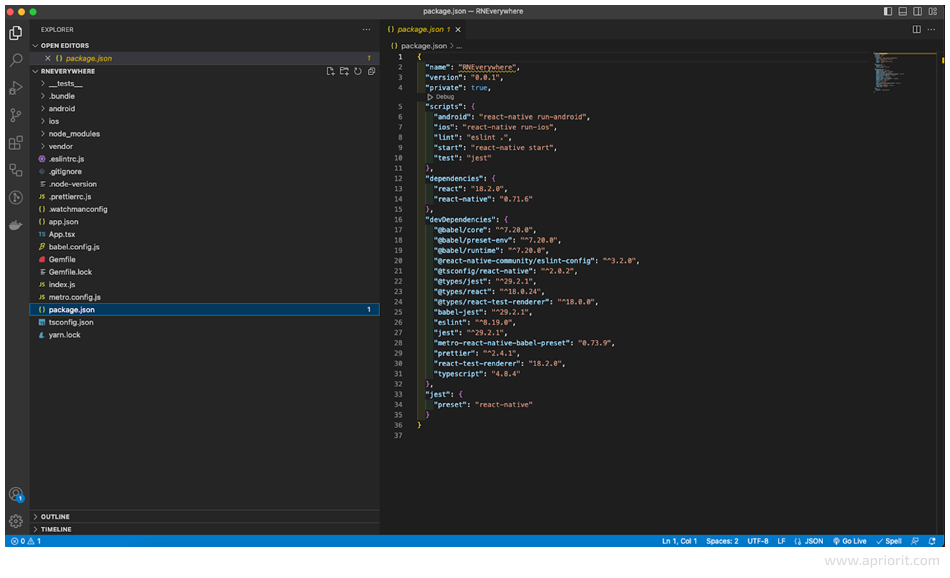
The package.json file contains the scripts we can run with yarn <scriptName> and a set of application dependencies and their versions.
The App.tsx file contains the contents of our application, including the set of React Native components. These components make up the UI of the app. You can read more about React Native components in the official documentation.
You can play around with them, for example, by changing some text in this file and seeing the changes in the emulator. After saving the file, the changes should be applied automatically.
Step 3. Create the UI
Now, it’s time to tweak the default UI. Our new interface will contain a couple of pages, so let’s add a routing package. In the terminal, in the project folder, run:
yarn add react-router-nativeThen replace the code of the App.tsx file with the following code:
import React from 'react';
import { StyleSheet, Text, View } from 'react-native';
import { NativeRouter, Route, Link, Routes } from 'react-router-native';
import About from './src/pages/About';
import Home from './src/pages/Home';


const App = () => {
 return (
   <NativeRouter>
     <View>
       <View style={styles.nav}>
         <Link to="/" style={styles.navItem}>
           <Text style={styles.navItemText}>Home</Text>
         </Link>


         <Link
           to="/about"
           style={styles.navItem}>
           <Text style={styles.navItemText}>About</Text>
         </Link>
       </View>


       <View style={styles.page}>
         <Routes>
           <Route path="/" element={<Home />} />
           <Route path="/about" element={<About />} />
         </Routes>
       </View>
     </View>
   </NativeRouter>
 );
}


const styles = StyleSheet.create({
 nav: {
   flexDirection: 'row',
 },
 navItem: {
   backgroundColor: '#eee',
   flex: 1,
   alignItems: 'center',
   padding: 10,
 },
 navItemText: {
   color: '#000',
 },
 page: {
   padding: 10,
 }
});


export default App;At the top of the file, we import several components from the library we just installed in order to organize routing in the application. We also import a couple of components from React Native.
The App function returns the user interface structure, which includes navigation links and a set of routes. The Link components represent clickable links to different pages in the application, and the Routes component defines the mapping between URL paths and the corresponding components to render. By organizing our components in this way, we enable users to navigate between pages seamlessly, making our application more interactive and user-friendly.
We used the Text and View components from the React Native library. The Text component allows you to display and render content within the user interface, while the View component helps you build the structure and the layout of your application. If you need to show some text in the application, it must be wrapped in the <Text></Text> tag. You can think of the <View> tag as the <div> in HTML.
At the bottom of the file, we created a Styles object, which we pass as props to our components. The style names look just like CSS names, only in camel case (backgroundColor rather than background-color).
Component alignment in React Native is achieved with Flexbox. Unlike on the web, Flexbox’s default direction is a column. You can find more details about styles in the official React Native documentation.
Also, at the top of the file, we import the Home and About components. These custom components that we create ourselves will represent our pages.
To make them, we create the src folder in the project folder — it will contain the source code of our components. Then we create the pages subfolder and place these two files in the pages: Home.tsx and About.tsx.
Now, we paste the following code into the About.tsx folder:
import React from 'react';
import { StyleSheet, Text, View } from 'react-native';


const About = () => (
 <View>
   <Text style={styles.header}>
     About Page
   </Text>


   <Text style={styles.secondaryText}>
     This app is developed in React Native
   </Text>
 </View>
);


const styles = StyleSheet.create({
 header: {
   fontWeight: '600',
   fontSize: 20,
   color: '#000',
   marginBottom: 20,
 },
 secondaryText: {
   fontWeight: '400',
   fontSize: 16,
   color: '#000',
 },
});


export default About;This component is quite straightforward, showing the page title, the secondary text, and text styling.
Now, we paste the following code into the Home.tsx file:
import React, { useState } from 'react';
import { StyleSheet, Text, View, TextInput, Pressable, Modal } from 'react-native';


const Home = () => {
 const [text, onChangeText] = useState('');
 const [modalVisible, setModalVisible] = useState(false);


 return (
   <View>
     <Text style={styles.header}>
       Home Page
     </Text>


     <Text style={styles.secondaryText}>
       Type some text and submit:
     </Text>


     <TextInput
       style={styles.input}
       onChangeText={onChangeText}
       value={text}
     />
     <Pressable
       style={styles.button}
       onPress={() => setModalVisible(!modalVisible)}
     ><Text style={styles.textStyle}>Submit</Text></Pressable>


     <Modal
       visible={modalVisible}
     >
       <View style={styles.centeredView}>
         <View style={styles.modalView}>
           <Text style={styles.modalText}>You have typed: {text}!</Text>
           <Pressable
             style={styles.button}
             onPress={() => setModalVisible(!modalVisible)}
           >
             <Text style={styles.textStyle}>OK</Text>
           </Pressable>
         </View>
       </View>
     </Modal>
   </View>
 );
};


const styles = StyleSheet.create({
 header: {
   fontWeight: '600',
   fontSize: 20,
   color: '#000',
   marginBottom: 20,
 },
 secondaryText: {
   fontWeight: '400',
   fontSize: 16,
   color: '#000',
 },
 input: {
   height: 50,
   marginTop: 12,
   marginBottom: 12,
   borderWidth: 1,
   padding: 10,
 },
 centeredView: {
   flex: 1,
   justifyContent: 'center',
   alignItems: 'center',
 },
 modalView: {
   margin: 20,
   backgroundColor: '#fff',
   borderRadius: 5,
   padding: 35,
   alignItems: 'center',
   shadowColor: '#000',
   shadowOffset: {
     width: 0,
     height: 2
   },
   shadowOpacity: 0.25,
   shadowRadius: 4,
   elevation: 5
 },
 button: {
   borderRadius: 3,
   padding: 10,
   backgroundColor: '#2196F3',
 },
 textStyle: {
   color: '#fff',
   fontWeight: '600',
   textAlign: 'center'
 },
 modalText: {
   marginBottom: 15,
   textAlign: 'center'
 },
});


export default Home;This component is a bit more complicated and contains a few new components:
- TextInput — shows the input box on the page
- Pressable — is used to implement buttons
- Modal — shows the dialog box
We used the useState hook to create and manage two variables that store and update the application’s state.
The first variable stores the text the user has put into the input box. We pass it as a prop into TextInput and change the state of this variable by passing the onChangeText callback to the same component.
The second variable stores the state of the dialog box (open/closed). When we type something in the input field and click Submit, the dialog box will show up with the text that has been typed.
Our app is ready! Now we can run the Android emulator and the iOS simulator again, and we should get the following:
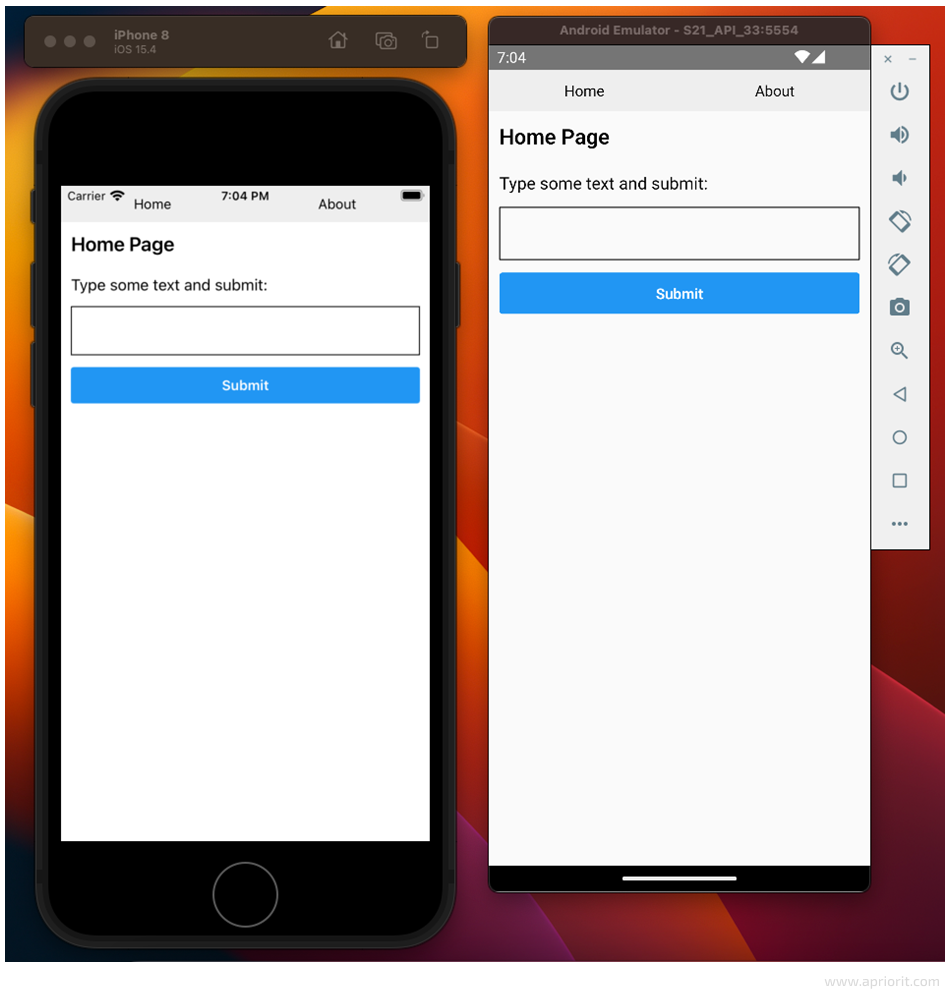
So far, we have created our own app that works on Android and iOS. Now it’s time to turn it into a web application.
Related project
Cross-Platform Data Backup Solution Development: Windows, Android, macOS, iOS
Discover how Apriorit fortified our client’s data integrity with our cross-platform backup solution, ensuring seamless data protection across all devices.
Creating a web application
Thanks to the React Native community, we have the opportunity to turn our mobile app into a web application. To do this, we will use React Native Web.
React Native Web is an open-source library that allows us to build web applications using React Native components. It supports all the core React Native components and APIs and uses React DOM to render the application in the browser.
To start, let’s add a couple of modules to our project. In the terminal, run:
yarn add react-dom react-native-webNext, we need to install some dev dependencies:
yarn add -D webpack webpack-cli webpack-dev-server babel-loader url-loader babel-plugin-react-native-web html-webpack-pluginHere, in addition to react-native-web itself, we installed:
- react-dom — used by react-native-web to render the application in the browser
- webpack — a module bundler for JavaScript applications that packages and bundles different modules and assets, such as JavaScript files, CSS stylesheets, images, and fonts, into a single bundle file that can be served to a web browser
- webpack-cli — a command-line interface tool for the Webpack module bundler
- webpack-dev-server — a Webpack development server that provides live reloading
- babel-loader — used by Webpack to transform modern JavaScript code, such as ES6 and JSX, into a format that older browsers can understand
- url-loader — a Webpack loader that transforms files into Base64 URIs; we will use it to handle images
- babel-plugin-react-native-web — a Babel plugin that will alias react-native to react-native-web
- html-webpack-plugin — a Webpack plugin we’ll use to create HTML files that will automatically include our Webpack bundles to run on the web
Now our package.json will look something like this:
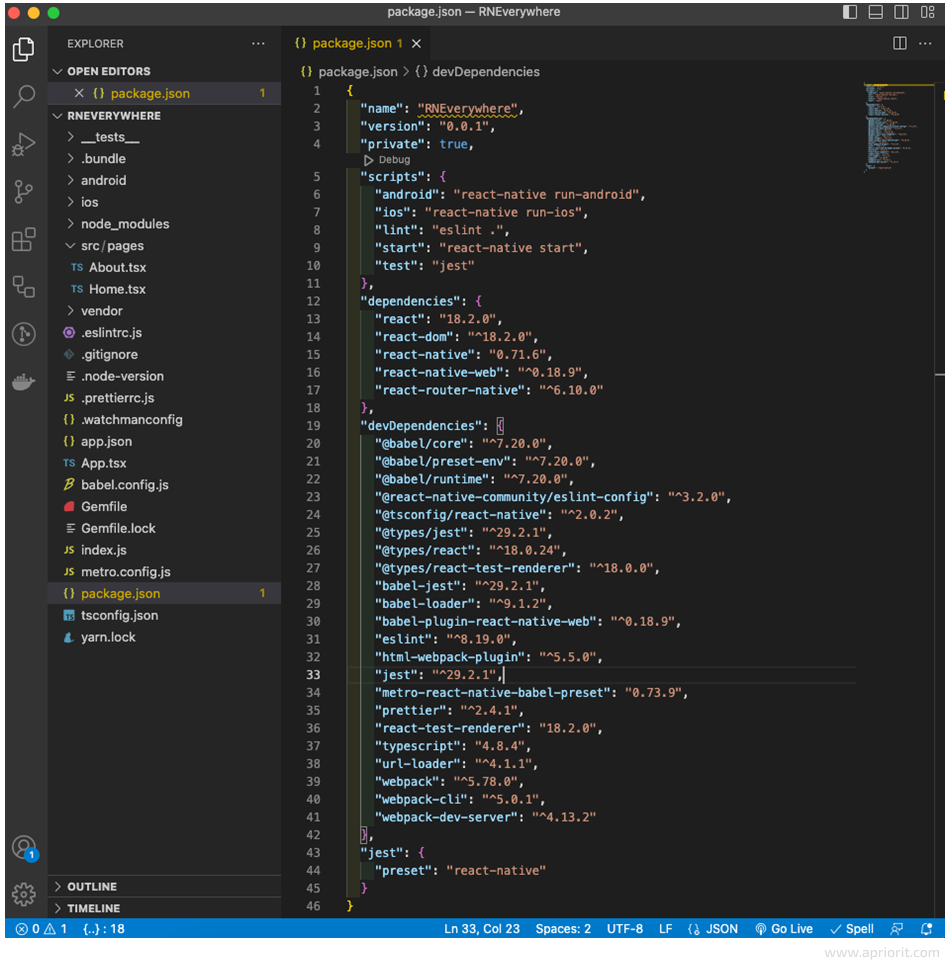
If you experience any problems or errors later on, you can change the versions of the packages in this file to the ones used here and run the yarn command. This command will read the package. Json file in your project and install the corresponding package versions specified in it. This will ensure that you have the correct package versions installed and help resolve any compatibility issues.
Next, create a top-level web folder and create three files in it:
- Index.html
- Index.web.js
- webpack.config.js
Here’s the code these files will contain.
1. index.html
<!DOCTYPE html>
<html>
 <head>
   <meta charset="UTF-8" />
   <meta name="viewport" content="width=device-width, initial-scale=1.0" />
   <meta http-equiv="X-UA-Compatible" content="ie=edge" />
   <title>RNEverywhere</title>
   <style>
     /* These styles make the body full-height */
     html, body { height: 100%; }
     /* These styles disable body scrolling if you are using <ScrollView> */
     body { overflow: hidden; }
     /* These styles make the root element full-height */
     #root { display:flex; height:100%; }
   </style>
 </head>


 <body>
   <div id="root"></div>
 </body>
</html>This is a basic HTML file template with some styles from the react-native-web documentation and a div in which our application will be rendered. This will allow us to apply the styles from our mobile app to the web application and ensure a consistent design across all platforms.
2. index.web.js
import { AppRegistry } from 'react-native';
import { name as appName } from '../app.json';
import App from '../App';


AppRegistry.registerComponent(appName, () => App);
AppRegistry.runApplication(appName, {
 initialProps: {},
 rootTag: document.getElementById('root'),
});This file is almost a copy of the index.js file from the root of the project with a small addition that will be used by react-native-web to render our application in the div with the root id.
By rendering the React application inside the div element with the root id, React Native for Web can ensure that the application appears in the correct location on the web page and has the appropriate styling applied to it.
3. webpack.config.js
const path = require('path');
const HtmlWebpackPlugin = require('html-webpack-plugin');


const appDirectory = path.resolve(__dirname, '..');


const { presets } = require(`${appDirectory}/babel.config.js`);


const babelLoaderConfiguration = {
 test: /\.js$|tsx?$/,
 include: [
   path.resolve(appDirectory, 'web/index.web.js'),
   path.resolve(appDirectory, 'App.tsx'),
   path.resolve(appDirectory, 'src'),
 ],
 use: {
   loader: 'babel-loader',
   options: {
     cacheDirectory: true,
     presets,
     plugins: ['react-native-web'],
   },
 },
};


const imageLoaderConfiguration = {
 test: /\.(gif|jpe?g|png)$/,
 use: {
   loader: 'url-loader',
   options: {
     name: '[name].[ext]',
   },
 },
};


module.exports = {
 entry: {
   app: path.join(appDirectory, 'web/index.web.js'),
 },
 output: {
   path: path.resolve(appDirectory, 'web/build'),
   clean: true,
   publicPath: '/',
   filename: 'bundle.js',
 },
 resolve: {
   extensions: ['.web.tsx', '.web.ts', '.tsx', '.ts', '.web.js', '.js'],
   alias: {
     'react-native$': 'react-native-web',
   },
 },
 devServer: {
   open: true,
   port: 3000
 },
 module: {
   rules: [
     babelLoaderConfiguration,
     imageLoaderConfiguration,
   ],
 },
 plugins: [
   new HtmlWebpackPlugin({
     template: path.join(appDirectory, 'web/index.html'),
   }),
 ],
};In this file, we created the configuration that will do all the work:
- babelLoaderConfiguration — transpiles all JavaScript and TypeScript files into a format that browsers can understand so that our app is compatible with a wide range of browsers
- imageLoaderConfiguration — handles the image files we will use in our application
- module.exports — configuration of our Webpack
- entry — the entry point to our application
- output — tells Webpack what to name the compiled files and where to save them to the disk
- resolve — changes how modules are resolved; will alias the react-native module so all references to it can be resolved to the same file
- devServer — contains dev server settings; will open the application in the browser on port 3000 and allow us to see changes immediately and test our app in a local development environment
- module.rules — allows you to specify how different types of files should be processed and transformed by Webpack
- HtmlWebpackPlugin — simplifies the process of generating and updating the HTML file for the application and injects the JavaScript bundle into the HTML file so it’s properly loaded
You can find more details about Webpack configuration in the official Webpack documentation.
Finally, add these two lines to the scripts section of package.json:
"web": "webpack serve --mode=development --config ./web/webpack.config.js",
"web:build": "webpack --mode=production --config ./web/webpack.config.js"Now you can run this command in the terminal:
yarn web…and get the desired web version of your React Native app:
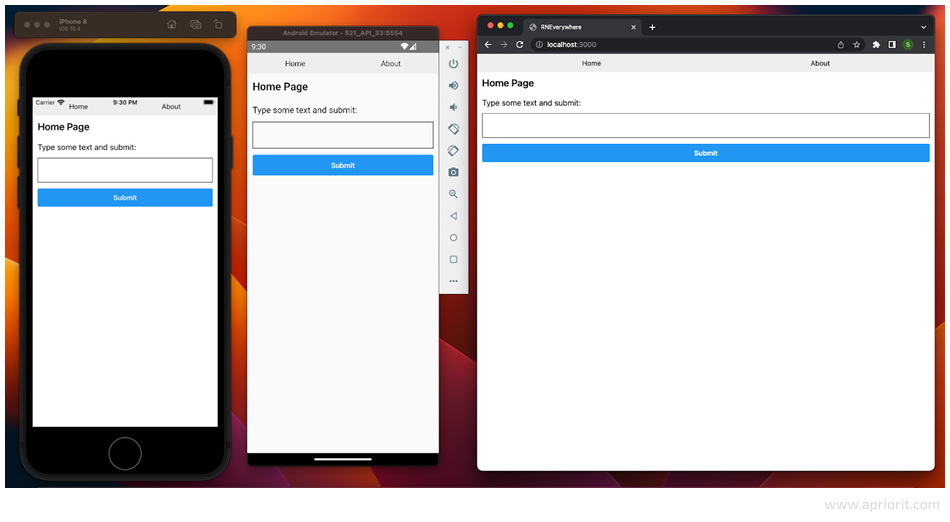
The second script will build the application’s production bundle:
yarn web:buildThis will trigger the Webpack build process, which will compile and optimize the code and assets for production. When the build is complete, a build folder will be created in the web folder containing all required production-ready assets, such as JavaScript, CSS, and image files.
Now, we have an app that runs on the web, Android, and iOS. Let’s talk about platform-specific cases and how to adapt your app to React Native supported platforms.
Read also
What are Single-Page Apps (SPAs): Architecture and Development Benefits
Elevate your online presence and drive revenue with single-page apps! Learn about the latest trends and best practices in single-page application development in our guide.
Adjusting a React Native app to different platforms
All platforms have their specific UI and UX layouts and rules, so it’s necessary to adapt your application so it looks native to the platform.
For example, in our case, the full-screen width button looks odd when we open our app in the web browser. Also, our app may use an API on mobile platforms that’s not available on the web, and vice versa.
For such cases, when we want specific code for a specific platform in React Native, we need to create a platform-dependent component. To do this, you need to create a file with a platform-specific extension. For example:
- Component.android.tsx
- Component.ios.tsx
- Component.web.tsx
To demonstrate this, let’s change our web layout to horizontal. First, we’ll need to create a components folder in the src folder and add two files to it: Layout.tsx and Layout.web.tsx.
1. Layout.tsx
import React from 'react';
import { View } from 'react-native';


function Layout(props: {children: React.ReactNode}) {
 return (
   <View>{props.children}</View>
 );
}


export default Layout;This is a normal layout that will render all of its nested components as they are.
2. Layout.web.tsx
import React from 'react';
import { View, StyleSheet } from 'react-native';


function Layout(props: {children: React.ReactNode}) {
 return (
   <View style={styles.container}>{props.children}</View>
 );
}


const styles = StyleSheet.create({
 container: {
   flex: 1,
   flexDirection: 'row'
 },
});


export default Layout;As you can see, we add some additional styles to the web version.
In the App.tsx file, wrap everything in this Layout component instead of View. Note that you should import it from the Layout.tsx file. The bundler will do the rest of the work for us.
...
import Layout from './src/components/Layout';


const App = () => {
 return (
   <NativeRouter>
     <Layout>
       ...
     </Layout>
   </NativeRouter>
 );
}Here’s the result: two different layouts for web and mobile platforms.
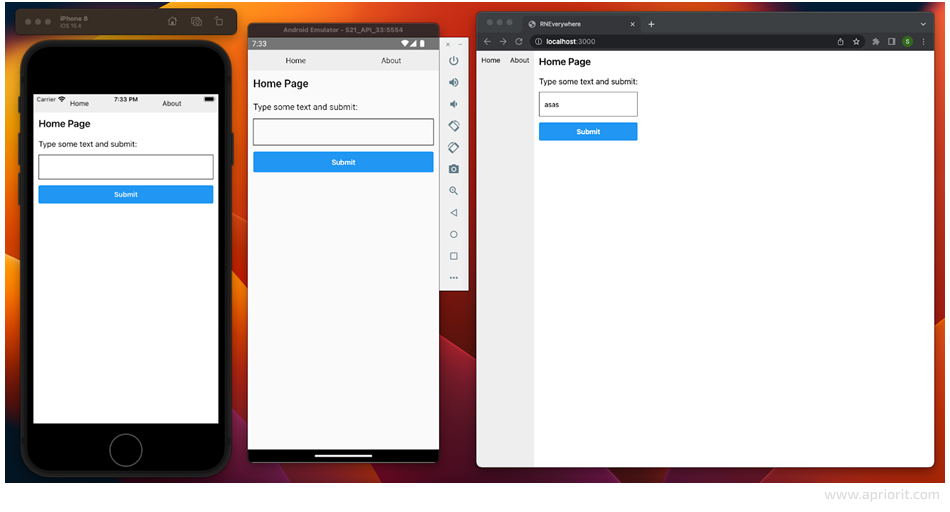
As you can see, the mobile UI has not changed, but the layout of the buttons is different in the web version. It does look better, but the buttons are still horizontally aligned.
For smaller platform-specific differences like this, React Native provides an API that determines which platform the application is running on. This is the second way to work with platform-specific code.
Import the Platform module from the react-native library and add some changes to it:
import { Platform } from 'react-native';


...


const styles = StyleSheet.create({
 nav: {
   flexDirection: (Platform.OS === 'web') ? 'column' : 'row',
   backgroundColor: '#eee',
 },
 navItem: {
   backgroundColor: '#eee',
   flex: (Platform.OS === 'web') ? undefined : 1,
   alignItems: 'center',
   padding: 10,
 },
  ...
});The buttons are now displayed in a column for the web.
Now that we have learned how to adapt a React Native application to web and mobile platforms, let’s talk about the browser extension you can create from the same codebase.
Creating a browser extension for your application
Sometimes, depending on the project you’re developing, you may need to create a browser extension. This applies if you’re working on a solution such as a/an:
- Cryptocurrency wallet
- Password manager
- Email service
- Grammar checker
- Translation tool
- Social media tool
- Ad blocker
Browser extensions can be more convenient and accessible compared to traditional web applications and provide your users with enhanced security features, some offline functionality, and more.
And now that we have a web version of our app, we only need to take a few more steps to turn it into a browser extension. Let’s explore how to do so for the Chrome and Firefox browsers.
Chrome extension
The manifest file is a key component of your extension that defines its permissions, content, and functionality. The manifest file is a JSON file that includes information such as the extension’s name, version, description, and icons. Let’s create the manifest.chrome.json file in the web folder:
{
 "name": "RNEverywhere",
 "description": "RNEverywhere Chrome Extension",
 "version": "1.0",
 "manifest_version": 3,
 "action": {
     "default_popup": "index.html"
 },
 "icons": {
     "16": "logo.png",
     "48": "logo.png",
     "128": "logo.png"
 }
}There’s a minimum set of fields that the manifest file can include in order for the extension to work properly. You can find more information about this in the Chrome documentation.
Here are the mandatory fields your extension should have:
- manifest_version specifies the version of the manifest format being used
- name is the name of the extension
- version is the version number of the extension
- description is a brief description of the extension
- icons is a set of icons that represent the extension
- browser_action or page_action specifies the behavior of the extension when the user clicks on the browser or page action icon
Note that if your extension is complex, you’ll need additional fields.
The icon object should specify different icon files with different resolutions. For the sake of simplicity, we specify the same file everywhere. Therefore, we need to add the logo.png file to the web folder. You can put any icon there.
We also need to specify the dimensions of our extension’s popup. Again, for the sake of simplicity, we specify them directly in index.html:
#root { display:flex; height:600px; width:350px }Now, we add the following line to the scripts section of package.json:
chrome:build": "webpack --mode=production --config ./web/webpack.config.js && cp web/manifest.chrome.json web/build/manifest.json && cp web/logo.png web/build/logo.pngWhen you run yarn chrome:build, the extension assets will be generated in the web/build folder. If you have a lot of icons and other files, you may want to use the Copy Webpack Plugin to automatically copy them to the build folder during the build process.
However, since we only have the logo and manifest file, we simply copy them using a script. Additionally, we rename the manifest file to manifest.json because this is the required name to work properly in the browser.
Finally, we put the chrome://extensions/ in your Chrome browser address bar and enable the developer mode slider in the top right corner. Select Load unpacked and select a build folder to load the extension in your browser:
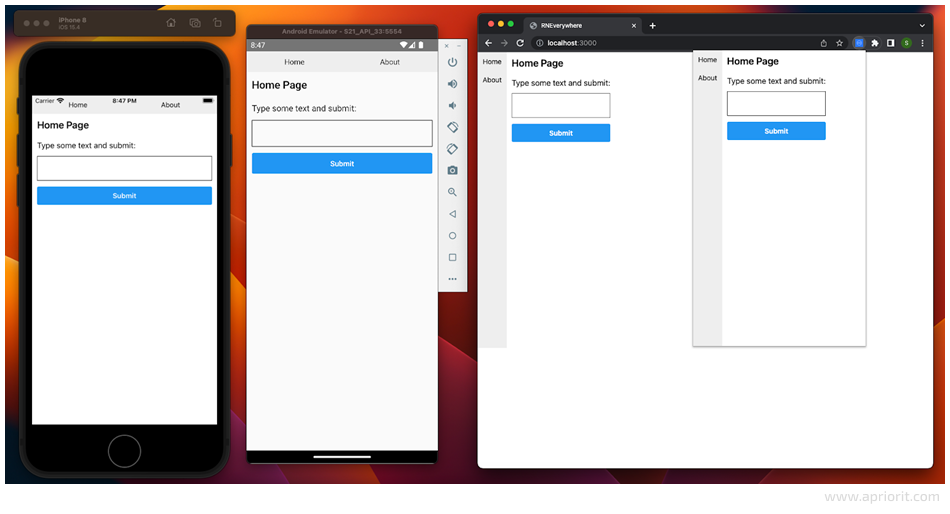
Firefox extension
Turning your React Native app into a browser extension works almost the same for Firefox as it does for Chrome. First, we create manifest.firefox.json in the web folder:
{
 "name": "RNEverywhere",
 "description": "RNEverywhere Firefox Extension",
 "version": "1.0",
 "manifest_version": 2,
 "browser_action": {
   "default_popup": "index.html"
 },
 "icons": {
   "16": "logo.png",
   "48": "logo.png",
   "128": "logo.png"
 }
}You can find more details about Firefox extensions in the official Firefox documentation.
Next, we add the following line to the scripts section of package.json:
firefox:build": "webpack --mode=production --config ./web/webpack.config.js && cp web/manifest.firefox.json web/build/manifest.json && cp web/logo.png web/build/logo.pngNow, we run the yarn firefox:build script to build the extension files.
Finally, put about:debugging#/runtime/this-firefox into the address bar of your Firefox browser, click Load Temporary Add-on… and select the manifest file in the build/web folder. It should look like this:
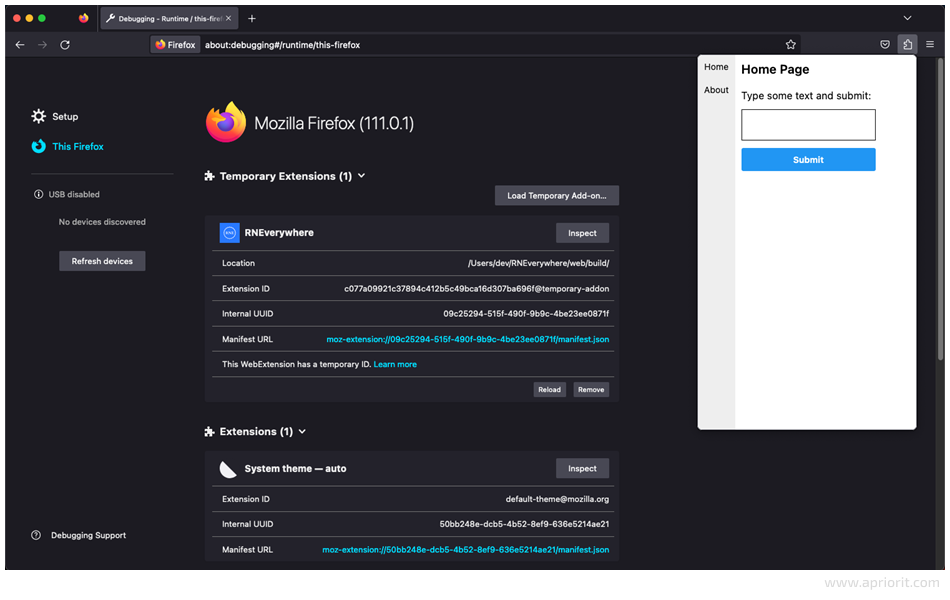
Now that we have covered both mobile and web platforms, let’s learn how to transform our React Native app into a Windows desktop application.
Related project
Cross-Platform Data Backup Solution Development: Windows, Android, macOS, iOS
Discover how Apriorit fortified our client’s data integrity with our cross-platform backup solution, ensuring seamless data protection across all devices.
Building a Windows desktop application
The React Native cross-platform tool set allows us to turn our app into a Windows desktop app. All we need is a tool called React Native Windows. It is an open-source framework developed and maintained by Microsoft that allows developers to build Windows 10+ applications using the React Native library.
This React Native extension provides components and APIs specifically for the Windows platform, including support for Windows-specific features. React Native for Windows also allows for building desktop applications using the Universal Windows Platform (UWP) and Win32 APIs.
To get started, we need to:
- Get our code on a Windows machine
- Set up the necessary environment on this machine to work with React Native according to the documentation
- Run yarn in the root of the project to install all dependencies
- Install a development environment to work with React Native Windows
Microsoft has done a great job, as we can install all missing dependencies automatically by running a single script. Start an elevated PowerShell window and run:
Set-ExecutionPolicy Unrestricted -Scope Process -Force;
iex (New-Object System.Net.WebClient).DownloadString('https://aka.ms/rnw-vs2022-deps.ps1');This will guide you through all the missing components and ask your permission to install them.
Now, to add React Native Windows to our project, run the following command in the root folder:
npx react-native-windows-init --overwriteAll the preparation work is done, and we can launch our project. Run:
yarn windowsAfter waiting a while for everything to build, this is what you’ll see:
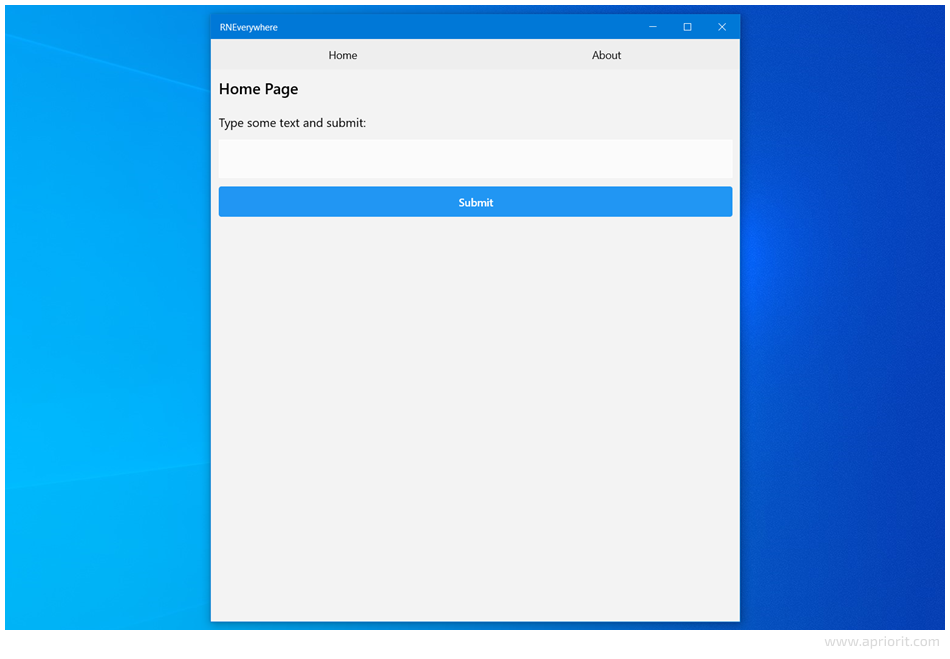
Windows has automatically applied some platform-specific styles. We can override this in the “Styles” object, of course, if needed.
But if we play with the application a little bit, type some string into the input field, and click Submit, we get an error message like this:
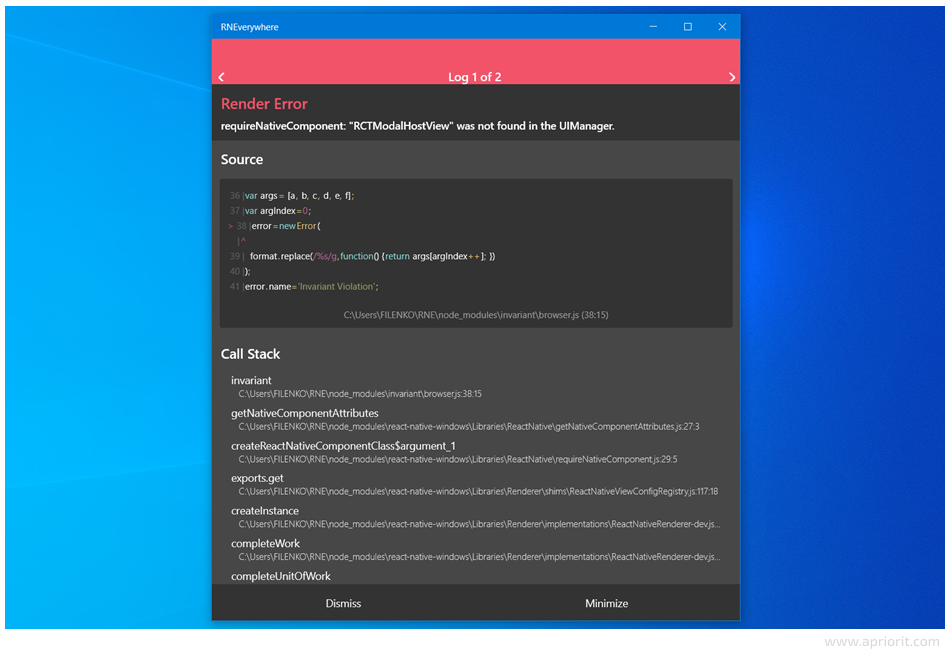
We expected to see Modal, but something went wrong. If we search information about this bug on the internet, we find out that Modal is not implemented in React Native for Windows. This issue has been discussed in the repository in various issues for four years now, but it still hasn’t been resolved.
We need to find some workaround. One option is to use the Popup component that React Native Windows provides.
To do this, we use the technique discussed above. Let’s create two files in the src/components folder: Modal.tsx and Modal.windows.tsx.
1. Modal.tsx
import React from 'react';
import { Modal as RNModal, ModalProps } from 'react-native';


function Modal(props: ModalProps) {
 const { children, ...rest } = props;
 return (
   <RNModal {...rest}>{children}</RNModal>
 );
}


export default Modal;In this file, we employ the Modal component from the React Native library and pass all the properties (props) it received from the parent component to the Modal component. Additionally, we include all nested components inside the Modal component so they can be displayed along with the Modal content.
2. Modal.windows.tsx:
import React from 'react';
import { ModalProps } from 'react-native';
import { Popup } from 'react-native-windows';


function Modal(props: ModalProps) {
 const { children, visible, ...rest } = props;
 return (
   <Popup isOpen={visible}>{children}</Popup>
 );
}


export default Modal;In this file, we use the Popup component from react-native-windows, pass all nested components inside, and match the properties.
The Popup component uses the isOpen property for the visibility state, while the Modal component uses the visible property. So we will pass the visible property to isOpen in the Modal component. The rest of the properties should also be treated like this if necessary.
On the Home page, instead of importing Modal from the React Native library, we will use the component imported from our component folder:
import Modal from '../components/Modal';Now everything works properly.
It is not an unusual case in cross-platform development that a component or API is not supported on one of the platforms. It can take quite a long time before the developers of the corresponding packages make the necessary changes or implement a solution.
So with cross-platform development, you need to be ready to look for workarounds and challenging solutions, sometimes make compromises, study the limitations that packages impose, and think ahead about whether product requirements can be met with cross-platform technology.
For example, an application built with React Native Windows works on Windows versions 10 and higher, but some features may not work on all versions. You can find out more details on this in the React Native for Windows documentation.
Tools for adapting your React Native app to macOS and Linux
You may have noticed in the React Native for Windows documentation that the prototype is called React Native for Windows + macOS. Indeed, Microsoft has gone further and implemented the ability to turn your app into a macOS desktop application as well.
Unfortunately, React Native for macOS works with React Native version 0.64 at the time of writing, while we started the project with React Native 0.71.6. It is possible to set up a repository for cross-platform development with different versions of React Native for different platforms to allow for sharing common code across platforms. This approach is called a monolithic repository, or monorepo.
The monorepo setup is more complicated, though, so we won’t cover macOS in this article, as we’ve looked for the easiest setup for cross-platform app development. If you’d like to port your application to the macOS platform, you can always use the instructions provided in the Microsoft documentation.
It’s also possible to create a desktop app for Linux out of the web version of your React Native app. To do this, we can use the Electron framework to port our app to Linux/Windows/Mac.
Electron is a popular framework for building cross-platform desktop applications using web technologies such as HTML, CSS, and JavaScript.
Another option is using Valence Native. It’s a React Native wrapper that uses a cross-platform application framework called Qt to render the user interface and provide platform-specific functionality for Linux, macOS, and Windows.
There is also a community-driven project called React Native TVOS for development of React Native applications for Apple TV and Android TV devices. It provides a set of tools and components for developing React Native applications specifically for TV platforms, including tools for focus management, a TV remote event system, and a TV menu system to help developers build TV applications more easily.
React Native is evolving rapidly, and its growing community is constantly creating new solutions that expand the possibilities. Our recommendation is to check the React Native documentation regularly for updates.
Conclusion
Cross-platform technologies like React Native provide businesses with a cost-effective way to expand their product to a wide user base with minimal effort. By using cross-platform technologies, you can decrease your development time, budget, and team size.
In this article, you’ve learned how to build cross-platform apps with React Native and adapt them to multiple platforms from a single codebase. We also showed you how to adapt your app for different platforms so the UI is both consistent and natural for each platform.
At Apriorit, we can help you bring your product to all platforms. Our mobile development team will gladly assist you in creating a cost-efficient and scalable mobile solution that will run on Android and iOS. Our web development team will then expand your project to the web and transform it into a desktop app or browser extensions.
Contact us so we can help you choose the optimal cross-platform approach to building your solution!
Looking for a dedicated mobile development team?
Leverage our extensive experience in niche mobile development to provide top-notch service and robust data security to your customers.


