 Skip to main content

Kubernetes is a useful and comfortable framework for container orchestration. Its flexibility allows developers to implement any logic they need. But creating a Kubernetes network requires constant monitoring of any unwanted changes.
A deep understanding of the internal structure of Kubernetes is important for customizing and extending the functionality of an API cluster. The best way to customize your Kubernetes network is by creating custom resources.
In our previous articles, we’ve covered the key elements of Kubernetes and explained how to protect sensitive cluster data with honeypots.
In this article, we explain what role resources play in the framework, why it’s worth creating a CustomResourceDefinition, and how to use a CRD for Kubernetes monitoring.
This article will be useful for developers who are looking for a way to optimize Kubernetes operations.
Contents:
Why are resources important?
A resource is an endpoint in the Kubernetes API that contains API objects of any kind. It’s the smallest part of Kubernetes and binds together the ecosystem. Endpoints are behind every event in the Kubernetes network. Most resources are created by the framework without any user involvement.
Kubernetes resources can be compared with files in UNIX-based systems. Kubernetes operations are based on resources the same way UNIX operations are based on files.
A user interacts with clusters through resources. Any interaction requires creating, updating, or deleting a resource. These processes are hidden from the user because each resource describes a certain entity (Service, Deployment, etc.). If a user creates a Service instance, for example, relevant to it resource is created automatically.
Resource properties are described in a YAML file. It contains the following parameters:
- Kind (describes how the cluster will work with the resource)
- Name
- Namespace
- Spec (contains a basic dataset for dealing with a resource)
- Dependent resources
- And more
Based on the Kind, Kubernetes validates a resource when it’s created. A resource won’t be created if there’s a mistake in one of these parameters.
Read also:
Investigating Kubernetes from Inside
For example, when we create a Kubernetes Deployment controller, we also create a resource with the Deployment, which creates a resource with the parameter ReplicaSet. In turn, ReplicaSet creates a Pod resource. So the user creates only one entity – a Deployment controller, which is required to launch the application. Then Kubernetes creates several resources it needs to maintain its work without any involvement of the user.
A custom resource is an extension of the Kubernetes API that defines custom objects. Custom resources make the Kubernetes framework flexible, allowing users to add their own logic to Kubernetes operations. There are two ways of creating a custom resource:
- By defining a CustomResourceDefinition (CRD) controller. This is a fast way to extend the Kubernetes API. You can write a CRD controller in any language, as the code doesn’t require running an additional service. A CRD upgrades alongside the API.
- Aggregating the API. This method requires more time and Kubernetes knowledge to implement. API can be written only in Go and requires additional services and integrations with various API versions.
In this article, we extend Kubernetes APIs with a CustomResourceDefinition, as this method is faster and easier.
CRD for extending the Kubernetes resource base
In order to build a custom resource type, we need to create a YAML file with type and scope definitions. This file is also a resource – a CRD.
Custom resources don’t perform any actions. They only structure data inside a cluster. If we need custom resources to be active (similar to ReplicaSet), we have to use a CRD controller.
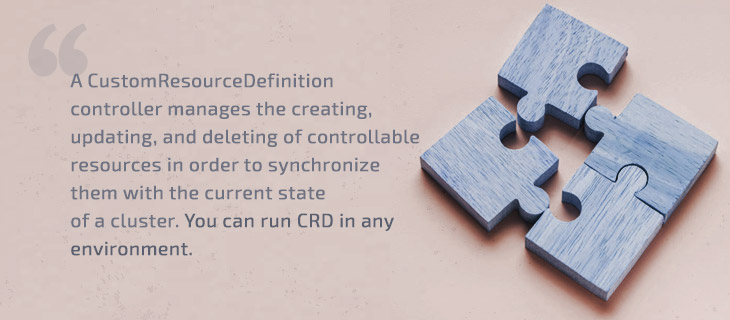
A CRD controller in Kubernetes manages the creating, updating, and deleting of controllable resources in order to synchronize them with the current state of a cluster. You can run a CRD in any environment. But if a cluster loses its connection with a controller, it might work incorrectly. So it’s best to launch a controller inside the cluster it interacts with.
There’s no need to register a CRD controller in a cluster in order to make it aware that a new resource has been created. The controller works in polling mode and learns about resource changes post factum by checking the cluster repeatedly. If you need a CRD controller to monitor resources when they’re created (in callback mode), use admission webhooks. This feature allows for creating and validating resources before they’re created in a cluster.
A CRD controller interacts with a cluster through the Kubernetes API (the same way that kubectl does). The API is in charge of the stable performance of the CRD as well as data transitions.
We start by creating a Deployment resource that deploys a controller inside a cluster. Now we need to grant this controller superuser rights to allow the Deployment resource to look for YAML files inside the cluster and interact with its scope.
Let’s find out how to create cluster resources with kubeclient.
Resource monitoring with CRD
Usually, developers create several resources with a single YAML file. This way, the kubectl create -f myresources.yaml command creates all of the listed resources. It speeds up the network building process, but you can end up with a non-operational environment if your resources depend on each other and some of them aren’t created. In this case, you need to delete all of the new resources and start over.
There are two ways to automate this process:
- Define an ownerReference. This is designed to delete objects without an owner. This method isn’t effective when a parent resource is valid but an accountable resource isn’t created, however. In this case, you can only manually delete the parent resource.
- Create a custom resource to own all the resources described in the YAML file. If one of these resources fails to be created, the owner deletes all the resources. An owner is described with CRD as a new resource type. Deletion logic is described in the resource controller.
Before creating a custom resource, make sure you comply with the following prerequisites:
- You have a running Kubernetes cluster. If you need to create one, follow the instructions on installing kubectl and setting up a cluster with kubeadm.
- You’ve installed the Go language and have set the $GOPATH environment variable. You also need an integrated development environment (IDE). In our project, we use Visual Studio Code.
- You’re using the dep utility to extend dependencies written in the Gopkg.toml file. You can find this utility in the Go repository.
Creating a CRD for an Owner resource
Let’s create a CustomResourceDefinition to describe the Owner kind. This CRD is meant to monitor resource creation and delete resources if some parts are built incorrectly. We need to create a YAML file containing this code:
apiVersion: apiextensions.k8s.io/v1beta1
kind: CustomResourceDefinition
metadata:
  name: owners.myproject.com
spec:
  group: myproject.com
  versions:
  - name: v1alpha1
    served: true
    storage: true
  scope: Cluster
  names:
  kind: Owner
  plural: owners
  singular: owner
  subresources:
status: {}The CDR describes only the resource type. Kind and scope are two of the most important parameters in this file. For this project, we chose the scope Cluster. In this way, the resource may be generated in various scopes, but it doesn’t affect its operations. This definition creates the appropriate semantic meaning for the resource.
Let’s create a project for our controller in this directory:
$GOPATH/github.com/kacejot/ownership-controller
The directory looks like this because we created the repository first, then executed the go get command.
Now, let’s create the controller. We need to use the client-go library. It contains all the entities needed for this operation. Our controller has three dependencies. Let’s place them in Cargo.toml:
k8s.io/client-go – Go entities needed for interactions with the cluster
k8s.io/apimachinery – Needed for accessing the cluster directly with the API
k8s.io/code-generator – Generates code for resource types based on CDR
Finally, let’s download these dependencies using the dep utility. This is done by running dep ensure, which is stored in the root repository.
Generating code for a resource
So far, we’ve created a project and set dependencies. Our next step is generating code for the Owner resource in Go. We can use this tutorial to organize the data structure before generating code.
Code generation tools are embedded in Kubernetes, so we don’t need to develop types before creating a resource. Let’s generate the types.go file:
package v1alpha1

import (
          meta "k8s.io/apimachinery/pkg/apis/meta/v1"
)

// +genclient
// +k8s:deepcopy-gen:interfaces=k8s.io/apimachinery/pkg/runtime.Object
type Owner struct {
          meta.TypeMeta   `json:",inline"`
          meta.ObjectMeta `json:"metadata,omitempty"`
          Spec          OwnerSpec   `json:"spec"`
          Status        OwnerStatus `json:"status"`
}

type OwnerSpec struct {
          OwnedResources []OwnedResource `json:"ownedResources"`
}

type OwnedResource struct {
          Resource  string `json:"resource"`
          Name    string `json:"name"`
          Namespace string `json:"namespace"`
}

type OwnerStatus struct {
          Log []string `json:"log"`
}

// +k8s:deepcopy-gen:interfaces=k8s.io/apimachinery/pkg/runtime.Object

type OwnerList struct {
          meta.TypeMeta `json:",inline"`
          meta.ListMeta `json:"metadata"`
          Items       []Owner `json:"items"`
}We’ve created OwnedResources, which manages other resources, and an OwnedResource type that describes other resources using the Name, Namespace, and Resource parameters.
Now we need to generate auxiliary code for this resource. It’s best to do this with a Kubernetes code generator. For example, we can generate auxiliary code such as a DeepCopy function or polling logic. To generate this code, you can use the tutorial we mentioned earlier.
Creating a controller
Our project consists of two files: main.go and controller.go. The first runs the controller, the second contains the project logic. Let’s create the controller.go structure using client-go and the previously generated code:
type OwnershipController struct {
  informerFactory informers.SharedInformerFactory
  kubeclient    *kubernetes.Clientset
}Let’s take a look at this code.
informerFactory is an example of generated code. It monitors the following processes with Owner resources:
- Creating
- Deleting
- Updating
kubeclient is a type from the client-go library. It’s responsible for communicating with a cluster and requires a configuration file to address a cluster correctly. We can acquire a configuration and create a controller object like this:
informer := informerFactory.Myproject().V1alpha1().Owners()
  informer.Informer().AddEventHandler(cache.ResourceEventHandlerFuncs{
  AddFunc: controller.onCreate,
  UpdateFunc: controller.onUpdate,
  DeleteFunc: controller.onDelete,
})In this piece of code, rest is a client-go module containing a configuration description, interaction methods, etc.
client is an example of the generated type module that communicates with a cluster inside an accountable resource. It’s required for creating informerFactory.
Now we need to register controller functions:
informer := informerFactory.Myproject().V1alpha1().Owners()
  informer.Informer().AddEventHandler(cache.ResourceEventHandlerFuncs{
  AddFunc: controller.onCreate,
  UpdateFunc: controller.onUpdate,
  DeleteFunc: controller.onDelete,
})We got the informer from informerFactory and created several callbacks for it. You can check the callback signature in the cache.ResourceEventHandlerFuncs structure. Cache is a сlient-go module responsible for storing resources received from the cluster on the controller.
Now we need to describe callbacks. Let’s describe a callback for resource creation. The Owner resource has to be created last; therefore, it will be listed at the end of the YAML file.
The description looks like this:
func (rc *OwnershipController) onCreate(resource interface{}) {
          owner, ok := resource.(*v1alpha1.Owner)
          if rc.checkOwnedResources(owner) == nil {
                      log.Printf("Owner and its resources successfully created)
                      return
          }

          rc.deleteOwnedResources(owner)
}First, we add the interface{} resource to v1alpha1.Owner, which we created before. Then, checkOwnedResources reads the list of resources accountable to it and checks that they’ve been created correctly. If something went wrong, deleteOwnedResources will delete all created resources.
You can find our example of a checkOwnedResources and deleteOwnedResources implementation in this repository.
Conclusion
Kubernetes provides developers with a vast number of tools and extensions for creating, deploying, and managing containerized projects. You can build a network using embedded Kubernetes instruments, modify default elements, and create your own resources.
Custom resources structure data inside the cluster, while controllers coordinate their behavior. In this article, we described how to implement a custom resource working as a monitoring tool with a Kubernetes CRD.
Need to build a challenging Kubernetes project? Contact us to start the discussion with our experienced web development team!
Have a question?
Ask our expert!
VP of Engineering


