 Skip to main content

The global car sharing market is expected to grow because of government anti-pollution initiatives, increased taxi fares, and the reduced need for personal vehicles due to remote work. However, car sharing may encounter trust issues between customers and car owners along with some security concerns.
One way to introduce more transparency to a car sharing service and make payments secure and convenient is to implement a blockchain.
In this article, we’ll explore a blockchain use case in automotive industry, explain how to develop a smart contract for car sharing services, and show how customers can interact with this contract using a simple decentralized application. This article will be helpful for anyone interested in securing car sharing services with a blockchain.
Contents:
How can a blockchain improve car sharing?
Car sharing lets people rent cars for a short period of time. Usually, available cars are spread around a city in reserved parking spots, making it easy for users to find them and even walk to them.
The way to unlock a car depends on the car sharing service. In some cases, a customer is provided with a key to a lock box that contains the car key. Other companies allow their customers to unlock cars (and sometimes even start them) using a mobile app.
Many car sharing networks price their services as a small initial fee plus a fee for the distance driven. Usually, the base rental fee includes insurance, gas, and car maintenance.
One of the biggest issues with car sharing services is a lack of trust. Since car rentals happen without any face-to-face interaction, there’s always a risk of fraud. A customer may find a way to not pay for the rental or a car owner may charge more than initially agreed. To eliminate this risk, you can implement a blockchain in your car sharing services.
Blockchain technology offers a fast and secure way to create a binding financial agreement in the form of a smart contract. Like traditional contracts, smart contracts specify obligations of both parties, only unlike traditional contracts, they programmatically enforce them.
When applied to blockchain based car-sharing platform, smart contracts can automate activities such as registering a new rental and calculating payment based on actual use.
With a blockchain, it’s also possible to implement a balance locking functionality that works similarly to a credit card authorization hold used by traditional car rental services. This way, car owners can be sure they will receive additional payment in case a rental period is prolonged, and customers can be sure their money will be unlocked if the car is returned on time.
Additionally, a blockchain ensures that car rental histories are immutable, so in case of an incident, a car sharing company can check who was driving the car at the time. For the model of peer-to-peer carpooling using blockchain, smart contracts guarantee car owners that use of their vehicles is transparent and that revenue is fairly paid.
To learn more about using advanced technologies, check out our article on applying artificial intelligence in the automotive industry.
In this article, we’ll show you how to use the Cosmos blockchain network to create a simple solution for carpooling using blockchain. When applied to car sharing, the Cosmos network allows organizations to process information from a vast number of users and cars at the same time without delays. Let’s take a closer look at the Cosmos ecosystem.
Empower your business with the transformative potential of blockchain!
Discover how Apriorit can help you make your platform secure and transparent.
A brief overview of the Cosmos network
Cosmos is an ever-expanding network of decentralized and interconnected blockchains. Its ecosystem consists of multiple blockchains, each powered by a Byzantine fault tolerance (BFT) consensus algorithm.
The Cosmos network is also called the internet of blockchains, since it includes numerous apps and services that exchange digital assets and data using the Inter-Blockchain Communication (IBC) protocol.
Cosmos is a popular network for developing decentralized applications (dApps). In this network, dApps are deployed as blockchains, which allows developers to use all the computing power of the blockchain.
Development tools such as modular frameworks provide a vast pool of technologies ready to be used in building specific applications. For example, the CosmWasm module allows developers to compile smart contracts written in high-level languages like Rust into the WebAssembly (Wasm) instruction format and execute these smart contracts on a Wasm virtual machine.
With that in mind, let’s proceed to development and see Cosmos in action.
Building a blockchain-based car sharing platform: plan of work
In this article, we want to show how a blockchain can help implement one of the key car sharing processes — charging flexible amounts depending on the rental period.
Our example application will consist of two main parts:
- A smart contract
- A CosmJs dApp to allow parties to interact with the smart contract
One of the key elements of any car sharing service is Know Your Customer (KYC) support. Let’s explore this in detail.
What is KYC and how to implement it?
KYC is a procedure in the financial services industry that aims to verify the identity of clients to prevent financial crimes, money laundering, and other business risks.
In real-life applications, KYC services include numerous checks to verify that a user is a real person, isn’t wanted by authorities, doesn’t have unpaid debts, etc. KYC may include verification based on an ID card, facial recognition, biometrics, billing documents, and more. If clients don’t meet minimum KYC requirements, businesses can refuse to work with them.
Since ensuring all these requirements is time-consuming and challenging, for our application, we’ll replace KYC with a component that simply changes the verification state of a user but doesn’t perform actual verification. So here we will only describe a possible KYC implementation.
The main roles in our service are:
- Car sharing service — A service that requires a customer’s KYC verification
- KYC — A service that collects data from a customer, validates it, and may provide it to other parties (like the Verifier)
- Customer — A party that uses car sharing services after passing KYC verification
- Verifier — A subsystem of car sharing services that performs KYC verification for customers
KYC verification can be performed in six stages:
- Customer provides personal data to the KYC service
- KYC service validates the given data
- Customer allows a verifier to access their personal data provided to the KYC service
- Customer registers in the car sharing service
- Verifier verifies the customer’s identity through the KYC service
- Verifier allows the customer to use the service
Now that we’ve defined the KYC concept, let’s move to developing a smart contract.
Read also
Exploring the Internet of Blockchain: Cosmos Network
Discover how the Cosmos network, dubbed Blockchain 3.0, stands out amidst the blockchain landscape with its innovative “internet of blockchains” concept, and how you can use it to create a custom platform.

Developing a smart contract for car sharing services
The main purpose of our smart contract is to automate the payment process: a customer pays for the time they use a car and the car’s owner receives payment.
To create our car sharing using blockchain smart contract, we’ll use:
- The Rust programming language
- The CosmWasm framework
- A Rust compiler
- wasmd (implementation of a Cosmos node with Wasm smart contracts enabled)
You can find installation guidelines in the ComWasm official documentation and the full code of our example on Apriorit’s GitHub page.
First, let’s show how different parties can interact with the smart contract:
Next, let’s move to creating a smart contract.
Smart contract code structure
There are three main files that constitute our smart contract:
- state.rs — contains the declaration of data structures used by the smart contract and functions that the smart contract uses to access storage to read or write this smart contract data
- msg.rs — contains the declaration of messages that the smart contract receives and the responses it sends
- contract.rs — contains the smart contract’s internal logic
Next, we need to work with the four main structures of our smart contract:
- Config
- Car
- Client
- Rent
To initialize the smart contract, we need to specify the following parameters that are declared in the Config structure:
#[derive(Serialize, Deserialize, Clone, Debug, PartialEq, JsonSchema)]
pub struct Config {
pub denom: String,
pub kyc_verificator: CanonicalAddr,
pub manager: CanonicalAddr,
pub rent_count: u64,
}These parameters are:
- denom — the name of the token used for payment. In our example, we don’t use a specific token type. You can specify any token type that is available in the network where you deploy the smart contract.
- kyc_verificator — the address of a party that confirms the client’s identity (verifier)
- manager — address of the party that adds new cars
- rent_count — counter of active rentals
The data we specify for the parameters mentioned above is saved in storage by the config key as a singleton.
The code below ensures access to the storage:
static CONFIG_KEY: &[u8] = b"config";
pub fn config(storage: &mut dyn Storage) -> Singleton<config> {
  singleton(storage, CONFIG_KEY)
}
pub fn config_read(storage: &dyn Storage) -> ReadonlySingleton<config> {
  singleton_read(storage, CONFIG_KEY)
}Let’s create other structures in a similar way.
Parameters of the Car structure include:
- id — address that is bound to the car; messages from the car to other parties will be sent from this address
- name — client’s name
- rent_price — rental price for a unit of time (in our case, an hour)
- deposit_price — amount that will be locked to rent the car
- balance — amount earned by the car owner from the rental
For the Client structure, we need to specify the following parameters:
- id — client’s address
- name — client’s name
- verified — an indicator that tells whether the client has passed KYC verification
- balance — client’s balance
- locked_balance — client’s locked balance
Finally, the Rent structure includes the following parameters:
- client_id — address of the customer that initiated the rental
- car_id — address of the rented car
- balance — deposit sum plus rental cost
- usage — planned start and end of the rental period
- actual_start — actual timestamp when the rental started
With all the main files and structures defined, let’s move to the processes that happen inside the smart contract.
Read also
Blockchain Attack Vectors: Main Vulnerabilities of Blockchain Technology
Explore more about blockchain vulnerabilities and strategies for safeguarding your network against cyber threats. We share valuable insights for ensuring the integrity and resilience of your blockchain-based applications.

Smart contracts using blockchain to rent a car
Once the smart contract is initialized, a manager needs to register cars in the contract. This is done by sending a RegisterCar message with a car’s address, name, rental price, and deposit price as parameters.
While processing a RegisterCar message, we first need to verify that the sender of this message is a manager using the following code:
let sender_address_raw = deps.api.canonical_address(&info.sender)?;
let config_state = config(deps.storage).load()?;
if sender_address_raw != config_state.manager {
  return Err(ContractError::Unauthorized {});
}If someone else is trying to add a new car, they will see an “Unauthorized” error.
When the identity of the sender is confirmed, we need to check that this is the first time this car is being added. To do so, we need to look in the car data storage:
let car_address_raw = deps.api.canonical_address(&id)?;
let key = car_address_raw.as_slice();
let stored_car = cars_read(deps.storage).may_load(key)?;
if stored_car.is_some() {
  return Err(ContractError::CarExist {});
}Finally, the smart contract will create a new car record, save it to storage, and send a reply that everything is okay:
let car = Car {
  id: deps.api.canonical_address(&id)?,
  name: name,
  rent_price: rent_price,
  deposit_price: deposit_price,
  balance: 0
};
cars(deps.storage).save(key, &car)?;
Ok(HandleResponse::default()) As a result, a car will appear in the application and will become available for customers to rent.
Once there are some cars available, customers can register in the system. This is accomplished using a RegisterClient message that contains a customer’s name and deposit funds.
When processing the RegisterClient message, we start by confirming that the customer doesn’t already exist:
let sender_address_raw = deps.api.canonical_address(&info.sender)?;
let key = &sender_address_raw.as_slice();
let stored_client = clients_read(deps.storage).may_load(key)?;
if stored_client.is_some() {
  return Err(ContractError::ClientExist {});
}Our next step is to confirm that deposit funds are attached to the message.
let config_state = config(deps.storage).load()?;
let sent_funds = info
    .sent_funds
    .iter()
    .find(|coin| coin.denom.eq(&config_state.denom))
.unwrap();If the previous steps were successful, we can add a new customer to the storage:
let client = Client {
  id: deps.api.canonical_address(&info.sender)?,
  name: name,
  verified: false,
  balance: sent_funds.amount.u128(),
  locked_balance: 0
};
clients(deps.storage).save(key, &client)?;
Ok(HandleResponse::default())Newly registered customers will be able to initiate rentals after verification. They can be granted such permission only by kyc_verificator. When off-chain verification is done, kyc_verificator sends the VerifyClient message, specifying the address of the customer in the message parameters.
Verified customers can now initiate new rentals. This is accomplished within the system by sending a RentCar message with a car’s address along with expected rental start and end dates. A car’s address works as the car’s identifier. Start and end dates are required to calculate the number of tokens that must be locked.
When handling the RentCar message, we start with validating the provided parameters. First, the smart contract checks if the requested car exists:
let car_address_raw = deps.api.canonical_address(&car_id)?;
let car = match cars_read(deps.storage).may_load(&car_address_raw.as_slice())? {
  Some(car) => Some(car),
  None => return Err(ContractError::CarNotExist {})
}
.unwrap();Then, the smart contract checks whether the customer exists and is verified:
let sender_address_raw = deps.api.canonical_address(&info.sender)?;
let client_key = &sender_address_raw.as_slice();
let mut client = match clients_read(deps.storage).may_load(client_key)? {
  Some(client) => Some(client),
  None => return Err(ContractError::ClientNotExist {})
}
.unwrap();
if !client.verified {
  return Err(ContractError::ClientNotVerified {});
}Next, the smart contract makes sure that the customer has enough tokens for the rental:
let rent_cost = car.deposit_price + car.rent_price * u128::from((end - start) / RENT_PERIOD);
if client.balance < rent_cost {
  return Err(ContractError::InsufficientFunds {});
}If the customer’s request meets all the requirements, the contract updates the customer’s balance and creates a new rental record:
client.balance -= rent_cost;
client.locked_balance += rent_cost;
let rent = Rent {
    client_id: deps.api.canonical_address(&info.sender)?,
    car_id: car_address_raw,
    balance: rent_cost,
    usage: TimePeriod{start, end},
    actual_start: 0
};If the RentCar message was handled successfully, the smart contract will send the identification of the created rental to the customer:
let r = HandleResponse {
    messages: vec![],
    attributes: vec![
        attr("action", "rent_car"),
        attr("rent_id", &rent_id),
    ],
    data: Some(to_binary(&RentCarResponse { rent_id })?),
};
Ok(r)When the customer starts using the car, the car sends the StartRent message to the smart contract. This message contains the rental ID and the current timestamp, which will be added to the rental record.
When the client stops using the vehicle, the car will send the EndRent message to the smart contract, specifying the rental ID and current timestamp in parameters.
When handling the EndRent message, the smart contract validates whether the specified car is registered and a rental is logged in the system:
let rent_key = &rent_id.to_be_bytes();
let mut rent = match rents_read(deps.storage).may_load(rent_key)? {
    Some(rent) => Some(rent),
    None => return Err(ContractError::RentNotExist {}),
}
.unwrap();
if rent.balance == 0 {
    return Err(ContractError::RentClosed {});
}
let car_key = &rent.car_id.as_slice();
let mut car = match cars_read(deps.storage).may_load(car_key)? {
    Some(car) => Some(car),
    None => return Err(ContractError::CarNotExist {}),
}
.unwrap();Each car in our application is represenred with a wallet address. If information provided in the EndRent message is valid, the car wallet will receive payment for the rental period. If the rental ended later than planned, the application will charge additional payment from the deposit balance.
Here’s how it works:
let payment = u128::from((date - rent.actual_start) / RENT_PERIOD) * car.rent_price;
car.balance += payment;If the actual car rental lasted less time than expected, the remainder will be returned to the client’s balance:
let client_key = &rent.client_id.as_slice();
clients(deps.storage).update(client_key, |record| {
  if let Some(mut record) = record {
    record.locked_balance -= rent.balance;
    record.balance += rent.balance - payment;
    Ok(record)
  } else {
    return Err(ContractError::ClientNotExist {});
  }
})?;Once a smart contract is deployed, it exists in the blockchain. The parties to the car sharing service can interact with it using the messages mentioned above.
Related project
Evaluating Smart Contract Security for Decentralized Finance (DeFi)
Discover the details of an effective security audit on a decentralized finance project. With our help, our client boosted the security of their smart contract and delivered a reliable product to their users.
Uploading the smart contract to the blockchain and initializing it
Once the smart contract is written, we need to upload it to the blockchain and initialize it. To build the contract, we use the Rust optimizer:
docker run --rm -v "$(pwd)":/code
  --mount type=volume,source="$(basename "$(pwd)")_cache",target=/code/target
  --mount type=volume,source=registry_cache,target=/usr/local/cargo/registry
cosmwasm/rust-optimizer:0.10.7As a result of running the code mentioned above, a *.wasm file will be generated. We need to create a blockchain account (manager account) so we can upload the *.wasm file to the Cosmos blockchain. To create an account, we have to add a new key and provide it with a name.
wasmd keys add validator
wasmd keys add managerNext, we upload the smart contract to the localnet (our test network inside the Cosmos blockchain) from the manager account:
wasmd tx wasm store cw_carsharing.wasm --from manager --gas-prices="0.035ucosm" --gas="auto" --gas-adjustment="1.2" -y --chain-id=localnetThe uploaded contract needs to be initialized so it can be used in the system. In the initialization parameters, we provide the name of the currency used (ucosm) and the manager and kyc_verificator addresses that we generated earlier:
INIT=$(jq -n --arg manager $(wasmd keys show -a manager) --arg validator $(wasmd keys show -a validator) '{"denom":"ucosm","manager":$manager,"kyc_verificator":$validator}')

wasmd tx wasm instantiate $CODE_ID "$INIT"  --from manager --amount=50000ucosm  --label "carsharing"  --gas-prices="0.035ucosm"
--gas="auto" --gas-adjustment="1.2" -y --chain-id=localnetAs a result, the smart contract is deployed and ready for use.
Developing a CosmJS web dApp
To show interactions between the smart contract and its different parties, we’ll use a simple CosmJS web dApp as an interface. It will emulate actions that the client, car, manager, and validator perform in real-life applications.
In this section, we’ll show three scenarios:
- Adding a new car to the system
- Registering a customer
- Renting a car
You can find the full code of our CosmJS web dApp example on our GitHub page.
CosmJS basics
To build our dApp example, we’ll use the Logic (@cosmicdapp/logic) and Design (@cosmicdapp/design) packages that have logic components to interact with the Cosmos blockchain and some UI components to simplify the creation of web pages.
The Logic package has the AppConfig class that needs to be configured to establish a connection between the blockchain and our dApp. We have to provide chain id, rpc url, and token names of the target network.
For the local chain, the parameters may look like this:
const local: AppConfig = {
  chainId: "localnet",
  chainName: "test",
  addressPrefix: "wasm",
  rpcUrl: "http://localhost:26657",
  httpUrl: "http://localhost:1317",
  faucetUrl: "",
  feeToken: "ucosm",
  stakingToken: "stake",
  coinMap: {
    ucosm: { denom: "COSM", fractionalDigits: 6 },
    stake: { denom: "ATOM", fractionalDigits: 6 },
  },
  gasPrice: 0.025,
};In our simple dApp, all actions are listed on the main page, but some of them are available only for specific accounts: such restrictions are listed in brackets.
Adding a new car
The car registration screen consists of four fields with parameters required by the RegisterCar contract message.
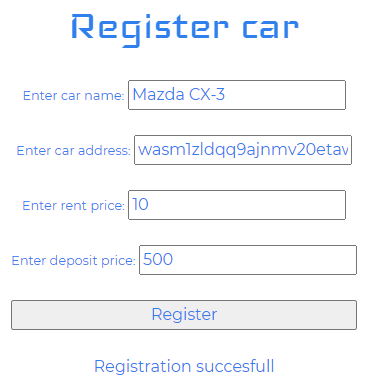
Figure 6. dApp page for registering a car
Once a manager clicks Register, our dApp will send a message with the following command to the smart contract:
getClient().execute(contractAddress, { RegisterCar: { carAddress, name, rent, deposit } }, "Registering car");The getClient() function is part of the Logic package. This function returns the SigningCosmWasmClient object, which is capable of sending messages to the Cosmos blockchain. Then, we use the execute method to send a message and its parameters in JSON format to contractAddress.
Customer registration
Customer registration is performed in two steps:
- A customer creates a new record in the contract
- The validator verifies the customer
To register, a customer needs to specify their name and a deposit amount:
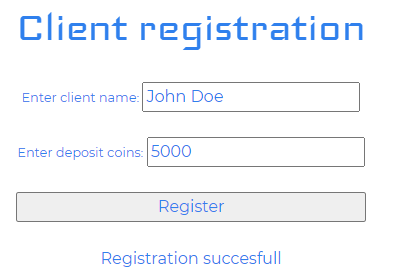
Figure 7. dApp page for customer registration
The entered deposit will be packed in the Coin structure and attached to the RegisterClient message:
const nativeAmountCoin: Coin = { amount: payment, denom: config.stakingToken };
const result = await getClient().execute(contractAddress, { RegisterClient: { name } }, "Registering user", [nativeAmountCoin]);To complete the verification process, a customer needs to enter their wallet address.
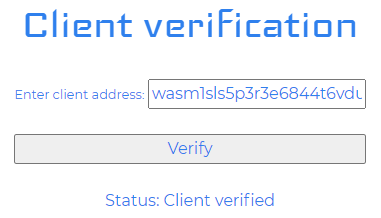
Figure 8. dApp page for customer verification
If the verification process is successful, the customer can initiate a car rental using blockchain.
Read also
Blockchain for Supply Chains: A Practical Example of a Custom Network Implementation
Uncover the potential of blockchain technology in revolutionizing supply chain management. With the help of FiberChain, you can find the balance between off-the-shelf convenience and customized efficiency.
Car rental
To rent a car, a customer has to specify the address of the registered car and a rental period in the UNIX timestamp format.
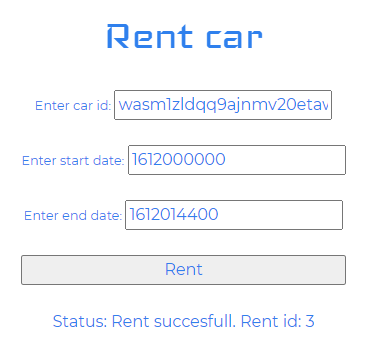
Figure 9. dApp page for renting a car
If this step is passed successfully, the rental ID can be retrieved from message response:
const result = await getClient().execute(contractAddress, { RegisterClient: { carId, startDate, endDate } }, "Renting car");
const rent_id = logs.findAttribute(result.logs, "message", "rent_id");To start the newly created rental, a customer needs to specify the car’s rental ID and date. This action is performed by the car that participates in the rental.
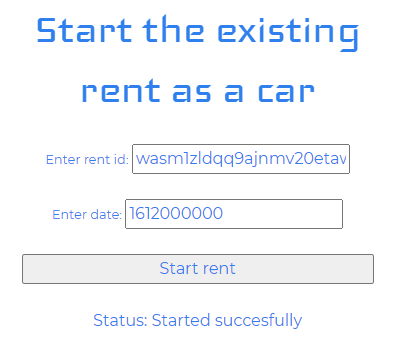
Figure 10. dApp page for starting car rental
Any party can retrieve information about an existing car rental by specifying the rental ID to the Rent query message:

Figure 11. dApp page for retrieving information about a car rental
This action doesn’t change the blockchain state and should be called using the queryContractSmart() method:
const result : RentResponse = await getClient().queryContractSmart(contractAddress, { Rent: { rentId } }); That’s it. Once a car rental is over, a customer goes to the Finish rental page, which looks similar to the Start rental page, and ends the current rental. The application calculates the amount due and charges the customer based on the actual usage period.
Conclusion
Applying blockchain technology to car sharing allowed us to implement a trusted model for a car sharing service. Customers can be assured they won’t pay more than they agreed to with blockchain car sharing, and car owners always receive payment for rentals.
In our simple smart contract example, we showed that payment can be flexible: the customer only pays for the usage period, and revenue goes directly to the car’s balance. Thanks to locking the customer’s deposit payment prior to starting a rental, car owners are always rewarded when their cars are used.
In case of an accident, the car owner will know who used the vehicle, as information stored in the blockchain cannot be changed and can be passed to third parties, such as insurance companies.
Transform your business processes with blockchain!
Partner with us to implement scalable and secure blockchain solutions for your product. Reach out to explore our comprehensive blockchain services to drive growth and innovation in your business.
Have a question?
Ask our expert!
VP of Engineering


