 Skip to main content

Today’s software solutions require continuous improvements. But what used to take weeks or even months can now be done with a couple lines of code, assuming you have the right application programming interface (API) at hand.
By integrating APIs into their software, developers can improve product security and performance and expand existing functionality with new services and features. Unfortunately, some APIs might be poorly documented or have hidden security or performance issues.
In this article, we describe how to reverse engineer a macOS API. We also show how to use a reversed undocumented macOS API in a proof of concept (PoC) Swift application. This article will be useful for macOS development teams who need to work with undocumented or poorly documented APIs.
Contents:
Reverse engineering undocumented APIs
Not all APIs are properly documented. Some APIs are private with no publicly available information on their internals. Such APIs are primarily intended to be used by in-house developers working on proprietary software. Others might be public but have incomplete documentation due to the continuity of the project, poor development practices, or frequent changes in development teams.
The problem is that when you integrate an undocumented API into your software, there’s a high risk of facing compatibility issues, compromising the solution’s performance, and even introducing new security flaws. That’s why before working with a private or undocumented API, you might need to first reverse engineer and analyze it. We’ve also mentioned this in our article on how to use LLDB to reverse engineer undocumented macOS functions.
Note: Make sure to check the terms of service before reverse engineering a private API that isn’t yours to avoid any legal issues. Also, remember that unlike open or public APIs, private APIs can be changed without any prior notice, so using another company’s private API in your own project should be a last resort.
There are several scenarios when reversing an undocumented API proves helpful:
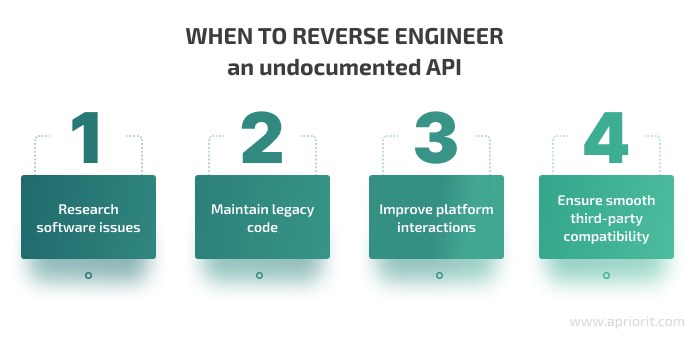
- Research software issues — API reverse engineering can help you determine the actual reason for poor performance or expose security vulnerabilities introduced as a result of integrating a poorly documented API.
- Maintain legacy code — Using reverse engineering techniques, you can restore lost documentation or improve the quality of existing documentation to keep your API easy to integrate and support.
- Improve platform interactions — The results of reverse engineering analysis can help you detect hidden bottlenecks and determine the best ways to improve interactions between your software and the platform it works on.
- Ensure smooth third-party compatibility — Reversing can be instrumental in finding unobvious reasons for your software’s poor compatibility with third-party solutions and services.
When you know exactly how a certain API operates, it’s much easier to identify possible flaws and security issues and figure out the best way to integrate the API into your software. So let’s see how to do reverse engineering of an API for macOS in practice.
Need to protect your application’s code from hackers?
Reach out to our cybersecurity experts and get bullet-proof protection for your software!
Reversing a macOS API
How can you reverse engineer an undocumented macOS API and when do you really need to do it?
Say you have a project where you need to display the developer mode status. Generally, there are two ways you can do that:
- Run the responsible utility and parse its output
- Call the corresponding API
From the technical point of view, getting the needed output directly from a system utility is easy. However, this isn’t always preferred due to possible performance bottlenecks. To enhance your application’s performance, it might be more efficient to identify the corresponding system API and invoke it directly from within the application.
For this article, we’ll be working with an undocumented API used by the systemextensionsctl developer utility to report and modify the status of developer mode on macOS. We’ll need to reverse engineer this macOS API and analyze it before integrating it into our Swift project.
The reverse engineering activities described in this article were performed on macOS Monterey 12.3.1 running on Apple Silicon. As the main tool for analysis, we used Ghidra 10.1.2, a popular suite of tools for software reverse engineering.
Disabling System Integrity Protection on macOS
Before analyzing the systemextensionsctl API, we need to disable System Integrity Protection (SIP). Without doing so, it would be impossible to enable, disable, or display the current developer mode status. Our proof of concept application, however, imposes no such requirement, as it can only display but not modify the developer mode status.
The process of disabling SIP is described in detail in the Disabling and Enabling System Integrity Protection article on the Apple Developer website.
Once SIP is disabled, you can use the following commands to set the desired developer mode:
systemextentionsctl developer on
systemextentionsctl developer offTo query the developer mode status, use the following command:
systemextentionsctl developerThe status is reported as being off or on based on the current setting:
% systemextensionsctl developer
Developer mode is off

% systemextensionsctl developer
Developer mode is onLater, we’ll compare the output generated by our PoC against this output.
Read also
How to Reverse Engineer an iOS App and macOS Software
Ensure compatibility and maintain your macOS and iOS legacy code! Explore the essential techniques for software reverse engineering with our comprehensive guide.

Locating the API to be reverse engineered
Next, we locate the API that displays the developer mode status. To do so, we upload the systemextensionsctl binary into Ghirda and get the disassembled binary code. We then perform a textual search using the output of the query command to identify the appropriate function. Ghidra identifies this function as FUN_100003754.
Note: As the aim of this post is to illustrate the overall process rather than provide step-by-step reversing instructions, we won’t cover this step in detail.
Now we can move on to analyzing the code of the FUN_100003754 function in detail.
Analyzing the reversed code
In Table 1 below, you can see the disassembly of the code block that determines the developer mode status with the accompanying pseudo code, as may be seen in Ghidra’s disassembly and decompiler listings, respectively.
Table 1: Disassembly of the code block that determines the developer mode status
| Offset | Opcodes | Mnemonics |
| 100003754 | 7f 23 03 d5 | pacibsp |
| 100003758 | ff 83 01 d1 | sub sp,sp,#0x60 |
| 100003788 | 00 57 04 58 | ldr x0=>_OBJC_CLASS_$_OSSystemExtensionClient |
| 10000378c | 73 0d 00 94 | bl __auth_stubs::_objc_alloc_init |
| 100003790 | f3 03 00 aa | mov x19,x0 |
| 100003794 | ff 0b 00 f9 | str xzr,[sp, #local_50] |
| 10000379c | 21 4b 04 58 | ldr x1=>s_developerMode:error:_10000716e |
| 1000037a0 | e2 7f 00 91 | add x2,sp,#0x1f |
| 1000037a4 | e3 43 00 91 | add x3,sp,#0x10 |
| 1000037a8 | 7c 0d 00 94 | bl __auth_stubs::_objc_msgSend |
| 1000037ac | f5 03 00 aa | mov x21,x0 |
| 1000037b0 | e0 0b 40 f9 | ldr x0,[sp, #local_50] |
| 1000037b4 | 8d 0d 00 94 | bl __auth_stubs::_objc_retain |
| 1000037b8 | f4 03 00 aa | mov x20,x0 |
| 1000037bc | b5 08 00 36 | tbz w21,#0x0,LAB_1000038d0 |
| 1000037c0 | e8 7f 40 39 | ldrb w8,[sp, #local_41] |
| 1000037c4 | e9 f7 01 10 | adr x9,s_Developer_mode_is_on_1000076c0 |
| 1000037cc | 4a f8 01 50 | adr x10,s_Developer_mode_is_off_1000076d6 |
| 1000037d4 | 1f 01 00 71 | cmp w8,#0x0 |
| 1000037d8 | 40 01 89 9a | csel x0=>s_Developer_mode_is_on_1000076c0,x10,x9,eq |
| 1000037dc | 2b 00 00 14 | b LAB_100003888 |
| 100003888 | 6c 0d 00 94 | bl __auth_stubs::_printf |
| 10000388c | 15 00 80 52 | mov w21,#0x0 |
| 100003890 | 02 00 00 14 | b LAB_100003898 |
| 100003898 | e0 03 13 aa | mov x0,x19 |
| 10000389c | 4f 0d 00 94 | bl __auth_stubs::_objc_release |
| 1000038bc | ff 83 01 91 | add sp,sp,#0x60 |
| 1000038c0 | ff 0f 5f d6 | retab |
Now, let’s outline the purpose of some of the lines above:
Table 2: Purpose of code lines from the disassembly
| Offset | Commentary |
| 100003758 | 0x60 bytes of local storage allocated on this function’s stack |
| 100003788-100003790 | Create an instance of the OSSystemExtensionClient class |
| 100003794-1000037b8 | Set up the parameters for and invoke the OSSystemExtensionClient developerMode:error method |
| 1000037bc-100003888 | If the OSSystemExtensionClient developerMode:error method returns true and a non-zero value in the local41 variable, the printf function displays the message “Developer mode is on.” Otherwise, the printf function returns the message “Developer mode is off.” |
| 1000038bc-1000038c0 | Restore local storage and exit the function |
The above disassembly would correspond to the following pseudo code generated by Ghidra’s decompiler and shown in the decompiler listing:
OSSystemExtensionClient* client = __auth_stubs::_objc_alloc_init(&_OBJC_CLASS_$_OSSystemExtensionClient); //100003788-100003790
char* local_50 = NULL; //100003794
char* selector = “developerMode:error:"; //10000379c
char* status = (char **)&local_41; //1000037a0
char* error = &local_50; //1000037a4
Bool ret = __auth_stubs::_objc_msgSend(client, selector, status, error); //1000037a8-1000037ac
param_1 = __auth_stubs::_objc_retain(local_50); //1000037b4-1000037b8
if ((ret & 1) != 0) { //1000037bc
    statstr = "Developer mode is off\n”; //1000037cc
    if (*status != '\0') { //1000037c0,1000037d4, 1000037d8
        statstr = "Developer mode is on\n”; //1000037c4
    }
    goto LAB_100003888;
}
…
LAB_100003888:
__auth_stubs::_printf(statstr);Now that we have successfully reversed the OSSystemExtensionClient API, we want to make sure we can use it in our PoC.
Using the reversed API in a Swift PoC
To use the reversed OSSystemExtensionClient API in a PoC written in Swift, we need to:
- Obtain the signature for the OSSystemExtensionClient developerMode:error method and put it into the OSSystemExtensionClient.h header file.
- Import the OSSystemExtensionClient.h header file into the PoCName-Bridging-Header.h header file for external symbols to become available in our Swift project.
Note: The following instructions apply to compiling Swift applications only. They won’t work if applied to applications written in other programming languages.
Let’s begin with the first of these two steps.
Step 1: Obtaining a method signature
The OSSystemExtensionClient API is part of the SystemExtensions framework. The framework is packaged as a dynamically linked shared library, which is part of the dynamically linked shared library cache available at /System/Library/dyld/dyld_shared_cache_arm64e.
There are tools available, such as class-dump and classdump-dyld, that can generate Objective-C header files with method signatures based on their analysis of binaries and libraries. Unfortunately, none of these tools worked for us out of the box in our environment, with each generating multiple compilation errors. The method signature was obtained using Ghidra instead.
To analyze the SystemExtensions framework with Ghidra, we first need to extract the framework library from the cache file. There are various tools you can use for this task, like DYLDExtractor, the dyld_shared_cache_util command-line tool, or the dyld-shared-cache-extractor tool. For the example described in this article, we used dyld-shared-cache-extractor, as it’s readily available as a precompiled binary package through the Homebrew software repository, which makes it immediately usable.
With the help of this tool, we can extract the needed library from the cache file:
% dyld-shared-cache-extractor /System/Library/dyld/dyld_shared_cache_arm64e /Users/user/tmp/dyld_shared_cacheThe extracted binary is now available at the following path:
% file
/Users/user/tmp/dyld_shared_cache/System/Library/Frameworks/SystemExtensions.framework/Versions/A/SystemExtensions
/Users/user/tmp/dyld_shared_cache/System/Library/Frameworks/SystemExtensions.framework/Versions/A/SystemExtensions
: Mach-O 64-bit dynamically linked shared library arm64eAfter extracting the library and analyzing it with Ghidra, we see the following method signature in the decompiler view:
undefined -[OSSystemExtensionClient_developerMode:error:]
(undefined8 param_1,undefined8 param_2,undefined *param_3,undefined8 *param_4)Quick inspection of the pseudo code indicates that the return value represented as a local variable bVar9 is a boolean value, set to zero or one to denote truth or falsehood respectively:
if (iVar2 == 0) {
    bVar9 = 0;
}
…
if (param_3 != (undefined *)0x0) {
    uVar1 = __auth_stubs::_xpc_bool_get_value(lVar6);
    *param_3 = uVar1;
}
bVar9 = 1;
…
return bVar9;The param1 parameter is a pointer to an instance of the OSSystemExtensionClient class. Whatever is passed as the param2 parameter doesn’t appear to be used within the developerMode method, the value of this parameter being set to zero:
18e5a4fcc 01 00 80 d2 mov param_2,#0x0The param3 and param4 parameters are identified as pointers and are the only ones that are passed explicitly.
Note: When reverse engineering system APIs, keep in mind that the same methods might have different signatures depending on the version of macOS you’re working with.
Next, we generate the header files containing the signature of the reversed API and import them into our Swift PoC.
Read also
How to Reverse Engineer Software (Windows) the Right Way
Discover how ethical reverse engineering practices can drive innovation of Windows software, speed up product development, and bring competitive advantages to your business.

Step 2: Importing headers
The first thing we need to do is generate Objective-C headers containing the signature of the method we’ve reversed. Based on our method signature analysis through Ghidra, the following signature was found as working:
- (BOOL)developerMode:(char**)arg1 error:(char*)arg2The method signature can now be put into OSSystemExtensionClient.h and imported into the devmodestat-Bridging-Header.h header file. To do so, we use the following commands:
% mkdir devmodestat
% cd devmodestat/

% cat >OSSystemExtensionClient.h<<eof import="" foundation="" h="">
#import <objc/NSObject.h>

@interface OSSystemExtensionClient : NSObject

- (BOOL)developerMode:(char**)arg1 error:(char*)arg2 API_AVAILABLE(macos(11));

@end
EOF

% cat >devmodestat-Bridging-Header.h<<eof import="" ossystemextensionclient="" h="" eof="" code="" pre="">
<p>Next, we generate the source file for our PoC with the following command:</p>
<pre>{code}% cat >devmodestat.swift<<eof import="" foundation="" var="" statusstring="Developer mode is " status:="" unsafemutablepointer="" int8="">? = nil
if #available(macOS 11, *) {
    if OSSystemExtensionClient().developerMode(&status, error: nil) == true {
        statusString += status != nil ? "on" : "off"
    } else {
        statusString = "unknown"
    }
}
print(statusString)
EOF
</eof></pre></eof></eof>Next, we generate the source file for our PoC with the following command:
% cat >devmodestat.swift<<EOF
import Foundation
var statusString = "Developer mode is "
var status: UnsafeMutablePointer<Int8>? = nil
if #available(macOS 11, *) {
  if OSSystemExtensionClient().developerMode(&status, error: nil) == true {
  statusString += status != nil ? "on" : "off"
  } else {
    statusString = "unknown"
  }
}
print(statusString) EOFAfter that, we can use the following commands to compile the PoC, link it against SystemExtensions.framework, and verify the resulting executable:
% xcrun swiftc -o devmodestat devmodestat.swift -import-objc-header devmodestat-Bridging-Header.h -framework SystemExtensions

% file devmodestat
devmodestat: Mach-O 64-bit executable arm64Once we compile the PoC, we can compare its output with the output generated by the systemextensionsctl developer utility.
Here’s the output generated with developer mode enabled:
% systemextensionsctl developer
Developer mode is on

% ./devmodestat
Developer mode is onAnd the output generated with developer mode disabled:
% systemextensionsctl developer
Developer mode is off

% ./devmodestat
Developer mode is offAs you can see, the output of the PoC is identical to the output generated by the macOS system API. This demonstrates that we managed to properly reverse an undocumented macOS API and successfully integrate it in the PoC.
Related project
Device Firmware Reversing to Obtain the Screen Mirroring Protocol
Discover how Apriorit reverse engineers analyzed our client’s original firmware to reconstruct the secure connection process and enable cross-platform compatibility for video mirroring.

Conclusion
Software developers often need to work with undocumented or poorly documented APIs. Reverse engineering can help them get the information they need to understand the inner workings, recover lost source code, and ensure smooth and secure integration of the analyzed API into the solution they’re working on.
At Apriorit, we have a team of reverse engineering experts who will gladly assist your company with tasks requiring deep expertise in software research and analysis.
Need a team of ethical reverse engineers?
Leverage our skilled reverse engineering team to make your software more secure, resilient, and reliable for your users!
Have a question?
Ask our expert!
Program Manager


