 Skip to main content

Monitoring and restricting access to a potentially malicious file can save your product from hacks, data leaks, and breaches. To do it in a Linux-based environment, developers often have to make kernel-level modifications, which are complicated to implement and risky for the system.
In this article, we explore an alternative to kernel-level modifications: custom policies and sandboxes in Security-Enhanced Linux (SELinux). We examine how to use them for event logging and monitoring, restricting file access, and controlling system calls within custom sandboxes.
This article will be useful for software development teams who want to incorporate SELinux into their workflow and look for practical insights.
Contents:
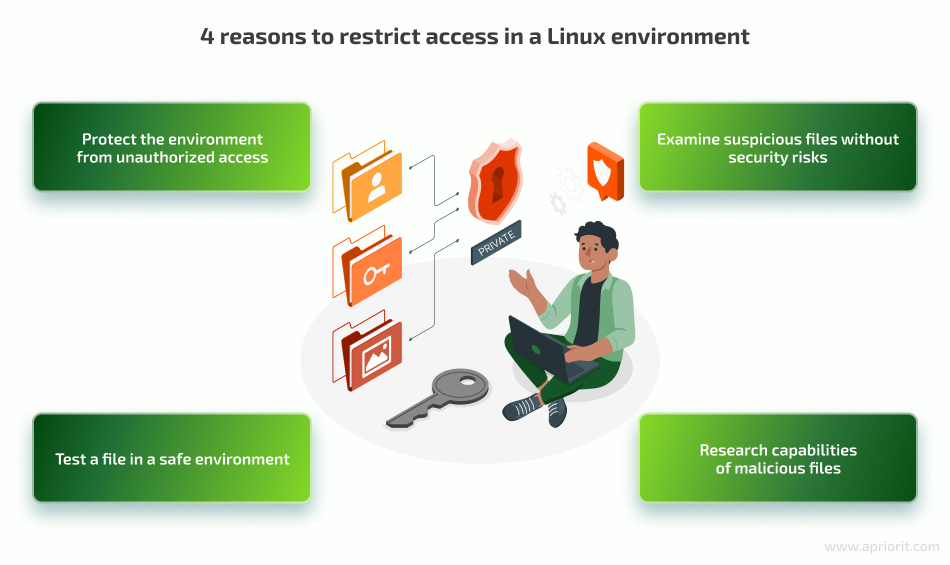
Why restrict file access in a Linux environment?
When creating a software solution — be it a simple driver or a complex cybersecurity system — it’s important to safeguard your product against unauthorized access. For teams working on Linux-based products, common reasons to monitor and manage data and file access include:
There are several traditional ways to do this: create Linux kernel modules to hook file operations, set hooks for monitoring and controlling processes, etc. Traditional means of limiting access often require advanced technical expertise and can introduce additional complexity into the development process. They can also add critical errors to your environment, as they often require kernel-level changes. That’s why such methods are useful only when you need nuanced control over a file’s access rights.
When you only need to monitor, allow, or deny access without any additional changes, it’s best to use SELinux. This system is integrated into the Linux kernel and provides developers with means to enforce mandatory access control. SELinux sets context for elements in a Linux environment and manages it through policies. SELinux provides a powerful sandbox that allows you to execute processes within a confined environment. This environment leverages the SELinux policy to define constraints and permissions for processes running within the sandbox. Using such policies allows developers to effectively enhance the security posture of their applications.
Using SELinux to manage file access has several advantages:
- Straightforward policy management. SELinux’s policy files are human-readable, so there’s no need to learn a specific syntax to write a policy.
- Granular access control. You can specify any access restrictions and permissions within a policy.
- Reliable file isolation. To control access to a file, SELinux puts it into a sandbox, isolating the file from the rest of the environment.
- Simplified access management. Changing access rights in a policy is much easier than implementing and making kernel-level modifications.
Before exploring how to work with SELinux in detail, ensure a suitable environment for creating SELinux policies. Note that in this example, we use Fedora Workstation and Red Hat Enterprise Linux distributions. SELinux is enabled on these systems by default, but it’s best to double-check if your system has SELinux enabled before continuing with our guide.
Looking for ways to secure your Linux-based solution?
Apriorit’s cybersecurity experts can help you assess the current state of your solution and suggest ways to efficiently improve its protection!
Setting up the environment for SELinux
Make sure to perform the steps described here in a test or development environment before applying SELinux policies to production systems. Incorrectly configured policies can impact system functionality and security.
If your Linux distribution doesn’t include SELinux, you can enable it by opening the terminal and executing the following command as the root user:
$ sudo dnf install selinux-policy-targetedAfter installation is complete, reboot your system. Upon reboot, SELinux will be enabled and running in enforcing mode. To confirm its successful installation, open a terminal and execute the following command:
$ sestatus
SELinux status:                 enabled
SELinuxfs mount:                /sys/fs/selinux
SELinux root directory:         /etc/selinux
Loaded policy name:             targeted
Current mode:                   enforcing          <<<<<<<<<< This line describes current mode
Mode from config file:          enforcing
Policy MLS status:              enabled
Policy deny_unknown status:     allowed
Memory protection checking: actual (secure)Sandboxing a process with SELinux
By default, the sandbox tool utilizes a multi-category security (MCS) model to enforce fine-grained access controls and process isolation. This model assigns a unique security label to each process and file based on its security level and category.
Let’s run the /bin/bash process within a sandbox to restrict it from accessing sensitive files or executing certain commands.
To create a sandbox and launch /bin/bash inside of it, we use the sandbox command as follows:
$ sandbox -H sandbox_test /bin/bashThe sandbox tool applies SELinux policies to confine the process within the sandbox. These policies define access permissions, system call restrictions, and file restrictions for the process. Policies ensure that the process can only access resources and perform actions allowed by the sandbox configuration. Under the hood, they generate random MCS numbers and set them as the SELinux security context for our process. Policies also label the respective files that should be available for our process.
For example, using SELinux sandbox for /bin/bash process with the home directory in sandbox_test will lead to the following output for ls -lZ on our directory:
$ ls -lZ | grep sandbox_test
drwxr-xr-x. 2 user user unconfined_u:object_r:sandbox_file_t:s0:c146,c312 49 May 3 06:50 sandbox_testThe random MCS numbers in our case are c146 and c312. The /bin/bash process runs with these numbers, and according to the sandbox source code it will get the SELinux security context execution command:
$ ps -eZ | grep bash
unconfined_u:unconfined_r:sandbox_t:s0:c146,c312 172662 ? 00:00:00 bashThis policy effectively limits our bash process to its home directory. However, this solution only works for specific folders and limits access to specific files with random MCS numbers. Another sandboxed bash with the same home folder would conflict with this one. To overcome this limitation, we can leverage our knowledge of the sandbox tool and its source code to create a custom SELinux policy that limits access to specific SELinux types.
In the next sections, we explore two types of SELinux policies:
- A permissive policy, which doesn’t block any connections and only monitors and logs security events, including violations. A permissive policy is useful when you need to test, debug, or research a file.
- An enforcing policy that establishes access permissions for a file and restricts any forbidden activities. It’s useful for establishing access management and securing your solution.
Let’s start with establishing a permissive SELinux policy example.
Read also
Catching Sandbox-Evading Malware: Techniques, Principles & Solutions
Learn how malware can evade basic sandboxing techniques and what can you do to implement a reliable sandbox solution.

Creating a permissive policy
To create a SELinux policy for a simple process like /bin/bash, we can use the sepolicy generate command. Let’s run the following command, generate policy files for the /bin/bash process, and name it mybash:
$ sudo sepolicy generate --application /bin/bash -n mybashThe mybash.te file contains human-readable SELinux rules for our policy. Next, we need to enable the transition from the unconfined_t domain to our custom mybash_t domain. To do it, let’s include the following macro in the mybash.te file:
unconfined_run_to(mybash_t, mybash_exec_t)This macro allows the transition between domains when executing the /bin/bash process and enables us to set our custom SELinux domain type for specific processes via setexeccon.
Here’s how our policy file looks now:
policy_module(mybash, 1.0.0)

########################################
#
# Declarations
#

attribute_role mybash_roles;
roleattribute system_r mybash_roles;

type mybash_t;
type mybash_exec_t;
application_domain(mybash_t, mybash_exec_t)
role mybash_roles types mybash_t;
unconfined_run_to(mybash_t, mybash_exec_t)

permissive mybash_t;

########################################
#
# mybash local policy
#
allow mybash_t self:capability { chown setgid setuid };
allow mybash_t self:process { fork setpgid setrlimit signal_perms };

allow mybash_t self:fifo_file manage_fifo_file_perms;
allow mybash_t self:unix_stream_socket create_stream_socket_perms;

domain_use_interactive_fds(mybash_t)

files_read_etc_files(mybash_t)

auth_use_nsswitch(mybash_t)

logging_send_syslog_msg(mybash_t)

miscfiles_read_localization(mybash_t)

sysnet_dns_name_resolve(mybash_t)To install this custom policy for the /bin/bash process and allow the /bin/bash process to operate under the specified SELinux context, let’s execute the auto-generated script:
$ sudo ./mybash.shTo set the process context directly from the bash shell, we can use a simple code snippet. Let’s create a new file, name it set_context.c, and add the following code to it:
#include <selinux/selinux.h>
#include <stdio.h>
#include <stdlib.h>
#include <unistd.h>
#include <errno.h>

int main(void) {
    security_context_t context_old = {0};
    security_context_t context_new = {0};

    if (getcon(&context_old) == -1) {
        printf("Failed to get context");
        return 1;
    }
    printf("%s\n", context_old);

    if (setexeccon((security_context_t)"unconfined_u:unconfined_r:mybash_t:s0") == -1) {
        printf("Failed to set context errno %d\n", errno);
        return 1;
    }

    execve("/bin/bash", NULL, NULL);

    return 0;
}Now we will build and run this code:
$ gcc -o mybash set_context.c -lselinux
$ ./mybash
$This code retrieves the current SELinux context, sets the new context to unconfined_u:unconfined_r:mybash_t:s0, and then executes the /bin/bash process with the updated context.
Now we have a permissive policy for the /bin/bash process and can execute it with the specified SELinux context. Let’s open another terminal and check /var/log/audit/audit.log. Here we can find what kind of permissions bash requested after starting:
type=AVC msg=audit(1683645539.705:301246): avc: denied { append } for pid=173167 comm="bash" name=".bash_history" dev="dm-1" ino=1225470 scontext=unconfined_u:unconfined_r:mybash_t:s0 tcontext=unconfined_u:object_r:user_home_dir_t:s0 tclass=file permissive=1


type=SYSCALL msg=audit(1683645539.705:301246): arch=c000003e syscall=257 success=yes exit=3 a0=ffffff9c a1=55bdf355c5f0 a2=401 a3=0 items=0 ppid=172599 pid=173167 auid=1000 uid=1000 gid=1000 euid=1000 suid=1000 fsuid=1000 egid=1000 sgid=1000 fsgid=1000 tty=pts2 ses=32 comm="bash" exe="/usr/bin/bash" subj=unconfined_u:unconfined_r:mybash_t:s0 key=(null)ARCH=x86_64 SYSCALL=openat AUID="sboy" UID="sboy" GID="sboy" EUID="sboy" SUID="sboy" FSUID="sboy" EGID="sboy" SGID="sboy" FSGID="sboy"


type=AVC msg=audit(1683645539.705:301247): avc: denied { setattr } for pid=173167 comm="bash" name=".bash_history" dev="dm-1" ino=1225470 scontext=unconfined_u:unconfined_r:mybash_t:s0 tcontext=unconfined_u:object_r:user_home_dir_t:s0 tclass=file permissive=1


type=SYSCALL msg=audit(1683645539.705:301247): arch=c000003e syscall=92 success=yes exit=0 a0=55bdf355c5f0 a1=3e8 a2=3e8 a3=55bdf355c7a0 items=0 ppid=172599 pid=173167 auid=1000 uid=1000 gid=1000 euid=1000 suid=1000 fsuid=1000 egid=1000 sgid=1000 fsgid=1000 tty=pts2 ses=32 comm="bash" exe="/usr/bin/bash" subj=unconfined_u:unconfined_r:mybash_t:s0 key=(null)ARCH=x86_64 SYSCALL=chown AUID="sboy" UID="sboy" GID="sboy" EUID="sboy" SUID="sboy" FSUID="sboy" EGID="sboy" SGID="sboy" FSGID="sboy"Note the denied fields that contain the type of requested permission and the permissive=1 mode, which actually means that this SELinux policy allows these permissions and just warns about them in audit.log.
Now, let’s execute the ls command in our custom bash process and see what is required to execute this command without parameters:
type=AVC msg=audit(1683645670.511:301248): avc: denied { read } for pid=173244 comm="ls" name="setcon" dev="dm-1" ino=1211972 scontext=unconfined_u:unconfined_r:mybash_t:s0 tcontext=unconfined_u:object_r:user_home_t:s0 tclass=dir permissive=1


type=SYSCALL msg=audit(1683645670.511:301248): arch=c000003e syscall=257 success=yes exit=3 a0=ffffff9c a1=562f22c913d0 a2=90800 a3=0 items=0 ppid=173219 pid=173244 auid=1000 uid=1000 gid=1000 euid=1000 suid=1000 fsuid=1000 egid=1000 sgid=1000 fsgid=1000 tty=pts2 ses=32 comm="ls" exe="/usr/bin/ls" subj=unconfined_u:unconfined_r:mybash_t:s0 key=(null)ARCH=x86_64 SYSCALL=openat AUID="sboy" UID="sboy" GID="sboy" EUID="sboy" SUID="sboy" FSUID="sboy" EGID="sboy" SGID="sboy" FSGID="sboy"With ls, we can continue working on the /bin/bash process and see how to enforce access control with SELinux.
Creating an enforcing policy
The SELinux log from audit.log file describes actions performed by the /bin/bash process. We’ll disable permissive mode in our custom policy by commenting out the “permissive” line and removing any additional auto-generated permissions. After that, the policy becomes enforcing, which means SELinux will block all undesired access attempts.
Here’s what the updated policy looks like now:
policy_module(mybash, 1.0.0)

########################################
#
# Declarations
#

attribute_role mybash_roles;
roleattribute system_r mybash_roles;

type mybash_t;
type mybash_exec_t;
application_domain(mybash_t, mybash_exec_t)
role mybash_roles types mybash_t;
unconfined_run_to(mybash_t, mybash_exec_t)


#permissive mybash_t;

########################################
#
# mybash local policy
#
#allow mybash_t self:capability { chown setgid setuid };
#allow mybash_t self:process { fork setpgid setrlimit signal_perms };

#allow mybash_t self:fifo_file manage_fifo_file_perms;
#allow mybash_t self:unix_stream_socket create_stream_socket_perms;

#domain_use_interactive_fds(mybash_t)

#files_read_etc_files(mybash_t)

#auth_use_nsswitch(mybash_t)

#logging_send_syslog_msg(mybash_t)By removing permissions, we effectively restrict the SELinux context of our /bin/bash process. Let’s install the updated policy and try running the new custom bash:
$ sudo ./mybash.sh
$ ./mybashHowever, this yields only a single line in the logs:
type=AVC msg=audit(1683646222.408:301270): avc: denied { entrypoint } for pid=173428 comm="mybash" path="/usr/bin/bash" dev="dm-1" ino=16959619 scontext=unconfined_u:unconfined_r:mybash_t:s0 tcontext=system_u:object_r:shell_exec_t:s0 tclass=file permissive=0Unfortunately, our bash process lacks the necessary permissions to launch. To address this, let’s generate the permissions using the audit2allow command and update our policy:
$ echo 'type=AVC msg=audit(1683646222.408:301270): avc: denied { entrypoint } for pid=173428 comm="mybash" path="/usr/bin/bash" dev="dm-1" ino=16959619 scontext=unconfined_u:unconfined_r:mybash_t:s0 tcontext=system_u:object_r:shell_exec_t:s0 tclass=file permissive=0' | audit2allow -r
require {
type mybash_t;
type shell_exec_t;
class file entrypoint;
}
#============= mybash_t ==============
allow mybash_t shell_exec_t:file entrypoint;Next, let’s add generated lines to the end of our mybash.te file and install the updated policy:
$ sudo ./mybash.sh
$ ./mybash
Segmentation faultEven after these modifications, the bash process still fails to start, resulting in a segmentation fault. So we need to add this line to audit.log:
type=AVC msg=audit(1683646840.208:301287): avc: denied { map } for pid=173620 comm="bash" path="/usr/bin/bash" dev="dm-1" ino=16959619 scontext=unconfined_u:unconfined_r:mybash_t:s0 tcontext=system_u:object_r:shell_exec_t:s0 tclass=file permissive=0Let’s repeat the permission generation step:
$ echo 'type=AVC msg=audit(1683646840.208:301287): avc:  denied  { map } for  pid=173620 comm="bash" path="/usr/bin/bash" dev="dm-1" ino=16959619 scontext=unconfined_u:unconfined_r:mybash_t:s0 tcontext=system_u:object_r:shell_exec_t:s0 tclass=file permissive=0' | audit2allow -r

require {
	type shell_exec_t;
	type mybash_t;
	class file map;
}

#============= mybash_t ==============

#!!!! This avc can be allowed using the boolean 'domain_can_mmap_files'
allow mybash_t shell_exec_t:file map;Now we can update the mybash.te file and run it again. We still get the segmentation fault, but we have a new record in audit.log:
type=AVC msg=audit(1683647173.571:301297): avc: denied { execute } for pid=173774 comm="bash" path="/usr/bin/bash" dev="dm-1" ino=16959619 scontext=unconfined_u:unconfined_r:mybash_t:s0 tcontext=system_u:object_r:shell_exec_t:s0 tclass=file permissive=0After we once again generate permissions, the mybash.te file will merge permissions for launching the /bin/bash process. Now, our final policy allows the process to launch:
policy_module(mybash, 1.0.0)

########################################
#
# Declarations
#

attribute_role mybash_roles;
roleattribute system_r mybash_roles;

type mybash_t;
type mybash_exec_t;
application_domain(mybash_t, mybash_exec_t)
role mybash_roles types mybash_t;
unconfined_run_to(mybash_t, mybash_exec_t)


require {
type mybash_t;
type shell_exec_t;
class file entrypoint;
class file map;
class file execute;
}

#============= mybash_t ==============

allow mybash_t shell_exec_t:file { map entrypoint execute };Overall, this policy allows processes in the mybash_t domain to interact with shell_exec_t files by mapping, accessing as entry points, and executing them. The require section specifies the permissions required by the mybash_t file type to interact with other file types.
The allow statements define the permissions granted to the mybash_t domain. Here’s what this process looks like:
allow mybash_t shell_exec_t:file map; - allows the "mybash_t" domain to map files of type "shell_exec_t".
allow mybash_t shell_exec_t:file entrypoint; - allows the "mybash_t" domain to access files of type "shell_exec_t" as entry points.
allow mybash_t shell_exec_t:file execute; - allows the "mybash_t" domain to execute files of type "shell_exec_t".Finally, we can update the policy one more time and start the bash process in our custom domain:
$ sudo ./mybash.sh
$ ./mybash
bash-5.1$ ls
bash: child setpgid (173932 to 173932): Permission denied
bash: /usr/bin/ls: Permission deniedWe created custom policies that allow us to run executables and manage their SELinux permissions in enforcing mode. This also allows us to simply monitor process actions in permissive mode and manage the application politely.
With this approach, we don’t need to implement custom hooks in the kernel module to manage read/write operations, and we can manage process actions via SELinux policies. However, we can only do so in the way that SELinux allows, so we’ll have to work with SELinux file types and manage access to them.
Conclusion
Monitoring and managing access is a huge part of securing any product. For Linux development, access management is usually based on kernel-level modifications and hooks, which are tricky to work with and may introduce stability issues.
Instead, your team can leverage SELinux’s flexible access control mechanisms to define custom policies. Such policies can help your team monitor security events and dictate precisely which file types can be accessed by a process and which system calls it is permitted to make.
In this article, we described only one way of using SELinux to secure and improve your Linux development processes. Our system management team knows how to use this and other approaches to the fullest to ensure the security of your projects.
Want to build a secure Linux-based product?
Start your journey by discussing it with Apriorit security experts. We can help you deliver an efficient solution and pick the most reliable ways to protect it.


