 Skip to main content

With new devices appearing every day, the Apriorit driver development team always has a tight schedule. Sometimes, default solutions don’t meet a project’s requirements, so our developers have to significantly reconsider existing solutions or even create their own from scratch. In this post, we describe how to develop a simple display-only driver for standard display devices based on Microsoft’s example.
Recently, Apriorit was asked to implement a display-only driver with the ability to enable or disable changes to the screen resolution.
In this article, we talk about how to create a simple display-only driver and establish its interaction with the user mode. We also explain what problems you may face when building such a driver and how to overcome them.
Contents:
Developing a simple display-only driver
A display-only driver is a new type of graphics driver targeting specific scenarios. Display-only drivers are supported only as Windows Display Driver Model (WDDM) 1.2 drivers, and enable independent hardware vendors to write a WDDM-based kernel-mode driver capable of driving standard display-only devices like monitors and tablets. Display-only devices are not allowed as the primary graphics device on client systems, but they’re optional for clients running in a virtual environment. For instance, in our project, we used one for running a virtual display, but they can also be used for configuring other display settings.
Keep in mind that the operating system handles the 2D or 3D rendering using a software-simulated GPU. You can find more information on this on the Microsoft Developer Network (MSDN). In this article, we consider only some of the most important points that you should pay attention to when creating a custom display-only driver.
We based our display-only driver on Microsoft’s example. We developed a simple driver with several custom callbacks, and in particular with the possibility to enable/disable changing the display resolution.
Main callbacks
The driver starts its work by filling the KMDDOD_INITIALIZATION_DATA structure and calling the DxgkInitializeDisplayOnlyDriver function for initialization. If this function returns STATUS_SUCCESS, then the DxgkDdiStartDevice callback is called.
In this callback, we call the DxgkCbAcquirePostDisplayOwnership function to get information about the current display settings (DXGK_DISPLAY_INFORMATION) of the current POST device. In most cases, the POST device is the main graphics adapter. The DXGK_DISPLAY_INFORMATION structure contains all the information we need for working with the graphics adapter.
Along with the DxgkDdiStartDevice callback, we should also implement the DxgkDdiStopDeviceAndReleasePostDisplayOwnership callback. In this callback, we return the DXGK_DISPLAY_INFORMATION structure (which is stored in the driver) to the system.
When you want to, say, support several displays, you need to work with multiple sources and targets. In this case, when you implement all other callbacks, you need to specify the VidPnSourceId and VidPnTargetId. You can learn more about sources and targets on MSDN.
Another callback we should mention is DxgkDdiPresentDisplayOnly. This callback draws the buffer sent by the system. Here, you need to pay special attention to possible problems with drawing the buffer (the wrong VidPnSourceId, wrong parameters, etc.).
For a more detailed description of these functions, see our display-only driver on GitHub.
Need a custom driver to unlock the power of your device?
Partner with a skilled dedicated team and leverage our experience in driver development, QA, and maintenance!
Interacting with the graphics adapter
Interacting with the graphics adapter is one of the main tasks of the driver. For example, when changing the resolution in the system, you need to notify the adapter so that the picture is displayed correctly on the monitor. Each adapter can have its own interface, but there’s also a universal interface. In our example, we used a universal interface – the ROM BIOS.
You can find more details about communicating with the ROM BIOS in our project repository on GitHub.
How to install a display-only driver
There are at least three ways we can install our display-only driver:
- Manually
- Using the PnPUtil utility
- Using the Device Console (DevCon) utility
In this article, we’ll consider the option of installing the driver manually through the Device Manager. But before installing it, we need to make sure that the driver is compatible with the devices we need to support. To do this, we need to specify the devices it can work with in the .inf file:
;
;    Allow the driver to be loaded on VGA and XGA exposed by PCI bus
;
"Simple Display Only Driver" = SDDriverInstall, PCI\CC_0300
"Simple Display Only Driver" = SDDriverInstall, PCI\CC_0301Let’s try to install the driver:
- Replace the current driver for the display adapter in the Device Manager.
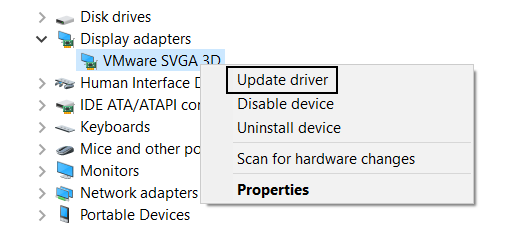
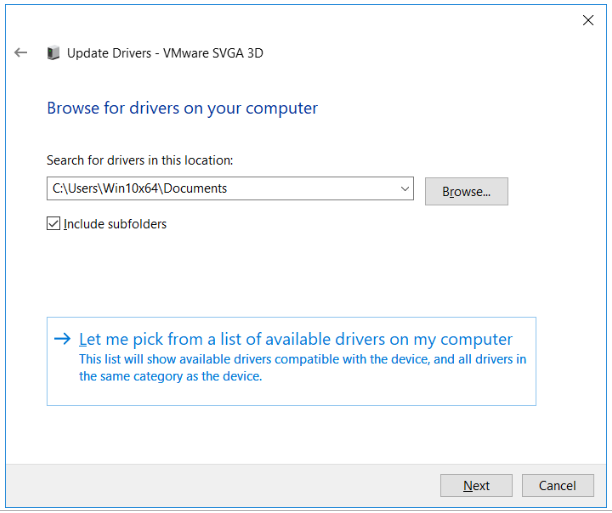
- Select Browse my computer for driver software, navigate to the SimpleDisplayOnlyDriver.inf file, and open it.
- Reboot the PC.
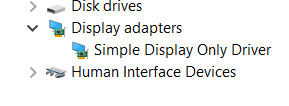
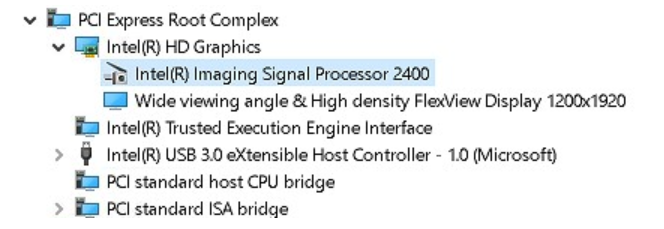
- The driver should work after the reboot. If the driver is installed successfully, it can be found in the Device Manager.
Related project
Improving a Windows Audio Driver to Obtain a WHQL Release Signature
Find out how a British audio technology company managed to get WHQL Release Signature and attract new users thanks to Apriorit’s work on custom audio drivers.

How to uninstall a driver
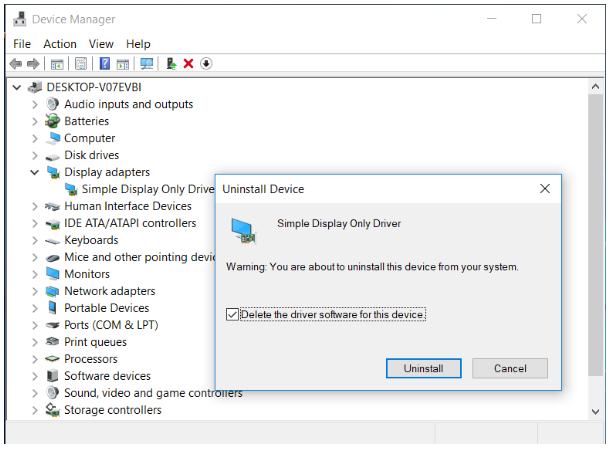
If you need to uninstall a driver, you can also do it through the Device Manager by choosing Delete the driver software for this device.
Interaction between user mode and the display-only driver
In the sections below, we discuss the specifics of our display-only driver and important implementation tips.
One of our tasks was to allow a user to enable or disable changing the screen resolution. In order to accomplish this task, we needed to let the driver know the user’s decision. To do this, we send a flag from the user mode to the driver. This flag can be a 0 or 1.
Communication between the user mode and the driver can be performed via the DxgkDdiEscape function. All we need to do in the user mode is fill in the D3DKMT_ESCAPE structure and call the D3DKMTEscape function, passing the filled structure to it. In the driver, we should implement the DxgkDdiEscape callback and parse the passed parameters from the user mode for decision-making.
You can find more details on the interaction between the user mode and the driver in the program source code.
Let’s see how it looks:
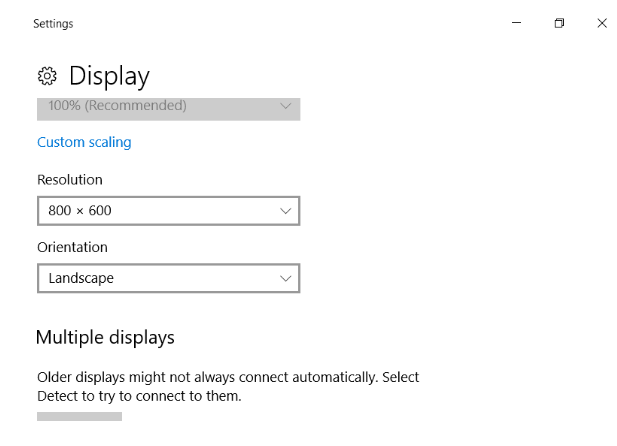
- Running ResolutionManipulation.exe with the 0 parameter disables the ability to change the screen resolution. So if we try to change the screen resolution, for example from 1152×864 to 800×600, the change won’t be applied.
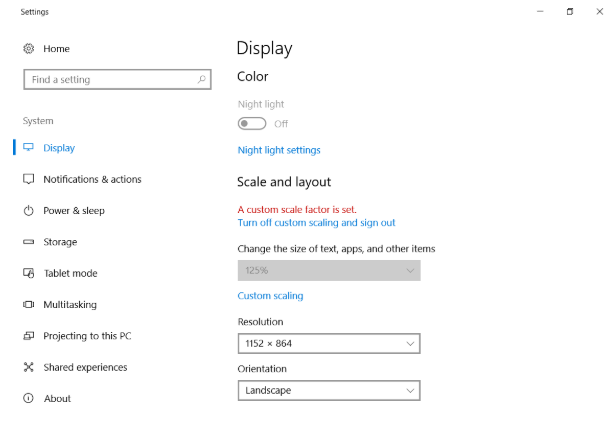
- Running ResolutionManipulation.exe with the 1 parameter enables changing the screen resolution. Now if we try to change the screen resolution from 1152×864 to 800×600 once again, the change will be applied.
So there it is: We’ve shown you how to create a simple display-only driver and manage it from user mode. Since our driver responded to the information received from the user, we can say that the task was completed successfully.
Now let’s take a look at some of the problems and limitations that you may face when working with a display-only video driver.
Related project
Developing a Custom Driver Solution for Blocking USB Devices
Per client’s request, we enriched their software with a custom driver that only allows client-approved devices and doesn’t interfere with system functionalities. The client gained competitive advantage thanks to driver’s support capabilities for different USB types and the ability to block not-approved devices.

Problems and limitations of a display-only driver
The three most common limitations related to display-only drivers are:
- BIOS function-related limitations
- Problems with support for child devices
- The appearance of artifacts on the screen
Let’s take a look at each of these problems and their possible solutions.
Limitations of BIOS functions
Unfortunately, BIOS functions don’t work in all cases. Without using BIOS functions, we can’t find out the capabilities of a graphics adapter. Another approach is to study the documentation and use of a specific adapter interface. But in our example, we can only work with the same resolution that we received by calling the DxgkCbAcquirePostDisplayOwnership function.
Also, keep in mind that using undocumented features can have bad consequences for new systems. It’s better not to use them.
Child device support
Some adapters are composite, meaning they consist of several devices. Webcams and some tablets are examples of such devices.
For such an architecture, you need to implement additional logic. You can find additional information about this on MSDN.
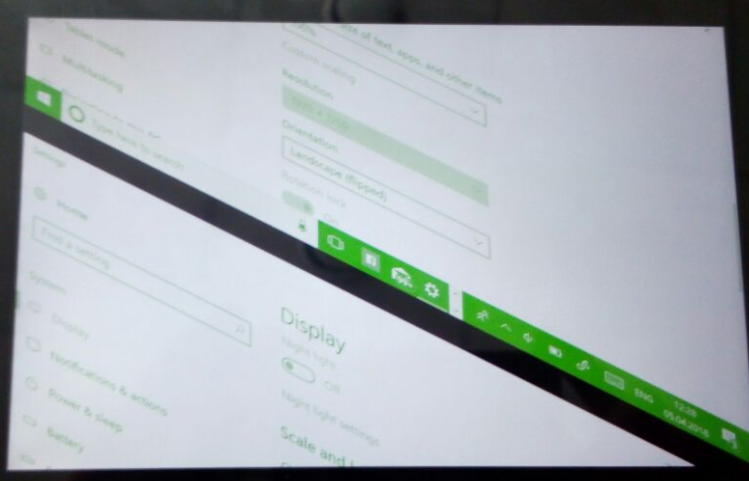
Artifacts on the screen
There may be a situation when artifacts appear on the screen or the driver crashes. We can face these issues, for example, when we change the screen resolution or orientation, or after hibernation.

Usually, this happens because an incorrect buffer was allocated.
Pay attention to the Pitch variable. To understand why the Pitch variable is so important, you need to understand how the PresentDisplayOnly function works.
The PresentDisplayOnly function takes the drawn buffer line by line. Therefore, if the Pitch variable is incorrect, the number of bytes copied to the buffer will also be incorrect.
In the case of hibernation, don’t forget to call the DxgkcbAcquirePostDisplayOwnership function to get new settings after waking up.
Conclusion
Developing a driver from scratch is a challenging task: you need to consider a wide range of factors and often deal with unexpected problems. In this article, we showed you how to build a basic display-only driver for a graphics adapter and how to expand its functionality. We also outlined some of the most common issues you may face when working on such a driver and gave you some tips on how to solve them. Hopefully, our advice will come in handy and help you better cope with your driver development project.
Apriorit has an experienced embedded Linux driver development team that can create software for your project. Just contact us and let us know how we can help.
References
- https://github.com/apriorit/simple-display-only-driver
- http://www.monstersoft.com/tutorial1//VESA_intro.html
- https://docs.microsoft.com/en-us/windows-hardware/drivers/ddi/content/d3dkmddi/
- https://github.com/Microsoft/Windows-driver-samples/tree/master/video/KMDOD
- https://www.geoffchappell.com/studies/windows/km/hal/api/x86bios/index.htm?tx=8
- https://docs.microsoft.com/en-us/windows-hardware/drivers/devtest/pnputil-command-syntax
Let’s build a custom driver that fits your needs!
Leverage Apriorit’s experience in driver development to ensure stable, consistent, and secure performance of your device.
Have a question?
Ask our expert!
Program Manager


