 Skip to main content

Debugging is an essential part of ensuring flawless mobile application quality. However, sometimes developers have to work with applications without having access to their source code, meaning they’re unable to make apps debuggable.
In this article, we show how to make an Android application debuggable without accessing Android application package (APK) files. We provide step-by-step instructions and explore every stage in detail.
This article will be helpful for developers who want to debug, reverse engineer, or analyze the behavior of Android apps without accessing their APK files.
Contents:
Making an Android app debuggable: plan of work
In one of our recent projects, we needed to reverse engineer an Android application — in particular, its APK file. To explore how the application works, we used static reverse engineering, which sometimes also requires debugging the application.
In the past, we could make an Android app debuggable by changing the state of the android:debuggable flag. But after Android switched the AndroidManifest.xml file to binary format, modifying this flag became tricky. We didn’t find any documentation for the binary code, and utilities for changing this flag (like Apktool) turned out to be useless.
So in order to make our target application debuggable, we had to understand what makes an Android app debuggable in the first place. To do that, we needed to analyze how the Android operating system decides whether to allow us to debug an application. As a result, we found a way to make any Android app debuggable without accessing its APK file.
We should note that Android Studio provides an engineering build of a system image for emulators by default. Such a build has root access and enables the debugging of processes and applications regardless of the android:debuggable flag’s state in the AndroidManifest.xml file.
However, some applications may check the system image build and forbid debugging. The method described in this article can help you with debugging Android apps that check the type of the system image build and don’t allow for using the engineering build.
After some research, we discovered that changing a few lines of code starting from a particular line in the PackageParser.java file and setting the ApplicationInfo.FLAG_DEBUGGABLE to unconditional can solve the problem.
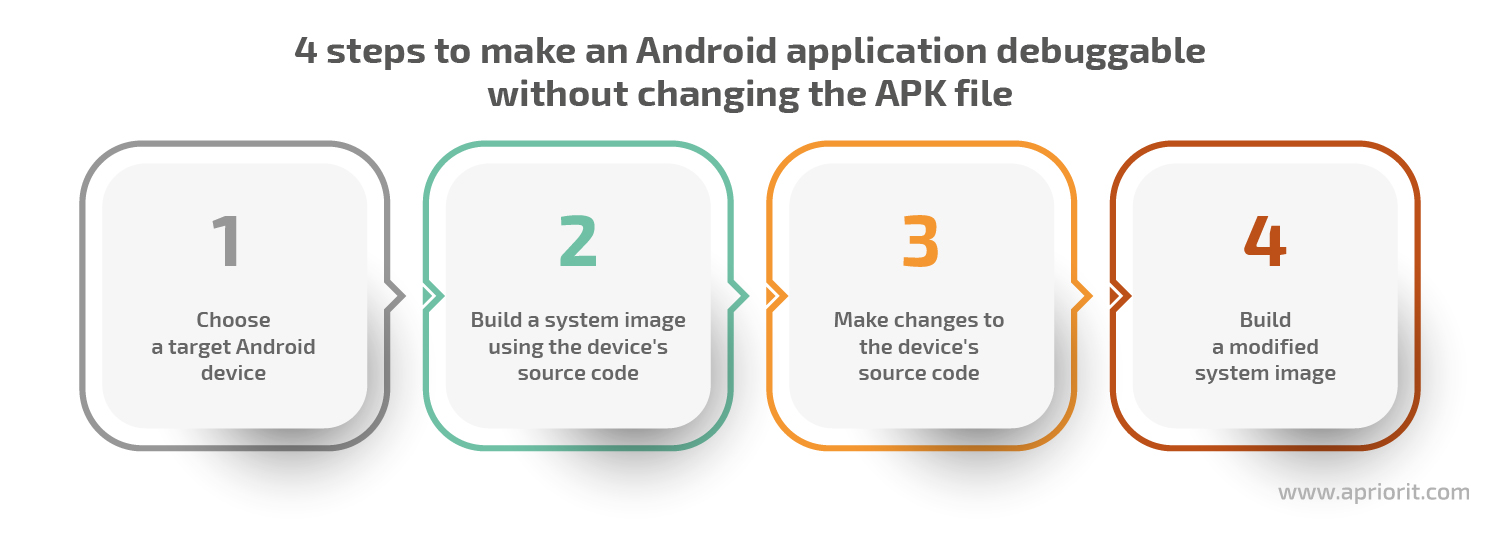
The approach we came up with consists of four steps:
- Choose the target Android device. Since our approach involves modifying the system image’s source code, this code should be open-source for our method to work. We managed to find the source code for Google devices. For example purposes, we decided to use a goldfish system image via an emulator.
- Download the source code and build a system image. We’ll need this image to check whether the build was completed successfully before we apply any changes to the source code. To build a system image for the emulator, we can just follow the instructions for sharing AVD system images for others to use with Android Studio and run
lunchfor the 64-bit target:launch sdk_phone_x86_64. - Make changes to the source code. We need to set the ApplicationInfo.FLAG_DEBUGGABLE flag to unconditional in the file located at platform/frameworks/base/core/java/android/content/pm/PackageParser.java.
- Build a modified system image and apply it. To use the system image in the emulator, we can execute the
emulatorcommand in the console.
Let’s start with exploring the main system image sources we’ll be working with: the PackageManager class, android:debuggable flag parsing, and the ApplicationInfo.FLAG_DEBUGGABLE flag.
Ready to enhance your mobile app’s security?
Apriorit’s seasoned developers and reverse engineers are ready to help you solve tasks of any complexity and deliver a solution with top-notch protection.
Exploring system image sources
To understand exactly how the android:debuggable flag is interpreted by the AndroidManifest.xml file, we need to analyze the source code for our system image.
The PackageManager class (the adb utility and a set of Java classes) receives the android:debuggable flag from the AndroidManifest.xml file using this code. But how exactly is this flag parsed from the AndroidManifest.xml file? This is a good question.
The PackageParser class uses the Resourse.obtainAttributes and XmlBlock classes for parsing the AndroidManifestApplication attributes. Besides that, XmlBlock is implemented in the native code and actively uses the ResourceTypes class, which includes implementations of the ResXmlTree and ResXmlParser classes. This means there’s an opportunity to create a modifier for a binary AndroidManifest.xml file. But we won’t dive into the details of parsing, since this is a topic for future investigation and another article.
To make the Android operating system accept that our application is debuggable, we need to change these lines in Android’s code so that the setting of the ai.flags |= ApplicationInfo.FLAG_DEBUGGABLE is unconditional.
Building a system image for distribution
This step is quite straightforward. We combine the commands for a build image using official Android instructions and commands for preparing a system image for distribution.
As a result, we get the following set of commands:
mkdir aosp-master; cd aosp-master
repo init -u
repo sync
source ./build/envsetup.sh
lunch sdk_phone_x86_64
make sdk sdk_repoAt aosp-master/out/host/linux-x86/sdk/sdk_phone_x86_64/, we can find the following two files that we’ll need later for image distribution:
- sdk-repo-linux-system-images-eng.[username].zip
- repo-sys-img.xml
Read also
Pentesting Android Applications: Tools and Step-by-Step Instructions
Improve the security of your mobile apps with relevant skills in reverse engineering and pentesting Android applications. Learn what tools to use and what challenges to expect.

Distributing the image
During the previous step, we received files required for image distribution. Now we need to upload the sdk-repo-linux-system-images-eng.[username].zip file to a file sharing site, from which we can later download the file with a usual HTTP/HTTPS GET request.
During our research, we didn’t manage to run the repo-sys-img.xml file in the same format as during the build. Its format used to be sdk-sys-img-03. However, when we attempted to use it in Android Studio, we received errors. We used Android Studio 4.0, build #AI-193.6911.18.40.6514223, built on May 20, 2020.
When we looked at repo-sys-img.xml files for other existing images provided by Android Studio by default, we noticed they had a different format somewhat similar to the skd-sys-img-02 file. So we decided to manually change the file format from skd-sys-img-03 to sdk-sys-img-02 to see if we would be able to run the repo-sys-img.xml file without errors. Luckily, it worked. Here’s how we did it:
<sys-img:sdk-sys-img xmlns:sys-img="http://schemas.android.com/sdk/android/repo/sys-img2/01" xmlns:xsi="http://www.w3.org/2001/XMLSchema-instance">
  <channel id="channel-0">stable</channel>
  <remotepackage path="system-images;android-28;debuggable;x86_64">
    <type-details xsi:type="sys-img:sysImgDetailsType">
      <api-level>28</api-level>
      <tag>
        <id>debuggable</id>
        <display>MyTagForDebuggable</display>
      </tag>
      <abi>x86_64</abi>
    </type-details>
    <revision>
      <major>5</major>
    </revision>
    <display-name>AndroidDebuggableTestImage</display-name>
   <dependencies ⁄>
    <channelRef ref="channel-0"⁄>
    <archives>
      <archive>        <!-- Built on: Thu Feb 21 12:04:09 2019. -->
        <complete>
          <size>601861079</size>
          <checksum>e4116efda559846d774c7f81bec00550445f7f4c</checksum>
<url>https://bitbucket.org/gamapat/androidosimagehost/raw/cfdb08b20edb9537e1f4a398344cea40e00109a3/sdk-repo-linux-system-images-eng.nikita.zip</url>
        </complete>
      </archive>
    </archives>
  </remotepackage>
</sys-img:sdk-sys-img>Let’s take a closer look at some key lines from the code above:
sys-img:sdk-sys-img/channeldescribes the list of channels that can be used in theremotePackagedescription.sys-img:sdk-sys-img/remotePackageis a description of the system image delivery package.remotePackage.pathis a line that can be used for identifying a system image and downloading it using the Android Studio utilities.remotePackage/type-detailsdefines the image’s parameters that can be used for finding an image in Android Studio when building an emulator.remotePackage/type-details/tag/displayis a text that will be shown in theTargetfield when displaying the image in Android Studio.remotePackage/channelRef.refis a link to the channel our system image relates to.remotePackage/archives/archivedefines parameters for downloading and checking the system image archive.- The
remotePackage/archives/archiveparameters are filled with data received from the original repo-sys-img.xml file. The link to the archive is received from the sharing site to which we previously uploaded the archive with our system images. - The rest of the parameters like
remotePackage/revisioncan be filled out with data from the XML example above, and this won’t lead to any significant changes.
Once we change the repo-sys-img.xml file, we need to upload it to the file sharing site so that our application can download it using a simple HTTP/HTTPS GET request.
After that, we need to add a link to the system image source in Android Studio using the instructions on editing or adding SDK tool sites. Once the link is added, a new source — AndroidDebuggable — will be displayed in Android Studio.
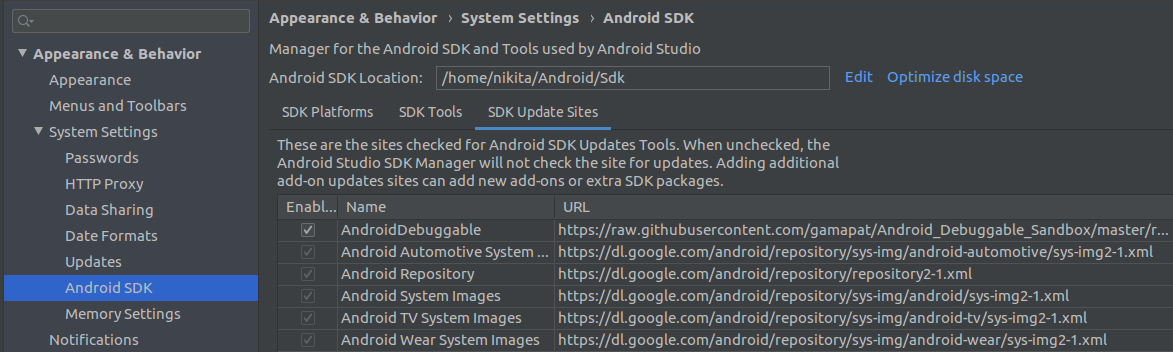
Screenshot 1. A new source displayed in Android Studio
Creating an emulator for working with the system image
After performing the previous steps, using the system image in Android Studio is quite an easy job. First, we need to create an emulator (we call it Android Virtual Device) in Android Studio. Then, we need to choose the system image and click on the emulator creation button.
To find the image when creating an emulator, we can add the identifier in the sys-img:sdk-sys-img/remotePackage/type-details/tag/display field, as shown in screenshot 2. In our case, we used the MyTagForDebuggable identifier.

Screenshot 2. Finding the system image using the identifier
Once an emulator is created, we can start debugging our target application.
Related project
Building a Complex Parental Control App for Android
Find out how we helped our client deliver a bug-free system that would benefit their company’s growth.
Checking the results
Using the method described above, we modified the system image to treat all applications as debuggable, built the system image, and made Android Studio use this image. Now, we should be able to debug all applications launched in the emulator using the remote debugger from Android Studio.
To check if we can, we’ll try debugging the Google Earth application to see how the remote debugger works.
When attempting to launch the debugger, we receive an error saying this application can’t be debugged:

Screenshot 3. An error saying that the application is not debuggable
But once we launch the application in our created emulator, we can debug it:
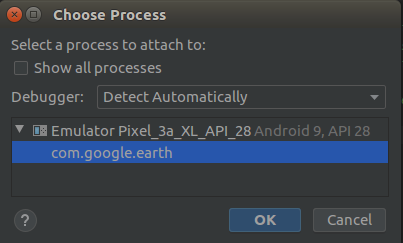
Screenshot 4. Emulator displays target applications as debuggable
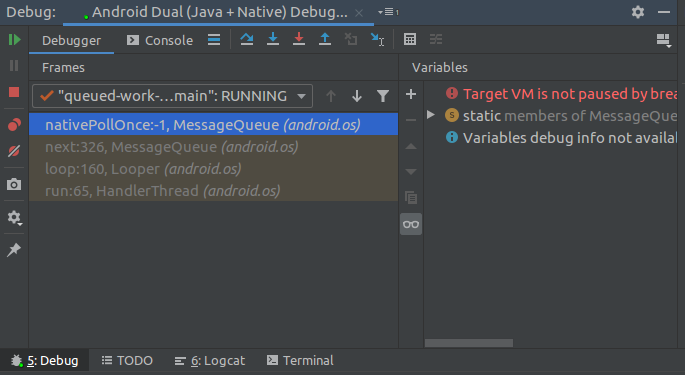
Also, we can debug other system processes in the Android operating system. This may come in handy when analyzing, debugging, or reversing system processes.
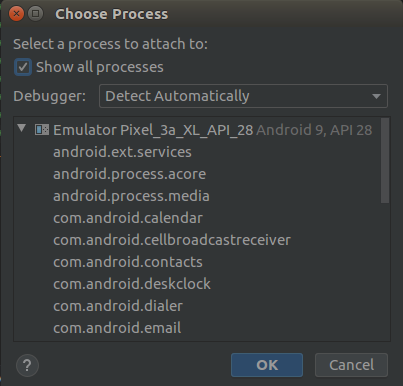
Screenshot 5. Debugging system processes in the Android operating system
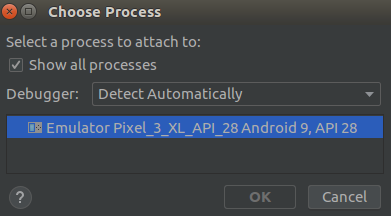
For example, we can check if debugging is available for the target application:
Screenshot 6. Application debugging is allowed
For comparison, we can’t debug remote processes on the system image without modifying it first. Screenshot 7 shows that there are no processes for debugging, while on screenshot 5 earlier, we saw a whole list of processes that can be debugged.
Screenshot 7. Attempting to debug remote processes on an unmodified system image
Our results show that after performing all the steps described above, we can debug system processes in the Android operating system. With this knowledge, we can get better results when researching and analyzing Android projects.
Conclusion
In this concise guide, we showed you how to make an Android app debuggable by modifying the system image, building the system image with modifications, and making Android Studio use this image. Once you’ve taken all these steps, you can debug all applications launched in the emulator using the remote debugger in Android Studio.
At Apriorit, we have dedicated teams of Android and iOS developers and reverse engineering experts always ready to deliver high-quality and secure products. Contact us now to start discussing your project!
Read more about how reverse engineering can augment your project below!
Have a question?
Ask our expert!
Director of Global Markets Development


