 Skip to main content

When working on a macOS-related project, your development and quality assurance (QA) teams have to take into account numerous nuances to deliver a secure application. For example, you need to ensure that your application works with all possible macOS security configurations. You have to know how these features work in a specific version of macOS, how an administrator can configure them, and how to ensure stable performance of your solution with various macOS security configurations.
In this article, we overview eight key macOS security configurations, show how to use them to protect macOS devices, and explain what you should take into account when developing a secure macOS application.
This article will be useful for IT engineers working on macOS development projects who want to get a deeper understanding of macOS security features.
Contents:
1. Set up user accounts
In macOS, you can choose between four types of user accounts with different levels of privileges. These privileges can allow or block the ability to use different operating system features.
In macOS, you can create the following account types:
- Admin. Administrators have all possible access rights. They can change any macOS configurations, install and delete applications, create and manage user accounts, etc. The first user you create in macOS will be of the administrator type. There can be several administrators on one device.
- Standard. Standard users can manage their own settings, work with files and folders inside their home folder, and download system updates but not install them. A standard user can’t install and delete apps, change profiles of other users, or edit system preferences such as those in the Network and Security preference panes. You can promote a Standard user account to an Admin account.
- Sharing only. The only thing users of a Sharing only account can do is remotely access shared files. They can’t log in to a personal user profile in macOS.
- Guest. There’s only one Guest user account per system, which doesn’t require a password to log in. A guest can’t change any device or operating system settings, manage users, or log in remotely. When the guest logs off, all data created by them is deleted.
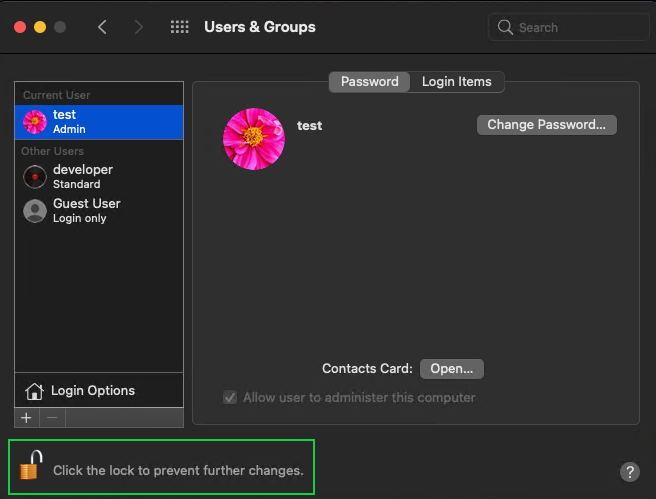
To manage users, open the Users & Groups preferences pane in System Preferences as an administrator. You will see a list of users with their account types. If you want to make changes to a user account, click the lock icon and enter the administrator password:
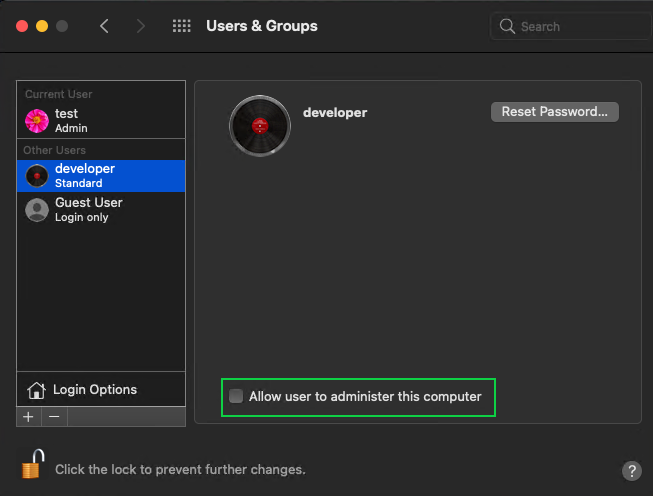
To promote a Standard user to an Admin, check the option Allow user to administer this computer. You can downgrade Admin users to Standard users by unchecking this box.
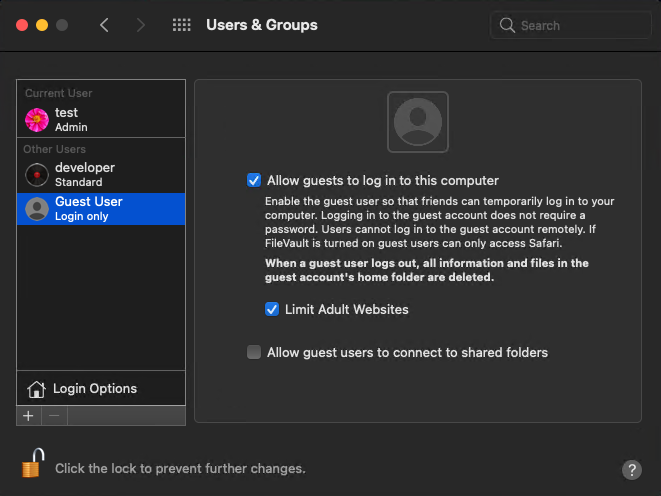
Click Guest User to manage the device’s guest account:
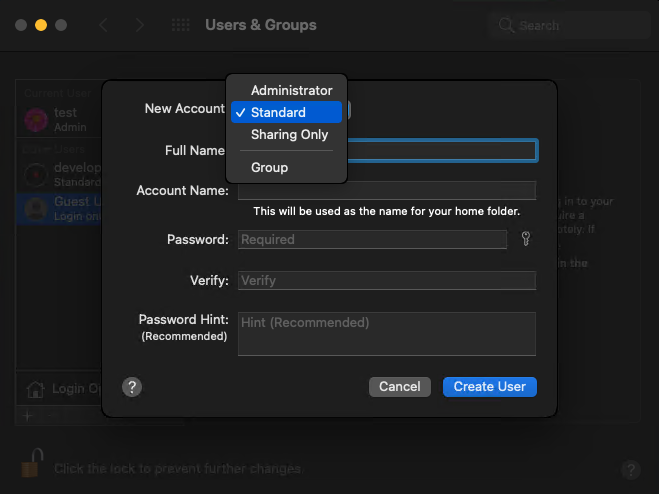
To create new users, click the plus button in the bottom left corner of the Users & Groups preferences pane and fill out the account creation form:
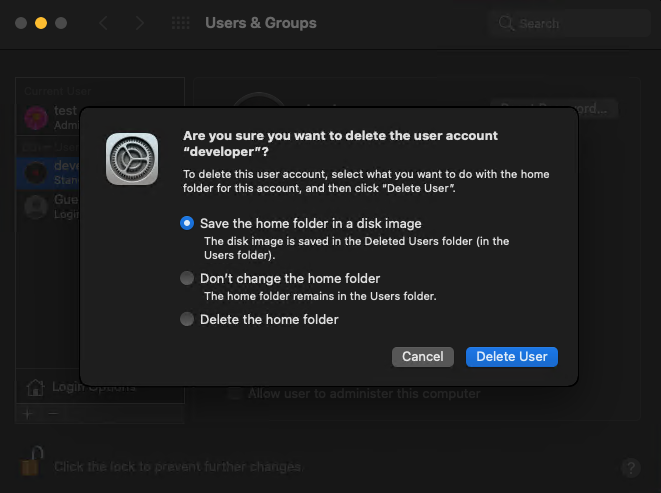
If you want to delete a user account, choose the account to delete, click the minus button in the bottom left corner of the Users & Groups pane, and confirm that you want to delete the account:
Configuring user accounts according to user roles and needs generally helps to improve the security of your network and applications, but you should pay special attention to account creation in the following cases:
- Several people can use the device. If many people have access to a system that stores sensitive information, you need to protect it from unauthorized access and insider threats. One way of doing this is by creating different user accounts with the level of access they need. For example, you can allow users to read data and take a look at system settings but only allow the system administrator to change data and settings.
- An organization owns the device. When an organization provides employees with computers for work, it may restrict user privileges in accessing device settings and control such devices with a group policy. macOS allows administrators to do this by creating user accounts with access limitations.
- The device has several usage scenarios. A user can do numerous tasks with the same computer: write code, create content, watch movies, etc. Creating a separate user account for each task can help customize device and application settings according to a certain usage scenario.
Several types of user accounts mean that developers have to test how their application works with all accounts. A QA team should verify the installation, execution, and uninstallation of an application with different access rights.
Say there’s a feature in your application that only works with administrator privileges. To check how this feature works, you need to test it first with an administrator profile. Then, run the same feature as a standard user and don’t give the application needed permissions. The feature won’t work in this case, but the application should continue working smoothly. Also, in this case, the application may display special notifications like <feature> needs administrator access.
QA engineers should add information about such access requests to application logs to help the development team locate any issues that may arise.
2. Limit screen time
macOS administrators can limit user access to certain applications by configuring screen time restrictions. This feature allows for configuring computer downtime, application limits, and content and privacy restrictions. When developing your application, make sure you know how this feature works and how your app should behave under screen time limitations.
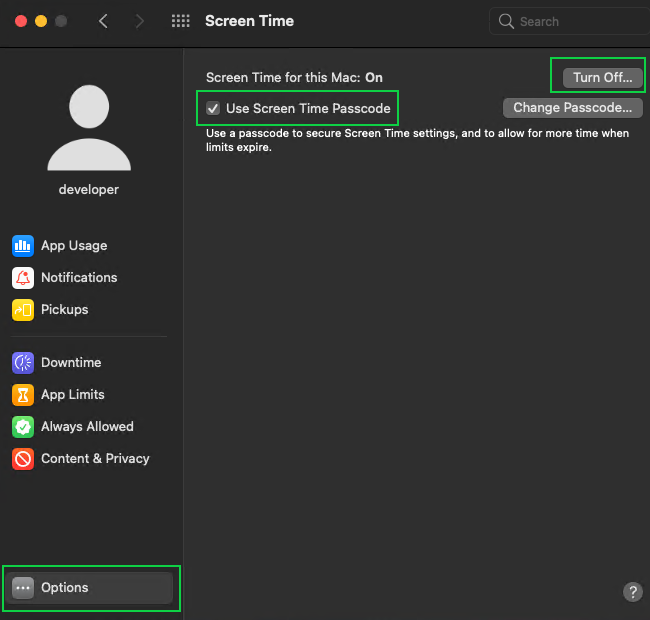
You can restrict user screen time by logging in to a new account and opening the Screen Time pane in System Preferences. Then, choose Options and turn on the feature. The next step is to enable Use Screen Time Passcode. The time passcode is a four-digit code required to ignore screen time restrictions or change the Screen Time settings.
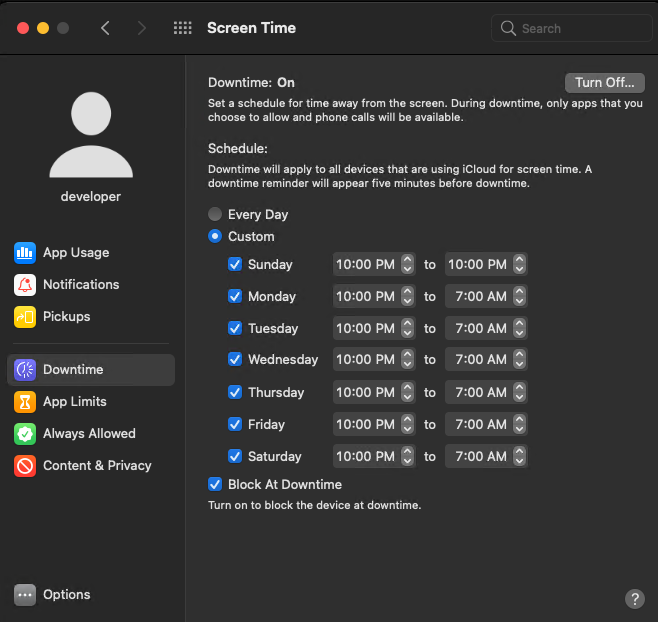
With Screen Time limits, you can also define which applications will be available during a certain period of time. Go to the Downtime tab to set the system downtime, turn on the feature, and set the schedule.
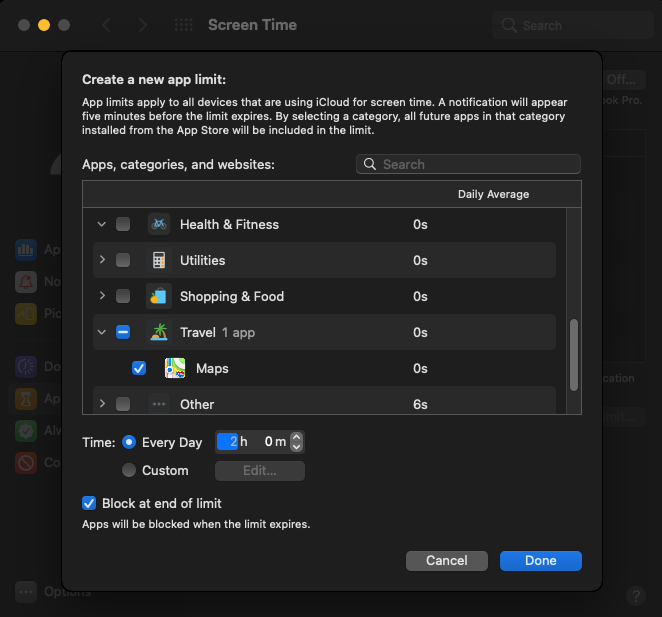
Then, go to the App Limits preferences pane to set the daily time limits for applications. Choose an application and set the limit. When the limit is exceeded, the application will be blocked.
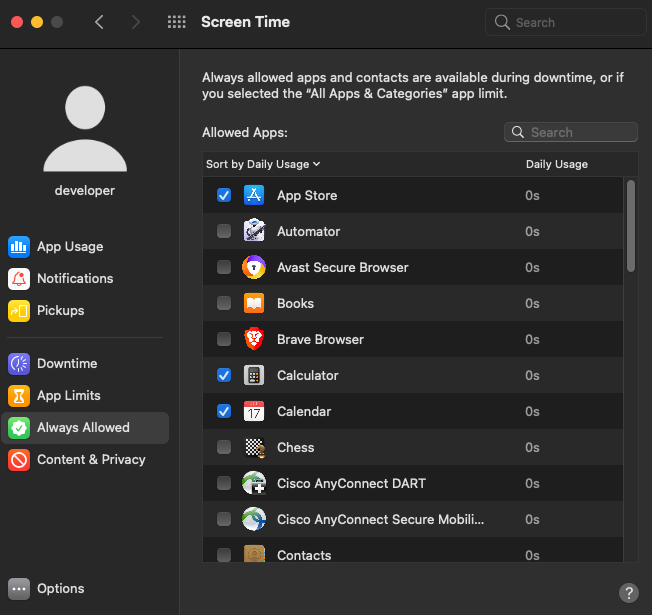
You can choose the applications that shouldn’t be blocked during downtime in the Always Allowed tab.
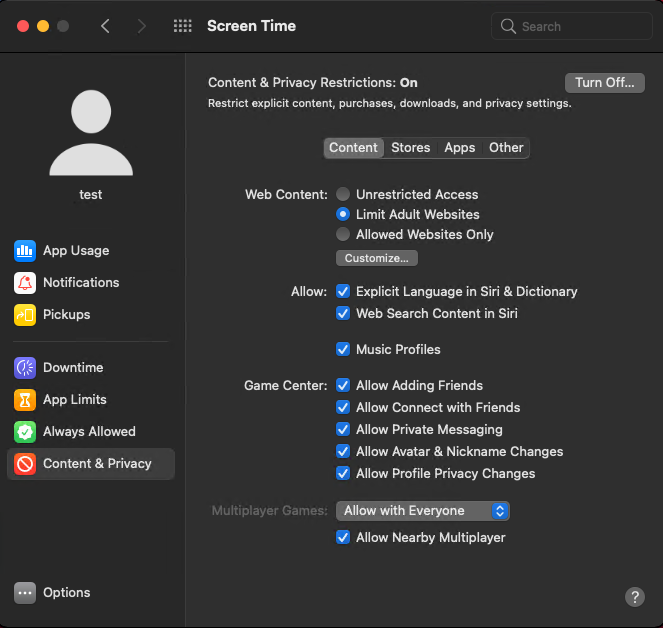
This feature also allows you to block explicit and adult content and set privacy settings for an account. You can do that in the Content & Privacy preferences pane.
If a user tries to visit a blocked website, they’ll see a warning message. They can add this website to the approved list only if they know the Screen Time passcode.
When you configure Screen Time restrictions for an application and those restrictions are active, the user will see a shaded icon.

When the user tries to launch a blocked application, they’ll see a warning about reaching their time limit. At that point, they can get one additional minute to complete their task or enter the Screen Time passcode to unblock the application.
macOS application developers also have to pay attention to Screen Time blocking when working on their products. In particular, be sure to check that:
- Screen Time can stop your application without any crashes or fatal errors
- A user can continue working with your application if they request one more minute or enter the Screen Time passcode
- A user can work with the application when it’s unblocked after downtime
- The application’s scheduled and background processes work as expected with Screen Time limits
There are a lot of different restrictions in the Content & Privacy settings of Screen Time. make sure to check that they don’t crash your application. For example, if you are developing a web traffic filter that can block adult websites, restrict access to such sites with Content & Privacy and check how your app works. If you are working on a video content application, restrict access to adult TV shows and then try to watch them inside the app. If you are developing a video game, you can restrict access to online gaming and try to play online.
3. Check developer ID with Gatekeeper
Gatekeeper is a feature that protects macOS from untrusted applications. A macOS user can configure their system to allow or block the execution of applications with unknown and suspicious origins in the Security & Privacy section of System Preferences.
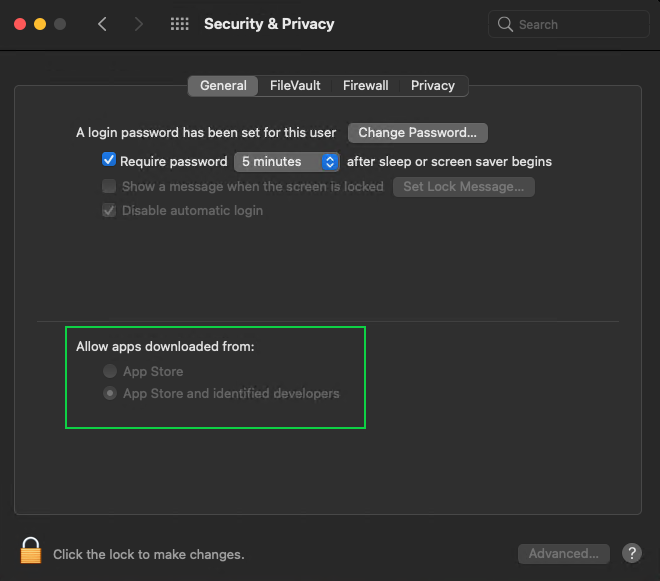
A user can allow their device to work only with applications downloaded from the App Store. It’s the most trusted source for downloading because Apple reviews the security of applications before they can be published on the App Store. If an application has any problems, Apple will remove it from the store.
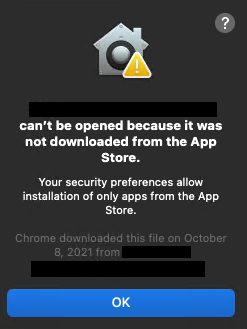
If a user tries to open an application not downloaded from the App Store, they’ll see the following message:
There’s also an option to allow launching applications from the App Store and identified developers. In this case, macOS will check the Developer ID and Notarization of the application to be sure that it’s secure. Gatekeeper checks the certificate when the application is installed and at every launch.
If the certificate isn’t valid, the application cannot be installed. Users can execute an installed application if it was compiled when the certificate was valid, even if the certificate has since expired. If a Developer ID provisioning profile is expired, the application can’t be executed.
That’s why every application should be signed with a Developer ID certificate. To get such a certificate, you have to be identified by Apple and become part of the Apple Developer Program. A Developer ID certificate is valid for five years from the date of creation, so make sure to renew your Developer ID periodically.
Any application also should be notarized to become trusted by macOS. The Apple Notarization service is an automated process that scans applications for malicious content. If it doesn’t discover issues, it permits macOS to run the application. To check Notarization permissions, Gatekeeper connects to Apple databases and searches for the application.
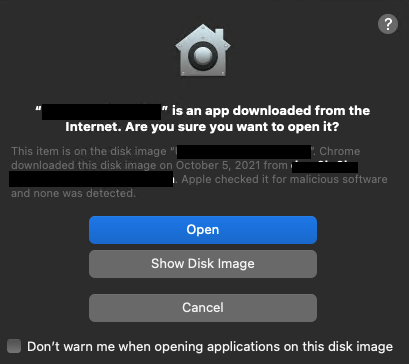
If a device allows a user to run applications downloaded from identified developers, Gatekeeper will still show a warning message with a note stating that Apple checked it for malicious software and none was detected, and it will allow the user to open the app.
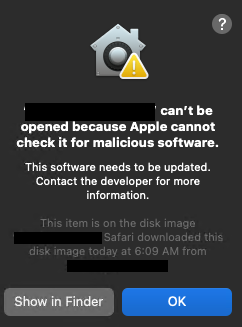
If a user tries to run an untrusted application, they’ll see the following message:
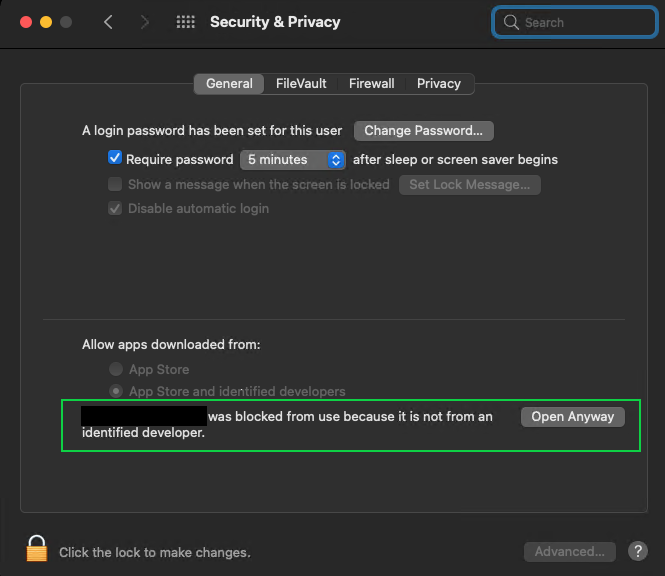
An administrator can allow a user to run untrusted applications by setting a corresponding permission in the Security & Privacy preferences pane.
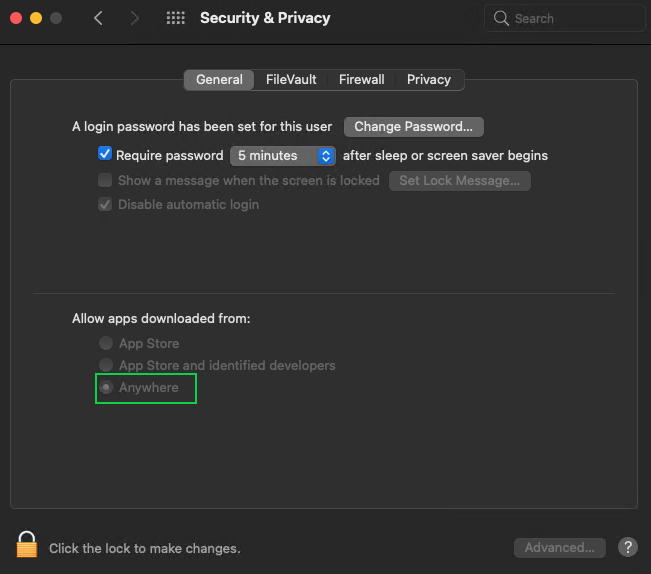
Gatekeeper can be a nuisance when you need to test your application which is not yet trusted and you don’t want to change security preferences. You can ignore Gatekeeper security features using the following command:
sudo spctl --master-disablespctl is an application that can be used to communicate with Gatekeeper. It adds the Anywhere option to Security & Privacy settings. This means you will be able to execute any application.
Note: We strongly recommend you not disable any security feature unless you are sure what you are doing!
You can verify an application’s Developer ID and Notarization with the following command:
spctl -vv -a '<your app>.app'In this command, -a is the parameter for getting evaluation results for the app, and -vv returns additional information.
If your application is signed by a valid Developer ID and has a valid Notarization, the command will return the message Notarized Developer ID and the developer’s information. For example, let’s check the Google Chrome app:

As you can see, Google Chrome is trusted by macOS.
If the application you’re interested in is created by a trusted developer but isn’t notarized, you won’t see the word Notarized in the source field:

If the application doesn’t even have a Developer ID signature, you’ll see a no usable signature message:

Before delivering any macOS product, use the command listed above to check the application’s Developer ID and Notarization. It will help your end users avoid possible issues with launching the application. You can also download the installer for your application from any internet resource and install it to simulate the user experience.
4. Manage external connections in Firewall
macOS has a built-in firewall that can secure applications from unauthorized internet access. It helps block any incoming connections and allows access to the applications you want.
To configure Firewall, visit the Firewall tab in the Security & Privacy preferences pane:
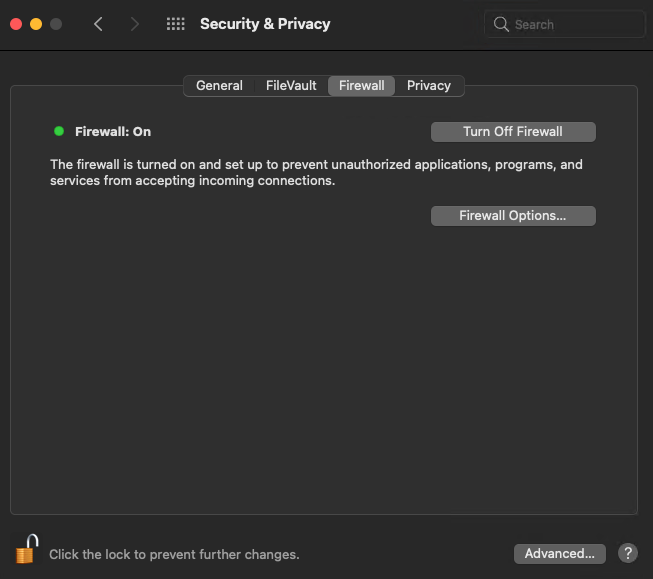
Then, click Firewall Options to configure the Firewall. You can block all incoming connections to prohibit anyone and anything from connecting to macOS. This is the most secure Firewall configuration, but some applications may not be able to provide online features when it’s enabled.
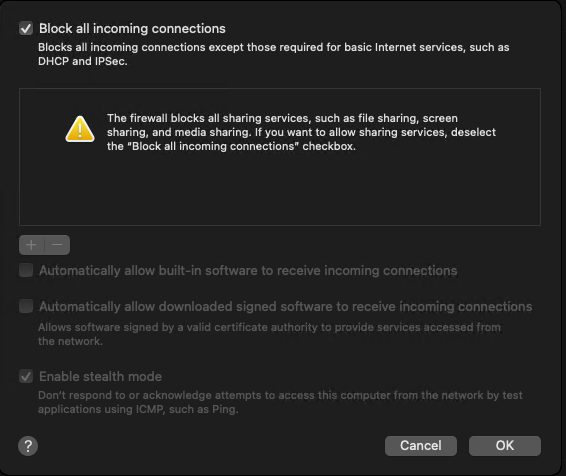
You can also choose to allow incoming connections for specific applications. If you are testing a client–server application and you see any issues with client–server connections, check the Firewall configuration and try adding your app to the allowed list.

5. Specify an application’s Privacy access
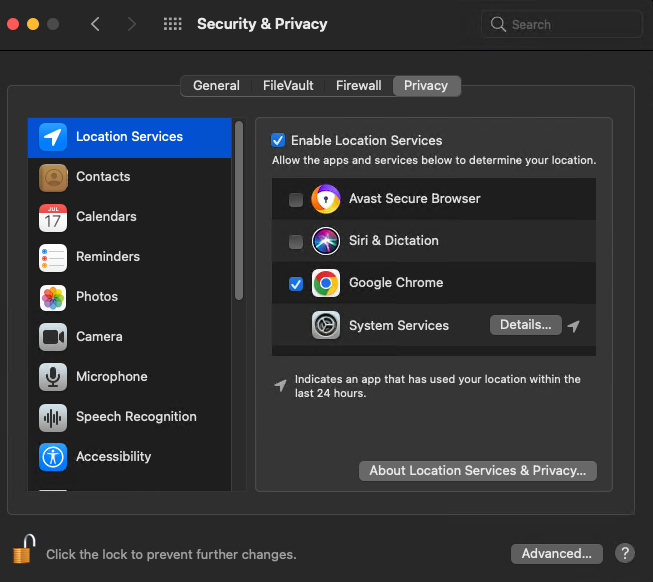
Some applications need access to advanced macOS features to work correctly. But malicious applications may also request access to those features to steal users’ personal data. By default, macOS blocks access to Location Services, Contacts, Photos, Microphone, Device Disk, Screen Recording, Bluetooth, and other features to protect a user from security threats.
If a user installs an application that requests access to blocked features, the user has to provide access in the Privacy tab of the Security & Privacy preferences pane.
When developing an application that requires access to sensitive features and resources, make sure to include an access request in the installer. The request can look like this: Please give <App name> access to the Camera. Also check how your application will behave if a user doesn’t provide access to necessary features, or if the user provides and then revokes access.
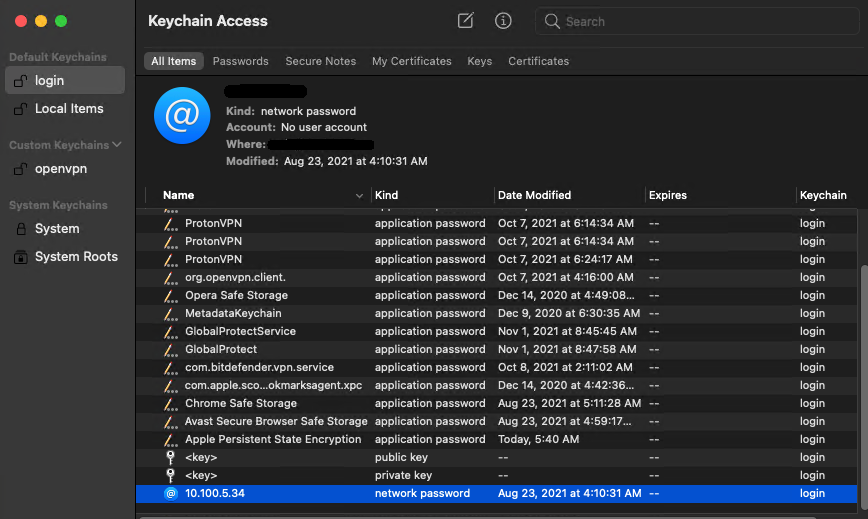
6. Configure Keychain Access
Keychain Access is a default macOS app for password management that stores a user’s credentials, reducing the number of passwords a user has to remember. You can find Keychain Access in the Utilities folder of your Applications list. Open it to find and configure any stored credentials.
To secure credentials, this application uses the Transport Layer Security (TLS) protocol and public key certificates. Let’s examine how they work.
TLS is a cryptographic protocol designed to secure communications in a computer network. It’s widely used in applications that use HTTPS, such as email, instant messaging, and voice over IP.
A public key certificate includes information about the public key, its owner, and the digital signature of an entity that has verified the certificate’s contents. If the signature is valid and software examining the certificate trusts the issuer, then it can use that key to communicate securely with the certificate’s subject.
In email encryption, code signing, and e-signature systems, a certificate’s subject is typically a person or an organization. In TLS, a certificate’s subject is typically a computer or other device, though TLS certificates may identify organizations or individuals in addition to their core role of identifying devices.
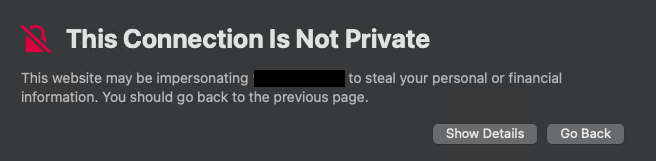
If you try accessing any secured resource, its certificate needs to be trusted by macOS. By default, macOS has a list of trusted certificates. If you want to access a resource without a trusted certificate, you’ll see the following message:
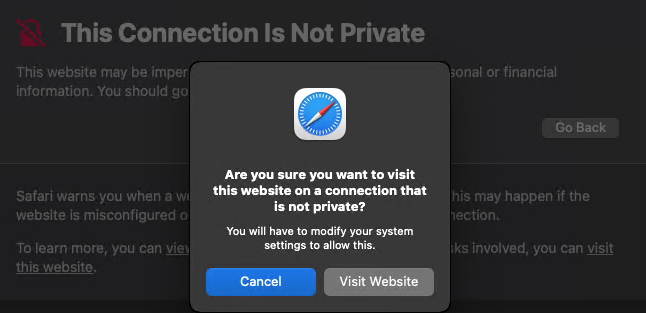
Only an administrator with corresponding credentials can add a resource to Keychain Access. Click Show Details and then Visit Website to add a certificate to Keychain Access.
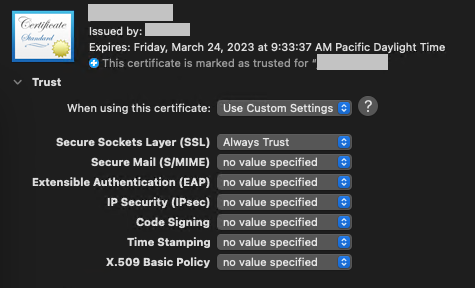
After that, you can open the certificate details and change the certificate’s settings.
When developing and testing a client–server macOS application, you need to know how to work with Keychain Access and manage security certificates inside it. If your application creates a certificate during installation, make sure to do the following:
- Provide your application with all permissions when it asks for administrator access, then check the certificate inside Keychain Access.
- Don’t provide administrator permissions for certificate installation, or don’t make the connection trusted. Check the application installation process and the application behavior. Your app should show a notification about certificate issues. Also, it should add information about these issues to the application logs. However, it shouldn’t crash.
- Check the behavior of your application when you make its certificate untrusted or delete the certificate altogether.
- Make application certificates expired by changing the date in macOS to any future date. Check how the application behaves in this case.
Keep in mind that Keychain Access features change in different macOS versions. For example, in macOS 10.15 and earlier versions, you can make a certificate trusted by executing the following script as a superuser:
sudo security add-trusted-cert -d -r trustAsRoot -k /Library/Keychains/System.keychain <certfile>In later macOS versions, you can’t do that. Also, in macOS 11 and 12, a user needs to manually approve application certificate even if they run a Terminal command to make the certificate trusted. This is done for security reasons: scripts can’t make any certificate trusted without the user’s permission. In these versions of macOS, check both UI and silent installation options using Terminal commands, as you may face silent installation issues on macOS 11 and later.
7. Enable Remote Login
Accessing macOS remotely allows developers to reproduce and fix an issue a user has trouble with. The OS provides a default feature for accessing remote systems, so you don’t need to install third-party software.
By default, all remote access features are disabled, but you can configure them in Sharing preferences. Enabling Remote Login will show you a message this:
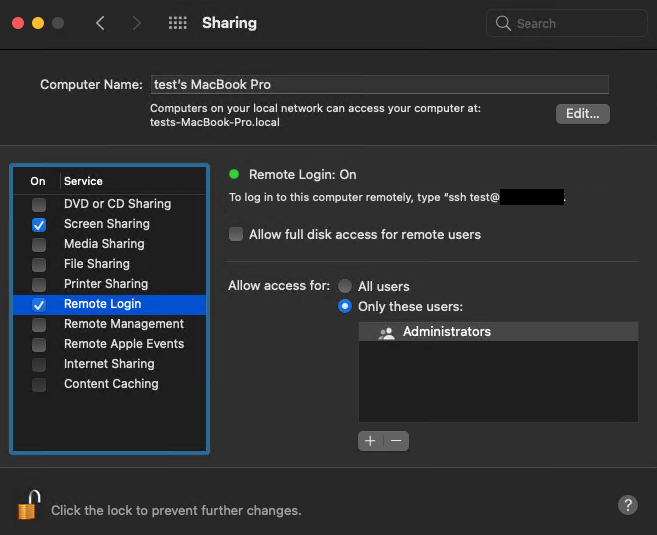
Use this command and your password to get access to another user’s system.
You can also enable Virtual Network Computing (VNC) access in Screen Sharing, which will allow you to share your screen. When you enable this feature, you will see a similar message:
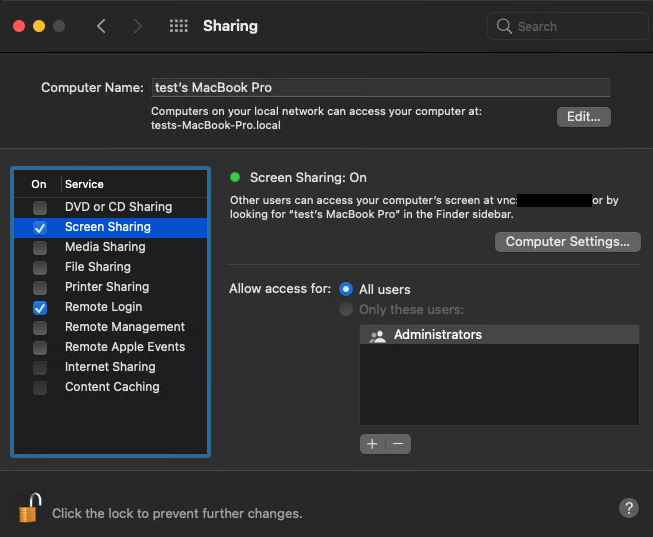
Note that to start screen sharing, you need to open Computer Settings and set the password that will be used to access your system.
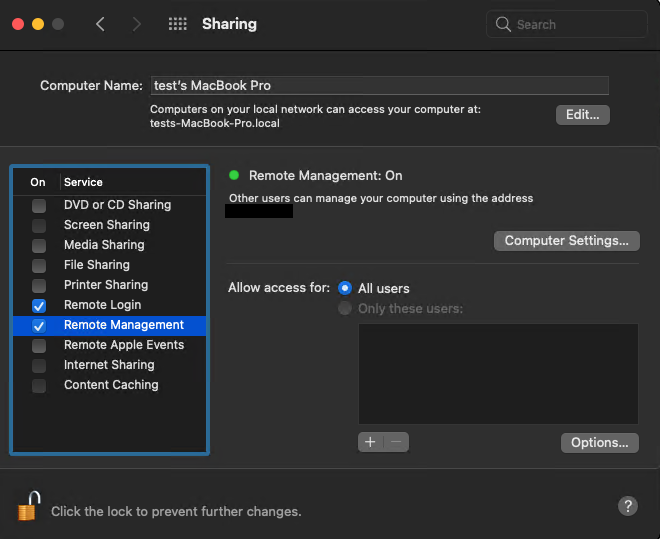
You can enable Apple Remote Desktop in the Remote Management service. It gives you the ability to remotely execute any scripts and use all Terminal capabilities. You can connect to another device via Apple Remote Desktop from any operating system. Apple Remote Desktop is the optimal way to establish a remote connection with a slow internet connection since it doesn’t load the macOS GUI.
The VNC service provides you with a remote connection to the macOS GUI. As a developer or QA engineer, you can use VNC to test your application on another Mac device with a different macOS version. You can also connect to your end user’s macOS device and debug any issues with your application.
8. Acquire superuser access
Root is a superuser that has unlimited access to all system features and files. This user is helpful when an administrator account can’t provide the required level of permissions. For example, an administrator can’t change system files, but a superuser can. You can obtain root access rights via the Terminal and in the GUI. Let’s take a look at the Terminal option.
When you run a command and see the Permission denied message, run the same command with the word sudo before it. You’ll need to enter the root password, and then the command will be executed without access issues.
To become a superuser inside Terminal without needing to enter sudo before each command, use the sudo su command. You’ll also need to enter the root password. When this command is executed, you’ll gain superuser access in this Terminal session.
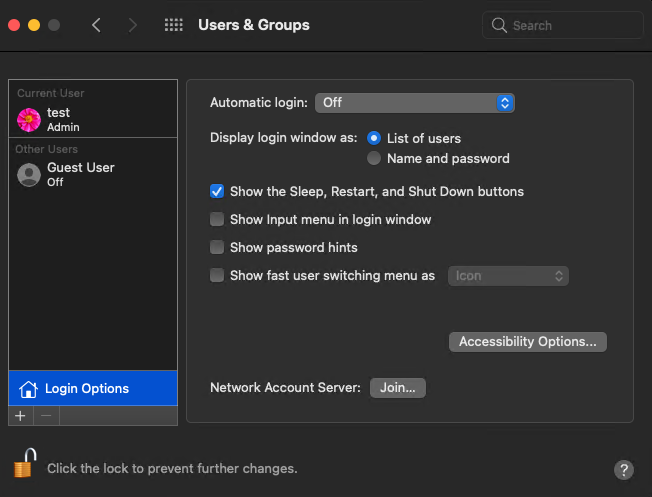
To gain superuser access via the GUI, you need to be an administrator. There’s no way of logging into macOS as a superuser by default, but there’s a workaround. Open Login Options in the Users & Groups preferences pane and click Join.
In the opened form, select Open Directory Utility, then click the lock icon in the bottom left corner and enter the administrator credentials.
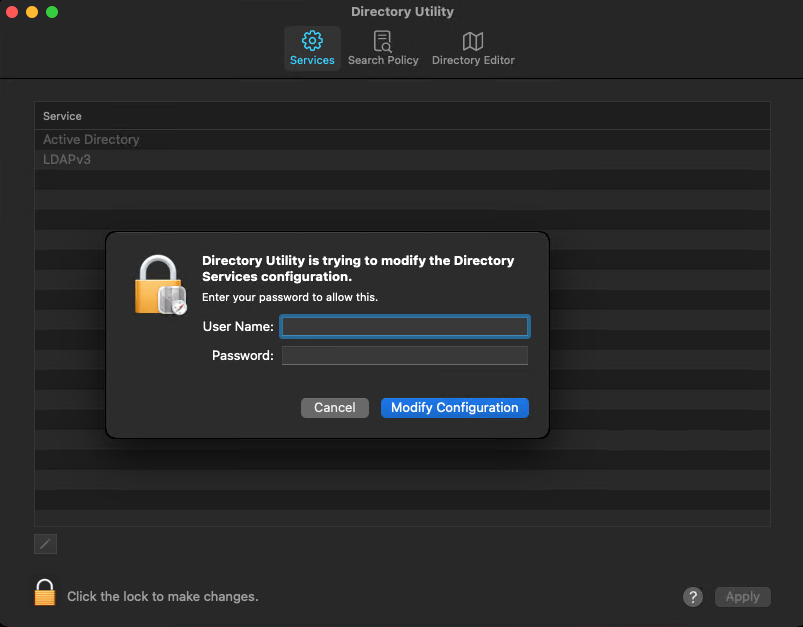
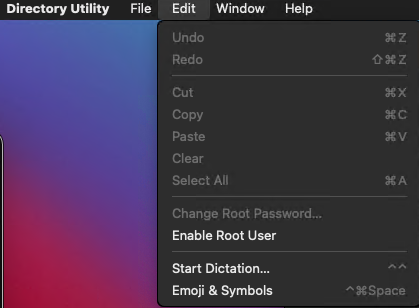
In Directory Utility, open the Edit menu, select Enable Root User, and set a password for the root user.
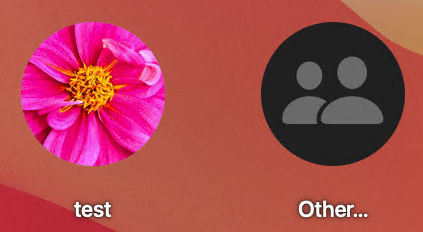
Now you can log in and out of macOS as the root user. On the login screen, choose Other, enter ‘root’ as the username and enter the password you created for the root account.
If your application has features that require root access to work, check how they perform if a user doesn’t have root access rights. Ideally, in this case the application should display a message about the permission issue, add this information to its logs, and continue working without crashing.
Conclusion
macOS has a robust set of built-in security features that macOS developers need to be aware of and configure properly to protect their systems and applications. Also, Apple often reworks and improves these security features, so with a new macOS release, you need to make sure your software works properly with the latest versions.
One way of doing that is by studying all macOS changelogs, learning the ins and outs of the system, and supporting your applications yourself. A better option is to outsource this task to Apriorit’s professional macOS development team that focuses on cybersecurity.
Our macOS experts deeply understand how different versions of the macOS operating system work, how to develop applications for various purposes and industries, and where to look when testing macOS apps.
Reach out to start building a secure macOS solution hassle-free!


