 Skip to main content
With the help of mobile applications, customers can connect with businesses around the clock. One can only imagine the profits companies are missing out on when they ignore mobile apps and focus only on websites. Yet, this is what many companies continue to do.
The high cost of mobile application development is a huge factor for some organizations, especially when a high return on investment isn’t guaranteed. Is it possible to develop a working mobile application with a tight budget? It is for WordPress site owners thanks to progressive web application (PWA) technology.
In this article, we talk about the specifics of progressive web applications, the benefits of this application type, and why businesses need PWAs. We also cover some of the key steps of how to turn a WordPress site into a PWA.
This article will be useful for product owners and service providers looking for new ways to deliver their products and services to a wider audience.
Contents:
What is a PWA and why do you need one?
Progressive web application technology allows you to develop a website that is visually and functionally similar to a native app. Without needing to develop a separate application, a company can turn their existing website into a PWA that users can install on a smartphone, tablet, or desktop. Sometimes, it’s enough for the companies to convert WordPress to PWA.
Some businesses choose a PWA instead of a native app because of time and budget constraints. Let’s take a look at other benefits as well as possible drawbacks of a progressive web application.
Looking to expand your mobile presence?
Let Apriorit engineers ensure a seamless mobile experience for your users and enhanced performance for your solution!
Pros and cons of a PWA for businesses
In the mobile-first era, it’s important to accommodate users’ needs. There are many things to consider when deciding on the type of app to build, including business needs, key features, and the target audience. Turning your WordPress to progressive web app has its own benefits and drawbacks.
Advantages of a PWA
Seeing as a PWA is a fusion between a website and an app, it might be exactly what your business needs to improve the user experience without needing a typical native app. These strong points set a PWA apart:
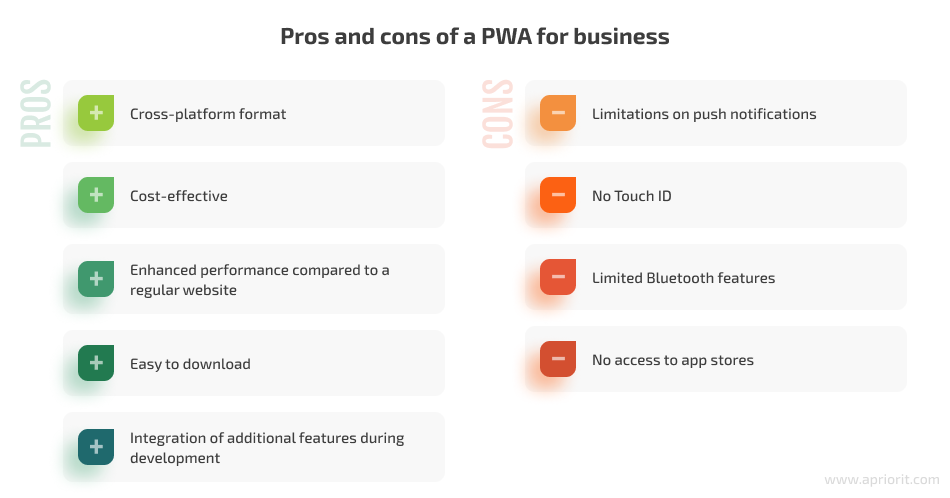
- Cross-platform format. A PWA can be downloaded to any mobile device (phone, tablet), desktop, or laptop.
- Cost-effectiveness. Developing, maintaining, and supporting a PWA is cheaper in the long run compared to doing the same for separate mobile apps, even with a dedicated team of software developers.
- Enhanced performance compared to a regular website. Progressive web applications are much faster than regular websites and can work offline.
- Easy to download. Businesses don’t have to direct users to a third-party store such as Google Play or the App Store. A PWA can be downloaded directly from your website.
- Integration of additional features during development. A progressive web app works well with third-party services like geolocation, camera, push notifications, and microphone, using the corresponding APIs.
Disadvantages of a PWA
Of course, a PWA is not a universal method for satisfying clients without developing a native app. There are also weak points to this format of product delivery.
- Limitations on push notifications. PWAs can’t send push notifications on iPhones and iPads running operating system versions below iOS 14. To enable notifications, you need to register your App ID in the Apple Developer portal. Push notifications work fine on Android devices.
- No Touch ID. Progressive web apps don’t support Touch ID.
- Limited Bluetooth features. PWAs also have limited Bluetooth compatibility.
- No access to app stores. If your business doesn’t have an updated website, direct download of a PWA without a link might be a problem for users.
There are two ways of turning your WordPress website into a progressive web app:
- Using a plugin
- Manually
A plugin can assist you when you don’t have much time or many resources. You can also build a PWA manually, but this method requires extensive programming knowledge.
Let’s take a look at both of these approaches in detail, starting with using a plugin.
Read also
How to Add Push Notifications to Your Web Application Using Google Firebase
Keep your users informed and engaged by adding push notifications to your web application in our step-by-step guide.

Turning a website into a PWA using a plugin
The easiest way to turn your WordPress to PWA is to use a dedicated plugin.
Here are some benefits of building a PWA with a plugin:
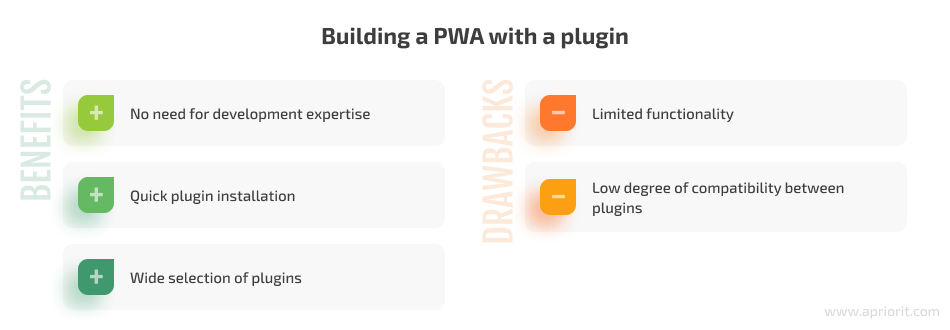
- No need for development expertise. You can start creating your PWA with a plugin without any previous programming knowledge.
- Quick plugin installation. Configuring the plugin might take some time, but the installation is faster than creating an app from scratch.
- Wide selection of plugins. When you use a popular plugin, you can be sure that its performance and security have been tested by many users.
There are also some disadvantages:
- Limited functionality. Plugin functionality is limited, so a plugin can’t be tailored to your needs.
- Low degree of compatibility between plugins. Some plugins are not compatible with each other, so conflicts might occur when using more than one plugin simultaneously.
Let’s take a look at the most popular plugins for progressive web apps:
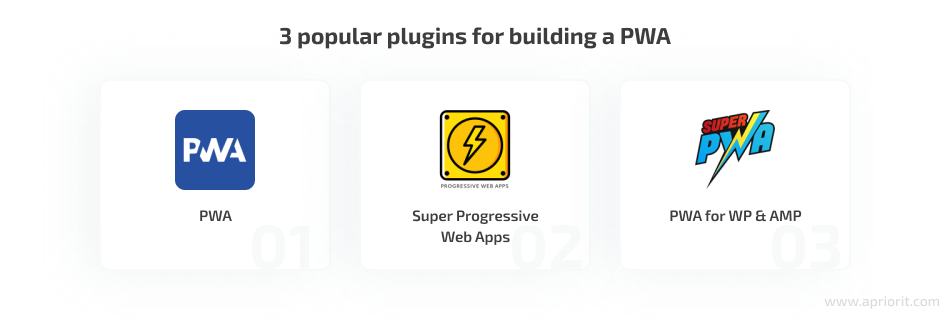
PWA
The PWA plugin is a set of application programming interfaces (APIs) that are used for integrating the plugin with the WordPress core. You can integrate different themes and plugins with these APIs to create a progressive web app. This plugin doesn’t turn your site into a fully functioning PWA. Your app still needs to be customized after installing the PWA plugin.
What sets this plugin apart is its ability to easily enable and disable offline mode. However, some users might find it inconvenient that there is no customization. This plugin utilizes the website’s default settings, like language, design, etc., instead.
Super Progressive Web Apps
After installing Super Progressive Web Apps, your website turns into a fully functioning PWA. You can check the degree of its progressiveness with the help of the Lighthouse tool (more details on this in the Testing tools section).
After installing the Super Progressive Web Apps plugin, you’ll get a button on your website that allows users to download your application to their device.
There are many additional features in this plugin that allow you to set:
- an icon for your app
- the name of the app
- which page to show offline
- and more
There are also some additional extensions (add-ons) that improve the experience for end users and allow for greater app customization.
One of the main benefits of this tool is that it’s intuitive so that even someone with minimal programming knowledge can turn a WordPress site into a PWA.
Related project
Cross-Platform Data Backup Solution Development: Windows, Android, macOS, iOS
Discover how Apriorit fortified our client’s data integrity with our cross-platform backup solution, ensuring seamless data protection across all devices.
PWA for WP & AMP
Just like the previous plugins, PWA for WP & AMP can convert WordPress website to PWA. There are many free features (offline support, background color options) as well as paid features (push notifications).
Currently, a progressive web app made with this plugin is fully compatible with accelerated mobile pages (AMP). The PWA for WP & AMP plugin works well with AMP for WP and AMP for WordPress by Automatic.
Users of this plugin can enjoy all the benefits of progressive web apps in addition to other useful features including:
- full compatibility with AMP
- support for offline mode
- native mobile UX
- add to home screen feature
However, the wide range of settings and features might take you a long time to figure out. As with other plugins, citizen developers need to know what particular functionality is needed for their project in order not to overload their PWA.
Building a PWA from a WordPress website manually is much more complicated in comparison to using a plugin. We explore the particulars of how to convert a WordPress site to PWA by yourself in the next section.
Turning a WordPress website into a PWA by hand
Developing a progressive web app takes a lot more time compared to using plugins. At the same time, the main advantage of this method is that you create only the functionality you actually need on your website. This way, you won’t add anything extra that only complicates the development process.
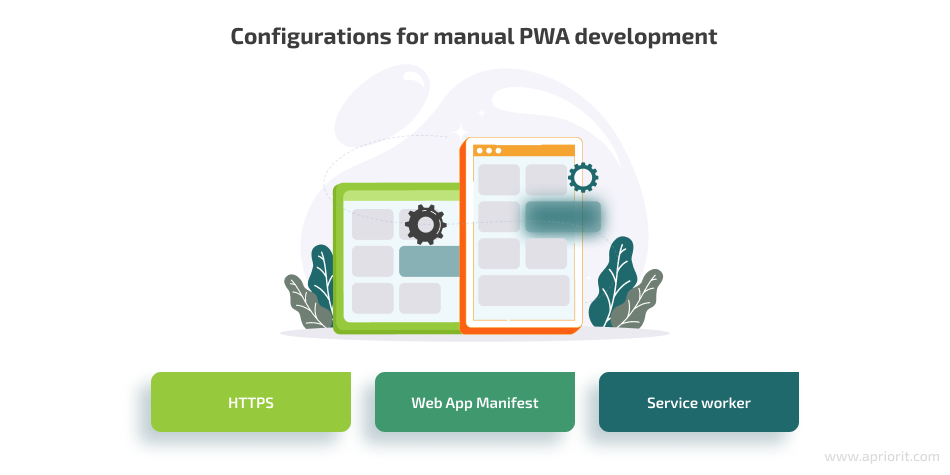
Before you turn WordPress into a PWA, you need to configure the following:
HTTPS
HTTPS is required for securely transmitting user data. It can be set up by adding an SSL certificate to the website.
Web app manifest
The web app manifest is a JSON file that provides data about your web application. This data makes your web app look like a native application to the end user. The manifest file includes the following information:
- Site title
- Author
- Icon
- Site version
- Description
- List of required assets
You can use the App Manifest Generator to create a manifest file for your PWA, or you can write one from scratch:
{
 "name": "Full Site Name",
"short_name": "Short Name",
"theme_color": "#2196f3",
"background_color": "#2196f3",
"icons": [{
    "src": "images/touch/homescreen48.png",
    "sizes": "48x48",
    "type": "image/png"
  }, {
    "src": "images/touch/homescreen72.png",
    "sizes": "72x72",
    "type": "image/png"
  }, {
    "src": "images/touch/homescreen96.png",
    "sizes": "96x96",
    "type": "image/png"
  }, {
    "src": "images/touch/homescreen144.png",
    "sizes": "144x144",
    "type": "image/png"
  }, {
    "src": "images/touch/homescreen168.png",
    "sizes": "168x168",
    "type": "image/png"
  }, {
    "src": "images/touch/homescreen192.png",
    "sizes": "192x192",
    "type": "image/png"
  }],
"display": "browser",
"scope": "/",
"start_url": "/"
}
This file needs to be added to the website’s root folder and connected to all pages. After that, the whole site becomes downloadable. Once it’s downloaded to a device, its icon will appear on the device’s home screen.
However, this is not a full-scale PWA yet. At this point, your website won’t have some of the distinguishing features of a true PWA, such as the ability to work offline. To implement offline functionality, you’ll need to create a service worker.
Read also
Caching in .NET and SQL Server Notifications
Reduce server load and deliver timely updates to users in your .NET applications by implementing effective caching for server notifications.
Service worker
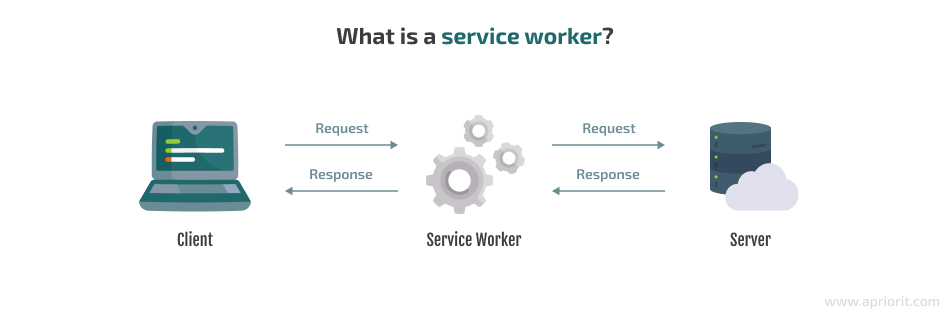
A service worker is the key script used for PWA implementation. This is an intermediary between the client and the server that handles all requests to the server. With the help of a service worker, you can intercept, modify, and respond to HTTP requests. A service worker also allows a website to work offline using various caching strategies, load faster, and display push notifications.
Now let’s focus on the features of the service worker and its life cycle.
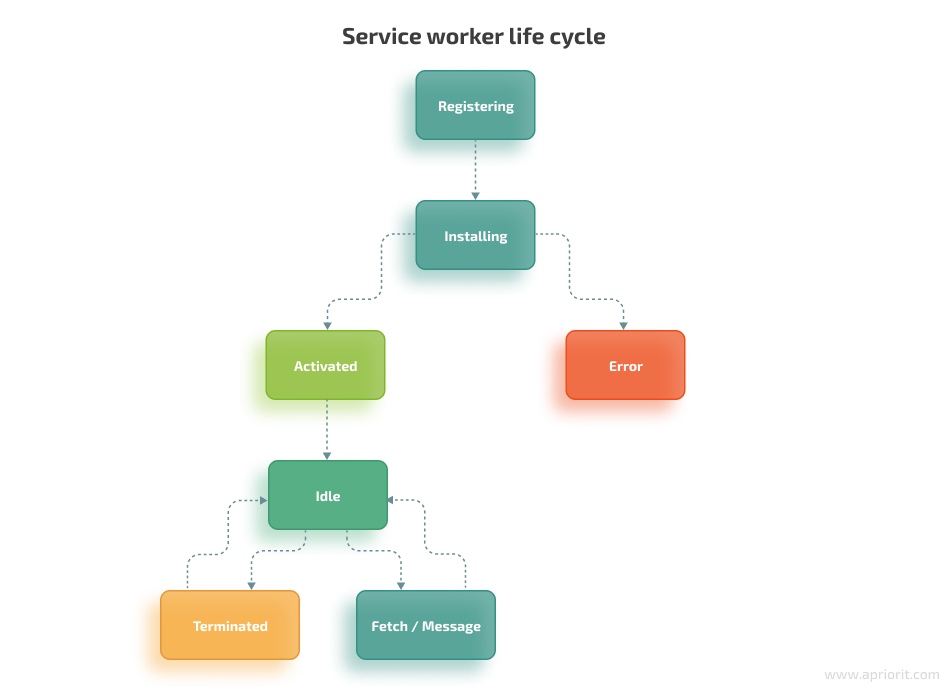
Service worker life cycle
There are usually three stages in the life cycle of a service worker: registration, installation, and activation. There are also idle and fetch states, which depend on the outcome of the previous stages. Let’s take a closer look at the life cycle of a service worker.
Registration
The service worker needs to be registered in a JavaScript file, and before the service worker can be installed and activated, this file has to be registered as a background process. This is the main difference between a service worker and a regular JavaScript file.
if ('serviceWorker' in navigator) {
  navigator.serviceWorker.register('/sw.js', {scope: './sw-test/'})
  .then((reg) => {
	// registration successfully completed
    console.log('Registration succeeded. Scope is ' + reg.scope);
  }).catch((error) => {
	// registration failed
    console.log('Registration failed with ' + error);
  });
}
Installation
The install event is used mainly for filling the browser’s cache with resources that are needed to successfully launch the application offline mode. For this, you can use the new API of service worker storage — cache. The cache API is global for all service workers, allowing you to store request results, using the requests themselves as keys for accessing these results.
self.addEventListener('install', (event) => {
  event.waitUntil(
    caches.open('v1').then((cache) => {
  	return cache.addAll([
    	'/',
    	'/main.js,
        '/main.css',
]);
	})
  );
});
Activation
Once a service worker is activated, you can tackle different tasks in the (activate) event. One of the most common tasks is deleting an old cache.
self.addEventListener('activate', (event) => {
  var cacheKeeplist = ['v2'];
  event.waitUntil(
    caches.keys().then((keyList) => {
  	return Promise.all(keyList.map((key) => {
    	if (cacheKeeplist.indexOf(key) === -1) {
      	return caches.delete(key);
    	}
  	}));
	})
  );
});
At this point, the service worker has full control over the page. Now it can process various events, such as fetch, push, and sync.
The fetch event starts every time resources controlled by the service worker are requested. These resources include documents within the specified scope and other resources associated with these documents. The fetch event also implements caching strategies.
self.addEventListener('fetch', (event) => {
  event.respondWith(
    caches.match(event.request)
  );
});
After activation, the service worker moves to the idle state without performing any actions until the next event is launched.
Termination
This is the event that stops the service worker immediately, without letting it finish any operations. You can initiate it manually or with a timeout timer.
Caching is among the most convenient features of service workers. With the help of caching, you can provide end users with a stable PWA experience similar to that of a native app. The fetch event of a service worker is directly connected to the caching strategy.
Read also
Building a Cross-Platform Mobile Web Application with Ionic and Angular
Leverage cross-platform frameworks to create responsive, feature-rich apps that reach a wider audience.
Caching strategies
All data transmitted via HTTP can be cached. The volume of cached data must be within the cache size limits. Depending on the browser, if the cache limit is exceeded, cached data will either be deleted by the browser or the browser will request permission to increase the cache limit.
When using any of the caching strategies, you can cache static files, request responses, and so on.
Here are six common caching strategies for a PWA:
- Cache only
- Cache first
- Network first;
- Network only
- Stale-while-revalidate
- Generic fallback
The first four strategies are the most common. Let’s take a closer look at them.
Cache only
This is one of the simplest caching strategies. As the name suggests, all requests are sent to the cache. You can use this approach when you need access to static assets.

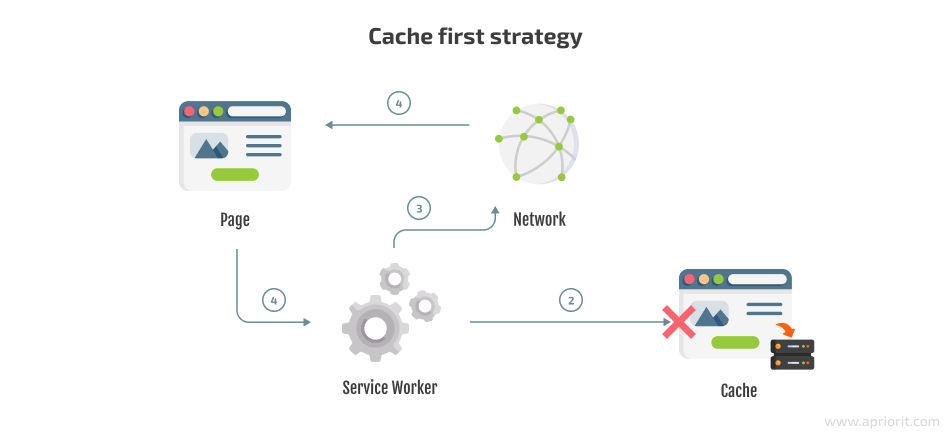
Cache first
In the cache first caching strategy, a service worker makes a request to the cache, and if there is no response, the request is redirected to the network. This approach is suitable when working with static content.
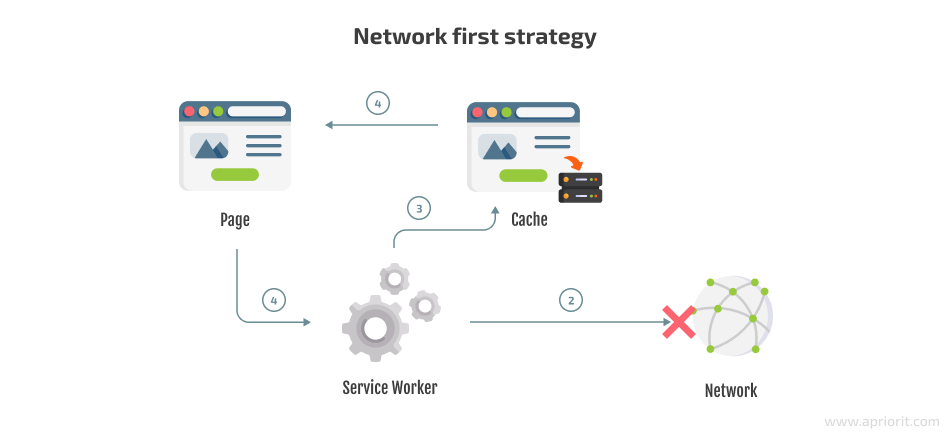
Network first
You can use the network first caching strategy when you need to display updated content alongside previous content. A common example of such a case is when an end user is changing their avatar.
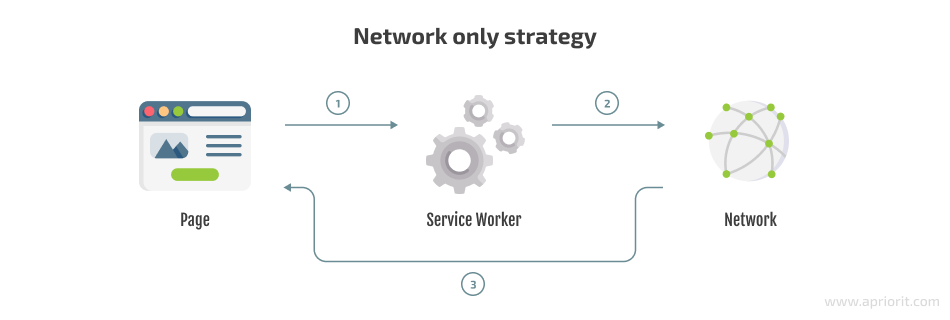
Network Only
Here, the client makes a request that gets intercepted by the service worker and sent to the network. This strategy is mostly used when there are no offline resources.
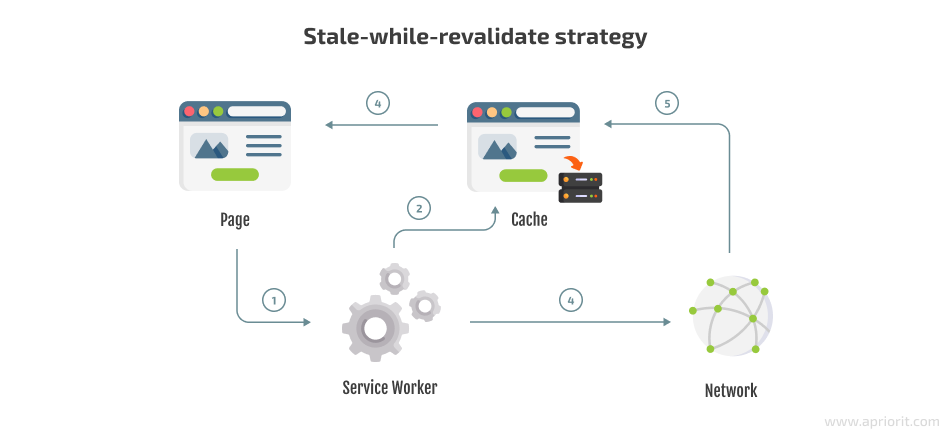
Stale-while-revalidate
In this case, the request is directed to the cache, which is updated in the background for the next request.
Generic fallback
The generic fallback strategy is used when there is no response either in the cache or from the network. The trick here is to pre-cache a fallback for specific network resources.

All these caching strategies allow users to handle data in their progressive web applications. Now let’s focus on how to test the work of your PWA and what tools you can use for simplifying the development and testing process.
PWA development and testing tools
Even if you use a plugin to convert WordPress site to PWA, you still need to test the final product. No matter what method you use to build your PWA, you need to make sure that your final product works flawlessly.
Lighthouse is used for PWA validation. It can be found in the Chrome Dev Tools. This extension tells you what is needed to turn your website into a PWA. This way, you can immediately see what needs to be added to your site when you convert WordPress to progressive web app.
PWABuilder helps you build a PWA and creates files that allow you to add your app to various app stores. It includes the following features:
- a PWA starter template
- an extension in VSCode for ease of development
- a packaging tool for putting the PWA in app stores
However, if you want to work with PWABuilder’s initial build, you need knowledge of technologies like lit, web-component, Vite, Vaadin Router, and TS.
Workbox makes it easier to work with service workers and provides many different features out of the box. For example, Workbox encapsulates the overall operations of a service worker, which is convenient for developers. Also, a lot of libraries and frameworks use Workbox when creating PWA templates (React, Vue, Next).
As you can see, there are many tools that can guide you through the process of converting WordPress site to PWA and testing it out.
Conclusion
Now you know the basic steps of turning your existing WordPress website into a progressive web application. You can use a template or a plugin, or you can build everything from scratch.
Hands-on development gives more opportunities to both end users and business owners. It’s always best to tailor your PWA to your target audience and the possibilities of your business.
Here at Apriorit, our specialists will assess the needs of your business, give you an estimate, and create a web application that’s perfect for you.
Looking for a team of web developers?
Apriorit’s dedicated teams combine technical and business expertise to deliver secure, functional, and user-friendly web apps. Let’s build a perfect web application for your needs.
Have a question?
Ask our expert!
Program Manager


