 Skip to main content

The more popular cryptocurrency and blockchain technology become, the more they draw the attention of hackers. According to recent research by Carbon Black, a total of $1.1 billion in cryptocurrencies was stolen in the first half of 2018. In approximately 35 percent of cases, the main targets of hackers were regular users and private businesses. And a significant part of these attacks were related to hacking smart contracts or stealing private keys from user accounts.
Once attackers get ahold of a legitimate user account’s private keys or hack a smart contract, they can get access to all the funds that the compromised account has access to. In this post, we take a detailed look at how to track suspicious transactions on the blockchain and prevent hackers from stealing your funds. To make this overview more informative, we’ll focus on detecting suspicious activity on the Ethereum blockchain.
Contents:
Protecting your cryptocurrency
There are different types of attacks in blockchain on different networks and digital currency exchanges, which became common these days. The majority of cryptocurrency-related attacks proceed in a similar manner, illustrated in Figure 1 below.
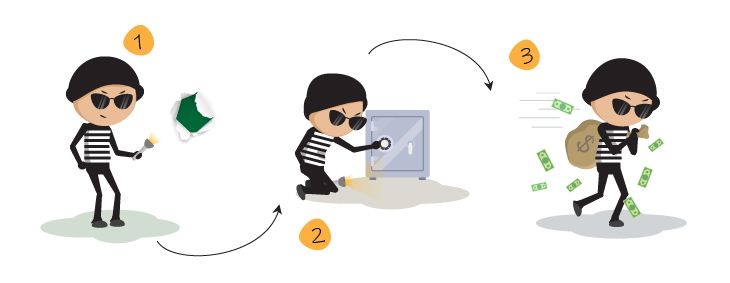
Figure 1. The scheme of a typical cryptocurrency-related attack
The process usually consists of three steps:
- A hacker finds a vulnerability in a victim’s computer system or in one of their smart contracts and exploits it.
- After exploiting the vulnerability, the hacker gets access to all the victim’s funds.
- The hacker takes the money and disappears.
There are a couple of ways to prevent steps 1 and 2 from happening. First, you should follow commonly used security best practices when developing a smart contract. Second, you should keep the majority of your funds in a secure offline storage device, like a cold wallet.
While these preventive measures may lessen the chances of hackers getting ahold of your cryptocurrency, they can’t guarantee a high level of security for at least three reasons:
- You can’t permanently store all of your cryptocurrency in offline storage. At least some part of your funds (the part that’s actively used for trading) needs to be available online and accessed quickly.
- Any smart contract can have zero-day vulnerabilities that haven’t been fixed yet and, therefore, may be exploited by hackers.
- Sometimes, tools like digital wallets or blockchain clients may introduce accidental vulnerabilities in software updates. Theoretically, these vulnerabilities can also be exploited by hackers.
It’s nearly impossible to fully protect your cryptocurrency from theft and prevent hackers from getting access to your funds. The good news is that there might be an effective way to not let the attackers leave with your money.
Tracking suspicious transactions to catch a thief
As you probably know, one of the signature features of the majority of blockchain networks is the full publicity and transparency of every single transaction. This means that even if hackers manage to get access to your account, you can find the details of every single transaction they make in the blockchain. This gives you a chance to track suspicious transactions and catch the thieves before they get away with your money.
Furthermore, it’s just as trivial to monitor new transactions as they appear and detect any suspicious activity related to your funds. So even if a hack happens, you can track the culprit’s every move and action while also working with the community to prevent the laundering of any stolen currency.
Sometimes, if a smart contract allows it, you can simply block all of your stolen tokens and stop the attack altogether. Earlier in 2018, Bancor used this opportunity when their BNT tokens got hacked.
Here is the latest update on the recent security breach: pic.twitter.com/JroypFvBri
— Bancor (@Bancor) July 9, 2018
Generally, there are two ways you can monitor transactions on a blockchain:
- Manually, by looking at particular transactions
- Automatically, by using the blockchain network’s APIs
Next, we take a more detailed look at each of these approaches.
Manual transaction monitoring
If you wanted to read several particular transactions from a personal wallet or a small-scale contract, the easiest way would be to do it manually. Just remember that in order to convert block data to a human-readable format, you need to use a special tool called a block explorer.
A block explorer allows you to explore the details of each transaction and follow any transfers of any currency. Note that there are specific block explorers for every major cryptocurrency. Here are some examples for Bitcoin Core, Ethereum, Ripple, Bitcoin Cash, Litecoin, and EOS. It’s also noteworthy that the Ethereum block explorer supports ERC20 tokens as well.
While this approach works well for monitoring personal wallets and small-scale smart contracts from time to time, it’s not suitable for full-scale 24/7 monitoring. If you need to monitor a large number of wallets and smart contracts on a regular basis, then it’s better to use automatic monitoring.
Automatic transaction monitoring
To access transaction data automatically, you need to use a network’s Application Programming Interface, or API. Every network has its own API for accessing blockchain data. Since our focus in this article is on the Ethereum network, we’ll describe how to work with this network’s API in particular.
For accessing transaction data, Ethereum uses an API called web3. As of today, there are two officially supported implementations of the web3 API: in JavaScript and in Python. Let’s look closer at each of these implementations.
JavaScript web3 API implementation
The JavaScript implementation of the web3 API works best for creating web applications that use blockchain technology. We can start with a simple JavaScript command that lists transactions in a given block. You can follow along with any JavaScript sandbox, such as jsfiddle. You’ll also need the Metamask extension installed and enabled in your browser in order to have access to web3 functions. No existing Ethereum account is required, as Metamask can create one for you, and you don’t need any ether either. Each of the following examples uses the main Ethereum network.
Here’s a function that can be used to get a single transaction:
web3.eth.getTransactionFromBlock(blockHashStringOrNumber, transactionIndexNumberInBlock[, callbackFunction])This function contains two special values that can be used instead of the block number in the first parameter: latest and pending. The latest block refers to the most recently mined block. The pending block contains every transaction that hasn’t been confirmed yet (e.g. is waiting to be mined). To list all transactions from a block, you need to loop over the index of each transaction.
There’s another function that allows you to get the total number of transactions in any given block:
var transactionCount = web3.eth.getBlockTransactionCount(blockHashStringOrNumber[, callbackFunction])Note that the Metamask extension doesn’t support synchronous requests, so in both of these functions you’ll have to provide the callback function to retrieve data asynchronously.
Here’s a sample script that lists every transaction in the latest block: (try it in jsfiddle)
var txCount = web3.eth.getBlockTransactionCount('latest', function(error, txCount) {
    if (!error) {
      console.log('Latest block contains ' + txCount + ' transactions:');
      for (var i = 0; i < txCount; i++) {
        web3.eth.getTransactionFromBlock('latest', i, function(err, transaction) {
          if (!err) {
            console.log(transaction);
          } else {
            console.error(err);<br>
          }
        });
      }
    } else {
      console.error(error);
    }
});What we actually need to do, however, is to monitor transactions live and without the need to constantly execute a specific command. There’s a separate function in web3 for this:
var filter = web3.eth.filter(filterString);
// OR
var filter = web3.eth.filter(filterOptions);Depending on the parameters used, this function can enable several filtering scenarios:
- Filtering of the most recent blocks (if the filterString is latest)
- Filtering of the most recent pending transaction (if the filterString is pending)
- Filtering of the event logs from processed transactions on the blockchain (if the filterOptions object is specified)
This function allows you to receive notifications for every new transaction created on the blockchain network. However, in order to get these notifications, you need to add a callback function to the filter:
filter.watch(callbackFunction);At this point, we can come up with a simple script that will list every new transaction to or from an address in the console: (try it in jsfiddle)
var watchContract = "0xDd9fd6b6F8f7ea932997992bbE67EabB3e316f3C".toLowerCase();
  var filter = web3.eth.filter('pending'); //set up the filter

  //a helper function to write transaction data to the console
  function logTransaction(transaction) {
    var logString = "Transaction detected\n" +
      "TxHash: " + transaction.hash + "\n" +
      "From: " + transaction.from + "\n" +
      "To: " + transaction.to + "\n" +
      "Value: " + transaction.value + "\n" +
      "Data: \n" + transaction.input + "\n";
    console.log(logString);
  }

  //a helper function to handle a transaction
  function handleTransaction(transaction) {
    if (transaction.from == watchContract || (transaction.to != null && transaction.to == watchContract)) { //check if the transaction is related to our contract (Note: 'to' is null for a contract creation)
      logTransaction(transaction); //this transaction relates to our contract, so add it to the log
    }
    //ignore the rest of the transactions
  }

  //subscribe to the filter
  filter.watch(function(err, pendingTx) {
    if (!err) {
      web3.eth.getTransaction(pendingTx, function(err, transaction) { //get the transaction
        if (!err && transaction) {
          handleTransaction(transaction); //pass the transaction into the helper function to perform necessary checks and log events
        }
      });
    } else {
      console.error(err); //in case any error happens, log the error
    }
});While successfully accomplishing the main task — listing every new transaction on the blockchain — this script has several drawbacks:
- It’s difficult to run outside of a web browser
- It doesn’t capture smart contract function call data
- It may skip internal function calls and transfers if they’re made from a different smart contract
Fortunately, these problems can also be addressed with the help of JavaScript. For instance, you can use Node.js to run the script in a console. You can also write a parser for the call data or you can use the beta web3 1.0 functions like abi.decode and eth.subscribe to parse the call data. Just remember that web3 1.0 is still in development and is poorly supported.
As for internal transactions, they aren’t recorded on the blockchain. So the only way to capture internal transactions is to run a modified version of the Ethereum Virtual Machine (EVM). Modifying the EVM, however, is out of the scope of this post.
The other way you can tell if a function has been executed internally is by using transaction logs. Any events that were fired during a transaction are recorded on the blockchain. The only requirement for this method is that the events actually were fired from the contract. Fortunately, this is considered the best practice for smart contracts.
Python web3 API implementation
In contrast to the JavaScript implementation of the web3 API, its Python implementation is more portable so it can be easily deployed even without a web server. Using the Python API, we managed to implement a better transaction monitoring script for Ethereum. The Python API fully supports the web3 API, except for the 1.0 beta version, and has several specific additions including some for controlling Ethereum nodes (admin API, miner API, and so on). The Python API filtering functions are somewhat different from the JavaScript functions too.
The block, pending transaction, and event filters in the Python API are just the same as in the JavaScript API. However, there’s another type of event filter that can be created right from a contract object.
The contract event filter provides event logs in an accessible manner so that you don’t need to parse anything. For example, this function allows you to detect transfer events from an ECR20 token:
event_filter = tokenContract.events.Transfer.createFilter(fromBlock="latest")This function will filter all Transfer events and their parameters. Then you can add some simple filtering to detect any suspicious transactions. The final script for the transaction monitoring will look something like this:
from web3.auto import w3
  from web3.contract import ContractEvents
  from web3.contract import ContractEvent
  import time
  import sys
  import json

  def print_log_entry(log_entry):
      print('Event: ', log_entry['event'])
      for arg, value in log_entry['args'].items():
          print(arg, ': ', value)

  def check_suspicious_event(tx_hash, logs):
      # check if transferred value was too large
      for log in logs:
          for log_entry in log:
              if (log_entry['event'] == "Transfer"):
                  return log_entry['args']['amount'] >= 1000 * 10 ** 18 # let's consider transactions of more than 1000 full tokens as suspicious (assuming that our token has 18 decimal places)
      return false

  def handle_event(event_data, contract):
      #get info about the transaction from the blockchain
      tx_hash = event_data['transactionHash'].hex()
      receipt = w3.eth.getTransactionReceipt(tx_hash)
      events = [event['name'] for event in contract.events._events] #workaround for contract.events lacking an iterator, get the list of events
      logs = [ contract.events.__dict__[event_name]().processReceipt(receipt) for event_name in events ] # loop through contract.events attributes
      #at this point you can add any conditions to log only suspicious transactions (e.g. the withdrawn value was too large)
      if (check_suspicious_event(tx_hash, logs)):
          print('Warning: a suspicious transaction has been detected!')
          print('TxHash: {}'.format(tx_hash))
          for log in logs:
              for log_entry in log:
                      print_log_entry(log_entry)

  def log_loop(event_filter, filterContract, poll_interval):
      print('Listening to transactions...')
      while True: #keep logging indefinitely
          for event in event_filter.get_new_entries(): #get every new event
              handle_event(event, filterContract) #handle each event
          time.sleep(poll_interval) #prevent from spamming requests too much

  def main():
      if (len(sys.argv) < 2):
          print('Usage: {} <address> <path_to_abi_file> [poll_interval]'.format(sys.argv[0]))
          return
      #read arguments
      [address, abi_file] = sys.argv[1:3]
      poll_interval = 5
      if (len(sys.argv) > 3):
          poll_interval = int(sys.argv[3])
      #load and parse abi file
      with open(abi_file) as f:
          abi_data = json.load(f)
          filterContract = w3.eth.contract(abi=abi_data, address=address) #create the contract object
          filter = w3.eth.filter({'fromBlock': 'latest', 'toBlock': 'latest', 'address': address}) #create the filter
          log_loop(filter, filterContract, poll_interval) #start polling for new events

  if __name__ == '__main__':
main()In this script, we set up a filter based on the contract’s address and keep polling the network for new events. A JSON file with the contract’s application binary interface (ABI) is used to parse all of the event data in the handle_event function. The parsed data is passed into the check_suspicious_event function, which can perform any necessary checks to validate the transaction. If the transaction is suspicious, the function will return true and the script will log event details. The example checks if a Transfer event (from the ERC20 standard) was emitted and if the transferred number of tokens was greater than 1000 full tokens.
You can easily use any other criteria for detecting potentially suspicious transactions.
- Recording the receiver address and frequency of payments — This way you can detect siphoning of tokens. Small but frequent payments may slip under the radar and allow an attacker to get away.
- Compare a transaction destination address with the contract address — This way you can figure out if a real person executed the contract. Automatic execution of a contract could be an attempt to exploit a reentrancy vulnerability.
The script above can monitor any contract as long as it emits events or is called directly via the fallback function.
Note that for running this script, you need Python 3.5 or higher and the web3 library has to be installed using the following function:
pip install web3Also, just like with JavaScript and Metamask, the Python API needs a web3 provider. You can use a locally running node or a wallet connected to the Ethereum network for this purpose and the API will try to detect a provider automatically. For more information on how to set up the Python web3 API, visit the Web3.py website.
After all of the dependencies are installed, you can run the script by providing an address of a contract and its ABI (created during contract compilation):
python monitorScript.py <contract address> <contract abi file> [poll interval]Of course, all these approaches are just some basic ways to monitor Ethereum transactions. There are lots of other ways of interacting with the blockchain, from browsing blocks in a block explorer to studying the blockchain using neural networks and machine learning. And, to monitor suspicious Bitcoin mempool activity, for instance, you’ll need to use a different approach.
You can choose the approach that best suits your needs and security standards. Regardless of the approach you decide to use, you should definitely look into monitoring blockchain data as a way to protect your digital assets.
Conclusion
Transaction monitoring is one of the most effective tools you can use for preventing and detecting criminal activity in cryptocurrencies. Depending on your scope of work, you can monitor and read blockchain transactions either manually, using a block explorer, or automatically, with the help of scripts.
Manual monitoring works best for cases when you need to check only a limited number of transactions executed from a personal wallet or a small-scale smart contract. Automatic monitoring is more suitable for handling a large number of transactions on a regular basis. In the case of Ethereum, you can use either JavaScript (for creating web applications) or Python (for a portable implementation of the web3 API).
At Apriorit, we have a team of experienced professionals whose field of interest is the fascinating world of blockchain technology. Our developers have a high level of expertise in cybersecurity and data encryption, so we can assist you in developing and securing your blockchain-based solution.
Have a question?
Ask our expert!
VP of Engineering


