 Skip to main content
Creating a blog for your web application is a proven way to generate traffic for your app, increase brand awareness, attract customers, and more. But to ensure that this blog will enrich your web app, you need to choose the right toolset and development strategy.
Django is one of the key frameworks that empowers developers to create complex and feature-rich applications. In this article, we explore how to leverage this framework’s opportunities to create a simple but reliable blog for a web application. This guide will show you the most essential steps of creating a blog with Django and Python.
Contents:
How to use Django to create a blog for your web app
In a nutshell, creating a blog for your web application is just like developing any other software. It includes the following six stages:
- Planning. Lay the foundation for the entire project by identifying the needs of your end users, gathering requirements, defining goals, and choosing the technology stack. By establishing a clear vision and roadmap during this stage, you increase the chances for your development process to start off on the right track.
- Design. Focus on creating a visually appealing and user-friendly interface. Create wireframes, mockups, and prototypes to visualize how the application will look and ensure that the design aligns with the project’s requirements and provides a blueprint for the development process.
- Development. Start the actual coding and implementation of your blog. At this stage, your developers write the necessary code, create databases, and integrate various components to bring the application to life.
- Testing. Ensure the quality and reliability of your web application’s blog before deploying it. It’s essential to systematically check the application’s functionality, performance, and security. Your team can use both manual and automated testing techniques to identify and fix any issues or bugs, ensuring that blog functionality works as intended.
- Deployment. Make your application’s blog available to users. This stage includes setting up servers, configuring the necessary infrastructure, and launching the application in a live environment. Deploying the application requires careful planning to ensure a smooth transition from development to production.
- Maintenance. Monitor the application’s work, address any user-reported issues, and make regular updates to keep the application secure, efficient, and up to date. Maintenance ensures that the application continues to meet users’ needs.
In this article, we focus solely on development, testing, and deployment to show you how to manage these essential stages of creating a blog using Django. We omit other stages of the process as they don’t depend on Django as much.
The importance of the manage.py file in Django
Before we start this Django blog tutorial, let’s briefly explore the importance of the manage.py file, mentioned both in instructions from our previous article and later in this article. The reason is that this file provides a wide range of possibilities for creating web applications, and we should discuss them before explaining each blog development stage.
The manage.py file serves as the entry point for executing Django-specific commands and performing common tasks. It encapsulates the functionality of the django-admin command-line tool but provides additional project-specific features:
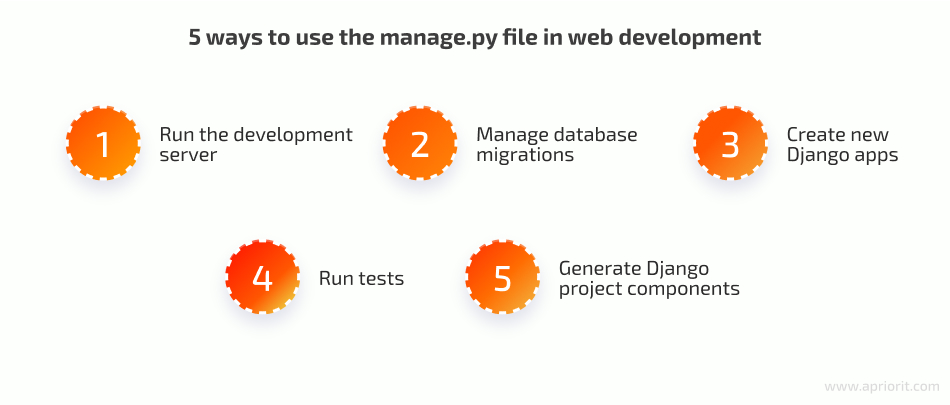
- Run the development server. You can start the local development server by running the python manage.py runserver. This allows you to preview your Django application in a local environment.
- Manage database migrations. Django provides a powerful database migration system. With manage.py, you can create and apply migrations to keep your database schema in sync with your code changes.
- Create new Django apps. You can use manage.py to create new Django applications within your project. This generates the necessary file structure and boilerplate code to get started with a new app.
- Run tests. Django includes a testing framework, and you can run your tests using manage.py. It provides commands to run tests and generate test coverage reports.
- Generate Django project components. The manage.py file allows you to generate various Django project components, such as models, views, forms, and templates. This streamlines the process of creating new code files within your project.
To learn more about the django-admin command-line utility and manage.py, you can explore the official documentation.
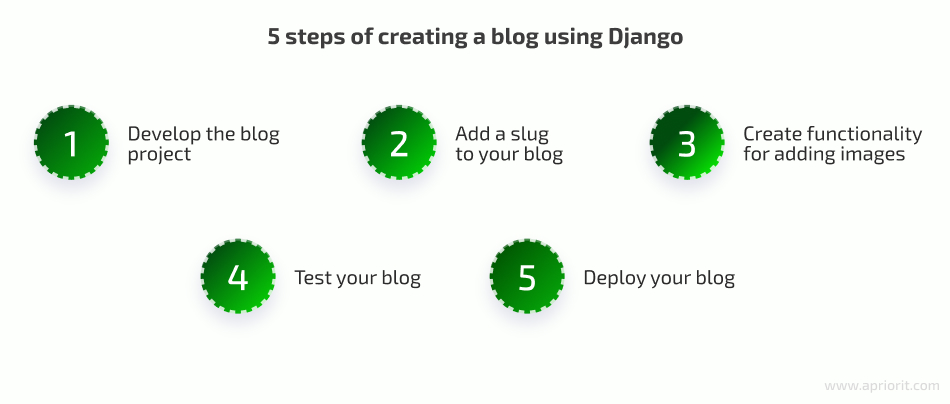
Once you familiarize yourself with the opportunities offered by manage.py, let’s start developing your Django blog app. This process will also include five major steps:
Let’s assume you have already agreed on all requirements, goals, and the blog’s design. Now, we move to exploring each step of building a blog application with Django and Python in detail.
Looking for skilled web developers?
Leverage the expertise of Apriorit engineers in Python and other top-notch technologies. Let us deliver a secure and efficient web application within an agreed timeline.
1. Develop the blog project
Before starting, make sure you have an existing Django project. If you’ve followed the steps from our previous article on building web applications using Django, you already have a virtual environment and a project called myProject. Let’s move on from there:
Create an application
To create a new application, use the following command:
python manage.py startapp blogAs you can see, in our example, we named the application – blog.
To add the newly created blog application to your project, add it to the settings: /myProject/myProject/settings.py
INSTALLED_APPS = [
   'django.contrib.admin',
   'django.contrib.auth',
   'django.contrib.contenttypes',
   'django.contrib.sessions',
   'django.contrib.messages',
   'Django.contrib.staticfiles',
   'blog'
]Then, run your project using the cmd command or PyCharm.
Create database models
During this step, you need to define models for future blog posts, including fields like post title, author, content, and publication date.
Here’s an example of how to define a Django database model for a blog:
from django.db import models
from django.contrib.auth.models import User

STATUS = (
	(0, "Draft"),
	(1, "Publish")
)

class Post(models.Model):
	title = models.CharField(max_length=300, unique=True)
	author = models.ForeignKey(User, on_delete=models.CASCADE, related_name='blog_posts')
	content = models.TextField()
	status = models.IntegerField(choices=STATUS, default=0)

	created_at = models.DateTimeField(auto_now_add=True)
	updated_at = models.DateTimeField(auto_now=True)

	class Meta:
		ordering = ['-created_at']

	def __str__(self):
return self.titleLet’s take a closer look at the field parameters the Post class contains:
- title ensures a field with a maximum length of 300 characters and is unique to make sure there won’t be several identical titles in the database.
- author associates each blog post with its author. This parameter is a foreign key to the built-in Django User model.
- related_name sets the reverse relation name for the blog_post field in the User model.
- context stores post content.
- status creates an integer field that offers choices defined by the STATUS tuple. This parameter has a default value set to 0.
- created_at shows the publication date and time, with the auto_now_add=True value meaning that the field is automatically set to the current date and time when the model instance is created.
- updated_at shows the date and time of the last update, with the auto_now=True value meaning that the field is automatically set to the current date and time whenever the model instance is updated.
The code example above also includes:
- The Meta class, which sets the order of blog posts using the -created_at field, where the – prefix means that the most recently created posts will be displayed first.
- The __str__ method, which is used to display the representation of the model instance in a list of all models in the admin panel.
You also need to create a new table in the database using the following commands:
python manage.py makemigrationsto generate a migration filepython manage.py migrateto migrate changes to the database
Build an admin interface to manage all blog posts
Since Django already comes with a built-in admin interface, all you need to do is create a superuser with the following command and log in to the admin panel:
python manage.py createsuperuserLet’s explore an example:
Username (leave blank to use ‘<username>’): admin
Email address: [email protected]
Password: <password>
Password (again): <password>
Superuser created successfully.
After creating a superuser, re-run the development server to apply changes:
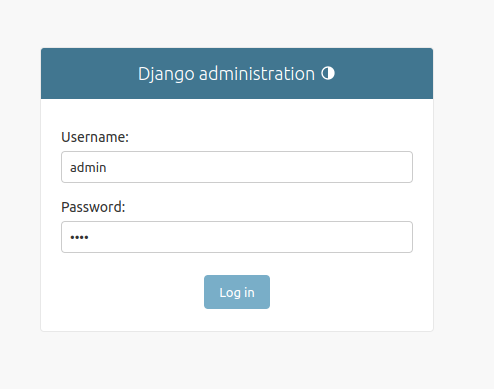
python manage.py runserverTo access the built-in admin interface, navigate to http://localhost:8000/admin and put your credentials in the form that appears:
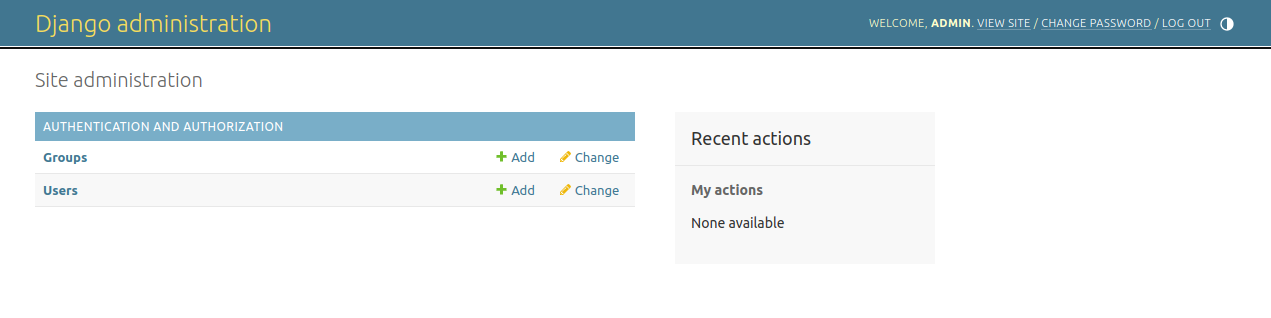
After logging in, you can only see the Group and Users tabs:
If you want to see the Post model in your admin panel, include it in the admin.py file of your application. Here’s an example of how to do it:
from django.contrib import admin
from .models import Post

class PostAdmin(admin.ModelAdmin):
list_display = ('title', 'status',)
list_filter = ('status',)
search_fields = ('title', 'content',)

admin.site.register(Post, PostAdmin)This code registers the Post model in the Django admin site and defines a custom admin interface for it.
The PostAdmin class creates a custom admin interface for the Post model. It inherits from the admin.ModelAdmin class, which provides a basic interface for managing model instances on the Django admin site.
Let’s take a closer look at the attributes from the example above:
- list_display sets the fields that should be displayed in the list view for the Post model in the admin site. In our example, it includes the title and status fields.
- list_filter sets the fields that should be used to filter the list view for the Post model on the admin site. In our example, we filter posts only using the status field.
- search_fields sets the fields that should be searchable on the admin site. In our example, we can search text via the title and content fields.
Now, register your admin interface in the admin site using the admin.site.register() function.
You can open your Post model and see posts in it:
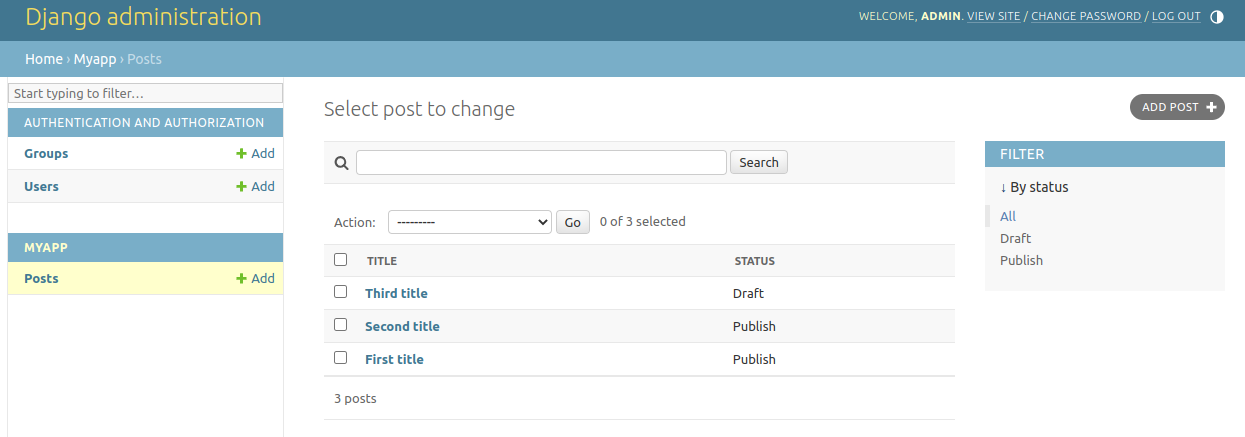
Create views
This step will ensure that posts can be seen on the main page of your service. Apart from views, you also need to create HTML templates for the data returned by these views and map these templates with specific URLs.
Let’s explore a simple example of creating views that will sort posts:
from django.views import generic
from .models import Post


class PostList(generic.ListView):
	"""
	Return all posts that have status 1 (published) and order from the latest to most recent.
	"""
	queryset = Post.objects.filter(status=1).order_by('-created_at')
	template_name = 'index.html'


class PostDetail(generic.DetailView):
	model = Post
template_name = 'post_detail.html'Let’s take a closer look at the classes from our example:
- PostList is a ListView class that returns all posts with status 1 (Publish) and orders them by their creation time in descending order. The template for this view is specified as
index.html. - PostDetail is a DetailView class that returns the details of a single post. The model attribute specifies that the view associated with the Post model and the template for this view is
post_detail.html.
Create URL patterns
The Django controller checks URLs to return the right view every time a user makes a request to the page.
What you need to do is create a file in the myProject/blog directory named urls.py to specify application-level URLs using the following code:
from . import views
from django.urls import path

urlpatterns = [
   path('', views.PostList.as_view(), name='home'),
   path('<int:id>/', views.PostDetail.as_view(),  name='post_detail'),
]Let’s explore the URL patterns for your blog in detail:
path('', views.PostList.as_view(), name='home')adds a URL pattern for the blog’s home page. When the URL is empty, this pattern will call the PostList view class as a function, which will return the list of published posts.path('<int:id>/', views.PostDetail.as_view(), name='post_detail')adds a URL pattern for the detail page of a single post. It accepts an integer as the post’s ID and calls the PostDetail view class as a function, which will return detailed information of the post that matches the ID.
The name argument identifies URL patterns in the templates.
Import URLs
Now, import URLs from the blog to the URLs file of the myProject directory (myProject/urls.py):
from django.contrib import admin
from django.urls import path, include

urlpatterns = [
   path('admin/', admin.site.urls),
   path('', include('myApp.urls')),
   path('blog/', include('blog.urls')),
]Here are the URL patterns for the entire project:
path('admin/', admin.site.urls)for the Django admin sitepath('', include('myApp.urls'))for your application. When the URL is empty, this URL pattern will call the URL patterns ofmyApp.urls.path('blog', include('blog.urls'))for your application’s blog. When the URL contains blog/, this URL pattern will call the URL patterns ofblog.urls.
Create URL templates
If you try to access any of your URLs right now, you’ll see an error: TemplateDoesNotExist. The reason is that you haven’t actually created any of them. So, let’s use HTML, CSS, and Django template language to create view templates.
First, configure your templates in the project settings to the default directory where all project templates are stored. Add the following code to setting.py:
TEMPLATES_ROOT = os.path.join(BASE_DIR, 'templates')

TEMPLATES = [
	{
		'BACKEND': 'django.template.backends.django.DjangoTemplates',
		'DIRS': [TEMPLATES_ROOT],
		'APP_DIRS': True,
		'OPTIONS': {
			'context_processors': [
				'django.template.context_processors.debug',
				'django.template.context_processors.request',
				'django.contrib.auth.context_processors.auth',
				'django.contrib.messages.context_processors.messages',
			],
		},
	},
]Second, create the following HTML files:
- base.html
- index.html
- post_detail.html
Let’s explore each file in detail.
1. base.html
The structure of the base.html file will be the basis for all future templates. Create a simple file with headers and content:
<!DOCTYPE html>
    <html>
        <head>
            <title>My Blog</title>
        </head>
        <body>
            {% block content %}
            <!-- Content goes here -->
            {% endblock content %}
        </body>
</html>Define a block with a tag {% block content %} named content (you can make any number of blocks in all paths of an HTML file). Now, you can create another template that extends it and override the content block to provide specific content for each application page. Close it in the end using the {% endblock content %} tag.
2. index.html
The index.html file extends the base.html template using the Django template language. It will contain the blog entries on the main page and use templates of post_detail.html. Here’s what this file’s structure can look like:
{% extends "base.html" %}
{% block content %}
<header class="masthead">
    <div class="overlay"></div>
    <div class="container">
        <div class="row">
            <div class=" col-md-8 col-md-10 mx-auto">
                <div class="site-heading">
                    <h3 class=" site-heading my-4 mt-3 text-white">Welcome to my blog.</h3>
                    </p>
                </div>
            </div>
        </div>
    </div>
</header>
<div class="container">
    <div class="row">
        <!-- Blog Entries Column -->
        <div class="col-md-8 mt-3 left">
            {% for post in post_list %}
            <div class="card mb-4">
                <div class="card-body">
                    <h2 class="card-title">{{ post.title }}</h2>
                    <p class="card-text text-muted h6">{{ post.author }} | {{ post.created_at}} </p>
                    <p class="card-text">{{post.content|slice:":200" }}</p>
                    <a href="{% url 'post_detail' post.id %}" class="btn btn-primary">Read More →</a>
                </div>
            </div>
            {% endfor %}
        </div>
    </div>
</div>
{% endblock %}Let’s take a closer look at the tags from the example above:
{% extends "base.html" %}indicates that this template extends the base.html template and allows index.html to inherit any blocks or code from it.{% block content %}opens the content block, which can be overridden in child templates that extend this template.{% for post in post_list %}loops through a list of blog post objects and displays their title, author, creation date, and truncated content.{% url 'post_detail' post.id %}generates a URL to the post detail view for each blog post.{% endfor %}indicates the end of the for loop.{% endblock %}closes the content block, which can be overridden in child templates.
3. post_detail.html
And here’s an example of how to create the post_detail.html file that provides a detailed view of the blog post:
{% extends 'base.html' %} {% block content %}

<div class="container">
    <div class="row">
        <div class="col-md-8 card mb-4 mt-3 left top">
            <div class="card-body">
                <h1>{% block title %} {{ object.title }} {% endblock title %}</h1>
                <p class=" text-muted">{{ post.author }} | {{ post.created_at }}</p>
                <p class="card-text ">{{ object.content | safe }}</p>
            </div>
        </div>
    </div>
</div>

{% endblock content %}Check the results
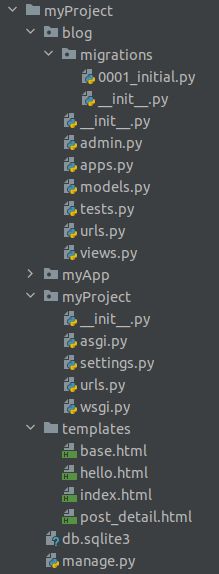
Congratulations! At this step, you’ve created your first Django blog application. Here’s how your files will be structured in your Django project:
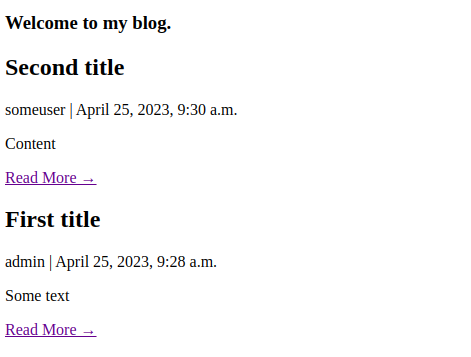
Now, you can see your published posts on the home page:
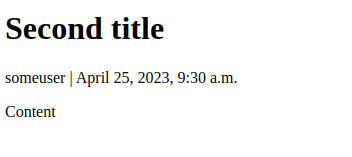
And you can open every post on its own page:
2. Add a slug to your blog
One of the key considerations when creating a blog is slugs. A slug is the last part of the URL that contains a unique string of characters, serving as a unique identifier for a resource.
Slugs not only improve the user experience; slugs also serve SEO purposes, helping you improve your blog’s promotion.
To make your post URLs look more informative, initialize a URL for every post using the models.SlugField() model. Let’s explore this process step by step.
Read also
Build Python Web Apps with Django: A Practical Guide with Code Examples
Learn more about the Django framework. Discover how to leverage each of its benefits in practice and explore real-life code examples.

Add a new attribute
Add a new attribute to the Post model (blog/models.py) slug:
class Post(models.Model):
	title = models.CharField(max_length=300, unique=True)
slug = models.SlugField(max_length=300, unique=True)
	author = models.ForeignKey(User, on_delete=models.CASCADE, related_name='blog_posts')
	content = models.TextField()
	status = models.IntegerField(choices=STATUS, default=0)

	created_at = models.DateTimeField(auto_now_add=True)
	updated_at = models.DateTimeField(auto_now=True)

	class Meta:
		ordering = ['-created_at']

	def __str__(self):
return self.titleThen, update your migration file and perform migrations.
If you don’t want to update all fields in the database, you can just delete the database file (db.sqlite) and migration file (blog/migrations/0001_initial.py). After that, migrate your changes, update your database, and create a new superuser.
Add the slug field to the admin panel
To do that, change list_display in the blog/admin.py file as shown below:
class PostAdmin(admin.ModelAdmin):
list_display = ('title', 'slug', 'status',)
list_filter = ('status',)
search_fields = ('title', 'content',)Now, when you open the admin site, you’ll see all three attributes in the post list:

Change your URL pattern
Go to the blog/urls.py file and make the following changes:
from . import views
from django.urls import path

urlpatterns = [
   path('', views.PostList.as_view(), name='home'),
   path('<slug:slug>/', views.PostDetail.as_view(),  name='post_detail'),
]Then, change the templates/index.html file: instead of using post.id, when you click on the Read More button, get the post.slug field from the Post model:
<div class="card-body">
 <h2 class="card-title">{{ post.title }}</h2>
 <p class="card-text text-muted h6">{{ post.author }} | {{ post.created_at}} </p>
 <p class="card-text">{{post.content|slice:":200" }}</p>
 <a href="{% url 'post_detail' post.slug %}" class="btn btn-primary">Read More →</a>
</div>Check the results
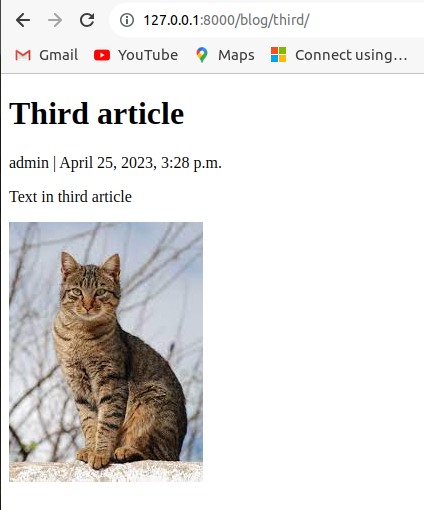
Now, when you go to a post’s detail page, you’ll see your slug field in the URL instead of the ID number: http://localhost:8000/blog/third/
3. Create functionality for adding images
If you want to enable users to add images to blog posts, you’ll need to make some changes to your models, forms, and templates.
1. Add the ImageField model to your Post model so it can store the image data:
blog/models.pyHere’s how to do it:
class Post(models.Model):
	...
	image = models.ImageField(upload_to='images/', default="")
	....

	@property
	def img_preview(self):
		if self.image:
			return mark_safe(f'<img src = "{self.image.url}" width = "300"/>')
return ""2. Introduce changes to the Admin model to show your image in the admin panel: blog/admin.py
class PostAdmin(admin.ModelAdmin):
	list_display = ('title', 'img_preview', 'slug', 'status',)
	list_filter = ('status',)
	search_fields = ('title', 'content',)
	readonly_fields = ('img_preview',)

	def img_preview(self, obj):
		return obj.img_preview

img_preview.short_description = 'Image Preview'Once you have image data, you can use the Pillow library to resize and optimize images before storing them on your server.
3. Display the images in your blog post using the img tag in your template. Add this tag to the templates/post_detail.html file.
Here’s how to do it:
{% extends 'base.html' %} {% block content %}
<div class="container">
<div class="row">
<div class="col-md-8 card mb-4 mt-3 left top">
<div class="card-body">
<h1>{% block title %} {{ object.title }} {% endblock title %}</h1>
<p class=" text-muted">{{ post.author }} | {{ post.created_at }}</p>
<p class="card-text ">{{ object.content | safe }}</p>
{% if object.image %}
<img src="{{ object.image.url }}" alt="{{ object.title }}">
{% endif %}
</div>
</div>
</div>
</div>
{% endblock content %}4. Check the results.
At this point, you should be able to see images at http://127.0.0.1:8000/blog/.
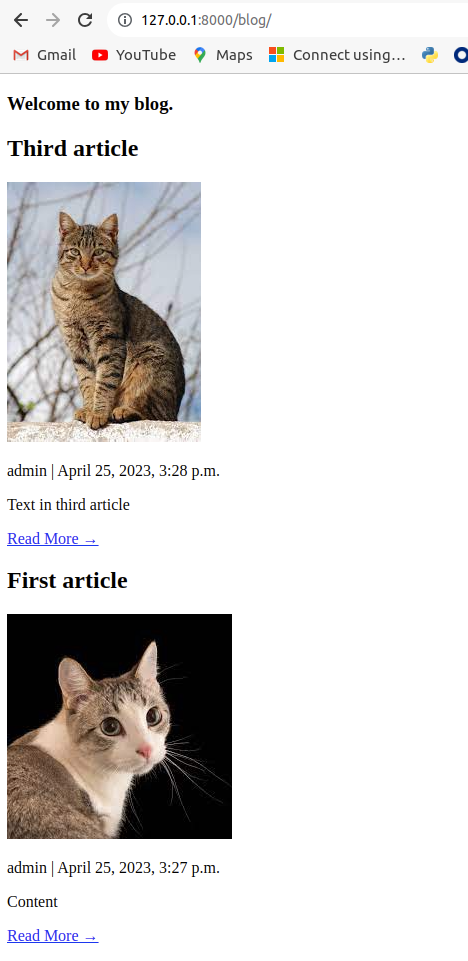
By now, you’ve enriched your Django blog with images, and it’s time to move to the testing stage.
Related project
Developing Smart Contracts for Creating and Selling NFT Images
Explore a real-life story of creating a web application for a blockchain project together with developing an NFT-based solution for selling digital art.
4. Test your blog
To create a blog app with Django that works flawlessly, it’s essential to test it to ensure the correctness and reliability of your code before deployment.
Django provides a built-in testing framework that makes it easy to write and execute tests for your Django applications. This testing framework allows you to create test cases to verify the behavior of your models, views, forms, and other components.
By writing tests in Django, you can catch bugs early, ensure that new features work as expected, and have confidence in your application’s stability. Testing helps you maintain code quality, enable refactoring with confidence, and promote a robust development process.
When writing tests in Django, you can create subclasses of Django’s TestCase or TransactiontestCase classes. These classes provide various methods and assertions to help you define test cases and verify expected behavior.
To execute tests, you can use the python manage.py test command, which discovers and runs all tests in your Django project. Django’s test runner automatically creates a test database, isolating your tests from your development or production databases. This ensures that your tests don’t affect your data and provides a clean slate for each test run.
Django’s testing framework also includes support for fixtures, which allow you to define and load test data. Fixtures provide a way to set up the initial state of your database for testing, making it easier to write tests with consistent data.
Let’s create two simple tests for your blog, assuming that your view works as intended and only aiming to check basic functionality:
- Request the home page to send you a response with the 200 status that includes content from the previously created post.
- Open a page with a post and check whether this page has all information about this post.
Below, we share an example of how to write such tests using Django’s testing framework.
Change your blog/tests.py file to add new tests:
from django.test import TestCase
from django.urls import reverse

from .models import Post
from django.contrib.auth.models import User


class BlogTests(TestCase):
	# fixtures = ["fixture1.json"] # Optional: If you have fixture data to load for the tests

	@classmethod
	def setUp(cls):
		# Set up the test user
		cls.author = User.objects.create(
			username='testuser',
			password='testpassword'
		)
		# Create a test post
		cls.post = Post.objects.create(
			title='Test Post',
			content='This is test post content.',
			author=cls.author,
			slug='test',
			status=1
		)

	def test_post_list_view(self):
		# Log in the test user
		self.client.login(username='testuser', password='testpassword')
		# Access the post list view
		response = self.client.get(reverse('home'))
		# Assert the response status code
		self.assertEqual(response.status_code, 200)
		# Assert that the response contains the expected content
		self.assertContains(response, 'Test Post')
		# Assert that the correct template is used
		self.assertTemplateUsed(response, 'index.html')

	def test_post_detail_view(self):
		# Log in the test user
		self.client.login(username='testuser', password='testpassword')
		# Access the post detail view with the post slug as an argument
		response = self.client.get(reverse('post_detail', args=["test"]))
		# Assert the response status code
		self.assertEqual(response.status_code, 200)
		# Assert that the response contains the expected content
		self.assertContains(response, 'Test Post')
		# Assert that the correct template is used
self.assertTemplateUsed(response, 'post_detail.html')In this code, the BlogTests class extends the TestCase class to create a test case for your blog application. Use the setUp method to set up the necessary test data, including creating a test user (author) and a test post (post). The test_post_list_view and test_post_detail_view methods contain individual test cases.
The comments provided in the code above explain each section:
- Setting up the test user and post
- Logging in to the user account
- Accessing views using the self.client.get() function
- Asserting the response status code
- Checking for the presence of expected content using
self.assertContains() - Verifying whether a template is responsible for generating content and responding to requests using
self.assertTemplateUsed()
But if you want to use a fixture, you need to uncomment the string with the fixtures parameter, delete the setUp method, and create your fixture. Also, you’ll have to add a new parameter to the project settings.py file where you mention the path to the directory with fixtures files. In this case, it will be a directory on the same level with templates and named fixtures.
Here’s an example of using a fixture:
FIXTURE_DIRS = [
os.path.join(BASE_DIR, 'fixtures'),
]Then, create the fixtures/fixture1.json file. Its contents will look like this:
[
   { "model": "auth.user",
       "pk": 1,
       "fields": {
           "username": "testuser",
           "password": "testpassword"
       }
   },
   { "model": "blog.post",
       "pk": 1,
       "fields": {
           "title": "Test Post",
           "content": "This is a post with test content.",
           "author": 1,
           "slug": "test",
           "status": 1,
           "created_at": "2023-05-01T12:04:51.516",
           "updated_at": "2023-05-01T12:04:51.516"
       }
   }
]Note: An alternative way to create a fixture is to generate it using the dumpdata command based on your existing database data:
python manage.py dumpdata <app name>.<model name> –output=<fixture file name>You can use a fixture for all tests. Just put it at the beginning of your test:
from django.test import TestCase
....
from django.core.management import call_command


class Tests(TestCase):

	def test_name(self):
	call_command('loaddata', 'fixture file name', verbosity=0)
....As you can see, the verbosity parameter is set to 0 to suppress the output during test execution.
You can refer to Django’s official documentation for more detailed information on how to write tests, use fixtures, and explore advanced testing concepts.
5. Deploy your blog
Once you manage to build a blog with Django that can display posts, it’s time for the next steps:
- Styling the pages
- Working on the design
- Adding the ability for users to create their own posts
- Adding functionality for administrators to edit user posts
- Establishing delayed publication, etc.
You may notice that the example application in this article is still in debug mode. In this mode, you can see extended logs with all information, which is helpful for you when coding. But when you’re moving the project to production, make sure to turn debug mode off. The reason is that logs can contain sensitive information, and there’s a chance an attacker might access and use it.
On a security note, your settings file is similar to the wp_config file and should be protected at all costs by only being accessible to the development team.
To turn off debug mode, simply change the DEBUG variable in the myProject/settings.py file. You’ll be required to provide a host that is allowed to connect to this application. In our example, we run the application locally, so we use localhost:
# SECURITY WARNING: don’t run with debug turned on in production!
DEBUG = False
ALLOWED_HOSTS = ['127.0.0.1']There are many things that can be configured here, so it’s worth reading the official documentation to explore all the opportunities. The main reason for using the myProject/settings.py file is to set environment variables. You can use the DJANGO_SETTINGS_MODULE environment variable to define the basic settings.
You will most likely use DJANGO_SETTINGS_MODULE for using environment variables where you can have your applications relying on environment variables.
If, for example, you are running a standalone application and need to introduce some additional changes (like providing some registry settings or system changes), you can use the django.setup call to introduce your changes. There can be other reasons for using this call, but in general, it should only be used in standalone applications.
Note: You can call django.setup() only once. Therefore, avoid putting reusable application logic in standalone scripts so that you have to import functions from the script elsewhere in your application.
To expand your web application to a wide audience, you need to publish it on a domain. Purchase hosting with a domain that will provide you with access to its functionality via an open internet network. Popular hosting choices are InterServer, Hostinger, A2 Hosting, SiteGround, and GreenGeeks.
Conclusion
To create a blog with Django for enriching your web application, your team has to thoughtfully choose the tools and plan the entire development process. Using Python and Django for web development will help you streamline product creation while still ensuring top-notch quality and security.
At Apriorit, we have experienced web development teams ready to help you deliver a robust solution, meeting all technical requirements and deadlines. With 20+ years in cybersecurity, we know how to ensure proper data security for IT projects and choose the most suitable technology stack for projects of any complexity and purpose. Leverage our wide experience in creating applications for different industries to develop, improve, and support your web project.
Want to build a web application or improve an existing one?
Discover exciting opportunities for enhancing your project. Apriorit engineers are ready to help you deliver a solution that meets your business needs!
Have a question?
Ask our expert!
VP of Engineering


