 Skip to main content
Web servers often become targets for hackers aiming to steal business and user data, disrupt services, listen to service operations, etc. To protect your business from significant financial and reputational losses, your team should treat web server security as the centerpiece of all your web projects.
In this article, we discuss the importance of server security for a web application. We also share proven practices that Apriorit’s web development experts often implement to enhance the security of our clients’ web products using Node.js Express.
This article will be useful for product and development leaders who are looking for ways to improve the security of their web products.
Contents:
- Why secure your web application’s server?
- How can you ensure web server security?
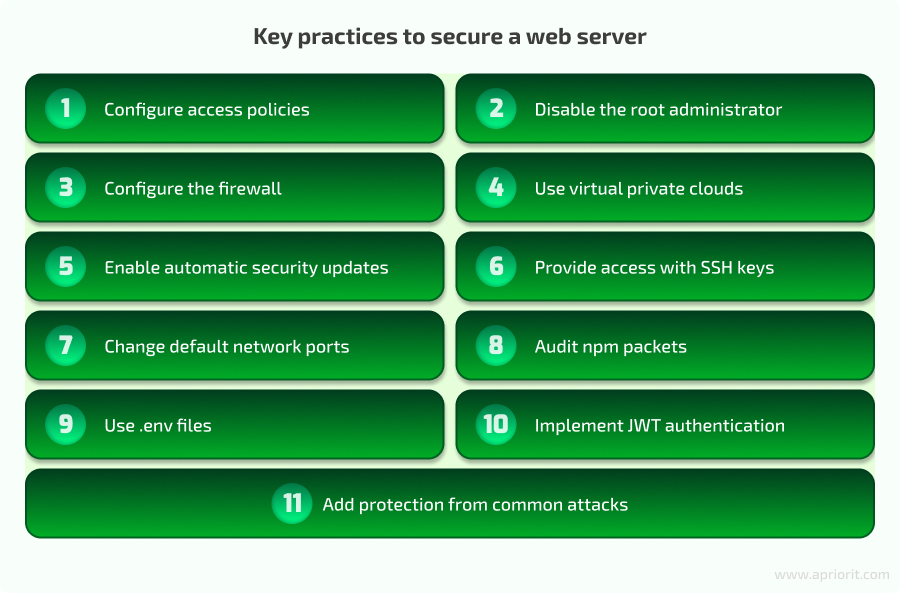
- 1. Configure access policies
- 2. Disable the root administrator
- 3. Configure the firewall
- 4. Use virtual private clouds
- 5. Enable automatic security updates
- 6. Provide access with SSH keys
- 7. Change default network ports
- 8. Audit npm packets
- 9. Use .env files
- 10. Implement JWT authentication
- 11. Add protection from common attacks
- Conclusion
Why secure your web application’s server?
A server is an integral part of any application’s back end that manages data, responds to user requests, and defines how the app behaves. Whether an organization deploys their app using a physical or virtual server, securing it is a top priority during web app development.
Web servers can be vulnerable to hacking attacks, insider threats, security misconfigurations, and other risks. Failing to protect a web server can expose a business to the following risks:
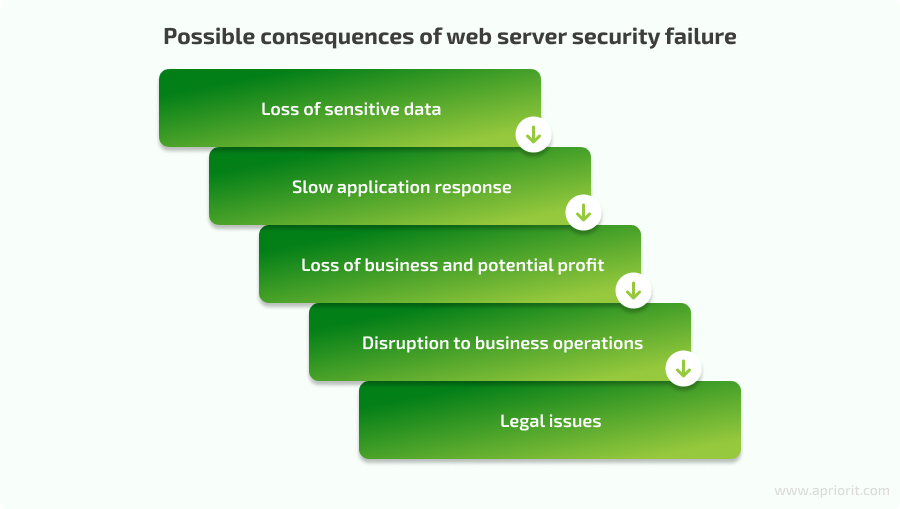
Loss of sensitive data. Web servers store databases with sensitive user and business information that can be leaked or stolen because of a security incident.
Slow application response. Some attacks like distributed denial of service (DDoS) consume web server resources, slow down page loading, and disrupt responses to user requests. Such attacks can make a web service unusable and drive away users.
Loss of business and potential profit. A successful attack on a web application makes it unavailable for some time and damages the business’s reputation.
Disruption to business operations. If business operations rely on web applications, when these apps are attacked, the business has to change its workflow or even temporarily stop working.
Legal issues. Failing to secure a web server can violate cybersecurity regulations, laws, and standards. Failing to comply with them can lead to fines, court proceedings, and additional security audits.
The key challenge of securing a web server is finding the balance between protection measures and server efficiency. Focusing too much on security may make a server respond slowly to requests, deny requests from legitimate users, or even shut down preemptively. On the other hand, focusing only on server efficiency can invite malicious actors to abuse an app.
In the next section, we share 11 proven web server security best practices that Apriorit developers use to protect our clients’ applications from common security threats.
Striving to secure your application?
Leverage our 20+ years of cybersecurity expertise to find the most fitting protection mechanisms for your product.
How can you ensure web server security?
Your team can use a variety of administrative and technical practices to secure a web server. From our experience, we recommend choosing security mechanisms based on the following factors:
- Project requirements and needs
- Common security threats for the type of app and industry
- Compliance requirements
- Project tech stack
Let’s examine how to secure a web server with must-have practices. Note that we’ll use a server based on Node.js Express in this article, but you can adapt these security mechanisms to other web development frameworks.
1. Configure access policies
An access control policy is one of the cornerstones to effective web server security. It defines which users can access a server and its resources. Sometimes, system administrators use default server settings or simple logins and passwords for specific server components such as SSH or databases. Such default configurations are well known, so attackers can easily use them to gain unauthorized access to a server using programs that iterate through common login and password combinations.
When configuring access to a web server, we define different user roles and permission sets. After that, an administrator can assign a group of users with a role that provides them the access they need. This will help enhance access management efficiency for various groups of users and reduce the attack surface if a malicious actor gains access to a server.
For instance, Node.js provides administrators with numerous packages to manage user access: acl, wmfs/rbac, passport, and others.
2. Disable the root administrator
The root administrator has full rights to perform any actions in the system. If an attacker gains access to the root account, they can get away with any malicious activity. Since having a root account is still useful for emergencies, we don’t recommend blocking the root account completely. The required minimum is to disable remote administration for the root user. This way, we reduce the chance of attackers leveraging stolen access to the root account for malicious intents.
To disable remote administration for the root user in Node.js, we create a new user with this command:
sudo adduser <username>Then, we create a password for this user:
New password:
Retype new password:Next, we add this user to the sudo group, which provides elevated rights to execute any command:
sudo usermod -aG sudo <username>Then, we disable remote access for the root users. To do so, log in to the server using the new user and execute this command:
sudo nano /etc/ssh/sshd_configFinally, we can find the line PermitRootLogin yes, change it to PermitRootLogin no, and restart the server with the command:
sudo systemctl restart sshd3. Configure the firewall
A firewall helps securing a web server by filtering all traffic passing through your web server, and providing an effective means to combat hacking attempts and DDoS attacks. To simplify firewall installation and configuration, you can use one of the tools native to your system or cloud service.
For example, Linux-based servers can use the UncomplicatedFirewall (UFW) utility. This program simplifies the process of working with iptables, allowing for flexible configuration of firewall security policies.
Cloud service providers (CSPs) typically provide built-in firewalls that help administrators conveniently configure basic traffic filtering rules and apply them to different components provided by the cloud service. For AWS-based servers, you can use AWS Firewall Manager. For Azure, there’s Azure Firewall, and for Google Cloud Platform, there’s Cloud Firewall.
Read also
Developing a Custom Secrets Management Desktop Application for Secure Password Sharing and Storage
Explore how a custom secrets management application by Apriorit helped our client improve their overall security score by 30%.

4. Use virtual private clouds
A virtual private cloud (VPC) is a pool of logically isolated resources within a public cloud that helps you install additional security restrictions between users in the same cloud. A VPC allows you to create a network similar to an office network, isolating resources from the external world and thereby increasing the security of organizational data.
For example, we can create a server cluster, allow internet access to one server, and block the others. Then, we can enable access to servers both directly and through a VPN, significantly enhancing resource security. There is also a configuration model where a single server, called a bastion, serves as a gateway that connects other servers in the network.
Major cloud service providers offer VPCs for their clouds:
- Amazon Web Services — Amazon VPC
- Microsoft Azure — Azure Virtual Network
- Google Cloud Platform — Virtual Private Cloud
- IBM Cloud — IBM Cloud Virtual Private Cloud
- Alibaba Cloud — Virtual Private Cloud
5. Enable automatic security updates
Attackers constantly look for new ways to abuse vulnerabilities in operating systems and web server frameworks, especially in systems that use outdated software versions. It’s essential to consistently install operating system and web server updates to minimize the risk of system compromise.
In most Linux distributions, automatic system updates are enabled by default. Others like CentOS and RedHat require manual configuration of automatic updates, which can be done with the dnf-automatic package. This package enables automatic update execution at a specified time:
sudo dnf upgrade
sudo dnf install dnf-automatic -y
sudo systemctl enable --now dnf-automatic.timer6. Provide access with SSH keys
Using passwords for SSH access to a server is one of the vulnerabilities that should be avoided. Instead, Apriorit’s security experts recommend using SSH keys, as they are:
- Longer and more complex than passwords
- Harder to intercept, steal, or guess
- Able to be part of a two-factor authentication process
- More convenient to manage than changing passwords for user accounts
It’s possible to implement SSH keys using various programs, OpenSSH being the most popular. To install the OpenSSH server, we can use this command:
sudo apt install openssh-serverThen, start the daemon with the following command:
sudo systemctl start sshdEach new user connecting to a server should independently generate public and private keys. They can do so by executing this command:
ssh-keygen -t rsaWhen a user gets their keys, they should provide the public key to the administrator, who then adds this key to the server. During each connection, the web server checks that the public and private keys correspond.
Administrators can automatically configure a new employee’s workspace with the help of their DevOps team.
Note that although SSH keys are more secure than passwords, a user’s private key still can get stolen. To minimize the risk of attack, Apriorit developers commonly set a passphrase. To do this, we first move to the user’s home directory after generating the keys:
cd ~Then, we create a new .ssh directory and an authorized_keys file within it:
mkdir .ssh && touch ./.ssh/authorized_keysNext, set permissions for the directory and file:
chmod 700 ./.ssh && chmod 600 ./.ssh/authorized_keysChange the directory owner:
chown -R username:username ./.sshCopy the contents of the id_rsa.pub file to the authorized_keys file, and open the file using a text editor:
nano ./.ssh/authorized_keysPress Ctrl+V to paste, Ctrl+X to close the document, and Enter to confirm saving. Now, we can connect to the server via SSH with the user’s key:
ssh <username>@hostnameIf the connection is successful, you can disable password access for the user by adding the following line to the /etc/ssh/sshd_config file:
PasswordAuthentication no7. Change default network ports
Changing the default port for SSH access is another effective way to prevent unauthorized access to the server. By default, users can connect to a Node.js server via port 22. Attackers can scan this port to discover the SSH version and check for standard passwords for the root user. Changing the port number reduces the chance of a successful attack, the server load, and the size of logs.
The port number is configured in /etc/ssh/sshd_config using the Port directive. To connect via SSH, we specify an additional parameter: -p <port number>. For example:
ssh <username>@hostname -p <port>Read also
Secure and Anonymous Virtual Networking Infrastructure: How It Works, How to Implement It, and What’s Next
Discover how Apriorit experts can help you secure access to your cloud resources using software-defined networking.

8. Audit npm packets
When developing JavaScript solutions, developers often use many npm packages to save time in implementing various functionalities. However, such npm functionalities are usually vetted by the community. The reason is that these packages may contain various vulnerabilities that malicious actors can exploit. To minimize security risks, we periodically audit such packages using the following command:
npm auditThis command will return a list of packages that contain known vulnerabilities:
1 low, 32 moderate, 3 high, 2 criticalTo avoid this, it’s crucial to update packages with critical vulnerabilities or look for alternatives. Automated updates of such packages start with this command:
npm audit fixThis command automatically updates dependencies with vulnerabilities to versions where the vulnerabilities are fixed. It may also update versions of other dependencies to ensure compatibility with the new versions of vulnerable packages. Since this command updates packages, it’s essential to thoroughly test the project after executing it to ensure that updates don’t cause any bugs.
9. Use .env files
.env files are environment variables that store confidential data like database access details, API keys, and tokens. Such files are never passed through Git. We recommend storing sensitive data in .env files instead of plain data or code because if an attacker gets unauthorized access to a web server, they won’t be able to see these files. One of the most popular npm packages for handling environment variables is Dotenv.
Here’s how to install this package:
npm install dotenvIn the project’s root, create a file named .env which will store the environment variables. Here’s an example of the .env file’s content:
DB_HOST=localhost
DB_USER=myuser
DB_PASSWORD=mypassword
PORT=3000To use Dotenv in the application, import the Dotenv library and call the config() method to load environment variables from the .env file:
const dotenv = require('dotenv'); // Import the Dotenv library

dotenv.config(); // Load environment variables from the .env fileThis string is typically placed at the beginning of the application in the app.js or server.js file. Now we can use environment variables in the application like regular JavaScript variables. For example:
const dbHost = process.env.DB_HOST;
const dbUser = process.env.DB_USER;
const dbPassword = process.env.DB_PASSWORD;
const port = process.env.PORT;

console.log(`Database Host: ${dbHost}`);
console.log(`Server Port: ${port}`);These variables will be available in the application after calling the dotenv.config() method.
10. Implement JWT authentication
Using the JSON Web Token (JWT) standard for user authentication and authorization ensures that the back end receives requests from a valid client, not a malicious one. To implement JWT authentication, you need to generate a secret key and then create an API_TOKEN based on it. In our projects, we use the crypto npm package and the jsonwebtoken library to generate keys.
Here’s an example of generating a secret key:
const crypto = require('crypto');

const generateSecretKey = () => {
  const key = (Math.random() + 1).toString(36).substring(7);
  return crypto.createHash('md5').update(key).digest('hex');
};And here’s how we can generate a token based on the created key using the jsonwebtoken library:
const jwt = require('jsonwebtoken');

const generateJwt = (data, secretKey) => jwt.sign({ ...data }, secretKey);Then, add the generated key and token to the project’s .env file. Also, add the API_TOKEN in the client’s header to include it in every request to the back end. The back end will then verify the token and continue processing user requests if the tokens match. Otherwise, it will throw an exception.
Read also
Cloud Computing Attacks: Types, Examples, and Prevention Tips
Discover seven proven ways to secure your cloud application from common cloud computing vulnerabilities.

11. Add protection from common attacks
The practices discussed above help to improve a web server’s overall cybersecurity posture. Let’s examine how to protect a web server from attacks with easy-to-implement improvements:
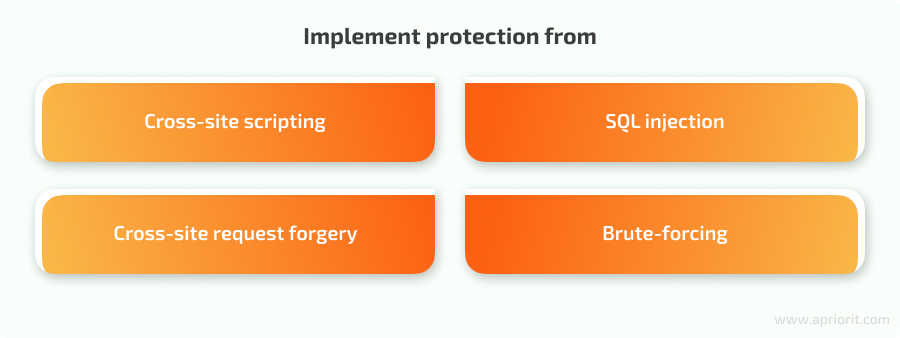
Cross-site scripting (XSS)
XSS is a common vulnerability found in many web applications. It allows an attacker to inject malicious JavaScript code into a page that executes whenever a user visits it. With an XSS attack, a hacker can steal a user’s sensitive information or authorization data.
To protect your web server from XSS attacks, Apriorit developers do the following:
- Sanitize user data by removing any characters that can be interpreted as code. You can do this with libraries like escape-html and node-esapi.
Define content security policy rules. Policies authorize content according to a list you specify, thereby allowing you to restrict the loading of certain content types. For example, Node.js allows us to configure response headers with the Helmet package and this command:
response.setHeader("Content-Security-Policy", "script-src 'self' https://example.com");SQL injection
An attacker can inject SQL queries into a parameter of a server request to retrieve, modify, or even delete data on the server. You can prevent such attacks with query escaping, prepared statements, or special object-relational mapping (ORM) tools for working with databases.
One of the popular ORMs we use in our Node.js development projects is Sequelize. Let’s examine how to configure it to prevent SQL injection:
1. Install Sequelize with this command:
npm install sequelize2. Install the driver for the required database; for example, MySQL:
npm install mysql23. Create a configuration file for Sequelize, typically named config.json, and specify the connection parameters in this file:
{
  "development": {
    "username": "your_username",
    "password": "your_password",
    "database": "your_database",
    "host": "localhost",
    "dialect": "your_dialect"  // e.g., "mysql", "postgres", "sqlite"
  }
}4. Initialize Sequelize by running the following command from the project’s root:
npx sequelize-cli initUpon the first launch, Sequelize creates the necessary directory and file structure, including models, migrations, and seeds.
5. Create models that correspond to database tables. Models describe the data schema and relationships between tables:
npx sequelize-cli model:generate --name User --attributes name:string,email:string6. Execute migrations that allow you to create and update the database structure according to the models:
npx sequelize-cli db:migrateNow, Sequelize models can perform create, read, update, and delete operations with data in the database. These operations are protected from outside SQL injections.
Cross-site request forgery (CSRF) vulnerabilities
CSRF is a type of social engineering attack where an attacker makes an end user perform various actions on an unprotected website. Using CSRF, hackers can get a user’s authentication data, such as a cookie with a session identifier.
During a CSRF attack, a user ends up on the attacker’s site, often through a link in an email. The attacker’s site is designed to closely resemble a site where the user has an account. The user then unknowingly fills out a form, and instead of sending the use’’s input, the form sends pre-prepared data crafted by the hacker to the server.
To prevent such scenarios, we add tokens to request headers. These tokens are generated on the server using a prepared key. The formula for generating the token looks something like this:
token=salt+":"+MD5(salt+":"+secret)When processing a request with a token in its header, the web server first checks the token. If it is correct, the server proceeds with the request.
Brute-force attacks
A brute-force attack is a method of authentication attack where an attacker systematically checks all possible username and password combinations and guesses credentials for a user’s account.
Preventing such attacks requires limitations on the number of connections from a single IP address. For Node.js, we use packages like express-brute and rate-limiter to enforce limitations.
It’s also recommended to implement CAPTCHA, which ensures that data in a form is filled out by a human instead of a bot. We use a Node.js module for this purpose, or use Google’s reCAPTCHA.
Conclusion
A web server is the heart of any web application that manages data and controls the app’s response to user requests. Securing a server is a must to ensure data protection, application performance, and service reliability.
The set of best practices for web server security depends on a server’s purpose, the data it handles, technologies used in development, business risks, and other factors. In this article, we shared 11 common practices that Apriorit’s web development experts successfully implement in our products based on the Node.js framework. But our expertise in securing web applications goes far beyond this, and you can leverage it for the benefit of your web project.
Bring top-notch cybersecurity to your project!
Let’s discuss how we can help you safeguard your next web-based product or enhance your protection of an existing one.
Have a question?
Ask our expert!
VP of Innovation and Technology, Canada Branch Director


