 Skip to main content
Small projects with stable, fixed data models rarely require significant changes to their databases. However, ensuring proper synchronization between an application’s data model and its database is vital for projects that constantly evolve.
In this article, we describe common types of Entity Framework database schema migrations, talk about ways you can migrate from one database schema to another, and provide some helpful database migration best practices. We also suggest ways you can overcome the limitations of the standard database migration tools provided by Entity Framework.
Contents:
While developing an application, you’ll likely make multiple changes to its data model. These changes need to be synchronized with your application’s database. To do this, you can use database schema migration.
Database migration is a feature of the Entity Framework that ensures your database is synchronized with your application’s data model. With its help, you can change the database schema.
You can migrate a database schema in two ways:
- Migration with no data relocation. Say we need to add a new field with the DEFAULT specification to the database. To do this, we only need to change the current schema, but we don’t need to relocate any data.
- Migration with data relocation. Say we have a (1):(N) relationship and we don’t want to call the COUNT(*) function for subordinate entities. In this case, we need to add the ChildCount field to the main entity and initialize this entity in COUNT(*) when creating the ChildCount field.
Or here’s another example: Say we want to merge a (1):(1) relationship into a single table. We add columns to the target table, then execute UPDATE with JOIN and delete the old table.
In both cases, we’re migrating data.
Aside from different data reallocation scenarios, Entity Framework offers several approaches to DB migration. In the next section, we go over each of these approaches, explain how they work, and outline the most important details of the schema migration process in Entity Framework.
Schema migrations in Entity Framework
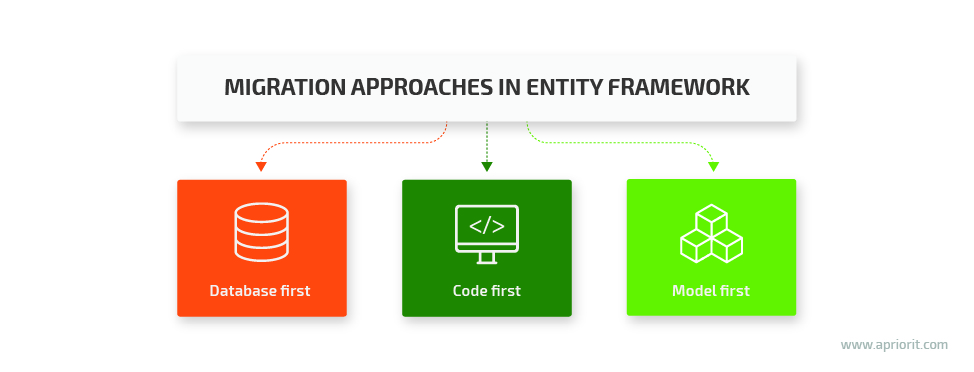
Entity Framework offers three possible approaches to database schema migration:
- Database first — Reverse engineer the existing database to create a data model that maps it completely.
- Code first — Define your data model in the code and then use this code to generate a new database.
- Model first — Generate a new database using the data model created with the Entity Framework Designer.
But if you dig deeper and compare the code first vs database first approaches, you’ll see that they both are actually based on the third approach: model first.
The model first approach is based on an edmx file that stores the entity–relationship model of your database and entity mappings of the database fields. So even if you write entity mappings using Fluent API or Data Annotations attributes, Entity Framework will implicitly create an edmx model.
When performing schema migrations in Entity Framework, you will have to work with several files, including:
The XXXXXXXXXXXXXX_InitialCreate.Designer.cs file. This file is generated automatically when you create your Entity Data Model (EDM), and it contains migration metadata used by Entity Framework.
The XXXXXXXXXXXXXX_InitialCreate.cs file. This file is supposed to contain all of a developer’s actions regarding database migration. It includes two methods:
- The Up method adds changes to the database schema.
- The Down method reverts changes made to the database schema.
However, you should keep in mind that there’s a significant difference between the way this file is supposed to work and the way it actually works. In theory, actions described in this file should define real interactions with the database. So if we add the CreateTable action, then by the next step the table should already have been created, and we should be able to add data to it.
But in practice, all actions added to this file define a plan of what should be done to your database. And changes described in the Up (or Down) method will be performed only after you exit this method. This unobvious detail can perplex developers who have little experience working with schema migrations. This sort of difference between the way the API looks and the way it actually works is a common issue in Entity Framework.
The XXXXXXXXXXXXXX_InitialCreate.resx file. This file contains two fields:
- DefaultSchema — Defines the format of your database schema. By default, it’s set to dbo.
- Target — Contains a compressed and base64-encoded version of the final edmx file. This is the EDM you’ll get after the schema migration is completed.
However, when implementing changes to data models in Entity Framework, you may face additional challenges.
Read also:
9 Tools for Design-Time Code Generation
The challenge of changing data models
For two out of the three possible approaches to schema migration — model first and code first — Entity Framework enables automatic creation of new schema migrations. It creates migrations when you make changes to the model or to the code, respectively. However, this feature has its peculiarities.
When you make changes to a database, Entity Framework records them by creating a new schema migration. The tricky thing is that it compares the current state of the data model to the model from the latest schema migration. And in some cases, this may create additional difficulties.
Let’s take a look at an example of this issue in practice.
Say you have a project where development activities are performed in different branches, which is quite a common scenario. Let’s call the main branch dev. From this dev branch, we get two more branches — feature1 and feature2 — with an interval of several days.
Both these branches need to make changes to the database schema. So you have two schema migrations created concurrently: <date>_feature1 and <date>_feature2. In this case, Entity Framework will compare both these migrations to the same data model.
Once developed, both features are merged with the dev branch: first feature2 and then feature1. Everything looks good so far and is operational.
Now you create a new branch, feature3, which also makes changes to the database schema with the <date>_feature3 schema migration. And this is where things start to go wrong. When you use the Add-Migration command to add feature3 to the Up method, the latter will have the changes from both feature3 and feature2.
Let’s figure out why this happens.
Once you merge two features with the dev branch, your current data model is supposed to look like this:
dev + feature1 + feature2
However, Entity Framework sees it like this:
dev + feature1
This confusion happens because feature1 was merged after feature2.
There are two possible ways to handle this problem:
- Do nothing. Inform other developers about this issue and run integration tests on all schema migrations. Of course, developers will have to fix their database migrations every time a new feature is added and will have to delete all excess data.
- Add an empty schema migration. After every merge, track the creation of a database schema migration. If the migration isn’t empty, then the data was overwritten. In this case, all you need to do is remove everything from the Up and Down methods and leave an empty schema migration as the latest saved data model. This workaround doesn’t make any changes to the database and simply commits all previous changes to the current data model.
Aside from these two nuances, Entity Framework is a useful and reliable solution for updating a database schema.
However, even the most reliable solution may struggle to keep up with the increasing number of business demands. For instance, in one of our recent projects, we faced the challenge of creating schema migrations with data seeding.
Schema migrations with database seeding
Database seeding is the process of filling a new database with data. Usually, such data falls into one of two categories:
- Statistical data, dictionaries, types, enums, and so on
- Default objects (in our case, these were the groups “all clients” and “all users,” predefined alerts, and so on)
In Entity Framework, you can seed data using the recommendations in these Entity Framework tutorials on seed data and database initialization strategies. In general, these recommendations work fine: we receive DbContext in the Seed method and can be sure that our database is on the latest schema migration. However, there’s one significant problem: Seed can be called only for new databases. If you’re working with an existing database, you can’t call the Seed method for it. In other words, Entity Framework provides you with no functionality for adding more data along with a new feature.
In theory, you can rework the initialization in a way that would allow you to call the Seed method for every schema migration — or at the end of the schema migration. However, by doing so, you will increase the complexity of the Seed code:
public class SchoolDBInitializer : DropCreateDatabaseAlways<schooldbcontext>
{
    protected override void Seed(SchoolDBContext context)
    {
        IList<standard> defaultStandards = new List<Standard>();
        // For each new object added, we need to check if it already exists in the database, as we don’t know which schema migration we updated from
        // and this object could have been added earlier
        if(!context.Standards.Any(x=>x.StandartName == "Standard 1")
        {
            defaultStandards.Add(new Standard() { StandardName = "Standard 1", Description = "First Standard" });
        }
        if(!context.Standards.Any(x=>x.StandartName == "Standard 2")
        {
            defaultStandards.Add(new Standard() { StandardName = "Standard 2", Description = "Second Standard" });
        }
        if(!context.Standards.Any(x=>x.StandartName == "Standard 3")
        {
            defaultStandards.Add(new Standard() { StandardName = "Standard 3", Description = "Third Standard" });
        }
        context.Standards.AddRange(defaultStandards);

        base.Seed(context);
    }
}GitHub users florisrobbemont and llCorvinSll have offered their own solution to the problem of calling the Seed method for current schema migrations. They each wrote a DbSeederMigrator class with their own realization of the EF.DbMigrator class. Their classes allow you to set the Seed method for each specific schema migration and execute seeders in the same order as schema migrations.
We used this DbSeederMigrator class as the basis for our own solution, improving some parts that didn’t work for us. This is what the process of applying DbSeederMigrator looks like:
1. Create a new IMigrationDataSeeder interface:
/// <summary>
/// Provides data seeding capabilities to the EF Migration classes
/// </summary>
public interface IMigrationDataSeeder<in TContext> where TContext : DbContext
{
    /// <summary>
    /// Seeds this migration
    /// </summary>
    void Seed(TContext context);
}2. If a migration needs to add its own data, we can inherit the migration from this interface and execute the Seed method.
public partial class UserPreferencesAddColumnGUID : DbMigrationSeeding<databasecontext>
    {
        public override void Up()
        {
            AddColumn("dbo.UserPreferences", "Guid", c => c.String(maxLength: 40));
        }

        public override void Down()
        {
            DropColumn("dbo.UserPreferences", "Guid");
        }

        public override void Seed(DatabaseContext context)
        {
            foreach (var userPreference in context.UserPreferences)
            {
                userPreference.Guid = Guid.NewGuid().ToString();
            }

            context.SaveChanges();
        }
}3. The main cycle in DbSeederMigrator looks like this:
var seedList = new List<IMigrationDataSeeder<TContext>>();
foreach (var migrationId in _pendingMigrations.ToArray())
{
    DbMigration migration = GetMigrationFromMigrationId(migrationId);
    IMigrationDataSeeder<TContext> migrationSeeder = GetSeederFromMigration(migration);

    base.Update(migrationId);

    if (migrationSeeder != null)
    {
        seedList.Add(migrationSeeder);
    }
}

// Create a new datacontext using the generic type provided
using (var databaseContext = _contextGenerator(connection()))
{
    // Apply data seeders
    foreach (var migrationSeeder in seedList)
    {
        migrationSeeder.Seed(databaseContext);
    }
}By applying this migrator, we achieve two key goals:
1) Create separate Seedings for each schema migration.
2) Automatically monitor the need for applying the Seed method and the order of the Seed processes.
Finally, let’s move to the next challenge we faced when working with database schema migrations: running background database migrations.
Background database migrations and zero downtime
Ensuring zero downtime is one of the most common requirements for working with large sets of data. When you update any software components working with databases, such an update should be nearly instantaneous, which is necessary to ensure that no critical business processes are affected by the update.
This requirement strongly affects the process of changing the database schema. Whenever you update large volumes of data or introduce significant changes, the scripts have to reprocess up to 100% of the data.
Naturally, the more data you need to process, the more time it will take. That’s why we usually talk about the need for eventually consistent zero downtime. In other words, we can assume that some old data may be unavailable for some time, but the software should still continue to work and process new data. Therefore, we can carry out database migration with data relocation in the background in parallel with the main software operations.
Let’s see how this works in practice. Say we have a project where database schema migrations aren’t configured automatically. However, we have our own analog of the _MigrationHistory table where we write down all rolled-out database versions. In this case, our update scripts would look like SQL files.
Updates are applied to a database sequentially, similar to migrations when a server is first started. The problem arises when actions related to the update take significant time. For example, creating tables for new databases doesn’t take long, but moving old data to a new schema does. When moving this data, the server is unavailable as it waits for the update to finish.
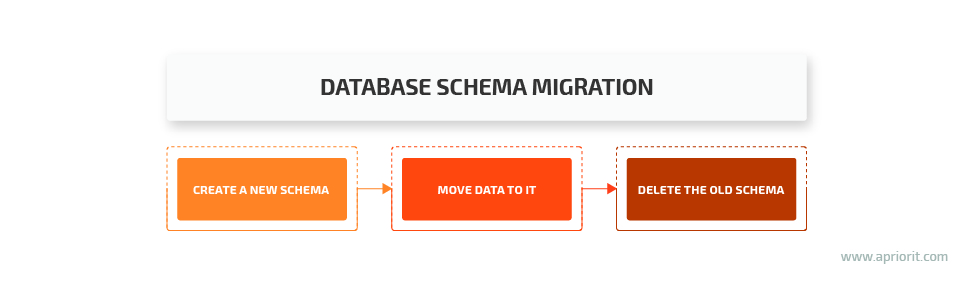
In general, a database schema gets updated in three steps:
- Create a new schema
- Transfer data from the old schema to the new one
- Delete the old schema
Therefore, to run a database schema migration in the background, we need to split our updatems files into three separate steps:
- Create
- Migrate
- Postdrop
Still, we treat them as one version of the database schema, just divided into three steps.
Entities that are migrated in the background have a separate Version field that helps us determine which objects haven’t been migrated yet. This field also allows us to keep the whole update process iterative. This means that the server can be stopped in the middle of the update and continue the migration later. And only after the migration of all data is complete will the Postdrop script be started to delete the old schema.
Also, a server might support sequential migration to the latest version of the database. For example, say an end user upgrades from version 350 to version 710 while we also have migrations for versions 200, 400, 600, and 700. In this case, the sequential migration mechanism will perform all three steps of the database schema migration for each version. And while doing so, the server will continue writing new data to version 710.
Introducing true zero downtime database schema migrations
The example described above has one significant downside: such an approach assumes that there’s only one server running. However, real high-availability schemas that ensure service availability of up to 99.99% usually have more than two servers. In this way, at any given moment, there should be at least one server running.
Therefore, we can’t stop all servers at once to update them simultaneously. We need to be able to allow a server node to write the old version while moving to the new one.
In general, this process looks like an advanced version of the previous example. We need to coordinate several servers with the ability to manage each of them. This is why we need to move the update process out of the general context of server performance. The update must be performed as a separate process. Truth be told, the update should be performed as a separate process even when there’s only one server, but that’s not always possible.
The whole algorithm for updating several servers will consist of five steps:
- Run the Create script that’s similar to the one we previously described. Only this time, alongside adding a new database schema, this script should create special triggers that copy (not redirect) the data from the old schema to the new one. By doing this, we ensure that during the update, new servers with the new schema will be able to understand the data received from the old servers.
- Start sequentially updating the servers. This can be either an in-place update or a replacement, when the new server launches and the old one stops, depending on the deployment scheme, resources, etc. At this moment, there are two versions of servers in the system, and they continue to work together. Old servers write both to the old schema and to the new one thanks to triggers, while the new servers write only to the new schema.
- Turn off the triggers for redirecting data to the old schema when the last server has been updated and the whole system is running a single software version.
- Start the background database schema migration process. Technically, it’s also possible to run background schema migrations using triggers: updating or re-inserting the existing data will invoke triggers to copy that data to a new schema.
- Delete the old schema and old data when the background schema migration is over.
As you can see, by adding only two extra steps, we can enable efficient background schema migration on several servers while ensuring zero downtime.
Conclusion
Database schema migration is a commonly used Entity Framework feature that’s responsible for synchronizing your database with your application’s data model. While Entity Framework offers at least three different approaches to schema migration, they’re all model first at their core.
Migrating database schemas can present various challenges. In particular, you may need to:
- Ensure that changes will be introduced to the database in the right order
- Enable data seeding for schema migrations
- Run schema migrations in the background with zero downtime
We’ve covered each of these challenges and described ways you can address them while migrating a database to a new schema. Have any questions on this topic? Feel free to contact us! At Apriorit, we have vast experience developing efficient solutions for processing and managing big data. Our team of experts will gladly assist you in building your data management solution.
Have a question?
Ask our expert!
VP of Engineering


