 Skip to main content

These days, businesses must keep up with rapidly changing customer demands. Development teams have to build, test, and deploy code more quickly and efficiently than ever. By automating software development processes, continuous integration and continuous deployment (CI/CD) frees up valuable resources, allowing your team to focus on delivering high-quality code and new features faster without compromising product quality.
In this article, Apriorit experts share their experience creating an automated pipeline for deploying and managing applications. In particular, we show you how to integrate Bitbucket Pipelines into a project running on Nomad.
This article will be useful for project leaders and business owners who want to optimize their development workflows, increase the speed of software delivery, and achieve seamless application deployment and management.
Contents:
Using Bitbucket Pipelines and Nomad for CI/CD adoption
CI/CD, short for continuous integration and continuous deployment, is an important software development methodology. It focuses on automating and optimizing the entire process of building, testing, and deploying software applications.
This approach includes two sub-processes:
- Continuous integration with the regular merging of code changes from individual developers into a shared repository.
- Continuous delivery with automated deployment of tested and validated code changes to various environments, including staging and production.
Introducing the CI/CD approach to your software development routine has several benefits. For example, as you create a CI/CD pipeline, your team gets to automate the main aspects of the development pipeline, including building, testing, and deployment, without the need for manual intervention. CI/CD also guarantees that code changes are regularly integrated into the main codebase. After passing tests, code changes are automatically deployed to production environments. All these improvements and optimizations allow developers to focus on implementing new features and quickly delivering quality products.
CI/CD workflows are implemented and supported with a combination of powerful tools, including:
- Version control systems
- Build automation tools
- Testing frameworks
- Workload orchestrators
- Deployment pipelines
The combination of these tools and their integration into your development process enhances the software development lifecycle.
In this article, we mostly discuss two types of CI/CD tools: CI/CD management platforms and workload orchestrators.
CI/CD management platforms automate the process of code integration, testing, and deployment. Some of the most popular CI/CD platforms are Jenkins, GitLab CI/CD, Travis CI, and Bitbucket Pipelines.
Workload orchestrators, in turn, make sure that deployed applications are managed effectively. Popular workload orchestrators include HashiCorp Nomad, Kubernetes, Docker Swarm, Amazon Elastic Container Service, and Rancher.
Choosing the right tools is crucial to ensure high product quality and timely delivery. This choice will often depend on several factors, including:
- The project’s scope and complexity
- Your current and future technology stack
- Integration with existing tools
- Vendor lock-in
- The learning curve
- Scalability, customization, and extensibility
In this article, we explore the tandem of Nomad as a workload orchestrator and Bitbucket Pipelines as a CI/CD management platform. This pairing may be fitting for various cases, and we’ve already tested the effectiveness of these tools on several of our projects, creating a more reliable and efficient development cycle and delivering high-quality software to users.
Our practice shows, however, that while choosing the right tools is important, configuring them correctly is even more important. We want to share how you can set up Bitbucket CI/CD and HashiCorp Nomad and use their benefits for your project based on a practical example. Let’s start with a brief overview of Bitbucket Pipelines.
Automating code deployment with Bitbucket Pipelines
Bitbucket Pipelines is a cloud-based platform that effectively manages CI/CD workflows. There are several advantages of using Bitbucket deployment pipeline in your development process.
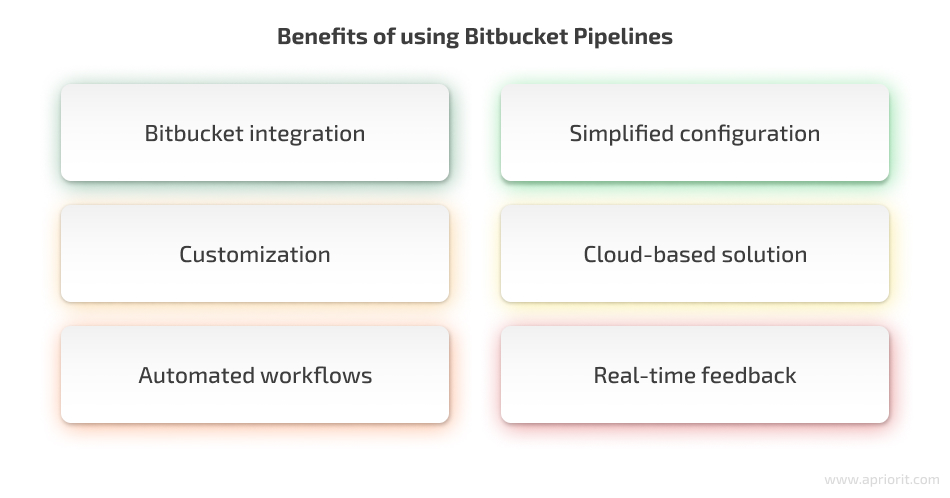
- Bitbucket integration. This tool offers Bitbucket continuous integration, which is a widely used web-based version control repository hosting service. This integration allows developers to collaborate with each other on their projects, such as by contributing code changes and reviewing each other’s work.
- Simplified configuration. Developers can use a YAML-based configuration file that describes the steps to build, test, and deploy code changes.
- Customization. The pipeline is highly customizable, which means that developers can specify which services and tools they want to use for each step of the pipeline.
- Cloud-based solution. Bitbucket Pipelines is a cloud-based platform, which eliminates the need to set up and maintain on-premises infrastructure.
- Automated workflows. With Bitbucket Pipelines, developers can automate the entire software delivery process, including building, testing, and deployment.
- Real-time feedback. As soon as developers commit code changes, the CI/CD pipeline triggers builds and tests, allowing them to detect and resolve issues early on.
To automate application deployment and management, you need to use a workload orchestrator that will help you schedule and manage the execution of tasks in different environments. Now it’s time to get acquainted with HashiCorp Nomad.
Orchestrating your project workload with Nomad
As we mentioned earlier, workload orchestrators are designed to handle the deployment and management of containerized applications at scale, making sure they are integrated seamlessly. Developed by HashiCorp, Nomad is a modern workload orchestrator that helps you automate your CI/CD pipelines with Nomad across a wide range of infrastructure platforms, public and private clouds, data centers, and edge devices.
Nomad promises to help users achieve streamlined and scalable application deployment processes, ensuring high availability, resource optimization, and flexibility.
Let’s explore the benefits of using Nomad in detail:
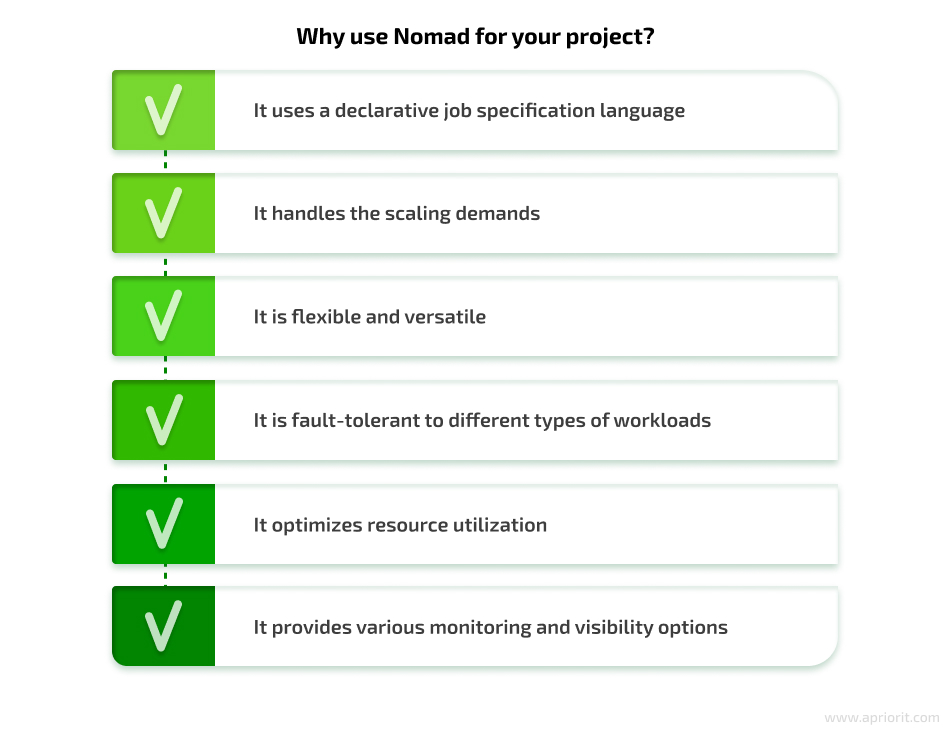
- Declarative job specification language. Nomad allows users to describe their infrastructure requirements and application dependencies in a human-readable format. This makes it easier for developers and operators to collaborate and ensure consistent deployment configurations.
- Scalability. Nomad can scale to support large-scale deployments, managing thousands of tasks and millions of containers. This allows developers to handle increasing workloads and deliver growth.
- Flexibility and versatility. Nomad supports a wide range of application types, allowing organizations to run diverse workloads on the same platform. It can handle microservices, batch jobs, or long-running applications, providing flexibility for different application architectures.
- Fault tolerance. Nomad can also handle failures in a cluster gracefully, automatically rescheduling failed tasks to healthy nodes.
- Resource optimization. Nomad optimizes resource allocation by intelligently scheduling and packaging workloads onto available infrastructure resources. This helps maximize resource utilization and cost efficiency.
- Monitoring and visibility. Nomad provides built-in monitoring and visibility features, allowing organizations to monitor application health and performance. It offers metrics, logs, and diagnostic information to aid troubleshooting and optimization efforts. The extensibility of Nomad allows users to enhance its functionality through plugins, enabling integration with other tools and services.
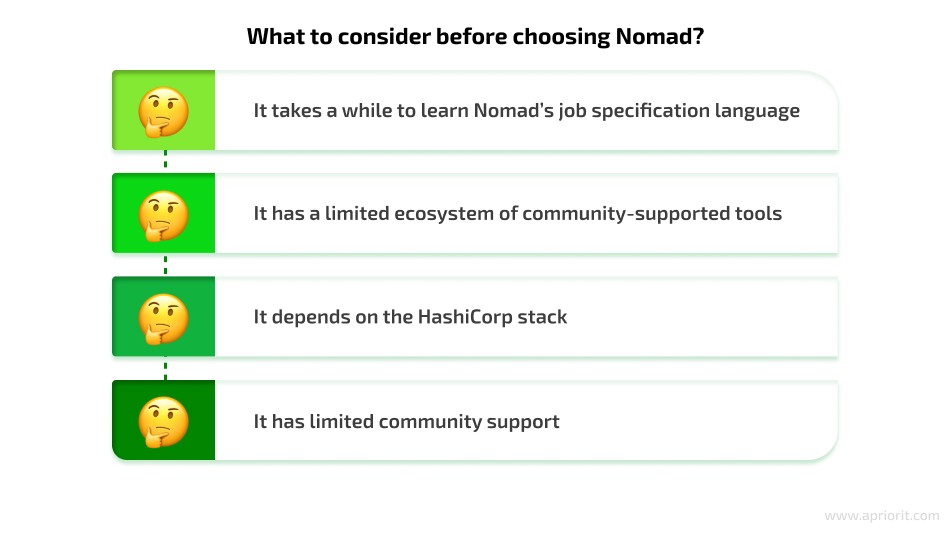
Although Nomad offers many advantages, it’s important for your team to also consider its limitations and weaknesses. Here are some of the challenges we have encountered when working with Nomad:
Now that you know the core pros and cons of Nomad, let’s see a practical example of how you can run an application with Nomad and configure a working CI/CD pipeline with Bitbucket Pipelines.
How to create a CI/CD workflow with Nomad and Bitbucket Pipelines
In this section, we explore a practical example of building CI/CD pipeline with Nomad and Bitbucket Pipelines. As an example, we’ll talk about one of our recent projects where we were tasked with migrating an application to a HashiCorp Nomad cluster orchestrator. Since the client’s team already used Bitbucket for version control and code storage, we had even more reasons to build a CI/CD architecture with Nomad and Bitbucket Pipelines.
Our development phase consisted of two stages:
- Preparing the prerequisites
- Implementing the application code
Preparing your environment for CI/CD adoption
In the beginning, it’s important to prepare your environment for shifting to a CI/CD workflow. In our case, this process included three core steps:
- Install HashiСorp Nomad
- Run Nomad client and server
- Create a Bitbucket repository
Let’s take a closer look at each of these steps.
1. Install HashiCorp Nomad
The installation process for Nomad may differ depending on the operating system you’re using. In our case, we used Ubuntu, so here are the steps for installing Nomad on a Linux machine:
1) Add the HashiCorp GPG key:
curl -fsSL https://apt.releases.hashicorp.com/gpg | sudo apt-key add -
2) Add the official HashiCorp Linux repository:
apt-add-repository "deb [arch=amd64] https://apt.releases.hashicorp.com $(lsb_release -cs) main"
3) Update and install Nomad:
apt-get update && apt-get install nomad
4) Verify that Nomad was installed correctly by calling the command:
nomad
You can find more information about installing Nomad on other operating systems in the official documentation.
2. Run Nomad client and server
Nomad can run as an agent on each machine in the cluster in either server or client mode. Servers manage the cluster, while all other agents must run in client mode. The Nomad client is a lightweight process that does the following tasks:
- Registers the host machine
- Communicates with the Nomad server using heartbeat, a periodic communication process
- Performs tasks assigned to it by servers
The agent has to be running on each host in the cluster so that servers can assign jobs to those hosts.
Now let’s examine how to run a Nomad client and server.
1) Using the nomad agent -dev command, start the Nomad agent in development mode. You can use this mode to quickly launch an agent that works simultaneously as a client and a server. This allows you to quickly pick up the environment for testing.
Note: This development mode should never be used in production, as it doesn’t persist in a state. In a production environment, we recommend having at least three Nomad servers per cluster. For details, refer to the official Nomad website.
2) Open a new terminal and use the nomad node status command to view the registered nodes in the Nomad cluster. The command output should display all essential information about each node, including its ID, datacenter, node name, class, drain mode, and current status.

3) Check if the agent is in server mode by running the nomad server members command. The command output displays your agent and the address it’s running on, along with its health state, version details, datacenter, and region.

3. Create a Bitbucket repository
To get started with deployment, create a Bitbucket repository. For this, you need to log in to a Bitbucket account or sign up for one. Once you’re logged in to Bitbucket, follow these steps to create a new repository:
- Click on the Create button and select Repository. This will take you to the Create a new repository page, where you can fill in necessary details, including the name of the repository.
- After that, choose Create repository. Bitbucket will create your repository and display its Source page.
A newly created repository is empty. The next step is to add your application code to it. In this example, we show how to add code for the http-echo server application.
Adding application code to the Bitbucket repository
Next, you need to place the application code in the Bitbucket repository. By doing so, you can optimize version control and automation. This integration also improves overall development and the deployment lifecycle.
The process includes four main steps:
- Deploying the application with Nomad
- Setting up CI/CD with Bitbucket Pipelines for application updates
- Implementing update and rollback strategies
- Configuring health checks for the Nomad application
Let’s look closer at each step.
1. Deploy the application with Nomad
To deploy an application using Nomad, you’ll need to create a job that defines the tasks to be executed. The job specification is written in HashiCorp Configuration Language (HCL), which provides a balance between human readability and machine friendliness. With the help of HCL, you can define desired tasks and their properties.
Let’s take a look at our example, where we have a simple http-echo server application that is publicly available on HashiCorp’s official GitHub repository. Before deploying the http-echo server application, you need to archive the binary file and upload it to the S3 bucket, which is specified in the Nomad job file. Here is how it’s done:
- Clone the app repository using git clone <repository_url>
- Build the app with the go build command
- Create a ZIP archive named http-echo_latest.zip that contains the binary file
- Upload the ZIP archive to an S3 bucket
Here is an example of how to run an application using the run_app.nomad file:
job "run_http_server" {
 type = "system"
 datacenters = "[[.datacenter]]"
 meta {
 git_sha = "[[.BB_COMMIT]]"
 }
update {
   	max_parallel 	= 1
   	min_healthy_time = "20s"
   	healthy_deadline = "3m"
   	progress_deadline = "5m"
	health_check  = "task_states"
   	auto_revert = true
 	}
 group "binary_example" {
   count = 1

   network {
 	port "http" {
   	static = "9595"
 	}
   }
   task "server" {
 	driver = "raw_exec"

 	artifact {
   	source  	= "https://[[. s3_binary_path]].s3.amazonaws.com/http-echo_[[. BB_COMMIT]].zip"


 	options {
   	aws_access_key_id 	= "[[.aws_access_key_id]]"
   	aws_access_key_secret = "[[.aws_access_key_secret]]"
 }

   	destination = "local/bin"
 	}

 	config {
   	command = "local/bin/http-echo"

   	args = [
     	"-listen",
     	":9595",
     	"-text",
     	"Hello Nomad",
   	]
 	}
   }
 }
} This Nomad job configuration sets up a system run_http_server job. This job includes an update block that specifies the parameters for job updating:
- Maximum parallel updates
- Minimum healthy time
- Deadlines for health and progress checks
Within the job specification, there is a binary_example group with a count of 1, indicating that one instance of the task will be deployed. The group includes a network block defining the HTTP port to be statically set to 9595.
The server task is defined with the raw_exec driver. It includes an artifact block that specifies the source of the artifact, which is downloaded from the provided Amazon S3 URL. The options block includes the AWS access key ID and the secret for authentication.
The task is configured with a command to execute the http-echo binary located at local/bin. The task’s arguments specify the following parameters:
- Listening address
- Text response
- Version information
As a result, you set up a Nomad job to run a single instance of the http-echo server with specific configurations and dependencies. The run_app.nomad file will be stored in the root directory of the Bitbucket repository.
To run the run_http_serve job in your Nomad environment, you can take the following steps:
1. Open a terminal on a machine with Nomad running
2. Create and open the nomad_test folder:
mkdir /opt/nomad_test
cd /opt/nomad_test/
3. Download the levant tool, which will be used to run the Nomad task using this command:
wget https://releases.hashicorp.com/levant/0.3.1/levant_0.3.1_linux_amd64.zip
4. Unzip the archive with the levant tool:
unzip levant_0.3.1_linux_amd64.zip
5. Make the levant file executable:
chmod +x ./levant
6. Check the levant tool with this command:
./levant -v
7. Copy the run_app.nomad file to the /opt/nomad_test folder.
8. Run the run_http_server nomad job using the levant tool:
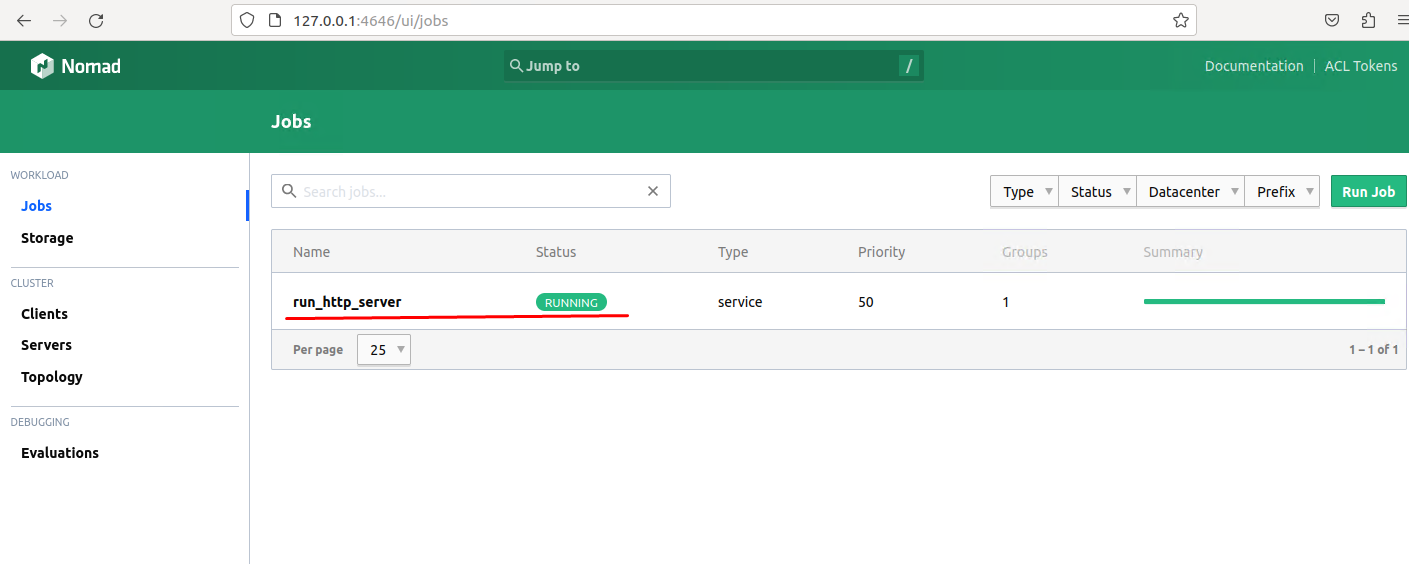
./levant deploy -var aws_access_key_id="AWS_ACCESS_KEY_ID" -var aws_access_key_secret="AWS_SECRET_ACCESS_KEY" -var s3_binary_path="test-prod-bb" -var BB_COMMIT="latest" -var datacenter="dc1" ./run_app.nomad
9. Check the status of the Nomad job in the Nomad GUI at http://127.0.0.1:4646/:
10. Make sure that the http-echo server application works as expected by navigating to http://127.0.0.1:9595/:

2. Set up CI/CD with Bitbucket Pipelines for application updating
To enable CI/CD for the http-echo server application on Bitbucket, you need to create a pipeline configuration bitbucket-pipelines.yml file in the Bitbucket repository. This file will specify steps and actions for the CI/CD process.
Here is what the bitbucket-pipelines.yml configuration file may look like:
image: golang:1.15

pipelines:
  branches:
	master:
	- step:
    	name: Build http-echo artifact
    	script:
      	- go build
      	- ls -la
    	artifacts:
      	- http-echo

	- step:
    	name: Zip http-echo binary
    	image: atlassian/default-image:2
    	script:
      	- zip -r http-echo_${BITBUCKET_COMMIT::7}.zip . -i http-echo
    	artifacts:
      	- http-echo*


	- step:
   	name: Upload the binary to S3
    	script:
      	- pipe: atlassian/aws-s3-deploy:0.3.8
        	variables:
          	AWS_ACCESS_KEY_ID: $AWS_ACCESS_KEY_ID
          	AWS_SECRET_ACCESS_KEY: $AWS_SECRET_ACCESS_KEY
          	AWS_DEFAULT_REGION: '$AWS_REGION'
          	S3_BUCKET: '$S3_BUCKET'
          	LOCAL_PATH: '$(pwd)'
          	EXTRA_ARGS: "--exclude=* --include= http-echo_${BITBUCKET_COMMIT::7}.zip "


	- step:
    	name: Install levant tool
    	image: atlassian/default-image:2
    	script:
      	- wget https://releases.hashicorp.com/levant/0.3.1/levant_0.3.1_linux_amd64.zip
      	- unzip levant_0.3.1_linux_amd64.zip
      	- chmod +x levant
      	- ./levant -version
      	- chmod +x ./cicd_deployment.sh
    	artifacts:
      	- levant
      	- cicd_deployment.sh

	- step:
    	name: Staging. Update Staging environment
    	deployment: staging
    	image: atlassian/default-image:2
    	script:
       	- export BB_COMMIT="${BITBUCKET_COMMIT::7}"
       	- echo http-echo commit ID ${BB_COMMIT}
       	- ssh -fN -L 4646:localhost:4646 ${ssh_user}@${nomad_server}
       	- ./cicd_deployment.sh

  custom :
   Prod_environment:
	- step:
    	name: Install levant tool
    	image: atlassian/default-image:2
    	script:
      	- wget https://releases.hashicorp.com/levant/0.3.1/levant_0.3.1_linux_amd64.zip
      	- unzip levant_0.3.1_linux_amd64.zip
      	- chmod +x levant
      	- ./levant -version
      	- pwd
      	- ls -la
      	- chmod +x ./cicd_deployment.sh
    	artifacts:
      	- levant
      	- cicd_deployment.sh

	- step:
    	name: Update Prod_environment
    	deployment: prod
    	image: atlassian/default-image:2
    	script:
      	- export BB_COMMIT="${BITBUCKET_COMMIT::7}"
      	- echo http-echo commit ID ${BB_COMMIT}
      	- ssh -fN -L 4646:localhost:4646 ${ssh_user}@${nomad_server}
- ./cicd_deployment.sh This pipeline configuration file has different steps to be executed for each commit that was made to the master branch of the repository. Also, you’ll need to trigger the pipeline manually for the production environment.
Here are the steps you need to execute for each commit in the master branch:
- Build http-echo artifact by using the Go build command and creating an artifact.
- Zip the http-echo binary that you got from the previous step and create different versions of the artifact based on the commit ID.
- Upload the binary archive marked with the commit ID to the S3 bucket.
- Download and install the levant tool used for deploying Nomad jobs.
- Update the staging environment by executing the cicd_deployment.sh script through an SSH connection to the Nomad server. Here, you also need to determine the commit ID parameter so that the Nomad task will take the binary file of the application marked with the last commit ID from S3.
For the production environment, you need to run the pipeline manually:
- Install the levant tool. Download and install the levant tool used for deploying Nomad jobs.
- Update the production environment by executing the cicd_deployment.sh script through an SSH connection to the Nomad server. The Nomad task will take the binary file of the application marked with the last commit ID from S3.
The cicd_deployment.sh script needs to be stored in the repository root. Script execution is written in bitbucket-pipelines.yml.
Here is the – ./cicd_deployment.sh script:
#!/bin/bash

# Nomad vars
echo ${DEPLOY_URL}
echo ${datacenter}
echo ${s3_binary_path}
echo "END VARS"


./levant deploy -log-level=debug -address=${DEPLOY_URL} -ignore-no-changes=false \
-var aws_access_key_id="${AWS_ACCESS_KEY_ID}" \
-var aws_access_key_secret="${AWS_SECRET_ACCESS_KEY}" \
-var s3_binary_path="${s3_binary_path}" -var BB_COMMIT="${BB_COMMIT}" \
-var datacenter="${datacenter}" \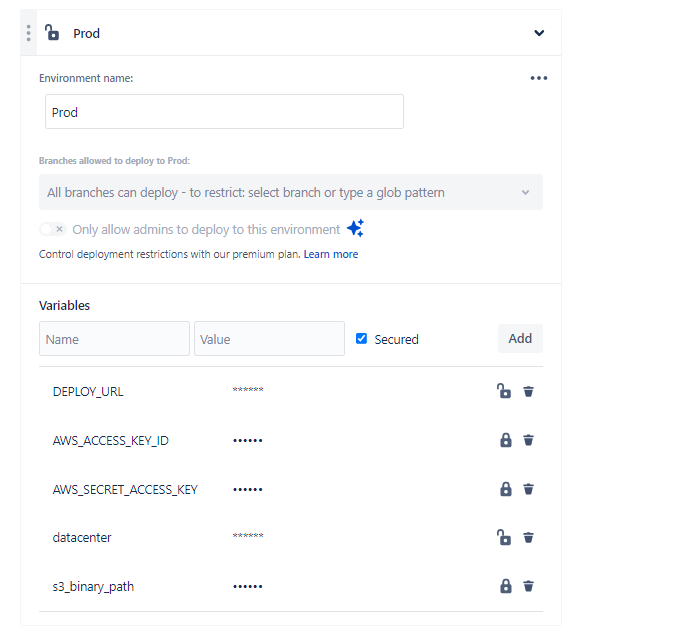
./run_app.nomad The cicd_deployment.sh script takes environment variables from the repository settings. Each environment requires different environment variables. For example, here are the variables for the project’s staging environment:

And here are the variables for the production environment:
This bitbucket-pipelines.yml file sets up a CI/CD pipeline that builds and deploys an application using Nomad, targeting the staging environment. It leverages the levant tool for managing Nomad deployments and executes the cicd_deployment.sh script to perform deployment actions.
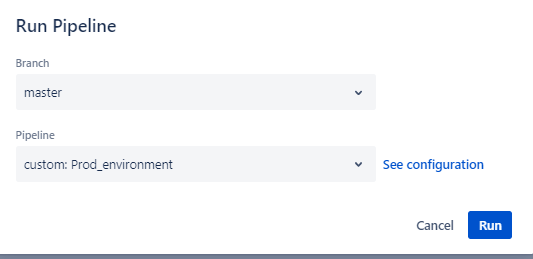
After testing the latest version of the application in the staging environment, you can manually run the deployment for the production environment. To do this, go to Repository -> Pipelines -> Run pipeline and choose the production environment.
To check the status of your deployments, go to Repository -> Deployments. Both deployments should be marked green.

After deployment, you can open Nomad and check your job. In the Meta section, you will be able to see that the git_sha parameter is equal to the Bitbucket Commit ID.
3. Implement update and rollback strategies
When working with Nomad, you might need to implement update and rollback strategies to maintain control over the application deployment process. These strategies offer mechanisms for handling potential issues and minimizing application downtime. They also provide flexibility and reliability when updating applications in a Nomad environment.
Here are common strategies that ensure a smooth deployment process:
- Canary deployments. Gradually roll out a new application version to a small subset of infrastructure or users to test it before full deployment.
- Blue/green deployments. Maintain two identical environments, one for the current production version (blue) and one for the new version (green). Switch traffic from blue to green once the new version is deemed stable.
- Rollback procedures. Have well-defined procedures in place to revert to a previous version in case of issues or failures during deployment.
- Version tagging and release management. Use version tagging to keep track of different application versions, facilitating precise rollback to a known working version if needed.
In our project, we used a version tagging and release management strategy. We added a git_sha tag for each version, which is equal to the Bitbucket Сommit ID. This ensures that we can roll back to a known working version of the product if necessary. Also, we set the auto_revert parameter to true. This means the job will automatically revert to the last stable job version when the deployment fails.
Here’s an example of an update configuration:
update {
   	max_parallel 	= 1
   	min_healthy_time = "20s"
   	healthy_deadline = "3m"
   	progress_deadline = "5m"
       health_check  = "task_states"
   	auto_revert = true
} In this configuration, the parameters are the following:
max_parallel— Specifies the maximum number of task groups that can be updated in parallel. In this case, it is set to 1, meaning only one task group will be updated at a time.min_healthy_time— Defines the minimum duration that a task group must remain healthy before considering the update successful.healthy_deadline— Sets the maximum time allowed for a task group to become healthy during an update. If the task group fails to become healthy within this time, the update is considered unsuccessful.
progress_deadline— Specifies the maximum duration for the entire update process. If the update is not completed within this timeframe, it is considered unsuccessful.health_check— Determines the health check strategy to use during the update process. In this case, task_states is specified, which means Nomad will monitor the health of individual tasks within the task group.auto_revert— When set to true, this enables automatic rollback in case the update fails. If the update does not meet the specified criteria (such as failing health checks), Nomad will automatically revert to the previous version.
These parameters allow you to control the update process and ensure the health and stability of applications running on Nomad.
4. Configure health checks for the Nomad application
To monitor an application powered with Nomad, we used Datadog — a cloud-based monitoring and analytics platform that can offer insights into your application’s performance. When working with Nomad, Datadog allows real-time tracking of performance metrics and system health.
Precondition
Before monitoring applications running in Nomad, you need to add a telemetry stanza to the Nomad configuration for a Nomad server:
telemetry {
publish_allocation_metrics = true
publish_node_metrics   	= true
datadog_address = "localhost:8125"
disable_hostname = true
collection_interval = "10s"
} After that, install the Datadog agent on the Nomad server. The agent will collect events and metrics from your application and send them to Datadog.
Creating a monitor and alert in Datadog
For monitoring Nomad jobs, you can use the nomad.nomad.job_summary.running metric. This metric shows the number of running allocations for a job.
Here is how to create a monitor:
1. Open the Datadog UI and choose Monitors
2. Add a new Metric monitor with the following parameters:
- The detection method, which in our example is Threshold Alert
- The metric
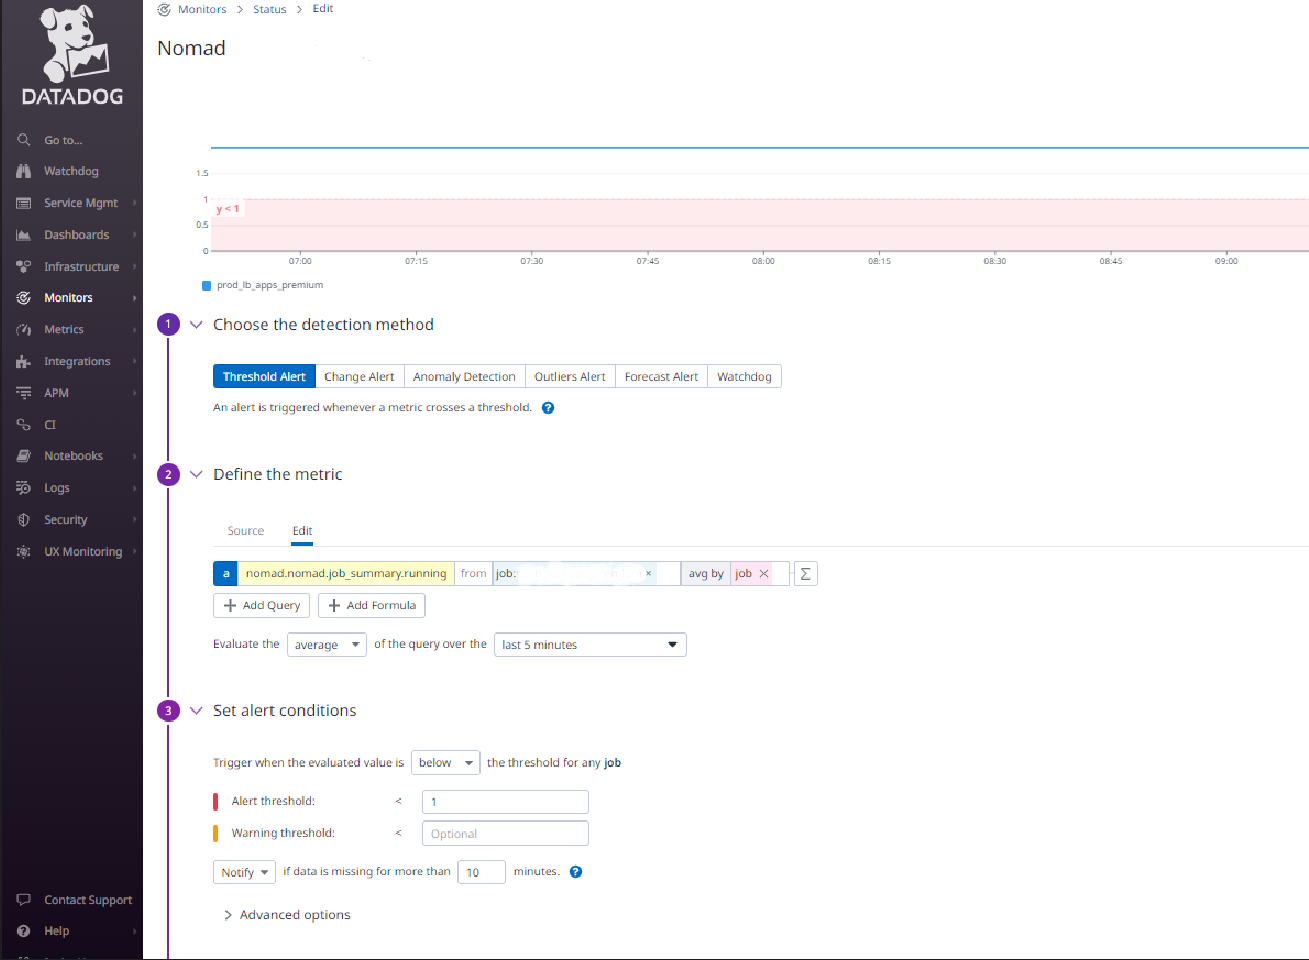
3. Set alert conditions. For instance, in our example, the alert threshold is <2.
This parameter depends on the number of allocations that have been run for the job. We usually use 1 for jobs with one allocation. As a result, the alert will trigger when the evaluated value is below the threshold for any job. The alert will also trigger if any allocation changes its running status. This allows for monitoring the status of Nomad jobs and receiving a notification if allocation fails. The team will also be notified if somebody adds alert parameters and specifies the name of a monitor.
4. Create the monitor. After that, the monitor is ready. You’ll need to create a separate monitor for each Nomad job that the team wants to monitor.
And that’s how you implement Nomad into your CI/CD flow with Bitbucket Pipelines as your workload orchestrator!
Conclusion
As the project grows and changes, developers need to optimize their development workflows and achieve seamless application deployment without sacrificing the quality of the final product. Using CI/CD pipelines allows development teams to efficiently manage applications in production environments and optimize the deployment process. And while there are different tools for implementing CI/CD into your software development lifecycle, Bitbucket Pipelines and the Nomad workload orchestrator are one of the proven tool combinations that can help your team achieve seamless application updates and deployment.
Apriorit software development experts will gladly assist you in deploying your application in different environments, guaranteeing optimal performance and reliability of the end product.
Contact us to find the best way to enhance your product!
Have a question?
Ask our expert!
VP of Innovation and Technology, Canada Branch Director


