 Skip to main content

Modern software is often based on inter-process communication (IPC). Programs and processes use this mechanism to run in parallel, communicate, and share data with each other, ensuring high performance, efficient data processing, and reliable security.
In this article, we discuss common IPC methods for Python software. You’ll learn what to pay attention to when planning your IPC workflow and find practical examples of inter-process communication in Python with various Python libraries and frameworks.
This article will be useful for project teams that are considering implementing IPC mechanisms in their projects with the use of Python tools.
Contents:
The need for inter-process communication
In monolithic applications, using language-level function or method calls is enough for establishing interactions among application components. But today’s complex solutions, such as microservices-based applications, run on several instances and thus require more advanced data exchange mechanisms.
Inter-process communication (IPC) is a mechanism that allows programs or separate processes to securely communicate with each other, exchange data, and synchronize their activities.
Common benefits of using IPC are:
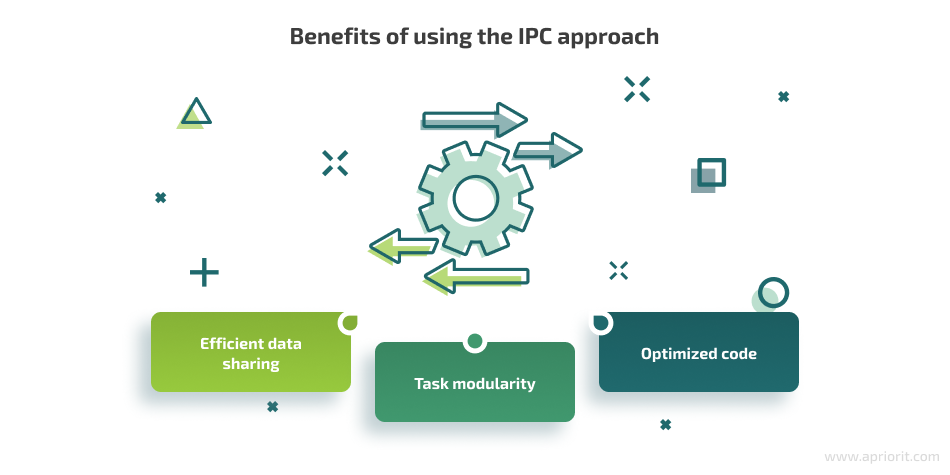
- Efficient data sharing — Using IPC, you can enable different processes in your application to access the same data concurrently.
- Task modularity — You can split a large task into a set of smaller subtasks that can be accomplished by different processes, thus finishing the initial task faster.
- Optimized code — With IPC, you don’t have to write extra code for managing communication between programs and processes at a low level.
To manage inter-process communication, you can use various methods including:
- Direct communication — Processes exchange data either by using shared data structures in memory or by passing shared data as parameters to function calls.
- Message queue — Processes use a shared list of messages to communicate with each other without establishing a direct connection.
- Message passing — Processes exchange data and synchronize their activities via received and sent messages.
- Shared memory — Processes use a designated memory region that they can access at the same time.
- Pipes — Processes read data from and write data to a common channel that works as a shared data buffer.
- Sockets — Processes establish two-way communication and exchange data using an endpoint for communication.
In this article, we discuss several common ways of managing inter-process communication and offer practical examples of each.
Note that our practical examples show how to do inter-process communication in Python.
Python is famous for being easy to use and offering a large variety of third-party libraries, modules, and frameworks for all kinds of tasks. However, the specifics of inter-process communication within your project might present additional limitations that you need to take into account when choosing your set of tools.
Have a Python-powered project in mind?
See your business goals and project vision turning into a protected and competitive solution. Delegate your development activities to Apriorit and benefit from a mature and thoughtfully-organized software delivery process.
Common IPC scenarios and their limitations
Depending on the specifics of your solution, communication among processes can be categorized based on different dimensions:
- Local or network
- Synchronous or asynchronous
- Single-platform or cross-platform
Each of these categories has unique limitations that will influence your choice of third-party tools. Let’s take a closer look at these approaches for inter-process communication in Python.
Local vs network communication
If your code is supposed to run on a single machine, managing IPC is rather simple.
However, if your application requires connecting processes executed on different machines, you need to take an advanced approach. As communication among multiple machines is fundamentally unstable, you need to use special libraries like wrappers over the TCP/IP stack.
Another thing to take into account when configuring network communication is data security. If you plan to transfer data across the network, make sure to implement proper encryption mechanisms to keep that data well protected. In particular, consider using TLS/SSL encryption for socket connections or SHA-256 hashing, AES, or RSA data encryption for other cases.
Synchronous vs asynchronous communication
Process interactions can be synchronous or asynchronous. This distinction is especially important for web applications and microservices-based applications, and it defines the behavior of the data-sending side (the client) after starting a communication with the server:
- For synchronous processes, the client sends a request and then waits for the server’s response before continuing code execution.
- For asynchronous processes, the client can continue code execution without waiting for the server’s response.
A request from one client can be processed by either one or multiple services. Thus, for some applications, using a single IPC mechanism might be sufficient, while others will need a combination of IPC mechanisms.
Single-platform vs cross-platform communication
Some types of communication can only be used within a specific operating system or architecture. Common examples of such communication mechanisms are:
- Named pipes for Windows
- Socket file nodes for Unix-like systems
While each of these communication mechanisms can be used in an application written in Python, the functionality they are used in will be difficult to port to other platforms, thus making your solution platform-specific.
Therefore, if you are planning to build a cross-platform solution, avoid using platform-specific communication mechanisms. Also, be attentive when choosing a Python library, as there are libraries that use platform-specific IPC mechanisms under the hood.
Choosing the communication mechanism most suitable for a specific task is crucial. But it’s also important to pick the right approach for serializing and deserializing your data so that it can be transferred securely and efficiently..
In the next section, we overview several Python modules and frameworks you can use for serialization and deserialization of IPC data.
Read also
Extending IDA’s Capabilities with Python: A Practical Example of Disassembling an Xtensa Instruction
Learn what to do if the available reversing tools don’t yet support the architecture you’re working with. Explore the nuances and helpful tips from Apriorit’s Python developers and reverse engineers.

Python tools for IPC data serialization
Data serialization is key to ensuring the secure storage and transfer of data during inter-process communication. Python offers a wide selection of dedicated modules and frameworks for changing data structures into a suitable format.
Let’s look at four common Python IPC tools you can use to serialize, deserialize, and validate transferred data:
- JSON module
- Protobuf framework
- Pydantic library
- Struct module
JSON module
Using the standard JSON module, you can encode and decode strings in JSON format to ordinary Python objects.
To see how you can work with this module, let’s first look at an example of a JsonWrapper class:
import io
import json

class JsonWrapper:
    @staticmethod
    def encode(obj, encoding):
        s = json.dumps(obj, ensure_ascii=False).encode(encoding)
        print("Encoded JSON: {}".format(s))
        return s

    @staticmethod
    def decode(json_bytes, encoding):
        with io.TextIOWrapper(io.BytesIO(json_bytes), encoding=encoding, newline="") as tiow:
            print("Decoded JSON: {}".format(json_bytes))
return json.load(tiow)Using this wrapper class, you can create a JSON binary string from a Python object, and vice versa.
Here’s what the code for encoding data to a JSON binary string looks like:
>>> from json_tools import JsonWrapper
>>> request_json = {"action" : "hello", "message" : "Hello, World!"}
>>> request_data = JsonWrapper.encode(request_json, "utf-8")
Encoded JSON: b'{"action": "hello", "message": "Hello, World!"}'
>>> request_data
b'{"action": "hello", "message": "Hello, World!"}'And here’s an example for decoding a JSON binary string:
>>> from json_tools import JsonWrapper
>>> binary_string = b'{"action" : "hello", "message" : "Hello, World!"}'
>>> response = JsonWrapper.decode(binary_string, "utf-8")
Decoded JSON: b'{"action" : "hello", "message" : "Hello, World!"}'
>>> response
{'action': 'hello', 'message': 'Hello, World!'}This module is easy to use, and it provides means for working with Python objects. However, if you plan on working with the JSON module, keep in mind that it requires additional exception handling for the data encoder and decoder. This module is also not suitable for unstable connections, as JSON decoding is very dependent on the format’s strict structure.
Protobuf framework
Protocol Buffers, or simply Protobuf, is a versatile framework from Google that you can use for constructing a domain-specific messaging system.
When working with Protobuf, the usual workflow consists of three steps:
- Define objects and messages in a .proto file
- Run the compiler command that will create language-specific headers
- Include the generated files in the project
Let’s look at each of these steps in practice.
Step 1. Define objects and messages in a .proto file
Inside the project code tree, there should be a .proto file that describes a data structure. As an example, we’ll create an employee.proto file:
syntax = "proto2";

package tutorial;

message Employee {
  required int32 id = 1;
  required string name = 2;
  optional string favorite_color = 3;
}For each data structure you want to serialize, you need to add a new message, specifying the name and type for each field in that message. For more information on creating nested data structures and arrays, see Protofub’s official documentation.
Step 2. Run the compiler command to create language-specific headers
At this step, you need to run the protobuf compiler and specify the source directory with your application’s source code, the destination directory where the generated code will be placed, and the path to the .proto file:
protoc -I=<source dir> --python_out=<output dir> <source dir>/employee.protoThe –python_out command-line argument indicates that the output must be a Python module. The compiler may create output files for a number of other languages.
The next command creates an employee_pb2.py file with multiple internal wrappers, encoders, decoders, and so on:
class Employee(message.Message):
  __metaclass__ = reflection.GeneratedProtocolMessageType
  DESCRIPTOR = _EMPLOYEE
...Step 3. Include generated files in the project
Now you can work with the created employee class:
import employee_pb2


class ProtobufWrapper:
    @staticmethod
    def encode(id, name):
        employee = employee_pb2.Employee()
        employee.id = id
        employee.name = name
        return employee.SerializeToString()

    @staticmethod
    def decode(raw_data):
        employee = employee_pb2.Person()
        employee.ParseFromString(raw_data)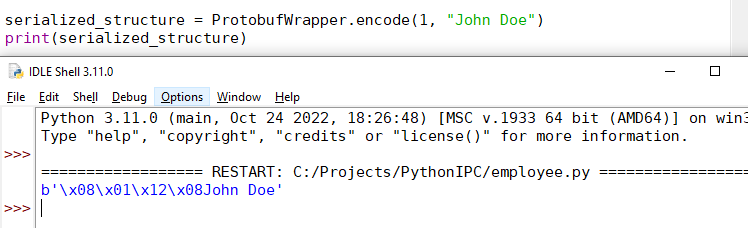
return employeeIt’s noteworthy that when you serialize data using the Protobuf framework, you create a compact binary representation of an object:
Here’s an example of code that launches data serialization:
import employee_pb2


class ProtobufWrapper:
    @staticmethod
    def encode(id, name):
        employee = employee_pb2.Employee()
        employee.id = id
        employee.name = name
        return employee.SerializeToString()

    @staticmethod
    def decode(raw_data):
        employee = employee_pb2.Person()
        employee.ParseFromString(raw_data)
        return employee
serialized_structure = ProtobufWrapper.encode(1, "John Doe")
print(serialized_structure)With Protobuf, you need to write less code than when using other tools, because data is defined in the .proto file. Auto-generated serialization also simplifies the handling of data structures. Since messages reside in the same file, there’s no need to ensure the work of both client and server code with the same entities. You can also use the same .proto file to generate headers for multiple languages, ensuring seamless Python inter-process communication with code written in C/C++ and other languages.
At the same time, the need to work with the compiler adds extra steps to the standard serialization process. As an alternative to using the compiler, you can store module outputs directly in the source code tree, thus cluttering your code.
Related project
Developing Software for a Drone Battery Charging and Data Management Unit
Discover the real-life case of leveraging Python as a part of an advanced toolkit to deliver an MVP of the drone battery recharging kit. Unveil the details of developing embedded software for the single-board computer, an iOS application, and cloud infrastructure to support the system.

Pydantic library
The Pydantic library is a useful tool for data validation that provides type hints at runtime. Using Pydantic models, you can ensure smooth and efficient serialization and deserialization of complex data structures.
Here’s an example of a Pydantic script for data validation during serialization or deserialization:
from typing import Optional
from pydantic import BaseModel

class User(BaseModel):
    name: str
    id: int
    signup_ts: Optional[datetime] = None
    colleagues: list[int] = []


external_data = {
    'name': 'Example User',
    'id': 3,
    'signup_ts': '2019-06-01 12:22',
    'colleagues': [5, 6],
}
user = User(**external_data)If validation fails, the script will end with an error, providing you with details on exactly what went wrong.
The Pydantic library can be used for both loading system settings and validating request data. It allows for validating complex data structures yet has better performance than many similar libraries. However, this approach might be redundant for small data structures with simple types and frequent communications, such as heartbeats or non-critical time synchronization via UDP.
Struct module
In order to communicate with native code like a C/C++ program or a native application binary interface (ABI) library at a low level, high-level Python code requires wrappers that account for type sizes, endianness, and pack alignments.
Using the standard struct module, you can work with raw binary data, packing and unpacking binary streams into usable data structures.
The pack and unpack methods receive a special format string that represents a low-level data structure: endianness, bit width, etc.
Here’s what a C-style Employee.h structure created with this module looks like:
struct Employee {
    char name[256];
    uint16_t id;
    uint16_t workplace_room_id;
    uint8_t workplace_id;
}The client and server code would require the following wrappers to pack a Python dictionary to or from binary sequences:
import struct

class StructWrapper:
    @staticmethod
    def encode(employee):
        name = employee.get('name')
        id = employee.get('id')
        workplace_room_id = employee.get('room_id')
        workplace_id = employee.get('workplace_id')
        return struct.pack('<256sHHb', name, id, workplace_room_id, workplace_id)

    @staticmethod
    def decode(raw_data):
        name, id, workplace_room_id, workplace_id = struct.unpack('<256sHHb', raw_data)
        return {
            'name': name,
            'id': id,
            'workplace_room_id': workplace_room_id,
            'workplace_id': workplace_id
}You can learn more about using format strings when packing and unpacking data in the struct module documentation.
The struct module offers a convenient solution for connecting to low-level ABIs, C/C++ libraries, and legacy code. However, the data encoding and decoding process is hidden and requires precision from a developer. And since the struct module works at a low level, you might need extensive unit test coverage for packing and unpacking operations to discover possible errors.
Since handling of data definitions as strings is not very clear and straightforward, there are other Python modules you can use for working with native code:
Now that you know what tools you can use to manipulate data structures in the desired way, let’s look at some practical examples of IPC methods.
Practical examples of IPC methods
As we discussed earlier, sockets are one of the advanced methods of inter-process communication. This method is often used in complex software, such as web applications and microservices solutions. In this section, we go over both platform-specific and cross-platform IPC methods based on the use of sockets, providing both client-side and server-side code examples.
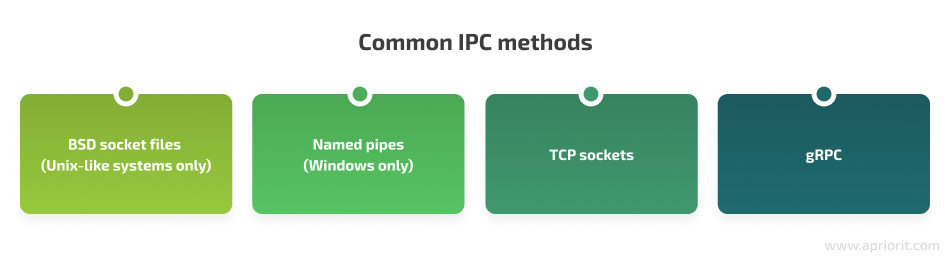
BSD socket files
Note: This IPC method is platform-specific and is only suitable for Unix-like operating systems.
In Unix-like platforms, socket files have the .sock extension and are used as communication endpoints for processes, programs, or servers. For communication within the same machine, you can also use Berkeley Software Distribution (BSD) socket files. However, to enable communication across machines, BSD socket files require an additional setup such as file node mapping.
Let’s take a look at an example of client-side code for a BSD socket file:
import os
import socket
import sys

# IPC parameters
SOCK_FILE = '/tmp/simple-ipc.socket'

# Init socket object
if not os.path.exists(SOCK_FILE):
    print(f"File {SOCK_FILE} doesn't exists")
    sys.exit(-1)

s = socket.socket(socket.AF_UNIX, socket.SOCK_STREAM)
s.connect(SOCK_FILE)

# Send request
s.sendall(b'Hello, world')

# Wait for response
data = s.recv(1024)
print(f'Received bytes: {repr(data)}')And here’s what the server-side code for this socket looks like:
import os
import socket

# IPC parameters
SOCK_FILE = '/tmp/simple-ipc.socket'

# Setup socket
if os.path.exists(SOCK_FILE):
    os.remove(SOCK_FILE)

s = socket.socket(socket.AF_UNIX, socket.SOCK_STREAM)
s.bind(SOCK_FILE)
s.listen(0)

# Start listening loop
while True:
    # Accept 'request'
    conn, addr = s.accept()
    print('Connection by client')
    # Process 'request'
    while True:
        data = conn.recv(1024)
        if not data:
            break
        # Send 'response'
conn.sendall(data)You can also take a look at what the example above looks in the console:

This IPC method is rather simple, as the only parameter you need to work with is a unique string. You can use a universally unique identifier so that you don’t have to worry about port number collision.
However, BSD socket files only support a single channel of client–server connection and only in a synchronous way, which may harm your application’s performance.
Named pipes
Note: This IPC method is platform-specific and is only suitable for Windows.
Named pipes are used by calling plain file operations to a file with a name that suits the \\.\pipe\<PIPE_NAME> format.
Since Windows wraps most of the low-level work inside file operations, in the Python client, you’ll need to use the open function as well as the file.write and file.read methods:
import struct
import time

# IPC parameters
PIPE_NAME = r'\\.\pipe\simple-ipc-pipe'
ENCODING = 'ascii'

with open(PIPE_NAME , 'rb+', buffering=0) as f:
    data = 'Hello, world'.encode(ENCODING)
    data_len = struct.pack('I', len(data))

    f.write(data_len)
    f.write(data)
    f.seek(0)  # Necessary

    time.sleep(1)

    received_len = struct.unpack('I', f.read(4))[0]
    received_data = f.read(received_len).decode(ENCODING)
    f.seek(0)  # Also necessary

print(f"Received data: {repr(received_data)}")Here’s the code for the server-side of the named pipe-based IPC:
import struct
import win32pipe, win32file, pywintypes

# IPC parameters
PIPE_NAME = r'\\.\pipe\simple-ipc-pipe'
ENCODING = 'ascii'

while True:
    pipe = win32pipe.CreateNamedPipe(PIPE_NAME,
        win32pipe.PIPE_ACCESS_DUPLEX,
        win32pipe.PIPE_TYPE_MESSAGE | win32pipe.PIPE_READMODE_MESSAGE | win32pipe.PIPE_WAIT,
        1, 65536, 65536, 0, None)
    try:
        print("waiting for client")
        win32pipe.ConnectNamedPipe(pipe, None)
        print("got client")

        request_len = win32file.ReadFile(pipe, 4)
        request_len = struct.unpack('I', request_len[1])[0]
        request_data = win32file.ReadFile(pipe, request_len)

        # convert to bytes
        response_data = "Response".encode(ENCODING)
        response_len = struct.pack('I', len(response_data))
        win32file.WriteFile(pipe, response_len)
        win32file.WriteFile(pipe, response_data)
    finally:
win32file.CloseHandle(pipe)After running the code above, you will get the following output:

Working with named pipes is just as simple as working with file operations. As with BSD socket files, you only need to work with one parameter, which is a unique string.
However, this IPC method also shares the same drawback as BSD socket files — you can only work with synchronous client–server connections established via a single channel.
Python’s standard socket module provides a way to use classic BSD-style socket objects in Python code. While most of the module’s capabilities are available across Unix, Windows, and macOS, some behavior may be platform-dependent, so make sure to check the documentation for details.
TCP sockets
Using Python’s socket module is the simplest method to configure cross-platform IPC. You can also easily scale it to inter-machine network communication.
To ensure the protection of transferred data, you can use Python’s standard SSL module that contains wrappers for TCP/IP sockets with SSL/TLS encryption.
Let’s take a look at an example of the client-side code for IPC via network sockets when all code runs on the same machine (i.e. using localhost as an address):
import socket

# IPC parameters
HOST = '127.0.0.1' # The server's hostname or IP address
PORT = 65432 # The port used by the server

# Create socket
s = socket.socket(socket.AF_INET, socket.SOCK_STREAM)
s.connect((HOST, PORT))

# Send 'request'
s.sendall(b'Hello, world')

# Wait for 'response'
data = s.recv(1024)
print(f"Received data: {repr(data)}")And here’s the server-side code for the same example:
import socket

# IPC parameters
HOST = '127.0.0.1' # Standard loopback interface address (localhost)
PORT = 65432 # Port to listen on (non-privileged ports are > 1023)

# Create socket
s = socket.socket(socket.AF_INET, socket.SOCK_STREAM)
s.bind((HOST, PORT))
s.listen(0)

# Start listening loop
while True:
    # Accept 'request'
    conn, addr = s.accept()
    print('Connected by', addr)
    # Process 'request'
    while True:
        data = conn.recv(1024)
        if not data:
            break
        # Send 'response'
conn.sendall(data)Now you can keep the server part running and call the client script to initiate data exchange:
TCP-based IPC is a simple and, most importantly, cross-platform way to enable communication between processes and programs running on different platforms and different machines in the network.
However, this method is associated with great data security concerns and requires additional use of SSL/TLS modules to ensure proper data protection. Also, keep in mind that for this method to work, the port number parameter must be unique and synchronized between the server and client code.
Read also
Python for Building FinTech Solutions: Benefits, Tools, and Use Cases
See how Python can help you build secure and reliable financial technology software. Find out the tasks such a solution must handle, what libraries and frameworks to use, and nuances to keep in mind when building a FinTech solution with Python.

gRPC
Google Remote Procedure Calls (gRPC) is a vast framework for building RPC infrastructure with a focus on performance and support for various platforms and programming languages. As a communication tool, gRPC uses the protocol buffers that we described earlier.
Let’s see how gRPC-based IPC works in practice.
Step 1. Instal the gRPC module and tools package using the following command:
pip install grpcio grpcio-toolsStep 2. Describe a communication protocol using protocol buffers.
The following warehouse.proto file describes an RPC service that sends the CrateRequest structure from the client and returns the CrateResponse structure from the server:
// Definition of the service for getting information about crates inside a warehouse
service WarehouseLookup {
  // Send an ID and receive the data structure
  rpc GetCrateInfo(CrateRequest) returns (CrateResponse) {}
}

// Request structure containing the requested ID
message CrateRequest {
  required int64 id = 1;
}

// Response structure containing the requested data
message CrateResponse {
  required int64 width = 1;
  required int64 height = 2;
  required int64 length = 3;
  required int64 weight = 4;
  optional string label = 5;
}Step 3. Next, you can use gRPC tools to create language-specific files from the warehouse.proto file:
python -m grpc_tools.protoc --python_out=. --pyi_out=. --grpc_python_out=. warehouse.proto -I.As a result, gRPC will generate two Python files:
- warehouse_pb2.py with the request and response structures
- warehouse_pb2_grpc.py with the client and server classes
Step 4. Using the client and server classes generated in Step 3, you can now enable communication between the entities.
Here’s what the code for this looks like on the client side:
import grpc
import random
import warehouse_pb2
import warehouse_pb2_grpc

crate_id = random.randint(1,1000)

print(f"Will try to get info on crate with id={crate_id}")

with grpc.insecure_channel('localhost:50051') as channel:
    stub = warehouse_pb2_grpc.WarehouseLookupStub(channel)
    response = stub.GetCrateInfo(warehouse_pb2.CrateRequest(id=crate_id))

print("Received crate info: ")
print(f"  Dimensions: {response.width}x{response.height}x{response.length}")
print(f"  Weight: {response.weight}")
if response.label:
    print(f"  Label: {response.label}")
else:
print(f" Unlabeled crate")And here’s the server-side code for this IPC implementation:
import grpc
import warehouse_pb2
import warehouse_pb2_grpc

from concurrent import futures


class WarehouseLookup(warehouse_pb2_grpc.WarehouseLookupServicer):
    def GetCrateInfo(self, request, context):
        # Read lookup on the server goes here
        # For illustrative purposes, the server will generate some random response
        import random
        print(f"Received request from client about crate with id={request.id}")
        if request.id % 2==0:
            # Create a response without the label field
            return warehouse_pb2.CrateResponse(width=random.randint(1,100),
                height=random.randint(1,100),
                length=random.randint(1,100),
                weight=random.randint(1,100))
        else:
            # Create a response with the label field
            return warehouse_pb2.CrateResponse(width=random.randint(1,100),
                height=random.randint(1,100),
                length=random.randint(1,100),
                weight=random.randint(1,100),
                label=f"Some crate with id={request.id}")


port = '50051'
server = grpc.server(futures.ThreadPoolExecutor(max_workers=10))
warehouse_pb2_grpc.add_WarehouseLookupServicer_to_server(WarehouseLookup(), server)
server.add_insecure_port('[::]:' + port)
server.start()
print("Server started, listening on " + port)
server.wait_for_termination()Now you can keep the server part running and call the client script to initiate data exchange:

gRPC is comfortable to work with, as it supports multiple programming languages, allowing for seamless inter-process communication between Python and Java code, as well as with code written in C/C++ and other languages. However, working with this framework requires using the protobuf compiler for data synchronization, which adds to the complexity of the build process.
Another no-socket IPC option you may consider is the FastAPI framework. This framework allows for building Application Programming Interfaces (APIs) with Python based on standard Python 3.7+ type hints.
Conclusion
Understanding what is inter-process communication in Python and how to work with it is key to building secure and efficient products. Programs and processes need to communicate with each other to effectively work with shared data.
Depending on which method is used for inter-process communication in Python when you build your application, you can improve the app’s performance and ensure secure data transfer.
With a wide selection of both standard and third-party IPC tools, Python enables you to work with a variety of IPC methods that can comply with your project’s specific requirements.
Apriorit developers have vast experience creating secure and high-performing applications with efficient IPC mechanisms in place. Whether your business needs a single-platform app or a complex cross-platform solution, our experts can help you deliver it.
Looking forward to creating a secure and high-performing app?
Use our experience developing reliable software with efficient IPC mechanisms in place. Whether your business needs a single-platform app or a complex cross-platform solution, Apriorit’s experts are ready to help you deliver it.
Have a question?
Ask our expert!
VP of Engineering


