 Skip to main content
Application Programming Interfaces (APIs) help different parts of a solution to communicate with each other and provide users with combined results that come from various systems. The bigger your project is, the more APIs it usually requires.
The problem is that each time developers add new endpoints to their APIs, they have to write new code and introduce relevant changes to the back end and front end of the web application. One way to accelerate these processes is to use automated code generation tools like NSwag and Swagger Codegen provided by the Swagger framework.
In this article, we explore how to automate the client code generation process with Swagger and provide a step-by-step guide on how to work with the framework. This article will be helpful for project leaders who want to speed up the process of adding new endpoints to APIs and save developers’ time on introducing changes to both the back end and front end.
Contents:
Why do you need to generate client code for Angular services?
Say you’re working on a large web application project with a front end (UI) written in Angular and a back end (API) written in ASP.NET Core Web API.
To work with APIs, you need TypeScript services. The TypeScript service layer contains information about API endpoints and some basic logic. When you add a new endpoint to your API, you have to add it to a certain TypeScript service as well.
When developing APIs, you also need to add different models. By model we mean some sort of business entity or, in other words, a set of data that the API endpoint receives and sends. And whenever you change or add a new endpoint or model to an API, you need to make corresponding changes to the front end of your application.
It takes a lot of developers’ time to find, modify, and test each service. But instead of spending so much time, developers can automate these processes. One way to do this is by using tools like Swagger that can automatically generate client code. Let’s take a closer look at this framework.
What is Swagger?
Swagger is a powerful suite of tools that help developers across the entire API lifecycle, from design and documentation to testing and deployment.
Swagger helps developers automatically generate client code for each build. All you need to do is configure the client code one time. After that, you can add a new endpoint to your API whenever you need.
Let’s briefly explore some tools Swagger provides:
- OpenAPI Specification creates a RESTful interface for easily developing and consuming an API by effectively mapping all resources and operations associated with it.
- Swagger Core allows you to generate documentation based on existing code.
- Swagger Codegen allows you to generate server stubs and client SDKs for any API.
- Swagger UI provides an opportunity to visualize and interact with an API’s resources without having any of the implementation logic in place.
- Swagger Editor allows you to design, describe, and document your API.
The major opportunity Swagger provides is that it allows you not only to interactively view API specifications but also to submit HTTP requests using the Swagger UI tool. According to the OpenAPI specification, it’s also possible to directly generate client code for working with endpoints, as well as to generate endpoints.
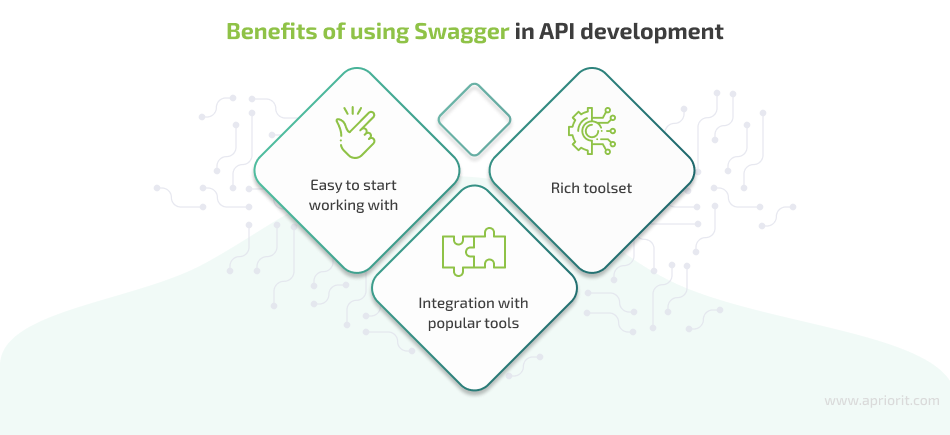
Key benefits of Swagger:
- Easy to understand and work with
- Can be integrated with popular tools like those of WSO2
- Provides a rich toolset for developing APIs and working with API documentation
Now, let’s explore how to generate an angular service code with Swagger.
Leading a project a project with dozens of APIs?
Get professional help in API management and code generation process. Leverage Apriorit’s experience to make your development processes faster and more efficient.
Generating Angular service code using Swagger
First, you need to choose the tool for generating code for Angular services. The most popular are:
- NSwag
- Swagger Codegen
- OpenAPI Gen
- AutoRest
- WebApiClientGen
- TypeWriter
Microsoft advises using NSwag and Swagger Codegen. In the examples shown in this article, we’ll use NSwag because it has all the necessary functionality and is easy to set up.
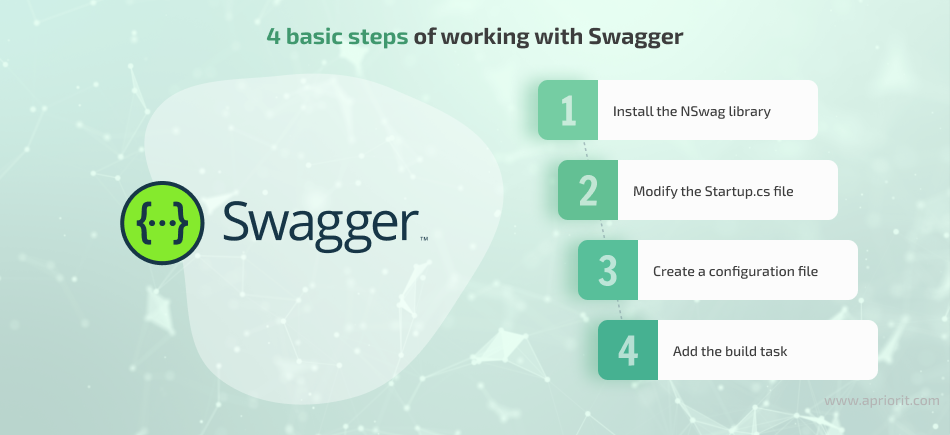
Let’s start with installing the NSwag library to get access to the functionality of the Swagger framework.
1. Install the NSwag library
Before you start using Swagger to generate client code, you need to install the following packages:
- NSwag.AspNetCore, NSwag.MSBuild,
- Microsoft.AspNetCore.Mvc.NewtonsoftJson
- NSwag.AspNetCore for documentation and UI representation
- NSwag.MSBuild for code generation
- Microsoft.AspNetCore.Mvc.NewtonsoftJson for JSON serialization
The .csproj file should contain values that look like the following:
<ItemGroup>
<PackageReference Include="Microsoft.AspNetCore.Mvc.NewtonsoftJson" Version="6.0.5"/>
<PackageReference Include="NSwag.AspNetCore" Version="13.16.1" />
<PackageReference Include="NSwag.MSBuild" Version="13.16.1">
<PrivateAssets>all</PrivateAssets>
<IncludeAssets>runtime; build; native; contentfiles; analyzers; buildtransitive</IncludeAssets>
</PackageReference>
</ItemGroup>Related project
Building a Microservices SaaS Solution for Property Management
Find out how a US-based provider of property management software achieved improved software performance and maintainability. Read on to explore how Apriorits dedicated team migrated the monolithic SaaS solution to a microservices-based architecture, and how this process helped our client benefit.

2. Modify the Startup.cs file
To make NSwag work after installation, you need to add a few lines of code to the Startup.cs file. Here’s an example of the configuration:
builder.Services.AddControllersWithViews().AddNewtonsoftJson();
builder.Services.AddSwaggerDocument(settings =>
{
settings.PostProcess = document =>
{
document.Info.Version = "v1";
document.Info.Title = "Example API";
document.Info.Description = "REST API for example.";
};
});And here’s the middleware:
app.UseOpenApi();
app.UseSwaggerUi3();Now you can see all the project’s endpoints, parameters, models, etc. You also can test requests using the UI by sending requests and retrieving responses.
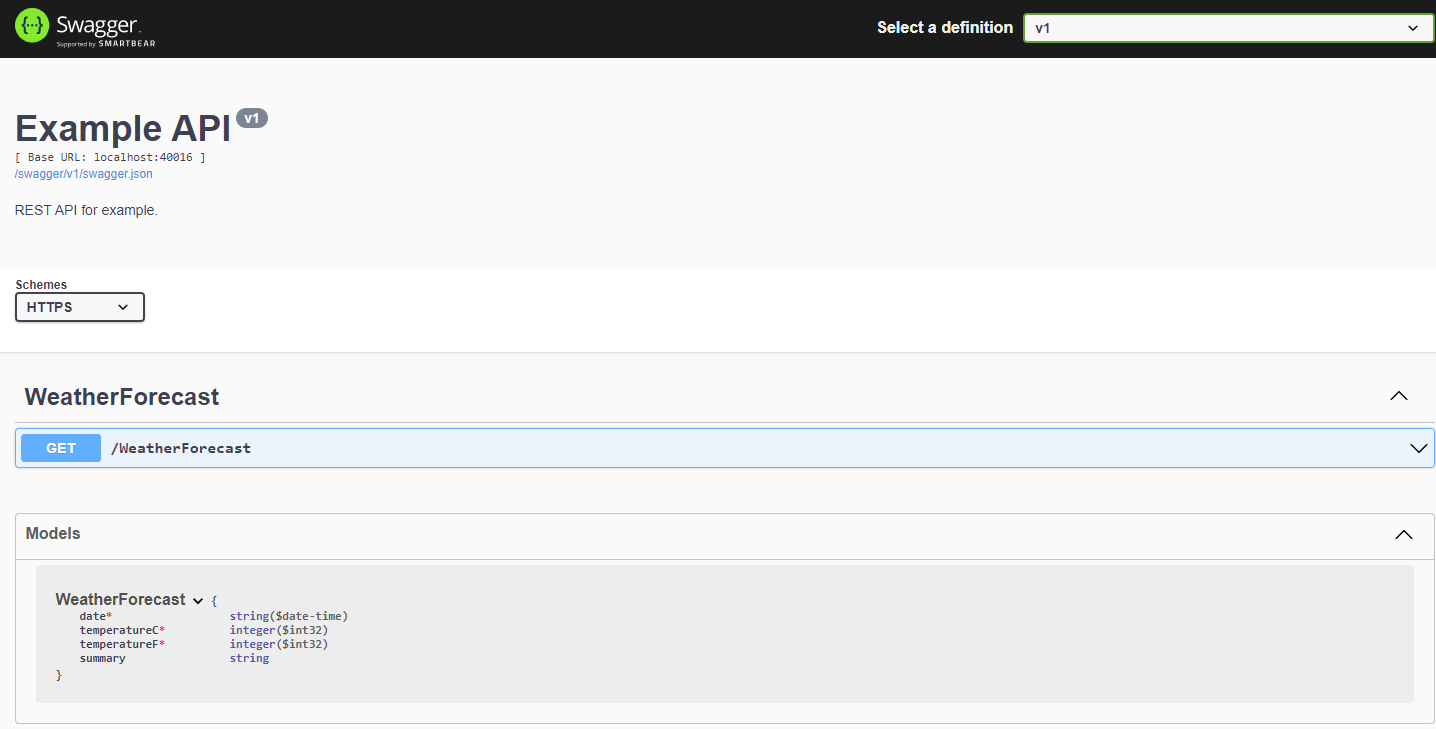
Screenshot 1. An API example in Swagger
3. Create a configuration file
The next step for generating Angular service code using Swagger is creating the nswag.json file, which is responsible for configuring the code generation process.
The configuration file contains settings that define how exactly code will be generated. For example, it specifies:
- What language to generate code in
- Which language version to use
- What data types to use
- Whether to generate classes, interfaces, etc.
You can find the full template for creating the nswag.json file on the NSwag Configuration Document GitHub page.
Here’s part of our file:
{

    "runtime": "Net60",
    "defaultVariables": null,
    "documentGenerator": {
    "aspNetCoreToOpenApi": {

    ...
    }
    },
    "codeGenerators": {
    "openApiToTypeScriptClient": {
    ...
    "template": "Angular",
    "promiseType": "Promise",
    "httpClass": "HttpClient",
    ...
    "injectionTokenType": "InjectionToken",
    "rxJsVersion": 6.0,
    "dateTimeType": "Luxon",

    ...
    "output": "./src/app/services/Core-api-v1.ts"
    }
    }
}Instead of creating the file manually, you can also do it automatically using NSwagStudio. This tool helps to correctly configure all code generation rules in the nswag.json file. Here’s what the program’s interface looks like:
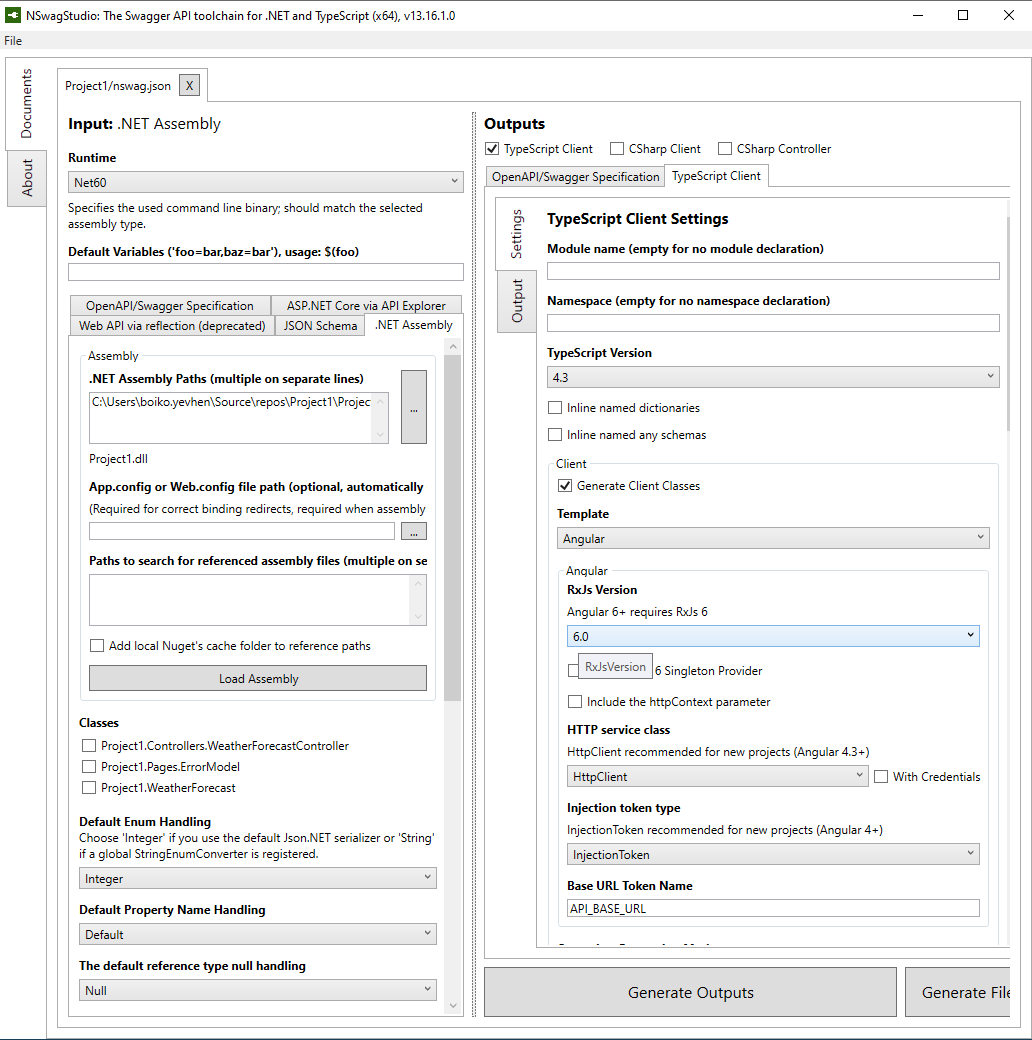
Screenshot 2. NSwagStudio interface
To create a configuration file in NSwagStudio, you need to perform the following steps:
- Add the project assembly to the Input section in the .NET Assembly tab.
- In the Outputs section, choose the clients you want to generate and configure the settings you need.
- Click Generate File to generate a client file.
- Click File → Save As, type nswag.json as the file name, and choose a path.
Then, NSwagStudio will create a configuration for you.
Read also
Building a Cross-Platform Mobile Web Application with Ionic and Angular
Prepare for cross-platform development with our detailed guide, including an overview of Ionic and Angular and code examples of application development using these services.
4. Add the build task
By now, you’ve almost configured automated code generation. The last step is to add the Build task to the AfterTargets attribute. To do that, modify your .csproj file by adding a new task to it, as shown below:
<Target Name="NSwag" AfterTargets="Build">
    <Exec Command="$(NSwagExe_Net60) run ./ClientApp/nswag.json"/>
</Target>That’s all. If you’ve done all the steps correctly, you’ll get code that you can use in an Angular service with all application endpoints saved in a new file stored at the path selected in the output option of the nswag.json file.
After that, everything works automatically. Whenever you add a new endpoint to your API, you only have to add it to the back end and build the project. After that, Swagger will automatically generate endpoint specifications, so the code will be ready for you to use.
To explore the full code for our example, visit the Apriorit GitHub page.
Conclusion
The more complex a web application is, the more APIs it requires. And ensuring proper documentation for each new endpoint can be extremely time-consuming. Swagger is a helpful framework that allows you to accelerate client code generation, saving resources for focusing on the bigger picture.
At Apriorit, we’ve built a strong team of experienced web developers who are passionate about creating reliable and secure solutions. We know how to efficiently organize solutions development and optimize processes to deliver final products in an agreed timeline, with their quality and security in mind.
Reach out to us to kick-start your brand-new web project or enhance an existing one!
Streamline Angular services development!
Secure yourself an experienced development team that knows how to generate code for Angular and integrate APIs into your software without headaches.
Have a question?
Ask our expert!
VP of Engineering


