 Skip to main content

Apple regularly introduces innovative solutions and improvements to macOS. However, not all improved tools can fully replace their predecessors. This is what happened with kernel extensions and their successors, System Extensions and DriverKit.
When working on a macOS solution, your development team may face the need to work with kernel extensions (kexts) — specific application bundles that enable developers to adjust and expand the functionality of the macOS kernel. Since kernel extensions have a direct impact on system performance, it’s crucial for their code to be clean and flawless.
In this article, Apriorit’s macOS development experts share their experience working with kernel extensions. We overview the basics of implementing macOS kernel extensions, some peculiar aspects of creating and signing them, and discuss how to install kexts. We also cover typical tasks requiring kernel extensions and tools and environments for creating them.
This tutorial will be useful for macOS development teams and technical leaders working on projects that still require the use of kernel extensions.
Contents:
Introduction to the macOS kernel and kernel extensions
The kernel is the central part of an operating system, providing applications with coordinated access to system resources: CPU, memory, external hardware, external input/output devices, and so on. The kernel usually provides access to applications’ executable processes. It does so using mechanisms for interprocess communication and by providing applications with access to operating system calls.
The macOS kernel is XNU — an acronym for X is Not Unix. This hybrid kernel was developed by Apple and is used in the macOS family. In 2019, Apple introduced macOS version 10.15, also known as macOS Catalina, which contained System Extensions and DriverKit and moved most kernel APIs to the user space. This approach changed the way developers access kernel parts of the system and improved the security and stability of macOS. However, adding System Extensions and DriverKit to macOS didn’t completely erase the need for kernel extensions (kexts). Let’s look closer at the peculiarities of this macOS feature.
Want to improve your macOS solution?
Gain competitive advantage with new product features and capabilities implemented by Apriorit’s team of expert macOS developers.
.kext kernel extensions
So, what are kernel extensions?
A kernel extension, or kext, is an application bundle used for extending the functionality of the macOS kernel. It’s the minimum unit of executable code that can be loaded and used in the kernel.
Usually, there’s no need for creating a kext when developing a macOS solution. The functionality available in user mode is sufficient for most tasks. Also, with the introduction of System Extensions and DriverKit, Apple has reduced the number of permitted APIs and cases where kexts can and need to be used.
But since the capabilities of System Extensions and DriverKit don’t cover all kext use cases, many developers still have to build and install custom kernel extensions.
There are tasks that can’t be implemented without a kernel extension, including:
- supporting a certain type of file system (including creating a new one)
- writing a specific device driver that the DriverKit API doesn’t cover (for example, a graphics driver)
One of the main restrictions when creating a kext is that the code of the kext itself, as indicated in Apple’s official documentation, should be essentially flawless. The reason for this strict quality requirement is simple enough: the worst-case scenario for an application is a crash and emergency exit. But if a kernel module fails, the worst-case scenario is a crash of the entire operating system and a reboot of the device. And if a kext is loaded at system startup and contains an error, it will crash the system each time it starts, thus complicating system recovery.
To avoid such unpleasant scenarios, it’s crucial to ensure the highest quality of kext code. In the next section, we take a look inside a kernel extension to give you a better understanding of its structure and most important operations.
Read also
Using System Extensions and DriverKit to Avoid Kernel Development in macOS
Learn how you can improve the security and stability of your macOS solution with DriverKit and system extensions.

Inside a kernel extension
Before you dive into the world of custom development of kernel extensions for macOS, you need to get familiar with the structure, enter/exit routines, and kernel–user interactions of macOS. If you already know all about this, you can move straight to the next section.
Kext bundle structure
A kext, like any other macOS application, is a bundle, only with the .kext extension. A bundle is a special folder that encapsulates application resources (in our case, kext resources).
A kext bundle must contain two files:
- a compiled binary file with executable code
- an Info.plist file containing information about the kernel extension: name, version, identifier, kernel library dependencies, etc.
Sometimes, the bundle.kext folder also contains additional files, including:
- device firmware
- resources (including those localized for use by user mode applications)
- plugins, including other kexts
Enter/exit routines
Depending on the type of extension, a kext can be written in C or C ++ and has its own peculiarities when loading to and unloading to/from the kernel:
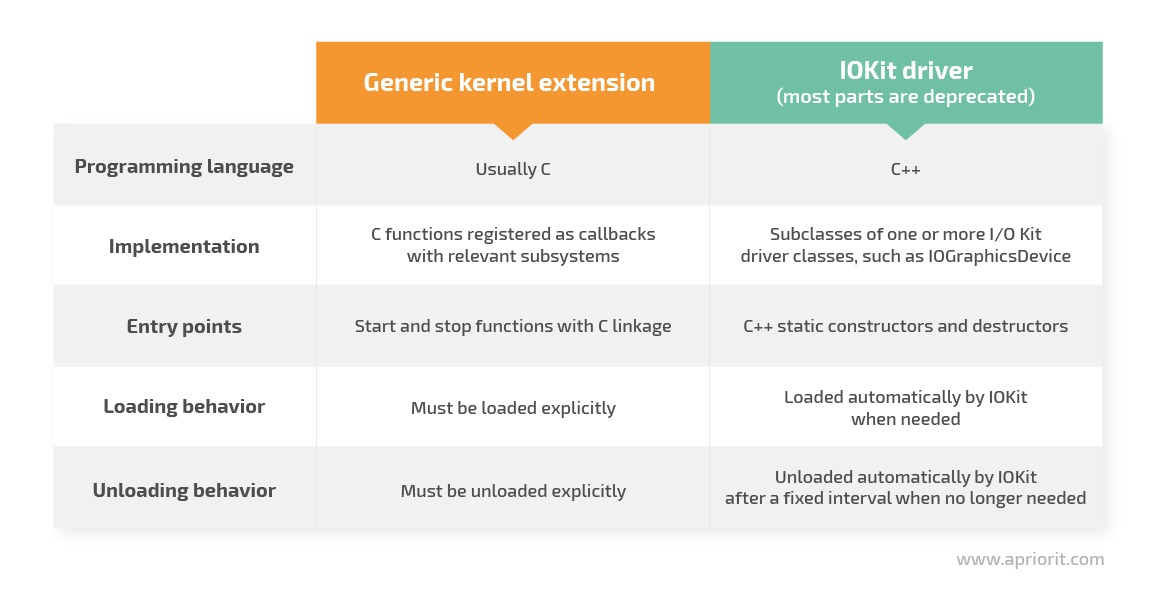
Since this article is devoted to regular kexts, let’s take a closer look at loading and unloading kernel extensions.
In kernel extension code, you must implement entry points — functions that are called when a kext is loaded to and unloaded from the kernel.
Entry points can have arbitrary names that must be specified in the project file:
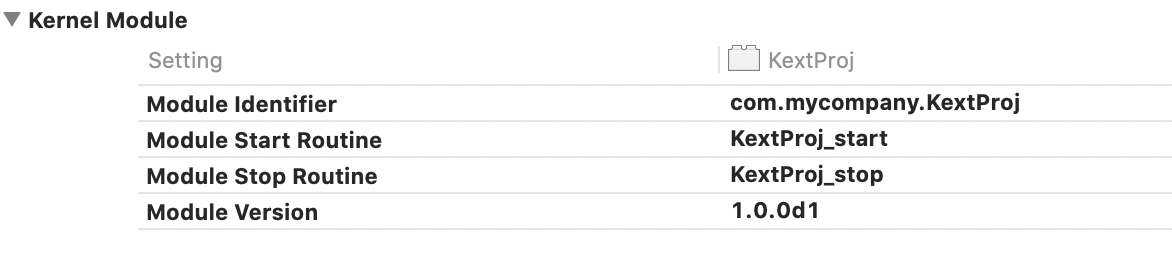
Entry point functions have fixed prototypes:
kern_return_t Kext_start(kmod_info_t* ki, void* d)kern_return_t Kext_stop(kmod_info_t* ki, void* d);The Kext_start function usually contains initialization code, which must be executed when the extension starts. This code:
- initializes user mode communication mechanisms
- initializes global variables and sets startup parameters
- performs other actions at startup
The Kext_stop function usually contains deinitialization code, releasing resources and performing other actions when the extension expires.
Load and unload .kext files — macOS has a number of command-line tools of the kext…xxx family designed to manage kexts. Commands associated with kexts must be run as root, e.g. with sudo. Here are some of the most commonly used kext commands:
- kextstat — displays the status of loaded kernel extensions
- kextload — loads kernel extensions to the kernel
- kextunload — unloads kernel extensions from the kernel
- kmutil — loads and unloads kernel extensions from the kernel (macOS 11 and later)
Let’s talk more about kmutil.
Starting from macOS 11.0 (Big Sur), the mechanism of working with kexts has changed a bit. Notably, Apple has added a new kmutil command. This command replaces kextload, kextunload, and other earlier tools for loading and managing kernel extensions. The older tools still work, but their implementations now call kmutil.
The kmutil tool builds a new kext collection with or without the specified kext, but it doesn’t install that collection immediately. The system installs the new kext collection only after it reboots. As a result, the unloaded kext actually remains active and runs until the next system reboot.
Kernel–user interactions (I/O)
Interactions between kexts and the user space can be implemented with the help of different mechanisms. Since a detailed review of all of them would require a separate article, let’s give a general description of the most common mechanisms:
- ioctl/sysctl (kernel control API for controlling kexts)
This method enables interactions between the kernel and the user space via special sockets. A similar socket must be configured in the kext itself (for example, when the kext starts in the Kext_start function).
Different clients in the user space can connect to the kext socket and send commands to it.
- kern_event (kernel event notifications)
Kernel event notifications inform applications about the occurrence of a particular event in the kernel. This interaction is also based on sockets.
- IOKit (only device drivers)
IOKit is Apple’s large framework designed for communicating with device drivers.
- Preference file/startup info
There’s no API that allows a kext to read a file directly. So to read a settings file when a kext launches, the kernel extension must work together with a daemon running in user mode. At launch, the daemon reads data from a configuration file, then uses the previously described tools to connect to the kext and pass it the settings read from the file.
Now that we’ve overviewed the basics of macOS kexts, let’s see how you can create and compile a kext with Xcode.
Developing kernel extensions using Xcode
To build a kext for macOS is considerably easier than to create kernel extensions for other platforms. You can write a kext in Xcode, a powerful and comfortable development environment that Apple provides for free.
In particular, Xcode has ready-to-use templates for conveniently creating kexts, an IOKit Driver, and a debug kit.
In the kext template, a developer is immediately provided with:
- an implementation file (named the same as the project) as well as templates for the start/stop functions of the kext itself
- an Info.plist file, which should be supplemented with the necessary information about the kext (name, identifier, library dependencies, etc.)
- the project file, which stores various settings for the kernel extension
Aside from building macOS kernel extensions, Xcode allows you to combine and collect all required tools in a single project.
For example, a project may contain:
- the kernel extension itself
- a daemon that configures the kext according to the saved settings when the system starts
- KextController, a macOS application with a graphical interface that allows users to easily manage the kernel extension
- an installer/uninstaller kext, which, unlike a simple macOS application, requires a number of specific actions during installation (copying to the right folder, manually starting the kext after installation (so as not to require rebooting), initial setup, etc.)
Xcode allows you to build a kext along with a complete set of auxiliary applications.
Note: Most kexts were deprecated with the release of macOS Catalina (10.15), and the list of deprecated kexts will only expand with future macOS releases. You can find a list of currently deprecated user extensions and their alternatives on the Apple Developer website.
For those kernel extensions that can still be used, it’s crucial to perform thorough testing and ensure the highest possible code quality. Let’s take a look at testing and debugging techniques suitable for checking the quality of kexts.
Read also
Developing a Simple Display-only Driver for a Graphics Adapter: A Practical Example
Learn what challenges to expect and how to address them when building a custom macOS driver for your product.
Kext testing and debugging techniques
Since kext errors can lead to an operating system crash, thorough testing and debugging is a must. But as a kext is in the kernel itself, you can’t use regular debugging techniques.
What you can do is use log analysis and/or kext debugging.
Logs, logs, logs
All kext code, but especially critical, complex, and questionable parts, should be covered with logs as much as possible. This technique allows you to accurately identify the place, and probably the cause, of any error in a kext.
Furthermore, when analyzing log messages, developers can locate warnings that didn’t lead to an error but could potentially do so in the future. You can view log messages from a kext in the standard macOS application Console.app.
Debugging
Yes, debugging a kext is possible, even though it isn’t as simple as debugging a regular application. In particular, you can choose a remote debugging technique based on the use of two devices:
- On device 1, you configure the necessary debugging tools and place the product code.
- On device 2, you prepare the testing environment and load the kext under test.
- The two devices communicate with each other, allowing you to debug the kext.
You can learn more about kernel extension debugging techniques in the following materials from Apple:
Read also
Driver Matching with I/O Kit: Building a USB Device Filter Driver
Get expert tips on matching devices and drivers to expand the capabilities of your macOS product.
Signing and installing a kext
macOS takes care of the security of users. In the latest versions of the platform, all kexts must be signed with a special signature: a Developer ID for Signing Kexts. This requirement has become even stronger with the implementation of System Integrity Protection. This security feature was added in macOS 10.11 and is enabled by default.
Note: With the introduction of System Extensions and DriverKit, Apple has made certificate approval even more difficult. Now, a developer has to explain why there’s no way to implement the required functionality any other way than by writing a kernel extension.
Additionally, it’s harder to allow the kernel extensions to load on Apple Silicon Macs without Automated Device Enrollment configured. For such devices, it’s essential for the administrator to boot into Recovery, select the Reduced Security checkbox and the Allow user management of kernel extensions from identified developers option, and then restart the Mac. This action needs to be performed on a device only once — all subsequent kernel extension loading operations don’t require the administrator to boot into Recovery.
In order to successfully sign your kernel extension to run it on the latest macOS systems, you need to perform the following steps:
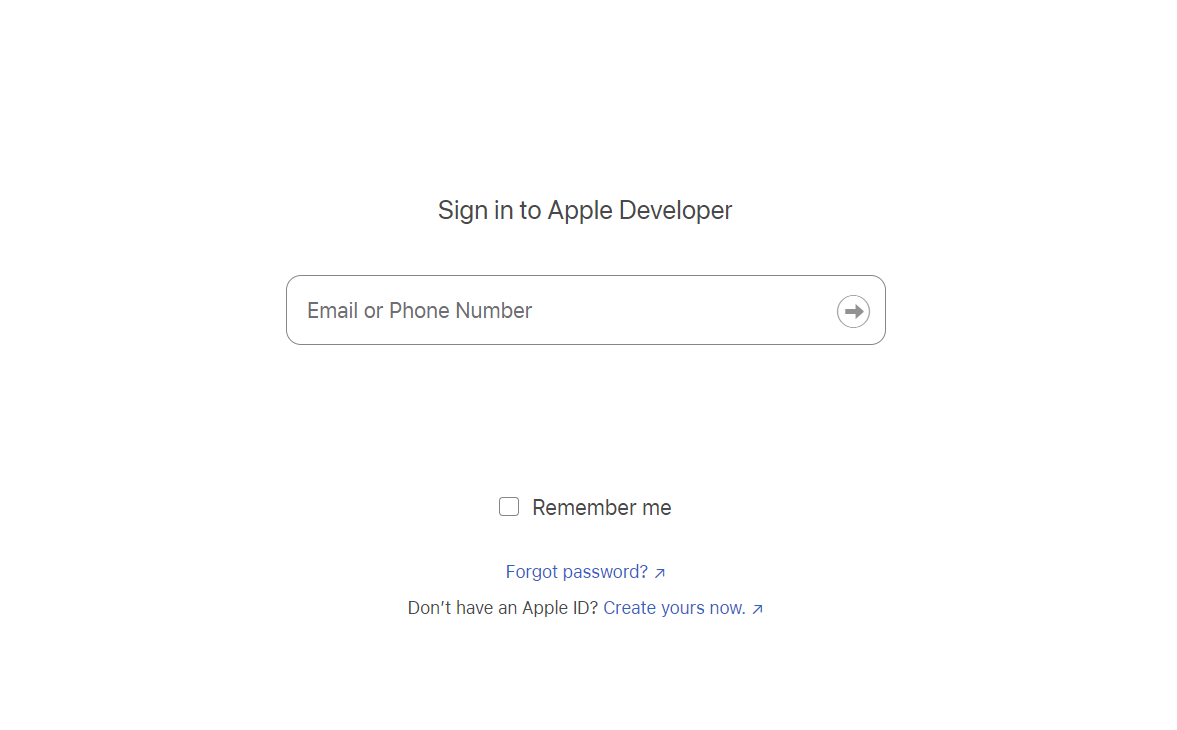
1. Get a Developer ID certificate by registering as a trusted developer at https://developer.apple.com.
2. Join the Apple Developer Program, which costs $99 per year.
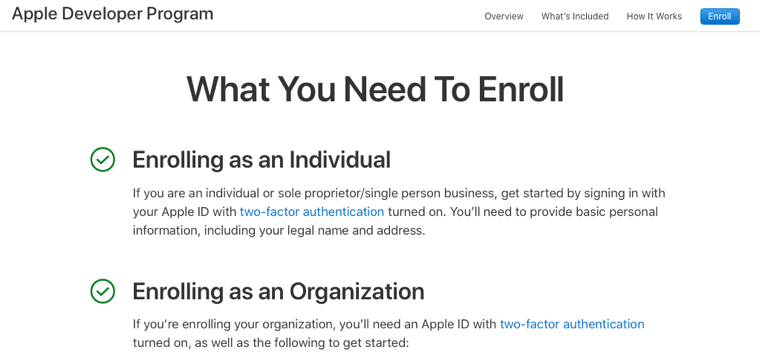
3. After joining the Apple Developer program as an individual user, you’ll automatically be assigned the Account Holder role (the role that includes the Team Agent and Legal roles). Only one member of an organization can be assigned as the Account Holder. This role allows you to create a Developer ID certificate and be responsible for entering into legal agreements with Apple, including app transfer agreements.
4. Now you need to request the right to sign kernel extensions in order to make your Developer ID certificate compatible not only with applications but with kernel extensions. To do this, visit https://developer.apple.com/contact/kext/.
You’ll have to explain why you need to develop a kernel extension, state which API you’re using, and answer some other questions to prove that you really need the right to sign kernel extensions. Also, you need to show why System Extension and DriverKit are not suitable for your needs. After you’ve provided this information, send your request for approval and wait for a response. Only after you get approval will your certificate be valid for signing kexts.
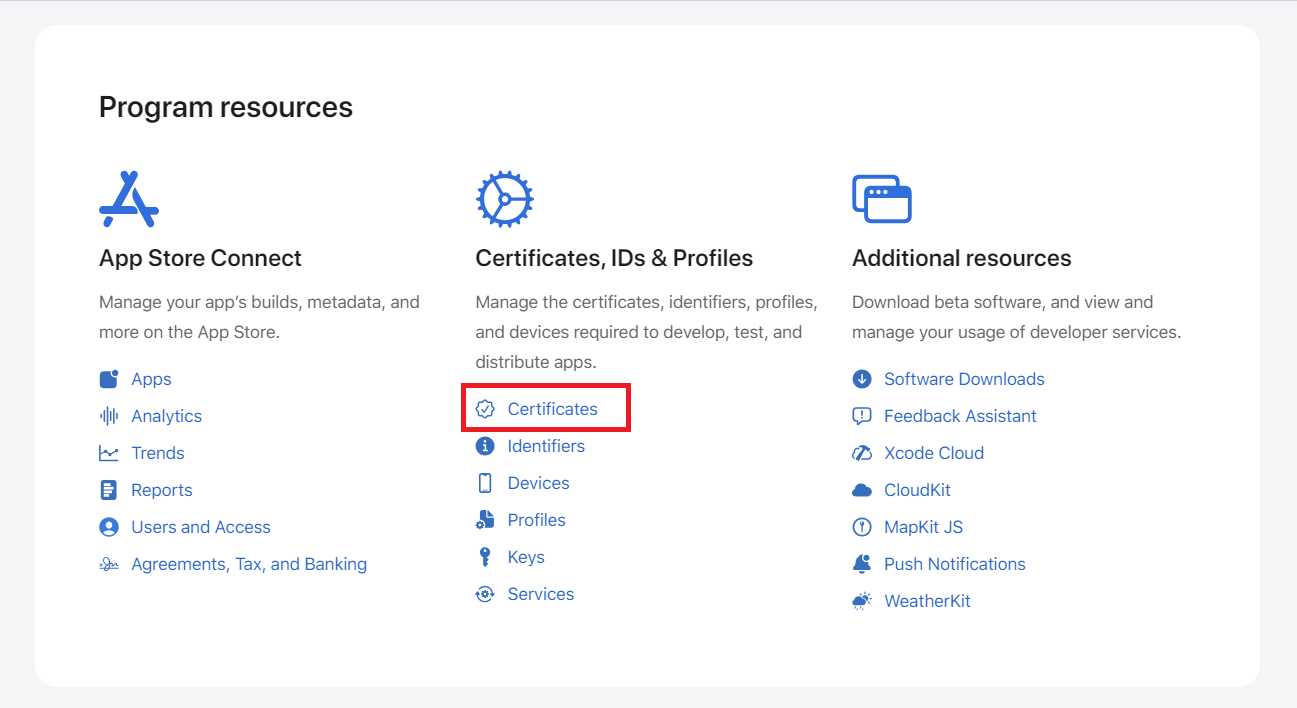
5. Once you’ve been approved, you can generate a certificate on Apple Developer. To do so, choose Certificates in the Program resources menu.
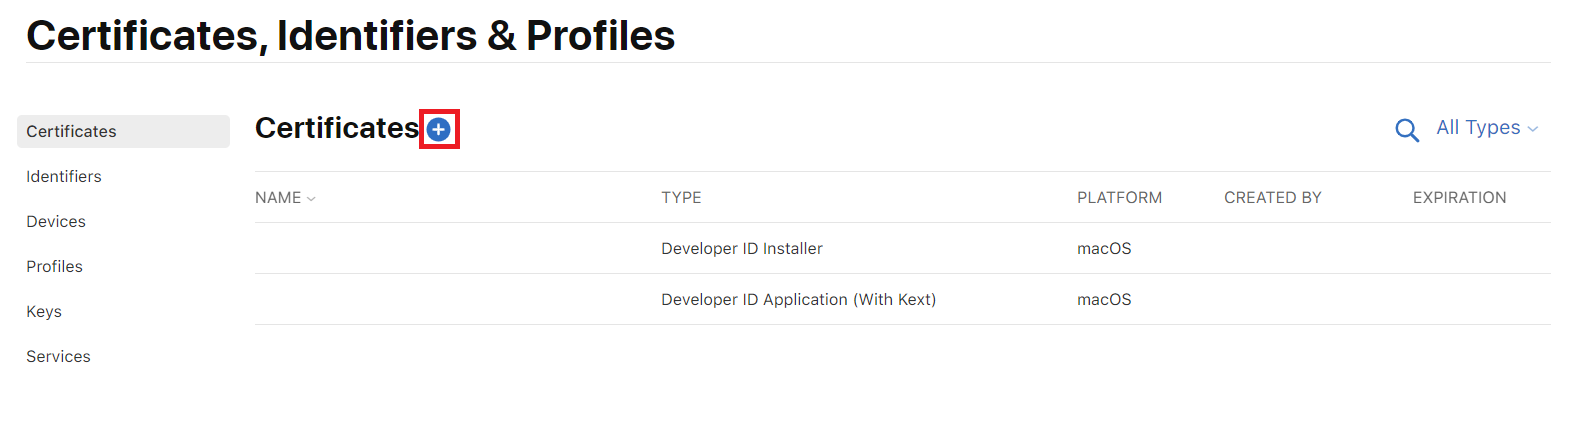
6. Click on the + sign to create a new certificate.
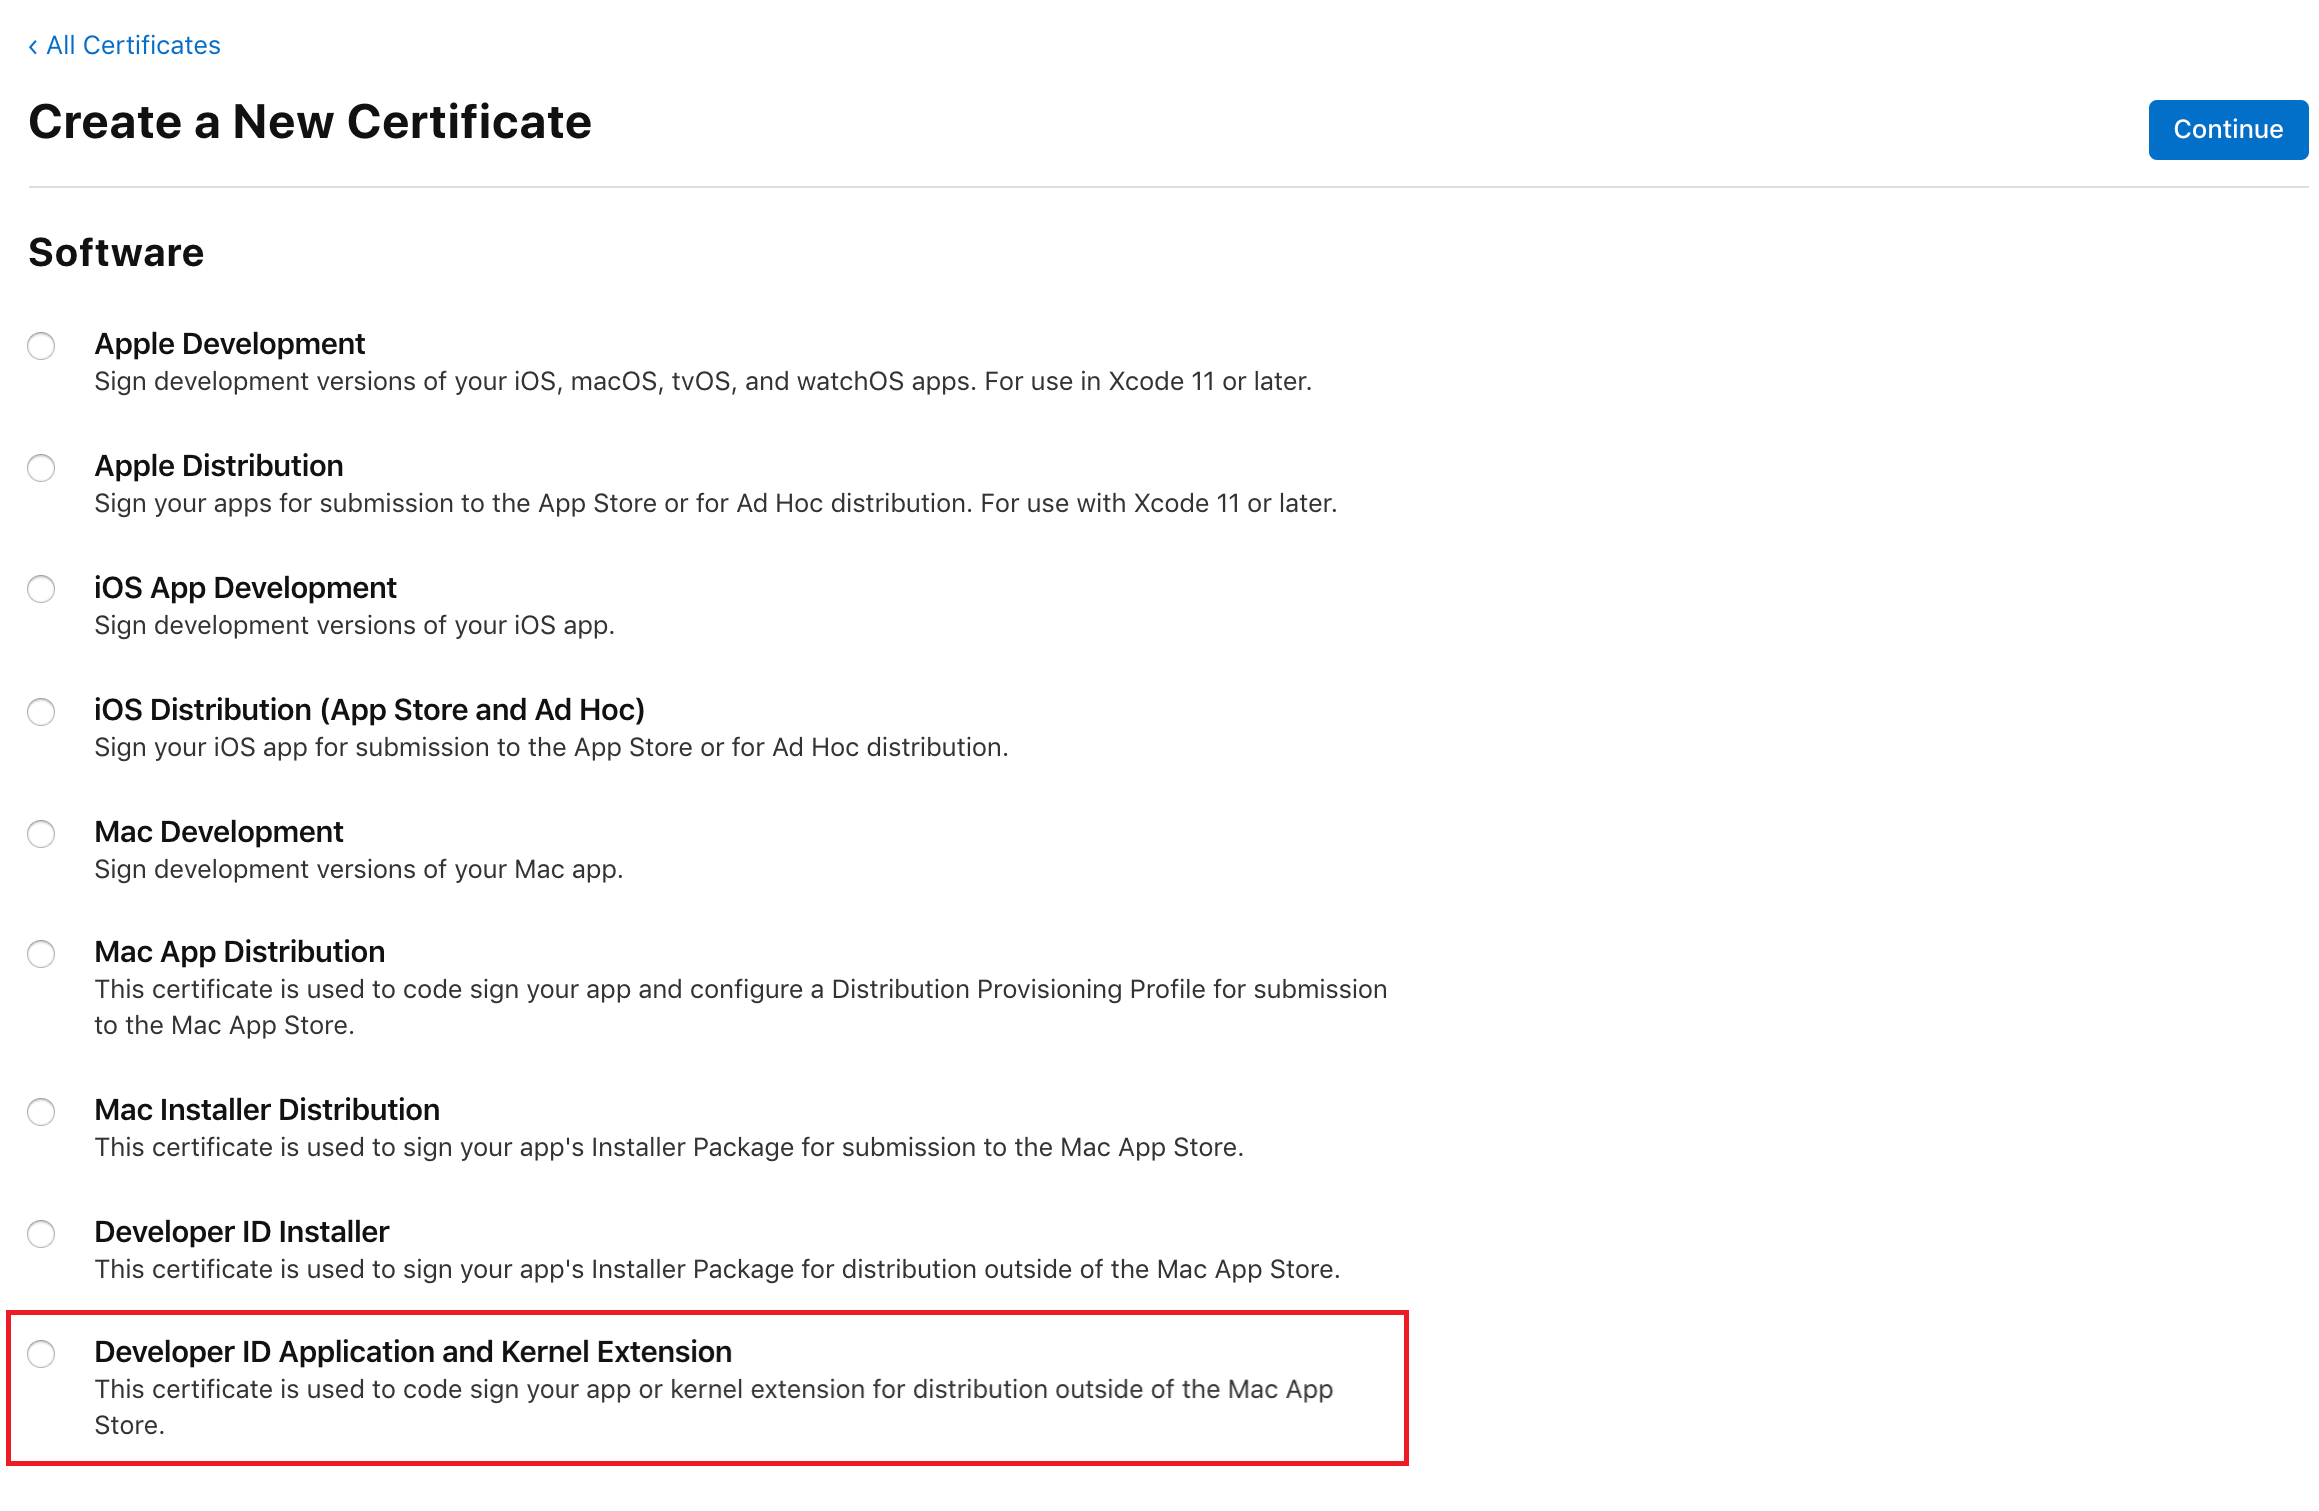
7. Select Developer ID Application and Kernel Extension and press Continue:
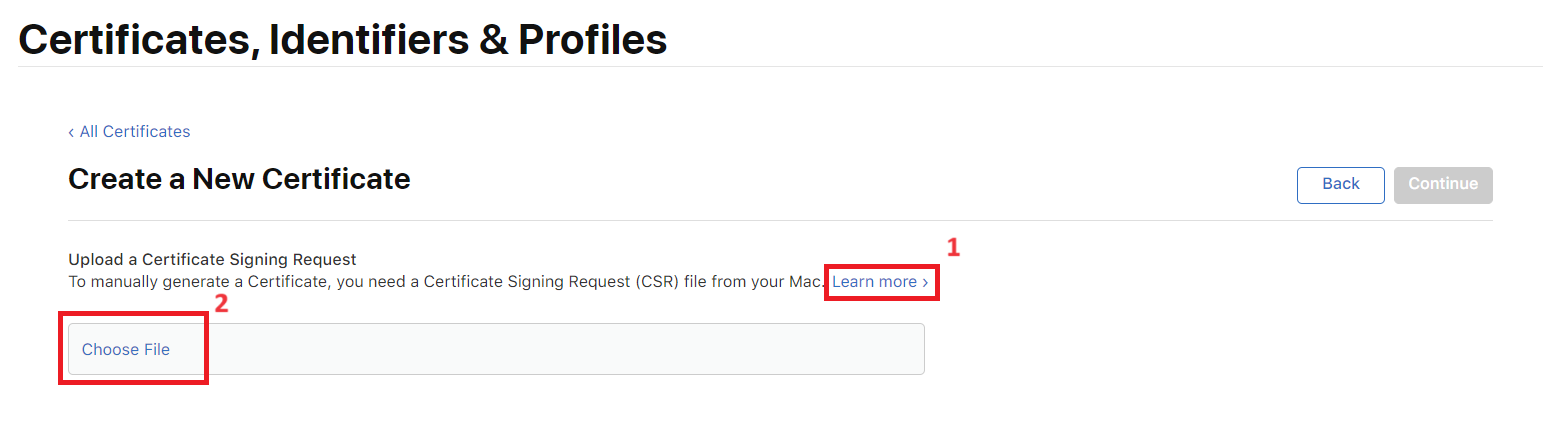
8. Create a Certificate Signing Request file with Keychain Access on your Mac. Click the Learn more button for extended instructions. After creating the request file, upload it to Apple for approval:
9. To create your Developer ID certificate using your Application Developer account, follow the detailed instructions on the Apple Developer website. You can also create a Developer ID certificate in Xcode by following the instructions on the help page.
10. After sending your request, wait for Apple to approve it (which can take up to a few days). After you get approval, a proper certificate will appear in your Apple Developer account under Certificates, IDs & Profiles. You’ll be able to download it from there.
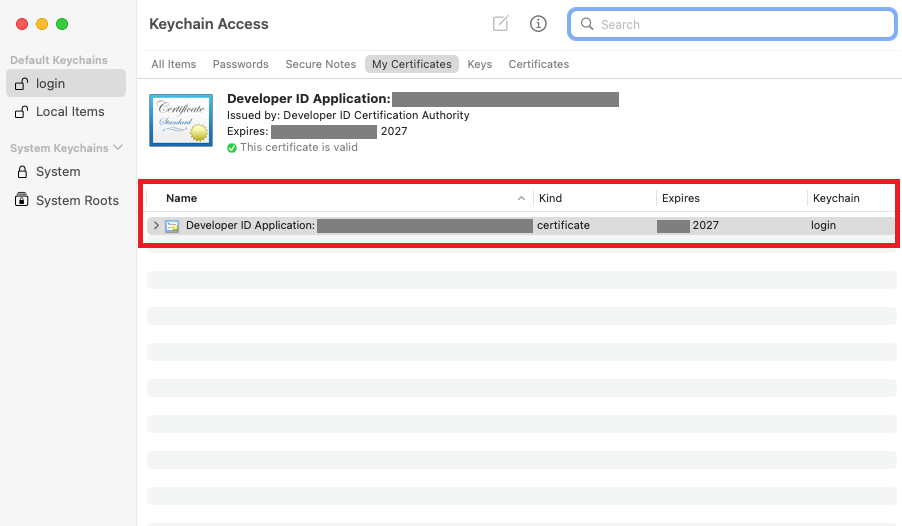
11. Once your certificate is available, add it to your Keychain Access by double-clicking on it:
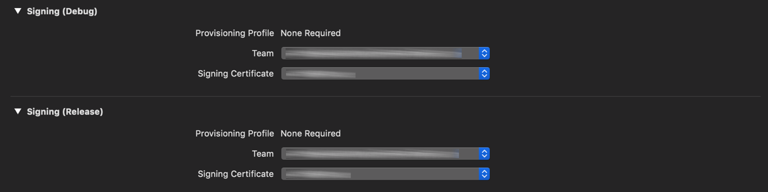
12. Actual signing is performed within Xcode (Developer ID certificates must be added to Keychain). To sign your kext, open your Xcode kext project settings (double-click the xcodeproj file in Project Navigator). Go to Build Settings, select your current team (or user) in Team and enter your Signing Certificate: “Developer ID Application: Your Certificate Name (ID)”.
13. You can also sign kexts manually from Terminal using the codesign utility:
ShellScriptcodesign -s "Developer ID Application: Your Certificate Name (ID)" --verbose YourKext.kextExporting your kext signing certificate
If you need to transfer your kext signing certificate to another machine, you can export it as a .p12 file. Here are the steps you need to take:
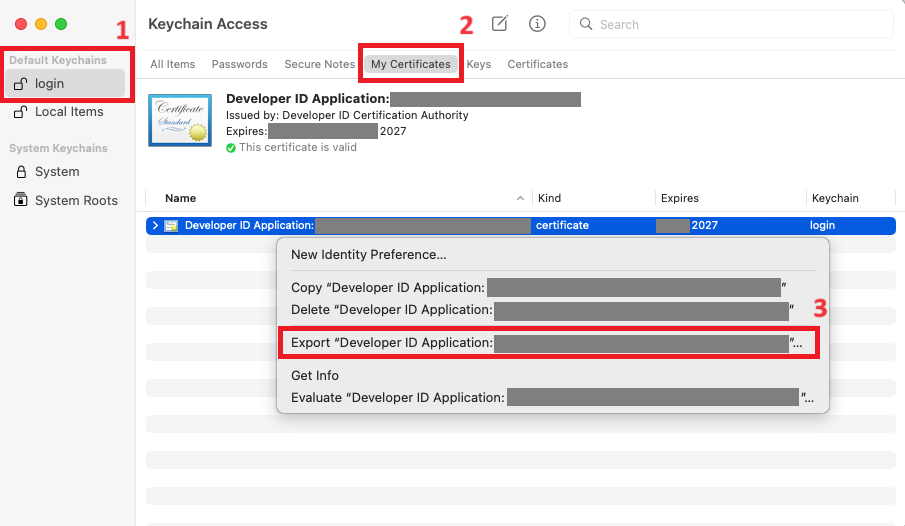
1. Launch Keychain Access on your Mac, pick the certificate entry, and right-click it to select Export Certificate from the pop-up menu.
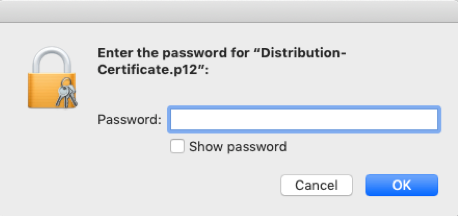
2. In the window that appears, set the file format to Personal Information Exchange (.p12) and save the certificate to your computer by clicking the Save button.
3. Enter a password for your certificate and click OK.
4. Your certificate will be saved to the specified location in the .p12 format.
5. When you move the certificate to a new Mac, double-click on the exported .p12 file to install it and enter the password you created in the previous step.
6. The certificate will be added to Keychain.
As you can see, working with kernel extension signing certificates is easy.
Conclusion
Custom kernel extension development is one of the most complicated tasks for macOS developers. As kexts directly influence the system’s performance, their code should be flawless.
While Apple is aiming to significantly reduce the use of kernel extensions, some tasks still can’t be performed without kexts. Such tasks include supporting specific file system formats and writing drivers not supported by the DriverKit API.
At Apriorit, we have a team of dedicated macOS kernel programming and software development experts who are obsessive about code quality and data security. They’ll gladly assist you in turning your most challenging ideas into innovative macOS applications.
Have a question?
Ask our expert!
VP of Innovation and Technology, Canada Branch Director


