 Skip to main content
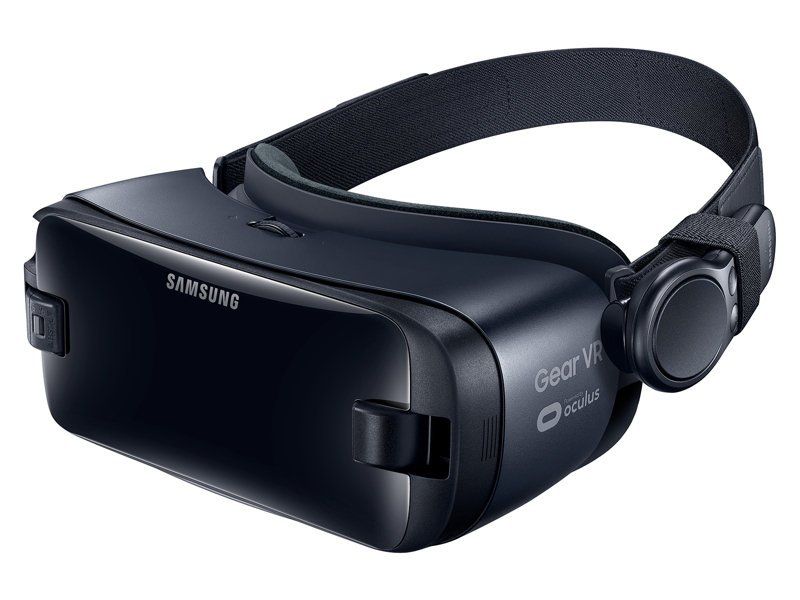
Virtual reality (VR) video is a popular trend in the virtual reality industry. Unlike ordinary videos, virtual reality videos totally immerse viewers in an artificial environment by rendering 3D images. Many people confuse virtual reality videos with 360-degree videos, but there’s a significant difference between them – namely, the fact that VR viewers can fully move around and explore inside their virtual environments. Virtual reality headsets like Oculus Rift and Oculus Gear VR allow for full interactivity between users and virtual environments. This article describes the experience of Apriorit in building an Android video player for Oculus Gear VR.
The popularity Google Cardboard VR video made an increasing number of projects paid attention to virtual reality. The reason for this was the variety of applications of virtual reality technology, including in media, tourism, education, healthcare, and entertainment.
For entertainment purposes, there’s a growing number of 360-degree videos that you can watch in VR mode on YouTube. Additionally, Google Street View has already made it possible to explore many historical destinations in VR mode. Some platforms offer live performances and educational videos in VR. Virtual reality games are also increasing in popularity among players. And that’s not to mention how useful VR has proven for assisting operators of complex equipment in fields like healthcare, construction, and aviation.
Consequently, there’s demand to create a virtual reality video app that meets all the requirements of the sophisticated VR user.
Contents:
Task Definition
Our developers got the task of making their own mobile 360 video player for Oculus Gear VR. These were the requirements:
- The Android video viewer should be optimized for Oculus VR.
- Google VR Video Player should be used.
- Three 360-degree videos, each recorded on a smartphone from different angles, should start playing at the same time.
- The viewer should be able to switch from one video to another seamlessly and continue watching from the same point (for instance, if the first video is at 9:31, the second should start at 9:31 immediately).
- The video player should have an additional UI element, for example a compass that shows the direction in which the user is looking. A compass is necessary to allow users to orient themselves and navigate in the virtual environment.
- A video that’s playing should have an overlay with a video number.
- It should be possible to switch between videos by swiping on the Gear VR controller.
Google 360 Video Player Description
The Google 360 Video Player allows you to play 360-degree videos and is suitable for many VR devices including Oculus Gear VR.
We used VrWidgetView from the package com.google.vr.sdk.widgets.video for playing our videos. However, we couldn’t easily modify the executable with standard methods. We also couldn’t display anything on top of the player since it runs in full screen mode on top of everything else.
The following methods are available for modifying the executable:
public interface VrVideoPlayer {

   //Download a video from url, use options to specify video type.
   // Options.TYPE_MONO;
   // Options.TYPE_STEREO_OVER_UNDER
   public void loadVideo(Uri var1, VrVideoView.Options var2) throws IOException;

   //Here you can set your listener that will inform you about player’s events via callbacks, for instance:
   public void setEventListener(VrVideoEventListener var1);

   public interface VrVideoEventListener {
       // A new frame has been drawn on the screen
       public void onNewFrame();

       //  If there is any video load error
       public void onLoadError(Exception e);
   }

   //Start playing the video
   public void playVideo();
   // Continue to play the video
   public void pauseVideo();

   //Seek the video to the specified time
   public void seekTo(long var1);

   // Get the video duration
   public long getDuration();
   // Get the current position of the video
   public long getCurrentPosition();
   // Returns the three-valued array of the current rotation of the user's head
   public int[] getHeadRotation(int time);
}Using Reflection to Access VR Player Functions
VR video player development involves displaying two instances of a 360-degree video at once – one for each eye. In order to achieve this, we need to start VR mode after our app runs. Then we need to overlay our UI elements on top of the video and hide unnecessary buttons.
There’s no API for calling VR mode, so we just find enterVrModeButton and activate it in the code of our app.
It’s also possible to enter VR mode using Java Reflection. We can do this by calling it manually with onClick(). The following function finds all the private variables we need:
private void initPrivateFields() {
       try {
           Field fullScreenDialogField = getPlayer().getClass().getSuperclass().getDeclaredField( "fullScreenDialog" );
           fullScreenDialogField.setAccessible( true );
           fullScreenDialogField.setAccessible( true );
           FullScreenDialog fs = ( FullScreenDialog ) fullScreenDialogField.get( getPlayer() );

           Field dialogViewField = FullScreenDialog.class.getDeclaredField( "dialogContent" );
           dialogViewField.setAccessible( true );
           dialogViewField.setAccessible( true );
           fs.show();

           Field privateImageButtonField = VrWidgetView.class.getDeclaredField( "enterStereoModeButton" );
           privateImageButtonField.setAccessible( true );
           enterVrModeButton = ( ImageButton ) privateImageButtonField.get( getPlayer() );

           // get the vr ui layer to hide back button
           Field vrUiLayerField = VrWidgetView.class.getDeclaredField("vrUiLayer");
           vrUiLayerField.setAccessible(true);
           vrUiLayer = (UiLayer ) vrUiLayerField.get(videoWidgetView);

           Field vrUiLayerBackButtonField = UiLayer.class.getDeclaredField("backButton");
           vrUiLayerBackButtonField.setAccessible(true);
           vrUiLayerBackButton = (ImageButton) vrUiLayerBackButtonField.get(vrUiLayer);


           // this is the fullscreen image asset provided by vr view
           Field privateEnterFullscreenButtonField = VrWidgetView.class.getDeclaredField("enterFullscreenButton");
           privateEnterFullscreenButtonField.setAccessible(true);
           enterFullscreenButton = (ImageButton) privateEnterFullscreenButtonField.get(videoWidgetView);

           vrUiLayer.setAlignmentMarkerEnabled( false );


           dialogView = ( FrameLayout ) dialogViewField.get( fs );
//            dialogView.addView( videoWidgetView );


       } catch ( Exception e ) {
           e.printStackTrace();
       }
}After we enter VR mode (enterFullscreenButton.performClick), we need to display our UI elements (for instance, a compass) somewhere. However, this isn’t possible because of the fullscreen video player that’s always on top of the UI. In order to add UI elements, we need to find a parent UI element and place our view on it. Thus, look for the field which is called FullScreenDialog:
View view = getLayoutInflater().inflate( R.layout.video_overlay, null );
trackNumber = ( TextView ) view.findViewById( R.id.track_number_overlay );
compassLeftEye = ( ImageView ) view.findViewById( R.id.video_compass_overlay );
compassRightEye = ( ImageView ) view.findViewById( R.id.video_compass_overlay2 );
dialogView.addView( view );In addition, we need to hide the standard buttons: Settings, Exit VR mode, and About.
We’ve already found all these buttons in the method initPrivateFields(). Now, we need to hide them after entering VR mode by using the method setVisibility(). However, this doesn’t work, as the buttons do not appear immediately after switching to VR mode. We can solve this problem by creating a thread that will wait for a certain time and then hide these buttons. This can be achieved using the JavaRX library. For example:
  private void enterFullScreen() {
   if ( enterVrModeButton.getVisibility() != View.GONE ) {
       enterVrModeButton.performClick();
       subscription = Observable.interval(3, TimeUnit.SECONDS)
               .observeOn( AndroidSchedulers.mainThread())
               .subscribe( new Action1<Long>() {
                   @Override
                   public void call( Long aLong ) {
                       performHidingButtons();
                   }
               } );
   }
}Here, we wait three seconds in an additional thread (to avoid blocking the UI thread), then call the button-hiding function in the UI thread.
Read also:
Android Rooting Using ADB
Video Types for VR Player
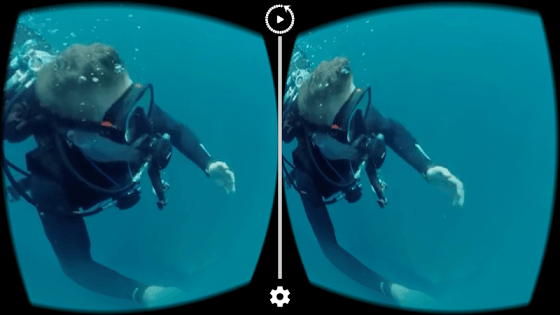
Anyone who wants to create a 360-degree video player will need to start with a good understanding of what 360-degree video is. A 360-degree video is also known as a spherical video. These videos have views in different directions, which is necessary for playback on a VR headset. There are two types of videos for VR players: stereoscopic 360-degree and monoscopic 360-degree.
A stereoscopic 360-degree video is recorded with a camera for each eye, achieving the perception of depth. However, this is quite hard to accomplish, as you need to unite the separate footage of two cameras and then create a side-by-side mapping for 3D video. The difficult structure of stereoscopic videos negatively impacts their resolution. Thus, the maximum resolution for this type of VR videos is 1920×960 at 30 frames per second (fps) or 1440×670 at 60 fps.
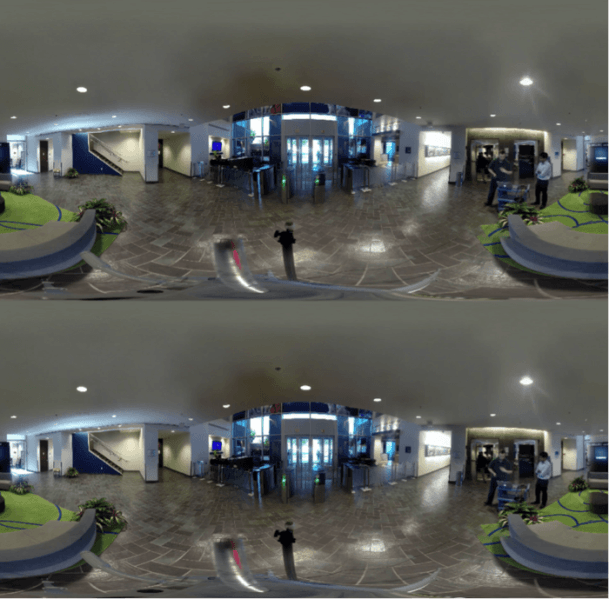
In contrast, a monoscopic 360-degree video is easier to produce, supports higher resolution, and is therefore usually chosen for creating VR content. A monoscopic video is filmed with one camera per field of view, and these videos are then combined to create a spherical video. To create a monoscopic video, you should have at least six cameras that simultaneously record six different fields of view. The maximum resolution for 2D monoscopic video on Gear VR is 3480×1920 at 30 fps or 2880×1340 at 60 fps.
In our case, we have a 360-degree monoscopic video.
Options options = new VrVideoView.Options();
options.inputFormat = Options.TYPE_MONO;
options.inputFormat = Options.TYPE_STEREO_OVER_UNDER

videoWidgetView.loadVideo( Uri.parse( FIRST_TRACK_PATH ), options );Options.TYPE_MONO specifies that we have a monoscopic video and that the Oculus Gear video player should split it for two eyes with the image offset. If we choose Options.TYPE_STEREO_OVER_UNDER, then the player will consider this video stereoscopic and will play it without splitting. It’s very important to set the right option. Otherwise, the video will be displayed incorrectly.
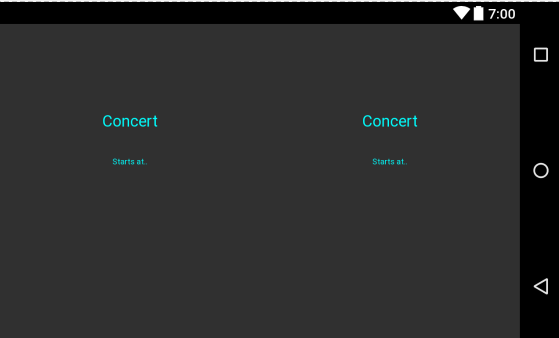
Previously, we discussed how to add an overlay to our view (for example, an image or text):
View view = getLayoutInflater().inflate( R.layout.video_overlay, null );
yourImage = ( ImageView ) view.findViewById( R.id.my_image );
dialogView.addView( yourImage);Each type of video requires a special approach for creating the overlay view. For instance, if we have a stereoscopic video, we should do the following: create a layout, then place a null view in the center, then place the views that will be duplicated for each eye. For example:
?xml version="1.0" encoding="utf-8"?>
<LinearLayout xmlns:android="http://schemas.android.com/apk/res/android"
             android:orientation="horizontal"
             android:layout_width="match_parent"
             android:layout_height="match_parent"
   android:weightSum="2">
   <RelativeLayout
       android:layout_width="0dp"
       android:layout_weight="1"
       android:layout_height="match_parent">
       <TextView
           android:id="@+id/concert_title_text_timer_view"
           android:text="Concert"
           android:layout_width="wrap_content"
           android:layout_height="wrap_content"
           android:layout_centerInParent="true"
           android:layout_alignParentTop="true"
           android:textSize="18sp"
           android:textColor="#00ffff"
           android:layout_marginTop="100dp"/>
       <TextView
           android:id="@+id/timer_text_timer_view"
           android:text="Starts at.."
           android:layout_width="wrap_content"
           android:layout_height="wrap_content"
           android:layout_centerInParent="true"
           android:textSize="9sp"
           android:textColor="#00ffff"
           android:layout_below="@+id/concert_title_text_timer_view"
           android:layout_marginTop="30dp"/>

   </RelativeLayout>
   <RelativeLayout
       android:layout_width="0dp"
       android:layout_weight="1"
       android:layout_height="match_parent">
       <TextView
           android:id="@+id/concert_title_text_timer_view2"
           android:text="Concert"
           android:layout_width="wrap_content"
           android:layout_height="wrap_content"
           android:layout_centerInParent="true"
           android:layout_alignParentTop="true"
           android:textSize="18sp"
           android:textColor="#00ffff"
           android:layout_marginTop="100dp"/>
       <TextView
           android:id="@+id/timer_text_timer_view2"
           android:text="Starts at.."
           android:layout_width="wrap_content"
           android:layout_height="wrap_content"
           android:layout_centerInParent="true"
           android:textSize="9sp"
           android:textColor="#00ffff"
           android:layout_below="@+id/concert_title_text_timer_view2"
           android:layout_marginTop="30dp"/>
   </RelativeLayout>

</LinearLayout>If we have a monoscopic video, then it’s better to place one image. If we add two images, the final picture may get blurry. Also, we made sure to add transparency to our overlay image so it doesn’t look like a sticker.
Playing VR Video on Gear VR
To play a VR video on Gear VR, we need to use the Gear VR SDK and a device-specific key generated on the Oculus Store for a single device. You can find the SDK for Gear VR and examples of basic apps for Gear VR on GitHub. If you need clear instructions on how to generate a key on the Oculus Store, click here.
Below, you can see the base process for running your app on the GearVR.AndroidManifest:
<application
   android:name=".AppApplication"
   android:allowBackup="true"
   android:fullBackupContent="false"
   android:icon="@mipmap/ic_launcher"
   android:label="@string/app_name"
   android:supportsRtl="false"
   android:theme="@style/Theme.AppCompat.NoActionBar">
……….
<activity android:name=".ui.activity.WelcomeScreenActivity"
         android:screenOrientation="landscape"
         android:launchMode="singleTask"
         android:theme="@style/GVRfAppTheme">
   <intent-filter>
       <action android:name="android.intent.action.MAIN"/>
       <category android:name="android.intent.category.LAUNCHER"/>
   </intent-filter>
</activity>Run GVRActivity for easy integration with a VR headset:
public class VrVideoActivity extends GVRActivityTo run the app in Gear VR mode, we need to opt for setMain(main) in VrVideoActivity, where main is the following:
    public class Minimal360Video extends GVRMain
{

   public Minimal360Video()
   {
   }

   /**
    * Called when the activity is first created.
    */
   @Override
   public void onInit( GVRContext gvrContext ){}

   public GVRVideoSceneObjectPlayer<MediaPlayer> getMain(){
       final MediaPlayer mediaPlayer = new MediaPlayer();
       return GVRVideoSceneObject.makePlayerInstance( mediaPlayer );
   }

}Then we need to overlay our player on top of GVRActivity. The standard method setContentView() doesn’t work, but GVRActivity has another method, registerView(view), which we can use for placing our overlay view:
View view = getLayoutInflater().inflate( R.layout.activity_vr_video, null );
options = new VrVideoView.Options();
options.inputFormat = Options.TYPE_MONO;
registerView( view );Using the Gear VR Sensor
The ability to scroll video with the help of the Gear VR sensor was another requirement of our task to create an Android 360 video app. We discovered that in order to do this, there’s no need to use any additional interface for the Gear VR sensor. We can simply add SwipeGestureDetector to the highest view, which is just like swiping the screen of the device with your finger.
For example:
videoWidgetView.setOnTouchListener( new View.OnTouchListener() {
   @Override
   public boolean onTouch( View v, MotionEvent event ) {
       vrTouchPadGestureDetector.onTouchEvent( event );
       return true;
   }
} );
VRTouchPadGestureDetector vrTouchPadGestureDetector = new VRTouchPadGestureDetector( new VRTouchPadGestureDetector.OnTouchPadGestureListener() {

   @Override
   public boolean onSwipe( MotionEvent e, VRTouchPadGestureDetector.SwipeDirection swipeDirection, float velocityX, float velocityY ) {
       if ( swipeDirection == VRTouchPadGestureDetector.SwipeDirection.Backward )
           changeVideoTrack( TrackController.previousTrack() );
       if ( swipeDirection == VRTouchPadGestureDetector.SwipeDirection.Forward )
           changeVideoTrack( TrackController.nextTrack() );

return false;Conclusion
In this article, we’ve shared our experience developing a VR video app for Oculus Gear VR. We’ve also discussed key problems that developers may face while working on similar projects. If you’re considering developing your own virtual reality video app, our Apriorit team can assist you with our knowledge of video delivery and mobile development.


