 Skip to main content

Kernel development for embedded systems is like heart surgery: it requires knowledge and experience, attention to details, and the ability to achieve perfection. During development, you have to take into account the specifics of an embedded device and the programming language you’re working with in order to create the required abstractions and drivers.
At Apriorit, we’re constantly working on complex kernel development projects. In this article, we share our experience writing a kernel with minimal functionality in the Rust programming language for a Raspberry Pi 3 embedded system. The kernel includes key input/output (I/O) abstractions and platform-dependent code representing device driver logic.
This article will be useful for developers who are studying kernel development and the specifics of programming embedded systems.
Contents:
An operating system kernel has total control over the system it manages. It contains low-level abstractions for system hardware, resources, and applications. That’s why even minor errors during kernel development may lead to all sorts of device malfunctions.
To avoid that, you need to carefully plan development, starting with the choice of embedded device for your kernel. This device must have enough resources to run your operating system, be able to connect to the required resources, and be comfortable to work with. At the same time, there’s no need to choose complex devices for simple tasks; if you do, you’ll end up writing code for device hardware and resources you aren’t going to use.
Another important question is which programming language to choose. Though the most common choice is C, in recent years, Rust development developers have also frequently used Rust for kernel development.
In our project, we decided to develop a minimal kernel for the Raspberry Pi 3 in the Rust programming language. In the next sections, we’ll explain why we chose this device and language.
Raspberry Pi as a prototype for an embedded system
The Raspberry Pi is a family of single-board fully functional mini computers based on ARM processors. It was originally designed to teach students computer science. Today, it has a large and supportive community and is used in research, scientific, and commercial projects. Many operating systems already support this board by default.
There are two reasons why we chose a Raspberry Pi 3 for this task:
- The board is comparable to a computer in terms of functionality because it contains a variety of hardware devices assembled on one compact board.
- We can put our software on it without bootloader development, as Raspberry Pi devices boot from a microSD card.
Looking to enhance your product’s performance at its very core?
Join forces with us to acquire comprehensive kernel development services, ensuring your products stand out in the market.
6 reasons to choose Rust for kernel development
We chose Rust for kernel development. A relatively young system programming language released in 2015 by Mozilla, Rust was listed in 2020 among the top 20 most popular languages in the world according to the TIOBE Index.
The Rust programming language is valued for its security, development speed, and concurrency compared to traditional languages like C and C++. Also, the Rust compiler supports lots of platforms, which makes this language an even more convenient choice.
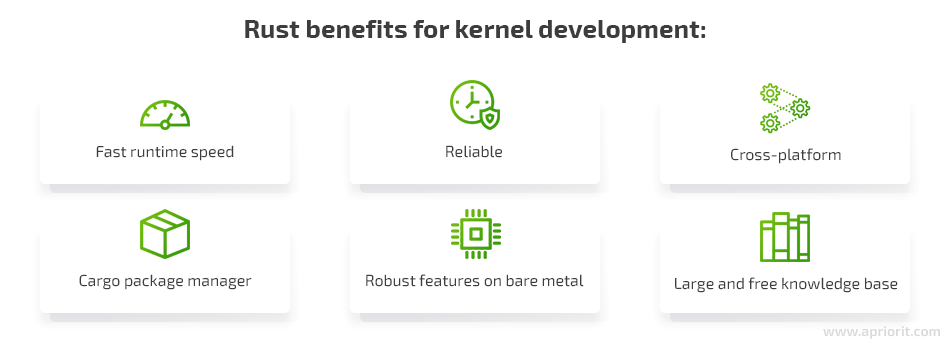
Here are the six reasons we chose Rust for developing our kernel on a Raspberry Pi 3:
- Runtime speed. Rust is compiled to the target machine’s native code. The language has as minimal a runtime as possible due to panic_handler and global_allocator attributes. You can find more information about the Rust runtime here.
- Reliability. Rust is designed with early error detection in mind. Most memory safety errors and data races are detected during compile time. That makes it nearly impossible to compile code with a potential memory leak.
- Cross-platform. Rust allows the same piece of code to be compiled for different architectures and systems. The Rust compiler doesn’t implement the Rust programming language standard. That solves some problems with portability between compilers that such languages as C and C++ have.
- Cargo package manager. This tool speeds up and eases coding in Rust. Projects created with Cargo include a default hello world program, a minimal dependency file, initialized git repositories, etc. Also, Cargo provides one-click builds, a code linter, a code formatter, and a dependency manager.
- Robust features on bare metal. Compared to C++, Rust has more features on bare metal. Rust doesn’t allow the use of standard libraries, so it uses libcore instead. Libcore is a platform-agnostic subset of the libstd library that contains a minimal set of functions. It doesn’t provide heap operations, I/O, and concurrency because it can’t make any assumptions about the system it runs on. However, it does allow you to use features like iterators, string formatting, and base memory operations.
- Large and free knowledge base. There are lots of Rust overviews, books, and articles with tutorials, examples, and development exercises on the official Rust website alone. You can also check out our ebook on Rust basics.
Now, let’s see how we can use Rust to create a minimal kernel on the Raspberry Pi 3.
Read also
Rust vs C++ Comparison
Choose a suitable programming language for your software with our comprehensive comparison between Rust and C++! Gain valuable insights into their features, performance, and use cases for different projects.

Planning kernel development
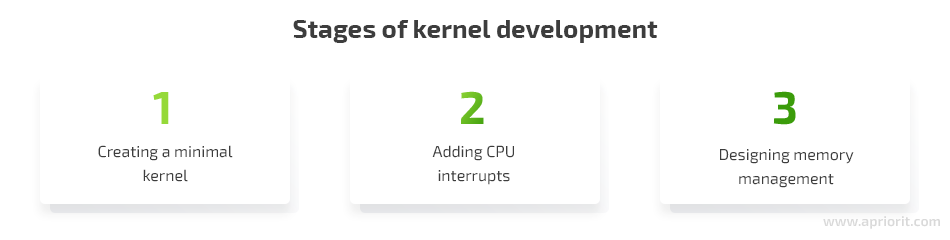
A kernel is usually developed in three stages:
- Creating a minimal kernel — The minimal kernel contains the core functionality of the operating system (OS), including key policies and mechanisms.
- Adding CPU interrupts — Interrupts are signals generated by the CPU or external devices that command the CPU to stop its current activities and execute an operating system function.
- Designing memory management — Policies are used by the kernel to manage its memory.
In this article, we will discuss the first stage — developing a minimal kernel. Our minimal kernel will handle user input and provide output that echoes all symbols typed on the keyboard back to the terminal on which they were inputted.
Building a minimal kernel
We’ll start kernel development by choosing devices for providing keyboard input and displaying the output.
The obvious choice would be a USB device connected to a keyboard for input and a High Definition Multimedia Interface (HDMI) device for output. However, to do this we would need to create logic that describes kernel I/O processing, and such a configuration is too complicated for our purpose. Developing drivers for all these devices would take too much time.
Instead, we’ll use two general-purpose input/output (GPIO) pins for entering and displaying data and a Universal Asynchronous Receiver-Transmitter (UART) for transmitting that data. With this configuration, we can implement a simple kernel and two drivers to interact with the outside world.
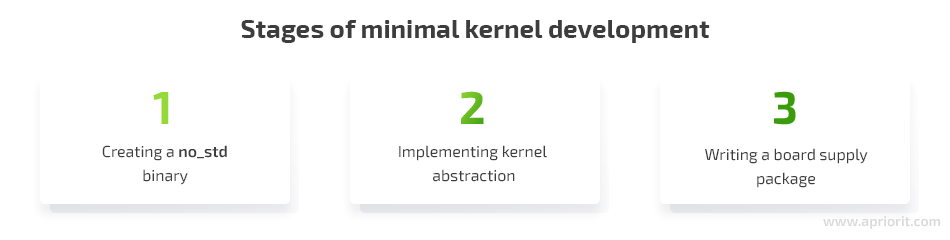
1. Creating a no_std binary
Since we’ll work with the libcore library for this project, we can’t use some features of the libstd library. All parts of libstd that use I/O features are inaccessible in our no_std project.
The first step in writing a kernel for Raspberry Pi 3 using Rust is creating a no_std binary project. This command will create a “hello world” type project:
cargo new kernelNext, we need to remove all the code in main.rs that was generated by the previous command and add the following inner attributes to our main.rs module:
#![no_std]
#![no_main]If we try to compile this code, we’ll get the following error:
error: `#[panic_handler]` function required, but not foundTo fix it, let’s define the panic_handler that will spin the core:
use core::panic::PanicInfo;

#[panic_handler]
fn panic(_panic: &PanicInfo<'_>) -> ! {
   loop {}
}panic_handler is the only item of the Rust language runtime we’ll use in our kernel, and it’s fully controllable from the programmer’s side. We’ll modify it to handle panic gracefully and make sure that all panic information is properly logged.
Related project
USB WiFi Driver Development
Learn how the Apriorit team ported an existing Linux driver to Windows instead of developing a new one, saving our clients time and money, as well as enhancing their product’s with new features!
2. Implementing kernel abstractions
The next step is to write code that’s independent from the board and responsible for driver loading and I/O operations.
To create a driver abstraction, we just need to initialize our GPIO and UART devices so that the Driver trait will contain the init method. Also, we want to know which driver we’re using, so we’ll add a string identifier to the driver using the name method.
The contents of the driver.rs file look like this:
pub trait Driver {
    fn init(&self) -> Result<(), &'static str> {
        Ok(())
    }

    fn name(&self) -> &str;
}However, implementing I/O operations requires more effort than working on driver abstractions. The libcore library doesn’t provide I/O operations, so we need to implement them by ourselves or make a modified version of those abstractions from the libstd library.
To develop our own I/O operations for kernel abstractions, we’ll migrate the Read and Write traits from std::io. There are no such traits in the libcore library because they depend on heap allocations in the Error type and have other minor runtime dependencies related to OS-defined operations.
There’s a proposal on how to migrate certain I/O operations to libcore. For our kernel, we’ll implement the Read and Write by ourselves. To do that, we’ll create a read.rs file that contains the following code:
use crate::kernel::io;

pub trait Read {
    // Error type is associated now to avoid
    // dependencies from heap allocations, so
    // we can choose the implementation on
    // the implementer's side.
    type Err;

    fn read(&mut self, buf: &mut [u8]) -> Result<usize, Self::Err>;

    fn read_exact<E>(&mut self, mut buf: &mut [u8]) -> Result<(), E>
    where
        E: From<Self::Err>,
    {
        // This is a default implementation. See full sources on our GitHub account
    }

    fn by_ref(&mut self) -> &mut Self
    where
        Self: Sized,
    {
        self
    }

    fn chain<R: Read, E>(self, next: R) -> io::Chain<Self, R, E>
    where
        Self: Sized,
        E: From<Self::Err> + From<R::Err>,
    {
        io::Chain::new(self, next)
    }

    fn take(self, limit: u64) -> io::Take<Self>
    where
        Self: Sized,
    {
        io::Take::new(self, limit)
    }
}The Write trait is implemented in the same way — by creating a write.rs file that contains this code:
use crate::kernel::io;
use core::fmt;

pub trait Write {
    type Err;

    fn write(&mut self, buf: &[u8]) -> Result<usize, Self::Err>;

    fn write_all<E>(&mut self, mut buf: &[u8]) -> Result<(), E>
    where
        E: From<Self::Err>
    {
        // This is a default implementation. See full sources on our GitHub account
    }

    fn write_fmt<E>(&mut self, fmt: fmt::Arguments) ->> Result<(), E>
    where
        E: From<Self::Err>,
    {
        // This is a default implementation. See full sources on our GitHub account
    }
}These traits are carbon copies of those in the libstd library. We’ve made two changes to them: created an Error type associated with Error types in the libstd library and removed methods relying on types that use heap allocations.
By now, kernel.rs contains these modules:
pub mod io;
pub mod driver;

pub fn init() -> ! {
    loop{}
}Here, io is a module that contains code with the Read and Write traits. driver is a module with the Driver abstraction.
At this point, our kernel code is only missing the entry point. For now, we have an infinite loop. Let’s work on the entry point while writing board-specific code.
Read also
12 Common Attacks on Embedded Systems and How to Prevent Them
Safeguard your embedded systems from cyber threats! Learn essential strategies to protect your devices, ensure data security, and maintain operational integrity in our guide from Apriorit experts.
3. Writing a board supply package
First of all, we need an entry point to our kernel image. On the Raspberry Pi 3, a 64-bit CPU kernel is loaded at the 0x80000 address, so we need to create a linker script file that will load the code at the required address.
Let’s create a link.ld file with the following contents:
SECTIONS
{
    . = 0x80000;

    .text :
    {
        *(.text._start) *(.text*)
    }
}The .text section is stored at the 0x80000 address, and the first symbol in this section is our kernel entry point. Everything after this symbol is the kernel code. This entry point should be enough to link our kernel together.
The next step is writing the entry point in Rust. Languages like Rust and C++ use name mangling to be able to support member functions. We need to disable this feature only for our entry point to have the same symbol compiled as described in the linker script.
We can disable mangling using #[no_mangle] by editing the contents of the bsp.rs file:
use crate::kernel;

#[no_mangle]
extern "C" fn _start() -> ! {
    kernel::init()
}After that, the kernel image will be linked correctly. We can then move to the next important step — writing GPIO and UART drivers.
4. Developing GPIO and UART drivers
To save some time, we can use a ready-made in-memory representation of GPIO and UART registers written by Andre Richter for his OS writing tutorial. We need to write logic that will manipulate these registers.
Later, we’ll use this logic to perform I/O operations. Both drivers should initialize device registers correctly, and the UART driver should implement io::Read and io::Write traits.
The Raspberry Pi 3 has two UART devices: PL011 UART and mini UART. PL011 UART is connected to the Bluetooth module, while the mini UART is used as the primary UART. But in fact, we can use PL011 UART with the 14th and 15th GPIO pins by using an alternative function configuration for this device.
To do this, we need to initialize GPIO registers so they’ll use PL011 UART instead of mini UART by switching pins 14 and 15 to their alternative functions. Every GPIO pin can carry an alternative function.
To switch to alternative functions, we need to set the FSEL14 and FSEL15 bit fields of the GPFSEL1 register to the 0b100 address that corresponds to the AltFunc0 function.
After this, we need to enable these pins by turning off pull-up and pull-down by setting the GPPUD register to 0 and setting the GPPUDCLK0 register’s PUDCLK14 and PUDCLK15 bit fields to 1. That’s it; the GPIO initialization process is done.
The GPIO driver code now looks like this:
pub struct GPIO;

impl GPIO {
    fn ptr(&self) -> *const RegisterBlock {
        mmio::GPIO_BASE as *const _
    }

    pub fn map_pl011_uart(&self) {
        use crate::bsp;

        // Bind PL011 UART to pins 14 and 15 instead of mini UART
        self
            .GPFSEL1
            .modify(GPFSEL1::FSEL14::AltFunc0 + GPFSEL1::FSEL15::AltFunc0);

        // Disable pull-up/pull-down
        self.GPPUD.set(0);
        bsp::spin_for_cycles(150);

        // Enable pins 14 and 15
        self
            .GPPUDCLK0
            .write(GPPUDCLK0::PUDCLK14::AssertClock + GPPUDCLK0::PUDCLK15::AssertClock);
            bsp::spin_for_cycles(150);

        self.GPPUDCLK0.set(0);
    }
}The UART driver needs to initialize device registers and implement I/O logic. To do that, we’ll configure the baud rate, set the size of data for transferring to 8 bits, and enable the first in, first out (FIFO) buffer for UART. FIFO is an intermediate buffer where data is stored before it’s read.
Here’s the UART init logic with our configurations:
fn init(&self) -> KernelResult {
    // UART init state
    self.CR.set(0);
    self.ICR.write(ICR::ALL::CLEAR);

    // Set 230400 baud (if the CLK has been previously set to 48 MHz by the firmware).
    self.IBRD.write(IBRD::IBRD.val(13));
    self.FBRD.write(FBRD::FBRD.val(2));

    // Set 8 bits as the data size and enable FIFO
    self.LCRH
        .write(LCRH::WLEN::EightBit + LCRH::FEN::FifosEnabled); // FIFO on

    // Enable UART, enable Read/Write
    self.CR
        .write(CR::UARTEN::Enabled + CR::TXE::Enabled + CR::RXE::Enabled);

    Ok(())
}After both devices are initialized by the drivers, we can work with the UART device using the io::{Read, Write} I/O abstractions. So let’s implement them for UART:
impl io::Write for PL011Uart {
    type Err = KernelError;

    fn write(&mut self, buf: &[u8]) -> Result<usize, Self::Err> {

        for byte in buf {
            while self.FR.matches_all(FR::TXFF::SET) {
                bsp::nop();
            }

            self.DR.write(DR::DATA.val(*byte as u32));
        }

        Ok(buf.len())
    }
}

impl io::Read for PL011Uart {
    type Err = KernelError;

    fn read(&mut self, buf: &mut [u8]) -> Result<usize, Self::Err> {
        for byte in buf {
            while self.FR.matches_all(FR::RXFE::SET) {
                bsp::nop();
            }

            *byte = self.DR.read(DR::DATA) as u8;
        }

        Ok(buf.len())
    }
}As you can see, here we manipulate the FLAGS register, which helps us detect if the device is busy with read/write operations. If it’s busy, we should wait for it to become available. When both drivers are ready, we need to enable the kernel to initialize them:
static mut UART: uart::PL011Uart = uart::PL011Uart{};
static mut GPIO: gpio::GPIO = gpio::GPIO{};

pub fn console() -> &'static mut impl io::Console {
    unsafe { &mut UART }
}

pub fn drivers() -> [&'static dyn Driver; 2] {
    unsafe { [&GPIO, &UART] }
}

pub fn post_init() {
    unsafe { GPIO.map_pl011_uart() }
}We used the unsafe function here because the compiler doesn’t allow us to use mutable statics for concurrency safety reasons. If a device processor has several cores, using this function will lead to resource conflicts. Since we use only one core, we won’t have such problems.
With that, we’ve finished writing the board-specific code. Now we need to add this code to the kernel:
pub fn init() -> ! {
    for driver in bsp::drivers().iter() {
        if let Err(_) = driver.init() {
            panic!("failed to load driver: {:?}", driver.name())
        }
    }
    bsp::post_init();

    kernel_main()
}

fn kernel_main() -> ! {
    let mut data = [0u8];

    // Wait until the user hits Enter
    loop {
        bsp::console().read(&mut data);
        if data[0] as char == '\n' {
            break;
        }
    }

    // Echo the input
    loop {
        bsp::console().read(&mut data);
        bsp::console().write(&data);
    }
}This piece of code waits for the user to hit the Enter key. Then the kernel echoes the user’s input, just as we wanted.
Read also
Driver Matching with I/O Kit: Building a USB Device Filter Driver
Explore our comprehensive guide on IOKit driver matching and unlock the key to seamless macOS driver development. Master the essential techniques and best practices for ensuring compatibility and reliability in your driver projects!

Conclusion
In this article, we showed you how to build a minimal kernel for an embedded system. Our project includes the development of a no_std binary, driver abstractions, and I/O operations that make a Raspberry Pi 3 echo user input.
Using Rust, a Raspberry Pi 3, and ready-made GPIO and UART registers allowed us to speed up development. Despite taking several shortcuts, building our kernel for an embedded device required careful planning and knowledge of several development areas. You can find the full source code of our project and instructions on our GitHub account.
Kernel and driver development is one of our key areas of expertise at Apriorit. Our dedicated teams have already designed, developed, and tested hundreds of kernel-related solutions for embedded systems.
Looking for a dedicated driver development team?
Benefit from our extensive 20-year track record in specialized driver development to reinforce your product and broaden its features!
Have a question?
Ask our expert!
Program Manager


