 Skip to main content
Businesses use web forms for both marketing and functional goals: to register a user, complete an order, collect a customer’s personal information, run a survey, etc. To ensure your web application provides a flawless user experience, you need to ensure your web forms work properly.
The problem is that creating many web forms from scratch takes time and resources. To speed up this process, it’s best to automate web form development.
In this article, we explore Formly, one of the most popular JavaScript libraries for Angular. We describe how to improve the web form implementation using Angular Formly and show practical examples.
This article will be helpful for project leaders and developers who want to optimize web application development in general and web form creation in particular.
Contents:
- Why automate web form development in Angular?
- What is Angular Formly?
- Improve web form development using Formly
- 1. Add Formly to your application
- 2. Leverage out-of-the-box support for UI frameworks
- 3. Create web forms with Angular Reactive Forms
- 4. Generate web forms automatically
- 5. Add custom field types, validation rules, and Formly expressions
- 6. Receive a form’s configuration from a file or server
- Conclusion
Why automate web form development in Angular?
Web solutions often require tons of forms to receive feedback from users, gather their personal information, and guide them through the application. And as a solution grows and evolves, you need to add new forms as well as reuse and maintain older ones. Developing that many forms from scratch is time- and resource-consuming.
In Angular, there are two main approaches to web form creation:
- Template-driven forms use two-way data binding to update the data model in the component as changes are made in the template, and vice versa.
- Reactive forms provide a model-driven approach to handling form inputs whose values change over time.
Although these approaches offer a variety of opportunities, there are a few issues that make creating and maintaining web forms challenging and time-consuming:
- Necessity to configure and maintain the web form in both HTML code and a component class
- Inconvenience of reusing entire forms or their parts
- Risk that combining both approaches can complicate the code
One way to speed up web form development and handle such issues is to automate this process using tools like Formly. This Angular library can help you:
- Automatically generate web forms
- Create and maintain web forms quickly and conveniently
- Reuse entire forms or parts of forms
Let’s take a closer look at Formly and discuss how to improve the web form implementation with it.
Elevate your web application with seamless user interfaces!
Let’s create dynamic and responsive applications that your users will love. Entrust your development challenges to Apriorit’s top engineers.
What is Angular Formly?
Formly is an open-source Angular library for creating dynamic web forms based on:
- Formly configurations set in a class component
- JSON Schema configurations read from a file or received from a server
The goal of the Formly library is to simplify the process of creating and maintaining web forms, decreasing the amount of HTML code in favor of TypeScript.
As opposed to built-in approaches to web form creation, configuring web forms with Formly takes place only in TypeScript. The JSON-like configuration format is the key to accelerating the process. All this makes it possible to reuse entire forms or parts of forms in accordance with the don’t repeat yourself (DRY) principle and easily introduce changes.
To sum up, the key benefits of using Formly are:
- No need to write lengthy template code
- Ability to generate web forms automatically
- Opportunity to reuse entire forms or parts of forms
- Opportunity to create custom field types and validation rules
Just as any other library, Formly has some disadvantages as well:
- Need to know syntax and specifics of creating web forms
- No opportunity to specify web application logic (expressionProperties, hideExpression, lifecycle hooks, etc.) when using JSON Schema configuration, as logic can be added to field configurations only after receiving it from a file or server
- Supports only the most popular UI frameworks
Despite these limitations, developing web forms with Angular Formly is beneficial for businesses, because it simplifies and accelerates web form creation.
Now, let’s discuss how to use Angular Formly to build web forms quickly and efficiently.
Read also
Angular 9 and 10: Overview of the Key Features
Explore how Angular’s latest updates can enhance your web applications, reduce development time, and improve overall performance.

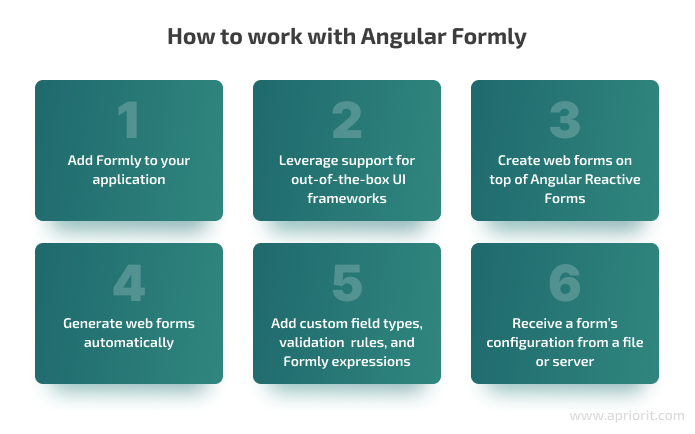
Improve web form development using Formly
Let’s explore how to generate web forms automatically. Here’s how you can start working with Formly and leverage the opportunities it provides.
1. Add Formly to your application
To add Formly to your Angular application, you first need to install npm packets. There are two ways to do that:
- Using the npm install command: npm install @angular/forms @ngx-formly/core @ngx-formly/ material –save
- Using the ng add command in the Angular CLI tool: ng add @ngx-formly/schematics@next –ui-theme=material
Instead of material, you can specify in both commands other UI frameworks supported by Formly: Bootstrap, Ionic, Primeng, Kendo, or NativeScript.
Once you install npm packets, the next step is to import the following modules: FormlyModule, ReactiveFormsModule, and FormlyMaterialModule. A decision whether to use the last one depends on the UI framework you integrate your application with.
Here’s how to import these modules:
@NgModule({
  declarations: [AppComponent],
  imports: [
    BrowserModule,
    BrowserAnimationsModule,
    FormsModule,
    MaterialModule,
    FormlyModule.forRoot(),
    ReactiveFormsModule,
    FormlyMaterialModule,
  ],
  bootstrap: [AppComponent],
})
export class AppModule {}If you install the packets using the ng add command in the Angular CLI tool, module importing will happen automatically.
2. Leverage out-of-the-box support for UI frameworks
There are dozens of UI frameworks that provide an opportunity to establish themes and styles for web page elements. Angular Formly allows you to integrate with the most popular:
- Bootstrap
- Material
- Ionic
- PrimeNG
- NativeScript
- Kendo
Out-of-the-box support for UI frameworks will relieve you from styling elements manually, allowing you to focus instead on web form configurations.
You can integrate your web forms with a built-in UI framework while installing the packets, as we described in the previous section.

3. Create web forms with Angular Reactive Forms
As we already mentioned, Angular has two built-in approaches for web form development: template-driven and reactive. In the developer community, the latter is considered a more reasonable choice because it provides a wider range of opportunities for configuring web forms.
Web forms created with Formly work with the reactive approach, providing an opportunity to use the benefits of both Formly and Angular Reactive Forms.
Related project
Building a Microservices SaaS Solution for Property Management
Learn how the Apriorit team helped our client attract new customers and optimize maintenance costs by successfully replacing a monolithic architecture of their SaaS platform with microservices.
4. Generate web forms automatically
You could say that the motto of Formly is less HTML in favor of JavaScript. This library provides a simple web form configuration process that requires minimum HTML.
Let’s create two versions of a simple web form that consists of three fields — Name, Age, and Country — using the reactive approach and Formly to see the difference in code. In our examples, we use Angular Material as the framework for the user interface.
Configuring web forms in a component class using a reactive approach
Configuring web forms in a component class using Formly
import { Component } from '@angular/core';
import { FormControl, FormGroup, Validators } from '@angular/forms';

@Component({
  selector: 'app-root',
  templateUrl: './app.component.html',
  styleUrls: ['./app.component.scss'],
})
export class AppComponent {
  profileForm = new FormGroup({
    name: new FormControl('', Validators.required),
    age: new FormControl('', Validators.required),
    countryId: new FormControl('', Validators.required),
  });
  countries = [
    { value: 1, label: 'England' },
    { value: 2, label: 'France' },
    { value: 3, label: 'Spain' },
    { value: 4, label: 'Ukraine' },
    { value: 5, label: 'USA' },
  ];

  onSubmit(form: FormGroup): void {
    console.log(form.value);
  }
}
import { Component } from '@angular/core';
import { FormGroup } from '@angular/forms';
import { FormlyFieldConfig } from '@ngx-formly/core';
export interface ProfileInfo {
name: string;
age: number | null;
countryId: number | null;
}
@Component({
selector: 'app-root',
templateUrl: './app.component.html',
styleUrls: ['./app.component.scss'],
})
export class AppComponent {
profileForm = new FormGroup({});
model: ProfileInfo = {
name: '',
age: null,
countryId: null,
};
fields: FormlyFieldConfig[] = [
{
key: 'name',
type: 'input',
templateOptions: {
label: 'Name',
required: true,
},
},
{
key: 'age',
type: 'input',
templateOptions: {
type: 'number',
label: 'Age',
required: true,
},
},
{
key: 'countryId',
type: 'select',
templateOptions: {
label: 'Country',
required: true,
options: [
{ value: 1, label: 'England' },
{ value: 2, label: 'France' },
{ value: 3, label: 'Spain' },
{ value: 4, label: 'Ukraine' },
{ value: 5, label: 'USA' },
],
},
},
];
onSubmit(model: ProfileInfo): void {
console.log(model);
}
}A form template for the reactive approach
A form template for Formly
...
<div class="form-container"><form formgroup="" profileform="" ngsumbit="" onsubmit=""><mat-form-field>
        <mat-label>Name</mat-label>
        <input formcontrolname="name" matinput="" type="text">
        <mat-error ngif="profileForm.controls['name'].hasError('required')">
          The field is required
        </mat-error>
      </mat-form-field>
      <mat-form-field>
        <mat-label>Age</mat-label>
        <input type="number" formcontrolname="age" matinput="">
        <mat-error ngif="profileForm.controls['age'].hasError('required')">
          The field is required
        </mat-error>
      </mat-form-field>
      <mat-form-field>
        <mat-label>Country</mat-label>
 <mat-select formcontrolname="countryId">
          <mat-option ngfor="let country of countries" value="" country="">
            {{country.label}}
          </mat-option>
        </mat-select>
        <mat-error ngif="profileForm.controls['countryId'].hasError('required')">
          The field is required
        </mat-error>
      </mat-form-field>
      <button mat-raised-button="" color="primary">Submit</button>
<pre>{{ profileForm.value | json }}</pre>
</form></div>
...
...
<div class="form-container"><form formgroup="" profileform="" ngsubmit="" onsubmit="" model=""><formly-form form="" profileform="" fields="" model=""></formly-form>
<button type="submit" class="btn btn-default" mat-raised-button="" color="primary">
Submit
</button>
<pre>{{ model | json }}</pre>
</form></div>
...As you can see, all we did to configure a web form in Formly was:
- In the
profileForm = new FormGroup({})

line, created a FormGroup type object in a component class - In the
model: ProfileModel = { name: '', age: null, countryId: null }line in the component class, created a model to bind the form value - In the component class, configured the form fields as array objects of the FormlyFieldConfig type
- Added
<formly-form>inside the<form>tag in the web form template, providing form, model, and field objects as values for input parameters
For field configuration, we set the following properties and parameters:
- key should correspond to the name of the model’s property we want to bind the field’s value with
- type is the field’s type
- templateOptions is an object that defines specific parameters for a template. In our example, these are type, label, options, and required parameters. The list of available parameters depends on the field type.
You can find a detailed list of available properties and parameters on the Properties and Options page of the Formly documentation.
Here’s how the web form looks:
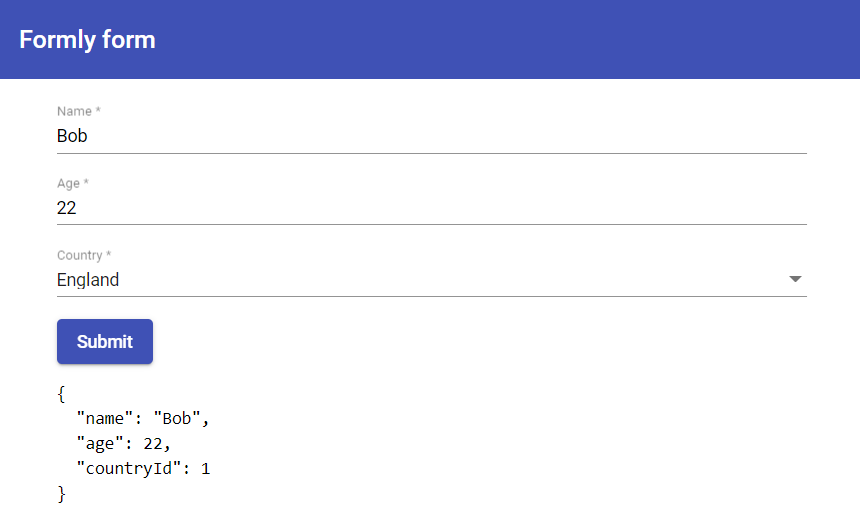
Screenshot 1. Example of the web form we developed
Comparing the two approaches for web form creation, you can notice that Formly doesn’t require HTML code for configuring fields. While using a reactive approach, we have to write lots of code for a specific UI framework. In our example, <mat-form-field>, <mat-error>, and <mat-label> tags that we use for the form fields refer to Angular Material.
But when using Angular Formly to develop web forms, you don’t have to write UI-specific code. Instead, you can keep specifics of the UI framework syntax in mind only when creating a field type. This property of Formly allows you to easily reuse forms with different UI frameworks.
As a result, we can automate form generation and focus on configuring separate web form fields in a component class.
Related project
Developing and Supporting a CRM System for a Medical Transportation Company
Find out how our team upgraded and secured a CRM system for a medical transportation company, helping our client deliver compliant, secure, and adaptable software.
5. Add custom field types, validation rules, and Formly expressions
Formly offers you some helpful customization options. In this section, we explore how to use:
- Custom field types
- Custom validation rules
- Formly expressions
1. Custom field types
Out of the box, Formly supports the main field types such as input, textarea, select, checkbox, and radio. The number of built-in field types can vary depending on the chosen UI framework. If you need to use a field type that’s not on the list, you can add a custom field type.
Say we need a web form with fields for Name, Age, and uploading a file. The latter is absent in the list of built-in field types in Formly. So let’s create a new field.
The first thing we need to do is create a component for implementing a custom field type. Here’s how we can do it:
import { Component } from '@angular/core';
import { FieldTypeConfig } from '@ngx-formly/core';
import { FieldType } from '@ngx-formly/material';


@Component({
  selector: 'formly-file-type',
  template: `
    <input type="file" formcontrol="" formlyattributes="" field="">
  `,
})
export class FileTypeComponent extends FieldType<fieldtypeconfig> {}
</fieldtypeconfig>A component for the custom field type has to inherit the FieldType<FieldTypeConfig> class and define the template.
Next, we should register the newly created component in AppModule. Here’s how to do it:
@NgModule({
  ...

  imports: [
    declarations: [AppComponent, FileTypeComponent],
    FormlyModule.forRoot({
      types: [
        {
          name: 'file',
          component: FileTypeComponent,
          wrappers: ['form-field'],
        },
      ],
      ...
    })
  ],
  ...
})
export class AppModule {}When registering a custom field type, we specify the name we’re going to use for the type property when adding fields of this type and the component. In our example, we also specify that we want to use the form-field wrap for this field type. As a result, our field will be wrapped in Angular Material to display descriptions and validate messages for the field.
Now, we can add our new field for uploading files to the web form. Here’s how to do it:
export class AppComponent {
  ...
  fields: FormlyFieldConfig[] = [
    ...
    {
      key: 'picture',
      type: 'file',
      templateOptions: {
        required: true,
      },
    },
  ];
  ...
}As a result, we receive the following form with a field for uploading a file:

Screenshot 2. Web form with a custom field type for uploading files
Note: We made this example only to demonstrate how to create custom field types in Angular Formly. To receive access to a chosen file using this field type, we would need to implement additional logic.
2. Custom validation rules
Just as with field types, Formly offers the main types of validators out of the box: required, min, max, minLength, maxLength, and pattern. When developing web forms, we often have to write validation rules for each scenario.
There are two ways of declaring custom validators:
- At the module level
- At the field level
For our example, let’s create a validation rule that doesn’t allow “Bob” in the Name field. Let’s start with adding a validator at the module level:
// Declare validator message function
export function nameValidatorMessage(error: any, field: FormlyFieldConfig) {
  return `"${field?.formControl?.value}" is not a valid Name`;
}


// Declare validator function
export function nameValidator(control: AbstractControl): ValidationErrors | null {
  return control.value !== 'Bob' ? null : { name: true };
}

@NgModule({
  declarations: [AppComponent, FileTypeComponent],
  imports: [
    ...
    FormlyModule.forRoot({
      ...
      validators: [{ name: 'name', validation: nameValidator }],
      validationMessages: [
        { name: 'name', message: nameValidatorMessage },
        { name: 'required', message: 'This field is required' },
      ],
    }),
    ...
  ],
  ...
})
export class AppModule {}In the example above, we did the the following:
- Added the nameValidatorMessage function for a validation message. This function received the field’s configuration as FormlyFieldConfig. We can use FormlyFieldConfig for building accurate validation messages.
- Added the validator’s nameValidator function. This function receives the field for validation as AbstractControl. In this function, we describe the validation rule. If in the result of validation the function’s value turns out to be invalid, the function returns the object with a true property. If the field’s value is valid, the function returns null.
- Registered the created functions in the FormlyModule settings. The name configured for the nameValidatorMessage function when registering must match the name of the object’s property retrieved by the validator’s function.
Now, let’s apply the newly created validator to the Name field. To do that, we have to use the validators property when configuring the field. Here’s an example of how to use the custom validator:
...
export class AppComponent {
  ...
  fields: FormlyFieldConfig[] = [
    {
      key: 'name',
      type: 'input',
      templateOptions: {
        label: 'Name',
        required: true,
      },
      validators: {
        validation: ['name'],
      },
    },
    ...
  ];
  ...
}Let’s now explore how to create custom validation rules at the field level:
...
export class AppComponent {
  ...
  fields: FormlyFieldConfig[] = [
    {
      key: 'name',
      type: 'input',
      templateOptions: {
        label: 'Name',
        required: true,
      },
      validators: {
        name: {
          expression: (control: AbstractControl): boolean => {
            return control.value !== 'Bob';
          },
          message: (error: any, field: FormlyFieldConfig) => {
            return `"${field?.formControl?.value}" is not a valid Name`;
          },
        },
      },
    },
    ...
  ];
  ...
}To add validation rules at the field level, we use the validators property. In this property, we can set validation rules in the form of nested objects. Each nested object has the following properties:
- expression (function) represents a validation function that returns true if the field’s value is valid
- message (function or string) represents a validation message
Let’s take a look at the results:
1. We see a message saying the name “Bob” is invalid.
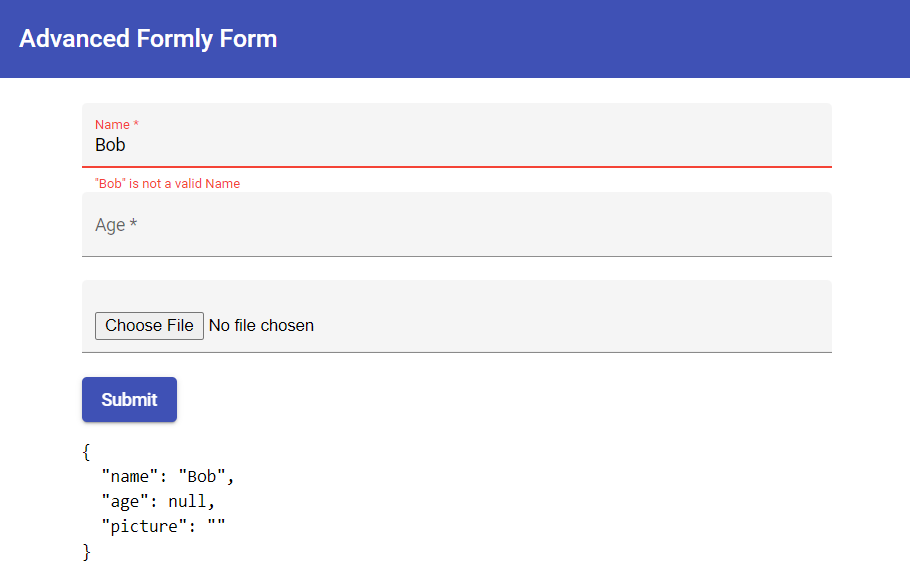
Screenshot 3. The name “Bob” is considered invalid
2. If we type in another name, the validation message doesn’t appear.
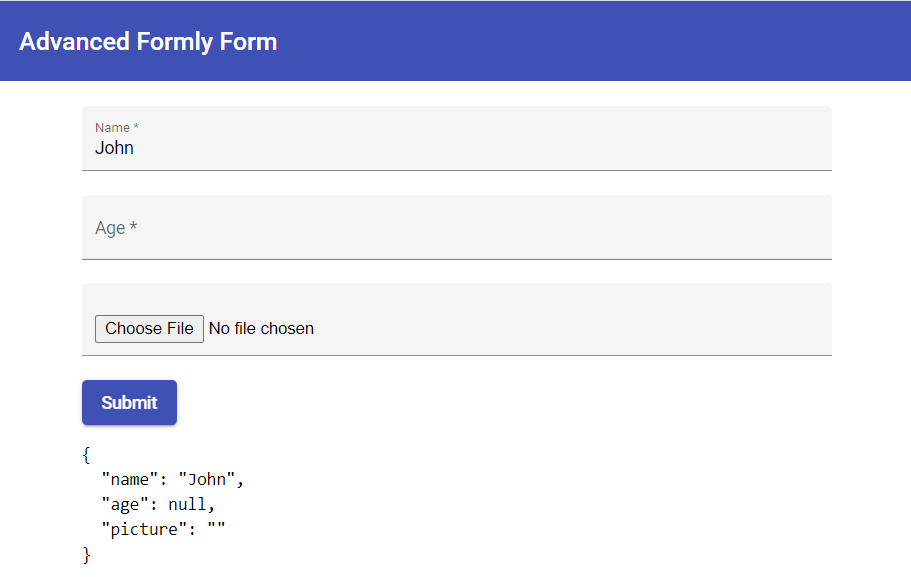
Screenshot 4. No validation message when typing in any name except for “Bob”

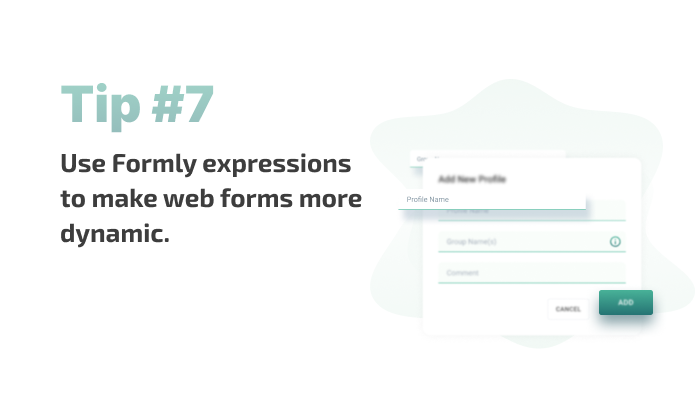
3. Formly expressions
With Formly, you can use specific expressions to make your web forms more dynamic. For example:
- hideExpression to dynamically hide fields
- expressionProperties to dynamically change properties of fields
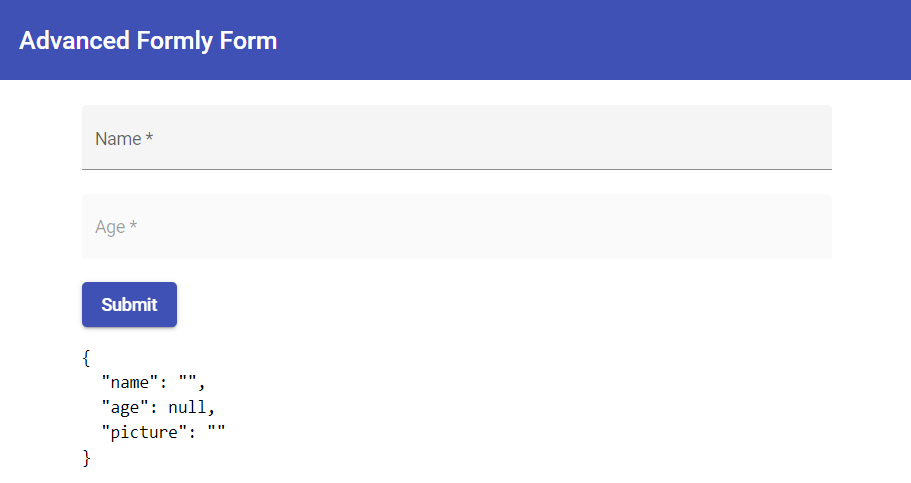
To demonstrate work with hideExpression, let’s add a rule that hides the field for uploading files if the Name or Age field isn’t filled out. And to demonstrate how expressionProperties work, we’ll show how to disable the Age field if the Name field is empty.
Here’s how we do that:
...
export class AppComponent {
  ...
  fields: FormlyFieldConfig[] = [
    {
      key: 'name',
      type: 'input',
      templateOptions: {
        label: 'Name',
        required: true,
      },
    },
    {
      key: 'age',
      type: 'input',
      templateOptions: {
        label: 'Age',
        required: true,
      },
      expressionProperties: {
        'templateOptions.disabled': '!model.name',
      },
    },
    {
      key: 'picture',
      type: 'file',
      templateOptions: {
        required: true,
      },
      hideExpression: '!model.name || !model.age',
    },
  ];
  ...
}For hideExpression, we can set a value as string/function/boolean. In our example, we set a rule using the following line: hideExpression: '!model.name || !model.age'.
By using expressionProperties, we can dynamically change the settings of the fields set in the templateOptions object. The value of expressionProperties is an object, and each of its properties we can use for changing any field parameter. For this object’s properties, we can specify any value of the string/function type. In our example, we specified the rule for the disabled parameter in the following line: 'templateOptions.disabled': '!model.name'.
As a result, if a user doesn’t fill out the Name field, the Age field will be disabled:
Screenshot 5. Disabling the Age field if the Name filled isn’t filled out
In the previous screenshot, you can see that the file upload field is hidden, as both the Name and Age fields aren’t filled out. Once a user types in them, the file upload field will be shown:
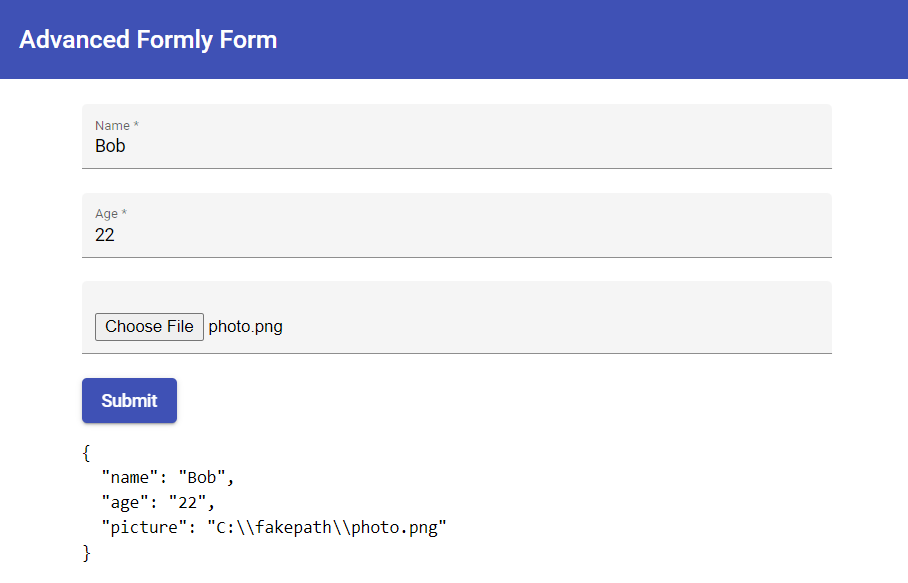
Screenshot 6. The file upload field is shown once other fields are filled out
You can find other helpful opportunities that the Formly library provides in the Angular Formly Guide.
Read also
React.js vs Knockout.js vs Vue.js: Features and Performance Comparison
Evaluate the strengths and weaknesses of popular web frameworks to make an informed decision for your next project. Find out how they can impact your application’s performance and user experience.
6. Receive a form’s configuration from a file or server
In previous examples, we used a standard way of configuring Formly web forms as an array of objects of the FormlyFieldConfig type in the component class. However, during web form development, you might need to receive a file configuration from a file or server. Angular Formly allows you to build web forms based on configurations received from a server in the JSON Schema format. JSON Schema is used for defining the structure of JSON documents. You can explore more details on the JSON Schema: Getting Started Step-By-Step page.
For our example, let’s create a simple web form in the JSON Schema format and place its configuration in the JSON file:
{
  "title": "Profile Form",
  "type": "object",
  "properties": {
    "name": {
      "type": "input",
      "title": "Name"
    },
    "age": {
      "type": "input",
      "title": "Age",
      "widget": {
        "formlyConfig": {
          "templateOptions": {
            "type": "number"
          }
        }
      }
    },
    "countryId": {
      "type": "select",
      "title": "Сountry",
      "widget": {
        "formlyConfig": {
          "templateOptions": {
            "options": [
              { "value": 1, "label": "England" },
              { "value": 2, "label": "France" },
              { "value": 3, "label": "Spain" },
              { "value": 4, "label": "Ukraine" },
              { "value": 5, "label": "USA" }
            ]
          }
        }
      }
    }
  },
  "required": ["name", "age", "countryId"]
}In this example, apart from the standard JSON Schema configuration, we’ve added the Formly properties and parameters for fields. To do that, we used the formlyConfig section, which is added to the widget section.
Here’s how to receive a web form configuration in a component class:
...
export class AppComponent implements OnInit {
  ...
  constructor(
    private http: HttpClient,
    private formlyJsonschema: FormlyJsonschema
  ) {}

  ngOnInit(): void {
    this.http
      .get<any>('assets/json-schema/profile-form.json')
      .subscribe((jsonSchema) => {
        this.fields =
          this.formlyJsonschema.toFieldConfig(jsonSchema).fieldGroup ?? [];
      });
  }

  onSubmit(model: ProfileInfo): void {
    console.log(model);
  }
}In the component class, we use the toFieldConfig method of the FormlyJsonschema service to change the JSON Schema format of the web form to Formly configuration. Therefore, we first inject the FormlyJsonschema service in the component constructor. Then we pass the received JSON Schema configuration as the parameter.
Here’s the web form template:
...
<div class="form-container">
    <form formgroup="" profileform="" ngsubmit="" onsubmit="" model="">
        <formly-form form="" profileform="" fields="" model=""></formly-form>
        <button type="submit" class="btn btn-default" mat-raised-button="" color="primary">
            Submit
        </button>
        <pre>{{ model | json }}</pre>
    </form>
</div>
...Now, let’s see what the web form looks like:
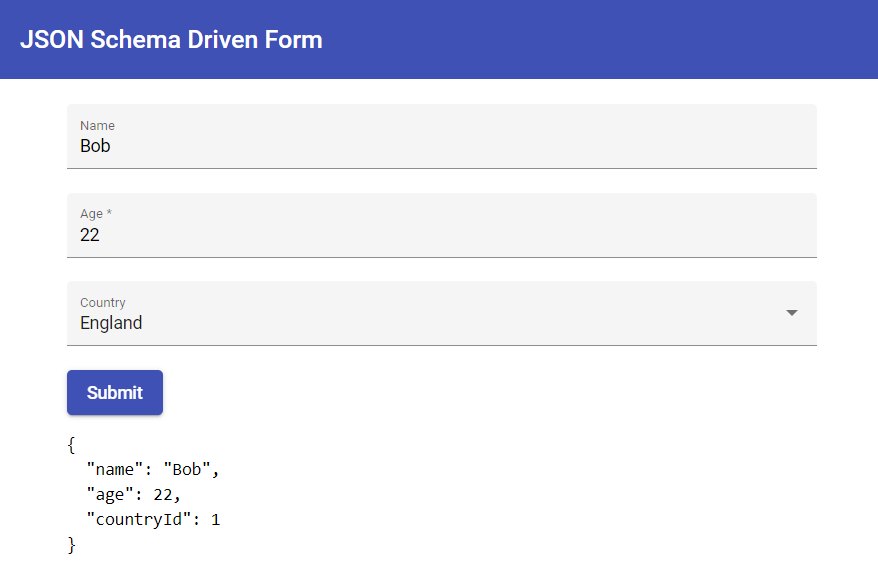
Screenshot 7. Web form received from JSON Schema
This way, you can receive configurations from files and servers and use that data to build web forms.

Conclusion
Automating different web application development processes is a great way to save both time and resources. Moreover, automation helps your team pay more attention to the bigger picture of how your solution works and offer relevant ideas for its further improvement.
Being an important part of any application, web forms have to perform flawlessly to ensure a smooth user experience. But this doesn’t necessarily mean you should spend lots of time developing each one from scratch. Tools like the Formly library can help you generate and reuse web forms quickly and easily whenever you need.
At Apriorit, we have a professional team of web developers with experience delivering custom solutions for different industries and purposes.
Streamline your web form development!
Apriorit’s dedicated teams combine technical and business expertise to deliver secure, functional, and user-friendly web apps. Let’s build a perfect web application for your needs.
Have a question?
Ask our expert!
Program Manager


